Recommended Free Tools
Turn the Nintendo Switch 2 completely off, clear away every loose strap, clip, cartridge and zipper pull, then remove the case using its intended path: slide a flat case away while keeping the console at 45 degrees or less, or lift it from an opened stand while keeping it at 70 degrees or less when those angles match the case maker’s instructions. Hold the console by its solid side edges, never pry against the screen, and stop immediately if the movement becomes rough or the case appears to press on the display.
The safest removal is controlled rather than forceful. A hard tool can scratch the screen, frame or case, and twisting can load the display and rails unevenly. The exact motion depends on whether you have a rigid travel case, a soft shell, or a split case with separate sections, so inspect the release path before pulling.
As an Amazon Associate I earn from qualifying purchases.
Prepare the Switch 2 and the work area
Power the console all the way off
Choose the console’s full power-off command rather than leaving it in sleep mode. Nintendo’s carrying-case guidance says the console should not be left switched on in the case. A powered-down console also gives you time to work without the screen waking, vibrating or distracting you while you check the fit.
Open the case completely and place it on a clean, stable surface. A table with good lighting is preferable to a sofa, bed or your lap: soft surfaces can let the case flex while you pull, and poor lighting makes it easier to miss a trapped zipper pull or a grain of grit.
#1 Best Overall

- Travel case
- Protection Library holds 12 game cards and offers full screen and analog stick protection
- microSD Card Case 2pcs, each holds 2 microSD Cards
- Comfortable carrying handle and soft cleaning cloth
Remove anything that can drag across the console
Take out cartridges, charging cables, straps, stylus-like accessories, clips and other loose items. Detach or move any internal divider that is not part of the retention system. If Joy-Con 2 controllers are being stored with the console, Nintendo’s carrying-case information says they should be attached when stored; follow the case maker’s arrangement rather than forcing the controllers against a divider.
Do not let a metal zipper pull, buckle or clip hang over the console as you extract it. Hold those parts out of the way or close the empty compartment so they cannot swing across the display or back panel.
Inspect the perimeter before applying pressure
Look around all four sides for a zipper pull, metal tab, clip, grit, a folded lining edge or a screen-protector lip caught between the case and the console. Check the corners and the area near the display in particular. If something is trapped, free it with your fingers or by opening the case farther; do not push a hard object into the gap.
Nintendo’s health and safety guidance warns that sharp objects or pressure can damage the screen and advises protecting the display from scratches and stains. Treat any visible debris as a reason to pause, not as a reason to pry harder.
Identify the case’s intended release path
Flat rigid or semi-rigid cases
Many flat travel cases retain the console with a shaped pocket, elastic edge or padded lip. They are designed for a sideways slide, not for lifting one corner first. Find the side of the pocket that opens or the direction shown by the case’s molded shape. If the manufacturer supplies a printed guide or removal video, use that release direction.
Rank #2
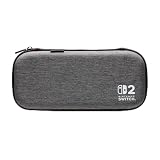
- Structured Protection: Molded interior with soft fabric lining
- Game Storage: Securely holds up to 10 game cards*
- Integrated Play Stand: unfold the convenient play stand and enjoy tabletop mode with ease
- Padded Screen Protector: The play stand doubles as a padded screen protector when the system is inside the case
- Compatibility: Compatible with Nintendo Switch 2
Cases with an internal stand
Some cases use an internal stand or hinged panel as the retaining edge. The stand must be opened before the console is lifted. Trying to pull the console out with the stand closed can make the retaining edge act like a clamp.
Soft shells and split cases
A soft TPU shell may release by peeling a flexible lip away from the console, while a split design can have separate front, middle-frame and Joy-Con covers. Do not assume that a motion that works for a flat travel case is safe for a shell. JSAUX, for example, documents a split design with separate front cover, middle frame and Joy-Con covers and directs users to its installation and removal video. Follow the release points for your exact case.
Remove a flat case with the slide-out method
Use this method only when the case is designed for a flat, sideways extraction. Belkin’s official case guide specifies keeping the console at 45 degrees or less while sliding and says not to force removal. Those angle limits belong to that guide; they are not a universal specification for every Switch 2 case.
- Support the empty case. Keep the case on the table with its base fully supported. If the case is hinged, hold the open half so it cannot fold against the console while you work.
- Grip the solid side edges. Place your fingers on the console’s rigid side edges, away from the display surface, buttons that could be pressed, and any exposed accessory. Use both hands so the force is balanced. Do not pull from a corner or from a controller attached at an angle.
- Set a shallow angle. Keep the console flat enough that its face remains supported and at 45 degrees or less. A shallow angle reduces the chance that a corner will catch on the retaining lip. If the case’s instructions show a different geometry, follow those instructions instead.
- Slide in the specified direction. Move the console sideways in one smooth, short motion. Do not rock it from side to side. The case should release along its designed channel; it should not require a sudden jerk.
- Pause at the first sign of binding. If one side stops while the other moves, return the console to its starting position, check for a trapped edge or shifted lining, and realign it. A crooked extraction can make a normal fit feel stuck.
- Lift only after it clears. Once the console has slid past the retaining lip and is free of the pocket, lift it straight up by the side edges. Keep metal hardware and loose accessories away from the screen while transferring it to the table.
Belkin’s stated instruction is: “Do not force the Switch 2 in or out of the case. If it does not move smoothly, check the angle and alignment before trying again.” Treat that as a practical stop rule even when your case is from another maker.
Remove a stand-based case with the lift method
Use this procedure when the case has an internal stand that forms the retaining edge. Belkin’s guide specifies opening the stand first and keeping the console at 70 degrees or less during the lift. Again, that geometry is specific to the documented case design.
Rank #3

- [Compatibility]: Compatible with Nintendo Switch 2 (2025 release) ONLY. Not Compatible with the Switch 2's Kickstand function.
- [Seamless Dock Compatible]: Specifically designed for Switch 2 with uninterrupted docking capability.
- [Foldable Joy Cons Coverage]: Revolutionary hinge mechanism enables Joy Con controllers quickly assembled and disassembled, protects Joy Cons from vibration and keeps Joy Cons firmly connected for a long time.
- [Enhanced Gaming Experience]: Anti-slip rubberized texture improves handling during intense gameplay. 139g weight-balanced construction preserves the console's natural feel while adding professional-grade protection.
- [Premium U.S.-Inspired Design]: Expertly crafted by professional designers with a sleek, futuristic aesthetic and ergonomic. Made with Bayer eco-friendly polycarbonate material from Germany, resistant to yellowing, fingerprints, and dust.
- Open the stand fully. Move the stand to its intended open position before touching the console. Confirm that its edge is no longer across the console’s path.
- Hold both side edges securely. Keep your thumbs and fingers on solid side areas. Do not use the screen, a corner, a loose shell lip or an attached controller as a handle.
- Lift at 70 degrees or less. Raise the console in the direction that clears the retaining edge while maintaining the documented angle. Avoid rotating the console as you lift; a twist can make one corner catch.
- Clear the retaining edge completely. Continue only until the console is visibly above and beyond the edge. If the edge still touches the case, lower the console, reopen the stand and check alignment rather than pulling upward harder.
- Transfer it to a clean surface. Set the console down screen-up or in the orientation recommended by the case maker, with the case hardware out of contact with it.
What to do when the case feels stuck
Recheck the obvious interference points
Close inspection solves many apparent jams. Check whether a zipper pull is under a corner, a metal tab has slipped into the pocket, or a lining seam has folded inward. Look for a screen protector whose edge has lifted and caught under a retaining lip. Remove loose objects and open every flap or stand before attempting another movement.
Reset the alignment instead of increasing force
Place the console back where it started, then make the case and console parallel. For a slide-out design, return to the shallow angle and try a short, straight slide. For a stand design, close and reopen the stand so its hinge is fully positioned, then retry the controlled lift. A second attempt should be gentler and better aligned, not stronger.
Stop when the resistance changes
Increasing resistance, a creaking shell, a visible bend in the display area, or pressure against the screen is a stop signal. Do not twist the console, yank one corner, bend the display, or use leverage to overcome the obstruction. If alignment looks correct but the case still binds, contact the case maker or Nintendo support rather than risking damage.
Tools: what is safe and what is not
Your hands are the preferred tool for removal. A clean, soft cloth can improve grip on the case exterior and catch fingerprints after the console is free, but it should not be stuffed into the gap as a wedge.
Do not insert a knife, metal pick, screwdriver, tweezers with sharp tips or another hard edge between the case and console. Nintendo specifically warns that sharp objects or pressure can damage the screen. Even if a tool never touches the glass, it can scrape the bezel, catch a button, tear a soft shell or concentrate force at one corner.
The Tool Desk
Outbyte Driver Updater FREEScan for outdated or missing drivers - takes under a minuteDriver Scan →Outbyte PC Repair FREEClear out junk files and repair common Windows errorsFree Scan →Rank #4

- NINTENDO CASE - SWITCH 2 COMPATIBLE: Our premium Nintendo Switch case is custom fit for your Switch 2, shielding your console with anti scratch velvet lining and shock absorbing materials—perfect for daily storage, commutes, or long travel days
- TRAVEL READY DESIGN: This compact portable Nintendo Switch 2 carrying case fits easily in a backpack or carry-on or can simply be carried by itself with a wristlet handle for secure handling without risk of drops—great for on-the-go everyday players
- CONVENIENT GAME & AIRTAG STORAGE: Whether at school, traveling or on the go, you can organize up to 12 game cards in a dedicated slot system and track your Case for Nintendo Switch 2 accessories using a hidden AirTag compartment, so it's never lost
- DURABLE & STYLISH: Crafted with an abrasion- and water-resistant polyester exterior and brushed velvet interior lining, plus hidden, no-snag zippers, this Nintendo Switch 2 travel case protector resists wear and tear for lasting device protection
- SUSTAINABLY MADE + 2-YEAR COVERAGE: This durable Belkin Switch 2 Case comes in 100% plastic-free packaging. Plus, you can purchase the Nintendo Switch carrying case with peace of mind knowing that it comes with 2-year coverage
A plastic pry tool is not automatically safe. Unless the case maker explicitly identifies a tool and a protected access point, using one adds a new failure mode and defeats the controlled release path. If you believe a tool is necessary, stop and obtain model-specific instructions from the case maker first.
How different case constructions change removal
| Case construction | Typical release path | Points to inspect | Best practice |
|---|---|---|---|
| Rigid or semi-rigid flat travel case | Sideways slide from a shaped pocket | Retaining lips, elastic edges, zipper pulls and folded lining | Support the case, hold the side edges and keep the console at 45 degrees or less when that is the maker’s specified geometry. |
| Stand-assisted case | Lift after opening the internal stand | Stand hinge, retaining edge and clearance above the pocket | Open the stand completely and keep the console at 70 degrees or less when the guide specifies that limit. |
| Soft TPU shell | Release or peel a flexible lip, usually at designated corners | Raised shell edges, buttons, vents and screen-protector clearance | Use the shell’s marked release points; do not stretch one corner while the opposite side remains attached. |
| Split front, frame and controller covers | Separate components in the order shown by the maker | Interlocking frame edges, front-cover tabs and Joy-Con 2 covers | Remove each section independently and follow the maker’s installation/removal video when supplied. |
The table describes common release patterns, not a universal design standard. The exact case model controls the safe direction and order of removal.
Independent reader supportYour contribution helps us test, update, and keep practical guides available for everyone.After removal: clean the console and case safely
Remove dust and fingerprints
Use a clean, soft cloth to wipe fingerprints and loose dust from the console and the case’s contact surfaces. Inspect the lining, lips and corners before putting the console back. If you see grit, remove it from the case rather than rubbing it against the console. Keep the cloth free of hard particles; a dirty cloth can create the scratches you were trying to avoid.
Check the screen-protector edge
A protector that has shifted or lifted can catch during insertion and removal. Nintendo’s screen-protector procedure is to clean the display first, align the protector with the outer screen frame, apply it while pushing bubbles out with a cloth, and use tape on a corner to lift and realign a misaligned sheet. Do not slide a metal object under the protector.
Do these 3 things before closing this tab:
1Scan for outdated or missing drivers - takes under a minute2Repair Windows errors before they cause bigger problems3Fix the driver behind crashes, sound loss and screen glitchesIf the protector is damaged, lifting, or no longer aligned with the outer frame, remove or replace it according to the protector maker’s instructions before reinstalling the case. Confirm that the replacement is made for the Switch 2 model and leaves the case’s retaining edges clear.
Best Value

- 【CUSTOM FIT FOR NINTENDO SWITCH 2】— Designed specifically for Nintendo Switch 2 (2025). The custom-shaped base, four support grooves and secure hook-and-loop strap help keep the console stable, while the pull tab makes it easier to lift out. Not compatible with the original Switch, Switch OLED or Switch Lite.
- 【HARD-SHELL PROTECTION FOR EVERYDAY TRAVEL】— The protective hard shell helps shield your console from everyday bumps, pressure and scratches inside a backpack or suitcase. Soft interior lining and the card-slot divider help reduce contact with the screen and controls while the console is being carried.
- 【24 GAME SLOTS AND ORGANIZED ACCESSORY STORAGE】— Keep up to 24 physical game cards together and easy to find. The upper zippered mesh pocket organizes a charger, charging cable, earbuds, wrist straps and other small accessories, helping prevent scattered cards, tangled cables and missing gaming gear.
- 【SOFT NYLON ZIPPER PULLS NEAR THE CONSOLE】— Soft nylon zipper pulls help reduce hard-metal contact around the screen and Joy-Con controllers. The fully zippered accessory pocket also keeps small items separated from the console area instead of allowing them to fall loose inside the case.
- 【GRAB-AND-GO GAMING FOR SCHOOL, COMMUTES AND TRIPS】— Whether you are heading to school, commuting, visiting a friend, taking a road trip or packing for vacation, the lightweight case keeps your console, game cards and small accessories together. The sturdy top handle makes it easy to carry alone or place inside a backpack or suitcase.
Inspect for damage before reinstalling
Look for new marks, a lifted protector, a distorted shell, a cracked retaining lip or a lining section that has pulled loose. Check that buttons and ports are unobstructed. If the console or display appears damaged, stop using the case and contact Nintendo support; do not try to hide the problem by tightening the case.
Reinstall the case without creating another jam
- Match the case orientation. Confirm which side receives the console and where the screen, controls and Joy-Con 2 controllers are meant to sit.
- Clear the pocket. Remove dust, loose straps and accessories from the contact path. Make sure no zipper pull or divider is underneath the console.
- Use the reverse of the documented path. For a flat case, align the console and slide it in at the maker’s specified shallow angle. For a stand case, open the stand first and lower the console beyond the retaining edge before closing it.
- Check the perimeter. Run your eyes around the edge to confirm that no lining, protector edge or cable is trapped. The console should sit evenly rather than riding on one corner.
- Close hardware gently. Zip or latch the case without pulling the hardware across the console. If a zipper catches, open it and correct the alignment instead of forcing it past the obstruction.
Choosing a replacement case that will be easier to service
Removal difficulty is a useful buying criterion, not merely a nuisance discovered after purchase. Compare the case’s release path and service instructions before relying on it for regular travel.
| Comparison point | What to verify | Why it matters |
|---|---|---|
| Removal path | Whether the console slides out flat or lifts after a stand opens | A clearly defined path reduces corner-catching and discourages improvised prying. |
| Contact material | Soft, clean lining or TPU at console contact points versus exposed hard edges | Soft, debris-free contact areas are less likely to mark the finish when the console moves. |
| Interference points | Location of zippers, metal tabs, clips, seams and screen-protector clearance | Hardware in the extraction path can snag or drag across the console. |
| Serviceability | Published removal instructions, diagrams or video; independently removable front, middle-frame and Joy-Con covers | Clear instructions make cleaning, protector replacement and troubleshooting safer. |
| Dock and accessory compatibility | Fit with the exact Switch 2 model, dock and accessories you use | A case that fits the console but interferes with the dock may require frequent removal and create more opportunities for mistakes. |
Verify compatibility for the exact Switch 2 model and dock before buying. Do not assume that a case advertised for a similarly shaped console has the same clearances or release geometry.
Quick wins for a faster PC:
Fix the driver behind crashes, sound loss and screen glitchesFind Drivers →Repair Windows errors before they cause bigger problemsFix Now →Scan for outdated or missing drivers - takes under a minuteDriver Scan →When to seek support instead of trying again
- The console will not move after you have removed loose items and realigned it.
- A retaining edge appears to press on the display or a corner is visibly bent.
- The case has a hidden latch, screw or interlocking section that is not explained in its instructions.
- A screen protector, shell or lining has adhered to the console.
- You notice a new scratch, crack, pressure mark or abnormal display behavior after the attempted removal.
Contact the case maker first for the case’s release sequence and Nintendo support for concerns about the console or screen. Describe the case construction, the direction you attempted, and where resistance occurs. Do not send the console through a tight case opening again until you know which part is retaining it.
Quick Recap
The safe-removal checklist
- Power the Switch 2 fully off.
- Open the case completely and clear straps, clips, cartridges and other loose items.
- Inspect for zipper pulls, metal tabs, grit, folded lining and screen-protector edges.
- Hold the console by its solid side edges, not the display or a corner.
- Use a sideways slide at 45 degrees or less for a flat case when that matches the maker’s guide.
- Open an internal stand and lift at 70 degrees or less when that matches the maker’s guide.
- Never use a knife, metal pick, screwdriver or other sharp object against the case opening.
- Stop, realign and recheck if the movement is not smooth.
- Clean the console and case with a clean, soft cloth before reinstalling.
Product prices and availability are accurate as of the date/time indicated and are subject to change. Any price and availability information displayed on Amazon at the time of purchase will apply.

