The most reliable way to photograph a large street mural naturally is to keep the camera level and as parallel to the wall as the location allows. If the mural is wider than one comfortable frame, make a sequence of overlapping photographs and stitch them instead of forcing the entire wall into an extreme wide-angle view. A tripod with an adjustable head or a perspective-control shift lens can improve consistency, but neither is essential.
This guide explains how to choose between one frame and a stitched panorama, how to capture each option, and how to tell perspective convergence from lens distortion and panorama-projection problems when you edit.
As an Amazon Associate I earn from qualifying purchases.
What photographers mean by mural distortion
A mural can look wrong for several different reasons, and each requires a different remedy. Treating every problem as a lens problem often makes the correction worse.
Perspective convergence from camera tilt
When the camera points upward or downward, lines that are parallel on the wall can appear to meet in the photograph. The effect is strongest when you tilt the camera to fit a tall wall from a close position. This is a viewpoint problem: the sensor is no longer facing the mural squarely. The Society of Photographers identifies keeping the camera level and parallel to the wall as the primary way to minimize this perspective distortion (guidance on photographing street art).
#1 Best Overall

- 【Lightweight and Portable】4 section leg can adjust tripod height from 20.4''/52cm to 64.1''/163cm; it can be folded to 15.5''/39.5cm to make it easy to put it in the carrying bag; the net weight with the ball head included is only 2.53lbs/1.15 KG.
- 【360 Degree Ball Head】36mm ball head can be rotated to any angle you want, helping to improve the range of camera activity during panning. It can withstand up to 17.6lbs/8kg.The 360-degree panning dial lets you set up precision shots to capture the beauty of landscapes.
- 【Efficient and Flexible】With powerful and quick flip leg lock, only use one hand can open and close all the buttons in a few seconds. It's very easy to use, saving you more time and can more focused on enjoying the shooting.
- 【Versatile Ability】The center column inverted installation (also with a short center column) to achieve the lowest angling shooting, archery and special photography.
- 【More Compatibility】This camera tripod with standard 1/4'' thread,which can be applied to most Arca-Swiss quick release plates; 1/4" screw is suitable for most cameras, DSLR camera, projector and telescope, etc.
Lens distortion
Lens distortion bends straight lines, especially toward the edges of a very wide view. It can make the outer portions of a mural appear stretched or bowed even when the camera is level. Correcting this is different from straightening converging verticals.
Panorama projection and seams
A stitched panorama combines several photographs into a new projection. Software must align common details, account for perspective and lens behavior, and blend the boundaries. The result may need cropping, and the final pixel dimensions will be less than the simple sum of every source frame because overlap and projection consume image area. Cambridge in Colour explains these alignment, correction and blending issues in its digital panorama tutorial.
Choose the capture method before you shoot
No single lens or technique works in every street. Your available distance, the mural’s width and height, and how much correction you can accept in post determine the sensible approach.
The Tool Desk
Outbyte PC Repair FREEClear out junk files and repair common Windows errorsFree Scan →Outbyte Driver Updater FREEFix the driver behind crashes, sound loss and screen glitchesFind Drivers →| Approach | Use it when | Main advantage | Main limitation |
|---|---|---|---|
| One carefully aligned frame | You can stand far enough back to include the mural without an extreme wide-angle view. | One exposure has no panorama seam or projection step. | A narrow street or close wall may make the framing impossible; a very wide lens can exaggerate edge stretching. |
| Overlapping horizontal or vertical frames | The mural extends beyond a comfortable single-frame field of view. | You retain a more moderate perspective while covering the whole wall. | Alignment, lens and perspective correction, seam blending and cropping are required; moving subjects or changing light can complicate the blend. |
| Shift-lens sequence | You need controlled, perspective-conscious multi-frame capture and have specialist equipment. | Adjacent views can be made while the camera body stays in place, reducing the correction burden during stitching. | A shift lens is optional specialist gear, not a prerequisite for a successful mural photograph. |
The practical decision is simple: first see whether you can obtain a square, level single frame from a sensible distance. If not, use an overlapping sequence. Consider a shift lens only when the project justifies specialized perspective-control equipment.
Prepare at the wall
Find the best stand-off distance
Walk backward until the mural fits at a moderate focal length rather than immediately choosing the widest setting. More distance gives you room to keep the camera square and reduces the temptation to pitch it upward. In a narrow lane, a building, traffic or a barrier may set the closest and farthest positions you can use. Accept that physical constraint and choose a sequence of sections if one frame would require an extreme view.
Rank #2
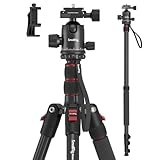
- Wide Compatibility: This camera tripod is universally compatible with cameras and devices with 1/4"-20 and 3/8"-16 threaded holes, such as DSLR cameras, action cameras and mirrorless cameras, etc. It can also be used with cell phones and projectors. 【Note】For cameras with telephoto zoom lens, you need to purchase additional tripod mount ring or telephoto lens mount for better balance.
- 2 in 1 Tripod Monopod: You can easily turn the aluminum tripod into a monopod according to your needs, this tripod is a good companion for your hiking or traveling.
- Angle Adjustable:The specially designed 36mm metal ball-head can rotate 360 degree allowing you to take photos at any angle with horizontally and vertically. And the central pole can be inverted to allow for low angle shooting and macro photography.
- Height Adjustable: 4-section column legs with 3 quick release flip-locks allows you to adjust the working height from 16" to 71" in seconds. 16.9" folden size is easily took to anywhere for outdoor photography.
- Load Bearing and Innovative Design: The dslr tripod offers high level of stability using great quality level of magnesium aluminum alloy. The net weight of the tripod is 1530g, it can withstand up to 33 lbs/15 kg(vertical)or 11 lbs/5 kg(tilt). Different from other tripods, this tripod has Three 1/4" threaded holes added to the bracket, which can meet the needs of external magic arms, mobile phones, monitors, etc.
Identify a square viewpoint
Look for a position where the sensor plane can face the mural rather than a corner. A wall that recedes sharply from your position will naturally show different apparent sizes across its depth; moving to a more frontal position reduces that effect. Keep the camera at a height that lets you frame the important artwork without pointing steeply up or down.
Keep the capture consistent
For a sequence, maintain the same camera height, orientation and framing height as you move across the wall. Keep exposure consistent as far as the changing street light permits. Consistency gives the stitching software comparable tones and geometry to work with and makes manual seam cleanup less destructive.
Do these 3 things before closing this tab:
1Fix the driver behind crashes, sound loss and screen glitches2Repair Windows errors before they cause bigger problems3Scan for outdated or missing drivers - takes under a minuteUse support when it helps
A tripod and adjustable head can make it easier to hold a level camera and turn it smoothly between sections. Nikon’s panorama guidance presents this as an aid rather than a requirement (panorama guidance). If a tripod would block a sidewalk or attract unwanted attention, careful handheld capture is still workable; support improves repeatability but does not replace a square viewpoint.
Workflow for a single mural frame
- Compose from the available distance. Step back until the mural fits without relying on the most extreme wide-angle setting. If the wall still cannot fit, stop trying to force a single frame and switch to the panorama workflow.
- Level the camera. Use the camera’s electronic level if available, or align the body with visible architectural references. Do not tilt upward just to include the top edge.
- Face the surface as directly as possible. Keep the camera and mural as parallel as the location allows. A position that is slightly off-axis is preferable to one that requires a strong tilt, but move toward a frontal angle whenever the street permits.
- Check the edges. Examine the outer parts of the frame for severe stretching from the wide view. If the composition leaves no margin, move farther away or choose a less extreme focal length before taking the final photograph.
- Make the exposure. Capture the entire mural with the alignment and framing you established. Preserve a little surrounding context if it helps you judge the wall’s geometry, but do not add empty space by pitching the camera.
A single frame is the least complicated file to deliver because it avoids panorama seams and projection choices. Its success depends almost entirely on whether the street gives you enough room to remain level and square.
Workflow for an overlapping mural panorama
Use a panorama when the wall is wider than your comfortable field of view. The goal is not to collect as many photographs as possible; it is to create adjacent views with enough shared information for alignment while preserving a consistent viewpoint.
Rank #3

- Innovative Pentagonal Tube Design – Engineered for stability and portability, this lightweight (2.6 lbs/1.18 kg) tripod features a unique pentagonal-shaped tube for enhanced durability and easy folding. With a compact 19.6 ''/50 cm folded size, it’s effortless to carry, making it ideal for travel, outdoor shoots, and professional use, even on rugged terrains
- Universal Phone & Tablet Compatibility – Designed for versatility, the 2-in-1 adjustable holder securely accommodates both smartphones and tablets with a firm grip, thanks to its high-quality plastic construction and thick rubber padding. Perfect for video recording, live streaming, online meetings, vlogging, and photography
- Extended Height & Precision Control – Adjustable from 18.9''/48 cm to 75''/190 cm, this tripod offers a wide range of shooting heights. A 360° rotatable 3-way pan head enables smooth panning, tilting, and wide-angle shots, while the built-in bubble level ensures perfect alignment for professional-grade results
- Flexible Shooting Angles – Capture every moment with complete horizontal and vertical rotation, allowing for dynamic compositions. Whether for photography, videography, live streaming, or creative projects, this tripod adapts to your needs
- Wireless Remote for Seamless Operation – The included Bluetooth remote provides hands-free control from up to 472'', ensuring effortless group photos, selfies, and video recordings without the need for manual operation
- Plan the direction. Decide whether a horizontal row, a vertical column or several rows are needed. Follow the mural’s shape and the space available for turning the camera. Keep the camera at one height for a single row whenever possible.
- Choose a moderate view. Select a focal length that gives the artwork natural proportions and leaves room for shared detail between neighboring frames. Avoid using an extreme wide-angle frame simply because it appears to cover more wall.
- Start before the artwork’s edge. Include some surrounding wall or identifiable mural detail in the first photograph. That shared detail becomes a reference when the next frame is made.
- Turn, do not walk, between frames. Keep the camera position, height and orientation consistent while rotating to the next section. A tripod head can make the turn smoother, but a careful handheld rotation can work when a tripod is impractical.
- Overlap adjacent sections. Ensure each photograph contains recognizable details from the preceding one. The overlap is what allows software to match edges; a barely touching boundary gives the algorithm little information and leaves less room to crop a misalignment.
- Keep framing height consistent. Do not raise or lower the camera as you progress. Changes in height alter the apparent geometry and make a straight mural harder to reconstruct.
- Keep exposure as consistent as practical. A sequence with noticeably different brightness or color between frames demands more blending and can reveal obvious bands across the artwork.
- Continue past the far edge. Include a final frame with shared detail and a little surrounding wall so the software can identify the end of the panorama and so you have room to crop.
- Review before leaving. Check that every section is sharp enough for the intended output, that no frame is missing, and that the overlap contains distinctive mural features rather than a blank patch.
Overlapping frames increase coverage without forcing the lens into an extreme view, but the finished panorama is not the sum of all source pixels. Alignment, projection and overlap reduce the usable dimensions, and cropping removes additional edges.
Quick wins for a faster PC:
Fix the driver behind crashes, sound loss and screen glitchesFind Drivers →Clear out junk files and repair common Windows errorsFree Scan →Scan for outdated or missing drivers - takes under a minuteDriver Scan →When a shift lens is worth considering
A perspective-control shift lens offers a specialized way to record adjacent views. Cambridge in Colour describes shifting the lens to capture neighboring portions while the camera body remains in place, producing a perspective-controlled panorama that generally needs less perspective and lens-distortion correction during stitching (shift-lens tutorial).
This method is most useful when you need repeatable geometry, the mural is highly detailed, and you already have access to the lens and a stable support. The body’s fixed position avoids introducing a new viewpoint for every section. You still need to respect the lens’s shift range, maintain consistent exposure and leave enough common detail for the stitching process.
Do not buy a shift lens solely to solve an occasional mural. A normal lens, a level camera and a carefully overlapped sequence address the same basic problem for most street situations. Shift capture is an efficiency and control upgrade for specialist work, not a basic requirement.
Stitch and correct the files
Start with panorama assembly
Use panorama software that can align photographs, match edges, blend details and compensate for perspective. Adobe Photoshop’s Photomerge documentation describes those functions in its Photomerge guide. Load the complete sequence, let the software generate a projection, and inspect the result at a high zoom before accepting it.
Recommended Free Tools
Rank #4

- Sturdy Aluminum Alloy Tripod: Aluminum alloy construction with strong telescopic twin legs tubes and middle spreader, the video tripod has reliable stability and support weight up to 22.0lb/10kg
- Professional Video Fluid Head: Dynamic balancing system allow stepless 360 horizontal and -75to +90 vertical movements. The bottom ring can adjust the amount of tension, which make the heavy duty tripod pan from left to right for smooth and stable movement while recording
- Quick Height Adjustment: The 3-section telescopic legs tripod height can be adjusted easily and rapidly from 36.06 inches (91cm) to 74.8 inches (190cm) with oversized leg locking knobs and buckles
- Stable Support Design: Built in Bubble level and 75mm bowl bottom provide better stability and balance for the video tripod. Retractable metal spikes feet and rubber feet allow shooting on uneven ground or smooth surfaces
- Wide Compatibility: Equipped with quick release plate and fitted with standard 1/4 inch and 3/8 inch screws, making the video head compatible with most cameras and camcorder. The video head also comes with one 3/8 inch threaded hole to meet your various needs for expanding external devices
Look for doubled brush strokes, broken lettering, wavy architectural lines or a seam that crosses a recognizable face. These are signs that the program found an incorrect match or that the viewpoint changed between frames. Try a different projection or remove a problematic source frame only when the remaining overlap still covers the wall; otherwise, return to the original files and correct the capture.
Separate convergence correction from lens correction
If verticals converge because the camera was tilted, use a perspective correction that straightens those lines. Adobe’s Adaptive Wide Angle documentation explicitly distinguishes camera-tilt convergence from panorama correction (Adaptive Wide Angle documentation). Applying a wide-angle filter to a panorama that is actually suffering from a bad projection can bend other parts of the mural, so identify the cause first.
Correct lens behavior before fine retouching
Where your software provides a lens-profile or manual distortion adjustment, correct obvious barrel or pincushion bending before judging the mural’s straight lines. Do not expect this step to repair a tilted camera; it addresses the lens’s rendering, not the viewpoint.
Inspect, crop and export
Panorama software often leaves transparent or irregular borders after projection. Crop only after you have checked the artwork near every seam. Cropping is part of the geometry trade-off: a stronger correction can remove more edge area, and a wider panorama may lose more pixels than its source count suggests. Preserve a master file if you may need to revisit the projection, then export the cropped image in the dimensions required for publication or display.
What’s actually slowing this PC down?
Pick the symptom - the matching free tool is one click away.
Troubleshooting common failures
| What you see | Likely cause | What to change next time or in post |
|---|---|---|
| The mural’s side lines lean toward each other. | The camera was pitched up or down. | Re-shoot with the camera level and facing the wall more squarely. A perspective correction can reduce the convergence, but it may require cropping. |
| The outer artwork looks stretched or bowed. | An extreme wide-angle view or uncorrected lens distortion. | Step back or use a less extreme focal length. Apply lens correction separately from convergence correction. |
| Brush strokes or letters repeat at a seam. | The software matched the wrong details or the camera position changed between frames. | Inspect overlap, choose a different projection, or exclude the faulty frame only if neighboring coverage remains complete. |
| Brightness changes in vertical bands. | Exposure or light changed during the sequence. | Keep exposure consistent during capture and use blending controls during assembly; avoid crossing a major tonal change through a key subject. |
| The panorama has large blank or transparent corners. | Projection and perspective correction changed the image boundary. | Crop after checking the entire mural. If important artwork is missing, re-shoot with more surrounding margin and more reliable overlap. |
| The final file is smaller than expected. | Overlap, projection and cropping reduce usable pixels. | Capture with sufficient source resolution and overlap, but do not assume that adding source pixel counts predicts the final dimensions. |
Practical decisions in difficult locations
A narrow street with no room to step back
Do not solve the lack of distance by pitching the camera upward and accepting severe convergence. Keep the body level, use the least extreme view that fits the immediate section, and record overlapping sections across the wall. The sequence preserves more natural proportions than one forced ultra-wide frame.
Best Value

- 75in Extendable Camera Tripod: This tripod for camera phone can extend to a height of 75 inches by adjusting the flip locks, which can be quickly adjusted to any desired height to meet the needs of various shooting scenarios. Both the ball head and center column are equipped with level for easy real-time level calibration, ensuring perfectly level shots.Good Digital Camera Accessory Kits for you.
- 3-in-1 Detachable Center Column: The center column supports quick detachment, allowing for flexible use as a monopod or selfie stick (Max Height:43.9 in / 111.5 cm). Camera phone tripod stand can also be installed upside down for low-angle macro shooting. This 3-in-1 multi-functional design simplifies shooting equipment, saves carrying space, and enhances practicality and cost-effectiveness, making it suitable for travelers, outdoor enthusiasts, and content creators.
- 3-Level Angle Adjustment For Various Terrains: The camera tripod legs can be adjusted to three angles using the angle adjustment locks, allowing it to spread almost horizontally to achieve a minimum height of 15.35in(39cm) for low-angle shooting. Each leg adjusts independently in both angle and length, ensuring the tripod stand steadily on stairs, rocky trails, or uneven ground—making it ideal for outdoor-photographers and hikers shooting in unpredictable environments.
- Remote Control & Flexible Ball Head: Equipped with a 360° ball head, which supports free rotation in both horizontal and vertical directions. When shooting vlogs or live streams, you can flexibly switch angles and landscape/portrait modes without moving the tripod. In addition, this phone tripod has a built-in remote control with a maximum 10m control distance. Whether it's selfies, group photos, or long-distance shooting, one-button control makes shooting easier and more convenient.
- Sturdy & Stability: Constructed from aluminum alloy, this DSLR camera tripod features thickened tubes and anti-slip rubber feet that provide stronger grip on various surfaces, effectively preventing image shake. Its bottom hook allows for hanging weights, increasing counterweight and further enhancing overall stability, ensuring smooth footage even outdoors.[Max load 8kg/17.64lb (vertical) or 3kg/6.61lb(45° tilt)]
A wall that is wider than the frame but evenly lit
This is the straightforward panorama case. Establish one camera height, rotate smoothly through adjacent sections, maintain shared detail and keep exposure consistent. The resulting files give the stitching software enough information to align and blend the mural.
A wall with strong perspective and limited access
Move toward the most frontal position available before changing lenses. If the camera cannot be square because the street prevents it, document the limitation and plan for perspective correction and cropping. A shift lens can reduce correction work when specialist equipment is available, but it cannot create physical space where none exists.
A mural that must remain fully visible with minimal cropping
Leave more surrounding wall in every source frame and avoid aggressive perspective adjustments. Check the projected borders before committing to the final crop. If the artwork touches the original frame edges, even a modest correction may remove important content.
Windows Errors? Fix Them Before They Spread
Repair common Windows errors and clear accumulated junk for a smoother, more stable PC - no reinstall needed.Free scan · no reinstallCrashes, No Sound, or Screen Glitches?
Random freezes, missing sound and display glitches usually trace back to one bad driver. Find and replace yours safely.Free scan · under a minuteFinal field checklist
- Can you stand far enough back to use a moderate view?
- Is the camera level rather than pitched to fit the top or bottom?
- Is the sensor as parallel to the mural as the street allows?
- If using multiple frames, are camera height, orientation and framing height consistent?
- Does every neighboring frame contain recognizable shared detail?
- Have you kept exposure consistent as practical?
- Did you review the complete sequence before leaving?
- In post, did you identify whether a problem is convergence, lens distortion or panorama projection?
- Did you inspect seams before cropping?
The dependable formula is alignment first, coverage second and correction last. A level, square single frame is ideal when the location permits it. When the mural exceeds that field of view, an orderly overlapping sequence produces a more natural result than an extreme wide-angle compromise. Tripods, adjustable heads and shift lenses improve control, but careful positioning and disciplined overlap do most of the work.
Quick Recap
Product prices and availability are accurate as of the date/time indicated and are subject to change. Any price and availability information displayed on Amazon at the time of purchase will apply.

