Fix Cricut Print Then Cut problems by separating two symptoms: a machine that cannot read the registration marks, and a machine that reads them but cuts away from the printed artwork. For scan failures, correct lighting, print scale, visible marks, material, mat placement, and sensor operation. For a repeatable cut offset after a successful scan, run Print Then Cut calibration in Design Space. Calibration cannot repair a page that was resized, cropped, printed outside Design Space, or moved on the mat.
First, identify which problem you have
The remedy depends on what happens before the blade starts. Watch the sequence and match it to the closest symptom below.
As an Amazon Associate I earn from qualifying purchases.
| What you see | Most likely area | Do this first |
|---|---|---|
| Design Space says it cannot read the sensor marks | Lighting, missing or altered marks, printer scaling, material reflectivity, placement, or sensor illumination | Turn off direct light, inspect every mark, verify print settings, and reload the sheet squarely on the mat. |
| The machine scans, but every cut is shifted by about the same amount | Printer-to-machine alignment calibration | Run Print Then Cut calibration in Design Space and follow the direction-specific correction prompts. |
| The cut is wrong only after printing a saved PDF | The page or sensor marks were resized outside Design Space | Print the project from Design Space instead of a separately opened PDF. |
| Only glossy, metallic, glitter, dark, or busy patterned media fails | Sensor contrast or reflected light | Test a supported non-reflective material for your exact machine. |
| The sensor light never turns on during calibration | Sensor-light or hardware problem | Stop repeating calibration and contact Cricut Member Care. |
A scan failure and a cut offset can occur together, but they are not the same fault. Calibration changes the relationship between the printed image and the cut; it does not change the size of a page, restore a cropped mark, or compensate for a sheet that moved.
Quick wins for a faster PC:
Fix the driver behind crashes, sound loss and screen glitchesFind Drivers →Repair Windows errors before they cause bigger problemsFix Now →Make the registration marks readable
Remove direct light from the sensor
Move the machine away from direct sunlight and switch off any overhead reading lamp or other bright light aimed at the machine. Cricut warns that these conditions can interfere with the Print Then Cut sensor light (Cricut’s sensor-mark troubleshooting guidance). Ordinary indirect room light is acceptable; the problem is concentrated light shining into the scanning area. After changing the light, restart the scan with the same sheet before changing several other variables at once.
#1 Best Overall
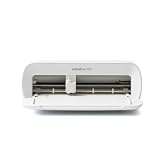
- BUNDLE INCLUDES - Cricut Joy Xtra, Fine-Point Blade, Fine Point Pen, Mini Weeder, Welcome card, USB cable, Power adapter, Free trial subscription to Cricut Access (for new subscribers), Materials for a practice cut, 30 bonus images in Design Space app
- ENDLESS CREATION & PERSONALIZATION - Cricut Joy Xtra works with 50+ materials, including vinyl, iron-on HTV, cardstock, stickers & so much more; This machine not only cuts, but it also draws, foils, & more
- COMPATIBLE WITH INKJET PRINTER - Create full-color designs for stickers & more with the Print-Then-Cut feature, compatible with most inkjet printers
- NO DESIGN EXPERIENCE REQUIRED — Design Space is the easy-to-learn design software that connects to all Cricut cutting machines; Our free content library includes 3,000+ images and 100+ fonts; Add our optional Cricut Access Subscription* to unlock more
- BONUS DIGITAL CONTENT – Bundle includes 30 additional premium-quality images with purchase
If the machine is under a window, temporarily close the blind or rotate the machine. Do not cover the sensor opening with tape or paper. A shield that blocks the lamp or sunlight while leaving the machine’s own sensor path clear is preferable.
Check that every mark printed completely
- Inspect all black corner marks before loading the mat. None may be cropped, covered by artwork, clipped by the printer, or hidden under a sticker or laminate.
- Print one page per sheet in portrait orientation unless the connected machine’s Design Space screen explicitly shows another orientation.
- Use ordinary page margins. Narrow margins, edge-to-edge printing, and automatic centering can alter the mark positions.
- Do not enlarge, shrink, rotate, or fit the page to the printer’s paper. Disable options labelled “fit to page,” “shrink to fit,” “scale to fit,” or similar.
Print from the Print Then Cut flow in Design Space. Cricut states that saving a project as a PDF and printing it outside that flow produces incorrectly sized cut sensor marks (How to Print Then Cut in Design Space). A PDF can look visually correct while its black marks are a fraction of an inch out of specification, which is enough to make scanning or cutting fail.
Use the printer settings Cricut expects
Printer dialog names differ by manufacturer, so use the system print dialog or your printer’s documentation to locate the equivalent controls. For ordinary Print Then Cut work, verify the following before printing:
Free tools Windows power users keep installed
One-click scans. No signup required.
| Setting | Required choice or check | Why it matters |
|---|---|---|
| Orientation | Portrait | Keeps the mark geometry in the orientation Design Space generated. |
| Pages | One page per sheet | Prevents page-order or multi-page scaling changes. |
| Scale | 100% or the printer’s unscaled/actual-size option | Preserves the distance between marks and artwork. |
| Margins | Do not use narrow margins | Prevents marks near the edge from being clipped or repositioned. |
| Edge printing | Off | Borderless modes can change the printable area and scale. |
| Centering | Off when it changes the generated layout | Design Space already places the marks; a printer-side re-centering can move them. |
| Ink | Not low; black marks must print solidly | Faint or broken marks reduce contrast for the sensor. |
For a calibration sheet specifically, Cricut calls for black ink, high print quality, and white, non-textured copy paper. Its calibration guidance gives ideal top and left margins of 0.5 to 1.5 inches. Those values apply to the calibration sheet; follow the current on-screen instructions if your model presents a different sheet or orientation.
Rank #2
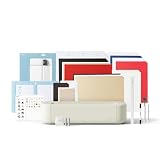
- 12 IN (30.5 CM) CUTTING MACHINE: Cricut Explore 5 is the newest generation of our Cricut Explore machines — perfect for making a variety of projects like custom decals, personalized apparel, full-color stickers, cards, and so much more. You can even make in multiples! 30% more compact than previous models, Cricut Explore 5 features an aesthetic new look and simplified interface for a more intuitive experience – all with the same dependable 12 in (30.5 cm) cutting performance. Available in a brand-new Taupe color.
- COMPATIBILITY: Precision-cuts 100+ popular materials, including vinyl, iron-on, cardstock & printable materials, plus this machine writes, draws, foils, scores & cuts intricate designs with precision. Works with six tools, including Deep Cutting Tool (sold separately) for working with thicker materials like foam & rubber. Plus, it features a new hassle-free snap-in pen holder.
- BUNDLE & SAVE: Make a wide variety of projects right out of the box and save even more! The Essential Bundle includes must-have tools and materials like Smart Vinyl, Smart Iron-On, Value Cardstock, Insert Card Sets, and Printable Vinyl. *Materials and accessories value based on comparable Cricut products sold separately. Bundle also includes 25 additional premium-quality images with purchase, plus 1 font.
- FULL-COLOR POSSIBILITIES: Print your design with your home inkjet printer, then your Cricut cutting machine automatically recognizes & precision-cuts around inkjet-printed images to create full-color stickers, decals, apparel & more.
- NO DESIGN EXPERIENCE REQUIRED: Use your mobile or desktop device and connect through Bluetooth to Design Space, our free, easy-to-use app that helps you turn your ideas into something one of a kind. With step-by-step design flows, customizable templates, AI-image generation, and a huge content library, it makes personalization feel effortless. Our free out-of-the box content library includes 3,000+ images, 100+ fonts, and 1,000+ projects to help get you started. Additional content can always be purchased a la carte, or go all in with a Cricut Access Subscription to unlock our ever-growing library for a small reoccurring monthly or annual fee.
Keep the material within the sensor’s contrast limits
Print Then Cut sensors need a clear difference between the black marks and the sheet. Cricut’s material guide classifies matte or otherwise non-reflective materials as the safe starting point. Metallic, glitter, and glossy finishes can reflect the sensor light, hide the black marks, or produce an offset cut (Print Then Cut compatible materials).
| Machine family named in Cricut’s guide | Material guidance | Practical choice for troubleshooting |
|---|---|---|
| Explore Air 2 and earlier | Non-reflective white material | Use plain matte white printable paper or sticker paper while diagnosing the machine. |
| Venture, Joy Xtra, Joy 2, Explore 3 and later, and Maker machines | Broader support for non-reflective white, lightly colored, and simple patterned materials | Start with matte white; move to a light color or simple pattern only after the white test succeeds. |
The material list is model-dependent, not a guarantee that every printable vinyl will scan. Dark colors and high-contrast or busy patterns can reduce mark contrast or confuse the scan. If a project works on matte white but not on a glossy sheet, the result points to material compatibility rather than calibration.
Place and load the sheet correctly
- Use a clean, flat, undamaged mat. Replace it only if dirt, cuts, loss of adhesion, or physical damage prevents the sheet from staying still.
- Place the printed sheet at the top-left of the adhesive area, aligned with the mat grid marks.
- Follow the orientation shown in Design Space for the connected machine. Do not rotate the sheet because another model uses a different loading direction.
- Press the sheet down smoothly from the center outward. Remove bubbles, wrinkles, curled corners, and lifted edges.
- Align the mat evenly under the machine’s guides and load it straight. A mat that enters at an angle can change the mark position during scanning or cutting.
Explore, Maker, and Joy Xtra workflows generally show the top-left placement described above, while Venture instructions differ in Cricut’s calibration guide. The screen for your connected model takes precedence.
What’s actually slowing this PC down?
Pick the symptom - the matching free tool is one click away.
Confirm the sensor light is operating
During a normal scan and during calibration, the sensor light should activate as the machine searches for the marks. If it does not turn on while scanning the calibration sheet, Cricut’s sensor-light troubleshooting guidance says to contact Member Care rather than continuing to make random adjustments (Print Then Cut Sensor Light Troubleshooting). A light that is merely hard to see is different from one that never activates; check in normal room lighting and observe the scan closely.
Rank #3

- BUNDLE INCLUDES – Cricut Maker 4, Fine-Point Blade, Materials Sampler (Smart Vinyl, Matless Vinyl, Smart Iron-On, Matless Heat Transfer Vinyl, Cardstock, Transfer Tape), Fine Point Pen, Light Grip Mat, Weeder & 30 bonus images in Design Space app
- ENDLESS CREATION & PERSONALIZATION - Cricut Maker 4 works with 300+ materials, including leather, wood, vinyl, iron-on HTV, cardstock, stickers & more. This machine not only cuts, but it also draws, foils, scores, engraves, debosses, perforates, & more
- COMPATIBLE WITH INKJET PRINTER - Create full-color designs for stickers & more with the Print-Then-Cut feature, compatible with most inkjet printers
- NO DESIGN EXPERIENCE REQUIRED — Design Space is the easy-to-learn design software that connects to all Cricut cutting machines. Our free content library includes 3,000+ images and 100+ fonts. Add our optional Cricut Access Subscription* to unlock more
- BONUS DIGITAL CONTENT – Bundle includes 30 additional premium-quality images with purchase
Calibrate when scanning succeeds but the cut is off
Calibration is for a consistent relationship error: the machine reads the marks, performs the cut, and the cut lands left, right, above, below, or at a repeatable distance from the printed edge. Cricut describes the purpose this way: “Print Then Cut calibration ensures your machine cuts precisely along the edge of your printed images” (Calibrating your machine for Print Then Cut).
Do not start calibration to fix a resized page, a cropped mark, a glossy reflection, or a sheet that slipped. Correct those physical and print problems first; otherwise calibration will be compensating for a different error on every project.
Run the Design Space calibration workflow
- Open Design Space with the machine you actually use. On desktop, open the machine-calibration controls; on iOS or Android, open the Print Then Cut settings. Labels and locations vary by platform and model.
- Select Print Then Cut calibration and choose the connected machine when prompted.
- Print the calibration sheet from the workflow. Use black ink, high print quality, and white non-textured copy paper. Do not use a saved PDF or a printer shortcut that scales the page.
- Place the sheet on the mat exactly as the screen shows and load it straight. For an A4 sheet, Cricut’s guide says to place the long edge horizontally and point the arrow in the upper-left sensor mark toward the top of the mat; use the displayed model-specific orientation if it differs.
- Let the machine scan the marks and make the assessment cuts. Answer the on-screen questions about which line or cut reaches the printed square.
- If the first square is substantially displaced, select the correction line that matches the observed direction. The workflow then repeats the cut so you can narrow the error.
- Continue until the cut touches the printed square, then complete the fine-calibration stage and save the result when Design Space offers that option.
The desktop and mobile paths are not identical, and some models use different sheet sizes or trimming instructions. Follow the current calibration screen for the exact machine instead of applying a Venture, A4, or mobile instruction to another setup.
Windows Errors? Fix Them Before They Spread
Repair common Windows errors and clear accumulated junk for a smoother, more stable PC - no reinstall needed.Free scan · no reinstallOutdated Drivers Are Slowing You Down
One free scan finds every outdated or missing driver and matches the right update for your exact hardware.Free scan · exact hardware matchUse the direction prompts for a large offset
Cricut’s current calibration article maps the first correction to the direction of the offset: line 21 for a cut offset to the left, line 1 for a cut offset to the right, line A for a cut offset down, and line U for a cut offset up. These are starting choices for the large-offset stage, not universal values to enter manually. Select the line Design Space identifies from your observed cut and repeat as instructed; do not choose random lines or alter several settings at once.
Rank #4

- 12 IN (30.5 CM) CUTTING MACHINE: Cricut Explore 5 is the newest generation of our Cricut Explore machines — perfect for making a variety of projects like custom decals, personalized apparel, full-color stickers, cards, and so much more. You can even make in multiples! 30% more compact than previous models, Cricut Explore 5 features an aesthetic new look and simplified interface for a more intuitive experience – all with the same dependable 12 in (30.5 cm) cutting performance. Available in a brand-new Taupe color.
- COMPATIBILITY: Precision-cuts 100+ popular materials, including vinyl, iron-on, cardstock & printable materials, plus this machine writes, draws, foils, scores & cuts intricate designs with precision. Works with six tools, including Deep Cutting Tool (sold separately) for working with thicker materials like foam & rubber. Plus, it features a new hassle-free snap-in pen holder.
- BUNDLE & SAVE: Make a wide variety of projects right out of the box and save even more! The Deluxe Bundle includes must-have tools and materials like Smart Vinyl, Smart Iron-On, Value Cardstock, Insert Card Sets, and Printable Vinyl. It's enough supplies to create up to 100 projects. Bundle also includes 25 additional premium-quality images with purchase, plus 1 font.
- FULL-COLOR POSSIBILITIES: Print your design with your home inkjet printer, then your Cricut cutting machine automatically recognizes & precision-cuts around inkjet-printed images to create full-color stickers, decals, apparel & more.
- NO DESIGN EXPERIENCE REQUIRED: Use your mobile or desktop device and connect through Bluetooth to Design Space, our free, easy-to-use app that helps you turn your ideas into something one of a kind. With step-by-step design flows, customizable templates, AI-image generation, and a huge content library, it makes personalization feel effortless. Our free out-of-the box content library includes 3,000+ images, 100+ fonts, and 1,000+ projects to help get you started. Additional content can always be purchased a la carte, or go all in with a Cricut Access Subscription to unlock our ever-growing library for a small reoccurring monthly or annual fee.
What calibration can and cannot correct
| Condition | Will calibration help? | Correct response |
|---|---|---|
| Marks scan and the cut is consistently displaced | Yes | Run Print Then Cut calibration and complete both the large-offset and fine-calibration prompts. |
| Marks are cropped, covered, faint, or missing | No | Reprint from Design Space with solid black marks and unscaled printer settings. |
| The printer used “fit to page,” “shrink to fit,” or enlargement | No | Print again at the generated size; do not calibrate a resized sheet. |
| The sheet moved, curled, or loaded at an angle | No | Use a flat sheet, clean mat, and straight loading. |
| Reflective or dark material confuses scanning | No | Switch to a supported non-reflective, light material for the test. |
| The sensor light never activates | No | Contact Cricut Member Care after confirming the machine is powered and the calibration workflow is selected. |
A complete recovery sequence for a project that is already failing
Use this order so each test removes one possible cause without introducing another.
- Cancel the cut and record the exact message: unreadable marks, failed scan, or successful scan with an offset cut.
- Move direct sunlight and aimed lamps away from the sensor.
- Return to the original Design Space project and print a fresh page from its Print Then Cut flow.
- Set portrait orientation, one page per sheet, unscaled output, normal margins, no borderless or edge printing, and no automatic centering that changes the layout. Confirm the printer is not low on ink.
- Use matte white, non-textured material for the diagnostic print. This is especially important on Explore Air 2 and earlier, whose stated guidance is limited to non-reflective white material.
- Inspect every black mark, place the page at the top-left of the mat, smooth it flat, and load the mat evenly under the guides.
- Retry the scan. If it still cannot read the marks, check whether the sensor light activates. A light that does not activate during calibration requires Member Care.
- If the scan completes but the cut remains consistently off, run the calibration workflow. Use the observed direction and the on-screen line choices, then perform the fine calibration.
- Test the corrected setup with a small, simple printed shape on the same material before committing an important sheet.
Changing the page scale, material, lighting, and calibration values simultaneously makes the result impossible to interpret. Keep the successful diagnostic setup unchanged while testing one new material or finish at a time.
Why a cut can look crooked or increasingly off-center
The page was printed at a different size
A small scale change moves marks and artwork together relative to the machine’s expected coordinates. The blade may appear correct near one corner and increasingly wrong farther across the page. Reprint from Design Space at the generated size; calibration is not a substitute for restoring the original scale.
The sheet moved during loading or cutting
A shifted sheet creates an apparent alignment error even when the machine’s calibration is correct. Adhesive loss, a curled corner, wrinkles, or an angled mat entry can all move the printed coordinate system. Flatten the sheet and load the mat straight before deciding that the machine needs recalibration.
Best Value

- COMPLETE CRICUT EXPLORE 5 KIT: Start crafting right out of the box with the Cricut Explore 5 cutting machine plus Smart Vinyl, Smart Iron-On (HTV), printable vinyl, cardstock, insert cards, and project inspiration. Create decals, labels, stickers, greeting cards, personalized gifts, and custom apparel without purchasing additional supplies. 30% more compact than previous models.
- CUTS 100+ MATERIALS WITH PRECISION: The Cricut Explore 5 smart cutting machine works with vinyl, heat transfer vinyl (HTV), cardstock, printable materials, paper, felt, and more. Create custom home decor, business products, apparel, scrapbook projects, stickers, and event decorations with clean, accurate cuts. Compatible with Cricut Smart Materials for continuous matless cuts up to 12 feet long. Easily make wall decals, signs, banners, labels, and bulk crafting projects while reducing setup time and material waste.
- RAINBOW ESSENTIALS BUNDLE: Make a wide variety of projects right out of the box and save even more! The Essential Bundle includes the all-new Cricut Explore 5 Cutting Machine as well as must-have tools and materials like Smart Vinyl, Smart Iron-On, Value Cardstock, Insert Card Sets, and Printable Vinyl. In addition you will receive 6 Smart Vinyl Sheets (9.5" x 13"), 6 Smart Heat Transfer Vinyl Sheets (9.5" x 13"), and access to 400+ Projects and How-To's in Design Space.
- CREATE STICKERS, SHIRTS, CARDS & MORE: Make custom stickers, vinyl decals, labels, greeting cards, iron-on shirts, tote bags, party decorations, wedding projects, and personalized gifts. This all-in-one Cricut bundle provides the most popular materials needed for a wide variety of projects. Designed for first-time Cricut users and growing makers, this bundle makes setup simple and crafting approachable. A thoughtful gift for birthdays, holidays, Mother’s Day, graduation, weddings, or anyone starting a DIY journey.
- BEGINNER-FRIENDLY CRAFTING MACHINE: Bluetooth connectivity and Cricut Design Space provide an easy setup experience with guided project tutorials and templates. Ideal for first-time Cricut users, hobby crafters, teachers, and small business owners. With step-by-step design flows, customizable templates, AI-image generation, and a huge content library, it makes personalization feel effortless. Our free out-of-the box content library includes 3,000+ images, 100+ fonts, and 1,000+ projects to help get you started.
The finish reflects the sensor
Gloss, metallic flakes, and glitter can make the black marks look lighter or displaced to the optical sensor. If the same file scans on matte white but fails on the decorative material, use a supported matte option or a compatible overlay only if your machine’s material guidance permits it. Do not assume a generic glossy printable vinyl is compatible.
The marks are visible to you but not to the machine
Human-readable marks can still be too faint, partially clipped, or surrounded by a confusing pattern. High print quality, solid black ink, a light non-reflective sheet, and the generated page margins provide the strongest contrast. Inspect under normal room light rather than shining a lamp directly into the sensor.
When to contact Cricut Member Care
- The sensor light never activates during the calibration scan after you have selected the correct Print Then Cut workflow.
- Fresh, unscaled pages from Design Space fail on supported matte white material in indirect light, with all marks intact and the mat loaded correctly.
- Calibration completes but a simple test remains consistently misaligned across multiple fresh sheets and supported materials.
- The mat cannot load evenly because its guides, rollers, or surface are physically damaged.
When you contact support, provide the machine model, Design Space platform (desktop, iOS, or Android), paper or material type and finish, whether the marks scan, whether the sensor light activates, and the exact printer scaling settings. That information separates a print or material problem from a machine-sensor problem more quickly.
Do these 3 things before closing this tab:
1Repair Windows errors before they cause bigger problems2Scan for outdated or missing drivers - takes under a minute3Clear out junk files and repair common Windows errorsPrevent alignment problems on future projects
- Keep a known-good matte white, non-textured sheet for calibration and diagnosis.
- Print every Print Then Cut page through Design Space and leave the generated page at its original scale.
- Check the four marks before applying the sheet to the mat.
- Use indirect lighting and keep bright lamps or sunlight out of the sensor’s path.
- Apply the sheet squarely to the top-left of a clean mat and smooth it flat.
- Use material finishes and colors listed for your exact machine family; test dark, patterned, glossy, metallic, or glitter media separately.
- Calibrate only after a successful scan shows a repeatable cut offset, and follow the current on-screen correction prompts.
These checks address the two different failure paths: making the marks readable, then maintaining the calibrated relationship between the printed design and the blade.
Quick Recap
Product prices and availability are accurate as of the date/time indicated and are subject to change. Any price and availability information displayed on Amazon at the time of purchase will apply.

