A gravity-fed water system can supply a nearby garden without a distribution pump when the stored water surface stays high enough above the outlet and the route does not consume too much pressure. The practical design sequence is: define the use, calculate supply and demand, check elevation at the tank’s lowest operating level, size the storage and overflow, then match pipework and irrigation hardware to the remaining flow. A rain barrel may work for a short hose or drip line; a large cistern serving indoor fixtures usually needs a pump.
Keep exterior irrigation, indoor non-potable plumbing and potable supply as separate design categories. The farther a project moves toward building plumbing or drinking water, the more important local permits, treatment, backflow protection and professional review become.
As an Amazon Associate I earn from qualifying purchases.
Decide whether gravity is suitable
Gravity provides pressure because the water surface is above the point of use. That pressure changes as the tank empties, so a system that works with a full tank may slow or stop at the reserve level. Design around the lowest water level at which you expect the system to operate, not the tank’s maximum fill line.
The U.S. Environmental Protection Agency (EPA) describes the scale distinction clearly: “Rain barrel systems and small cisterns can use a gravity fed distribution system.” It also notes that “Most distribution systems for larger cisterns need a pump to convey harvested rainwater from the cistern to its final destination, whether inside the building, an automated irrigation system, or gradually discharged to a secondary stormwater treatment practice.” These are practical tendencies rather than a guarantee based solely on tank size; elevation, pipe route, desired flow and end-use equipment decide the result. See the EPA’s NPDES Compliance Inspection Manual.
#1 Best Overall

- 50-Gallon Capacity: Provides ample storage for harvested rainwater, ideal for watering gardens, lawns, and plants.
- Durable Construction: Made from UV-resistant polyethylene for long-lasting durability and protection from the elements. Made of 100% Recycled plastic.
- Overflow Valve: Built-in overflow valve for managing excess water and the option to connect multiple barrels for increased storage.
- Convenient Spigot: Easy-to-use plastic spigot for quick and efficient water retrieval.
- Low Maintenance: Easy to install and maintain, offering a simple, sustainable solution for homeowners.
| Intended use | When gravity may work | Why a pump or specialist design is often needed |
|---|---|---|
| Nearby garden bed | Elevated barrel or tank, short route, low-flow drip or soaker line | Long runs, uphill sections, filters or emitters that need more pressure |
| Outdoor hose or multiple zones | Only when the lowest tank level still supplies the device’s required flow | Hose outlets and sprinklers commonly demand more flow than a small barrel can provide |
| Indoor non-potable fixtures | Possible in a purpose-designed system with adequate head and approved plumbing | Building pressure, backflow control, treatment and code requirements add complexity |
| Potable household supply | Rarely a simple do-it-yourself gravity installation | Water-quality treatment, cross-connection control, permits and professional design may be required |
1. Define the source and the water’s use
Identify the source
A roof, greenhouse, or other catchment can feed a storage barrel or cistern. Record the catchment area, roof material, gutter layout and where overflow can safely go. Surface runoff and open reservoirs have different contamination risks and may trigger different rules.
Separate the three use categories
- Exterior irrigation: The simplest gravity application. Drip or soaker equipment generally uses less water than sprinklers, but actual performance depends on the product, soil and layout.
- Indoor non-potable use: Toilets, laundry or other fixtures require plumbing review, labeling and cross-connection protection. Do not assume a garden arrangement can be extended indoors.
- Potable use: Roof-collected water is not automatically drinking water. Treatment, monitoring and approval depend on the catchment, storage, intended use and local health rules.
Write down the required outlets before buying a tank. A single drip zone, a hose bib, toilet flushing and drinking water have very different pressure, flow and regulatory requirements.
2. Estimate how much rain you can collect
Oregon State University Extension gives this first-pass equation in Harvesting Rainwater for Use in the Garden:
What’s actually slowing this PC down?
Pick the symptom - the matching free tool is one click away.
Harvested gallons = catchment area (square feet) × rainfall depth (inches) × 0.62
The result is potential collection. Roof texture, debris, evaporation, first-flush diversion, gutter losses and tank overflow reduce the quantity that is actually stored. Use rainfall data for your location and the season when water is needed; annual rainfall can conceal a long dry period.
Understand the Oregon examples without generalizing them
OSU’s coastal Oregon illustration assumes about 100 inches of annual rain and 75% collection efficiency. Under those assumptions it estimates approximately 47 gallons per square foot of roof per year. That figure is not a national yield and should not be transferred to a drier or differently managed site.
For a first estimate, multiply your roof’s plan area by the rainfall depth for the relevant month or dry-season recharge period, then apply a conservative collection-efficiency allowance. Compare that supply with the demand calculation below before choosing tank capacity.
Windows Errors? Fix Them Before They Spread
Repair common Windows errors and clear accumulated junk for a smoother, more stable PC - no reinstall needed.Free scan · no reinstallCrashes, No Sound, or Screen Glitches?
Random freezes, missing sound and display glitches usually trace back to one bad driver. Find and replace yours safely.Free scan · under a minute3. Estimate demand and the reserve period
Calculate irrigation demand
For a garden, determine the area to water, the irrigation method and the intended watering depth. Convert that schedule into gallons per day or week. Account for the longest period when rainfall will not recharge the tank.
OSU’s worked example uses a 30-square-foot garden under its stated dry-summer assumptions and no rainfall recharge. It estimates about 49.5 gallons per week and at least 620 gallons for 90 days. The example is useful for showing the method, not a universal requirement: soil, crop, weather, mulch and irrigation hardware all change demand.
Choose a reserve target
Decide whether the tank is intended to cover a few days, the peak dry season, or a defined emergency reserve. OSU suggests that a tank nearly double the calculated need can preserve some municipal or well-water use during peak summer periods. Treat that as an example planning preference, not a sizing standard.
Compare the demand total with the water that can be collected during the same period. A very large tank cannot solve a catchment that is too small, and a large roof does not help if the dry-season demand exceeds stored volume.
Free tools Windows power users keep installed
One-click scans. No signup required.
Rank #2
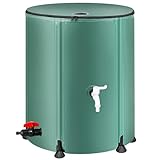
- 【Leak-Proof Design】Unlike typical rain barrels, our product features an integrated design with a straightforward screw-in faucet, eliminating the hassle of assembling multiple parts. This thoughtful construction guarantees a leak-proof system and simple installation
- 【Durable and Sturdy】Our collapsible rainwater collection system is made from premium three-layer PVC material, providing exceptional strength to endure even the toughest conditions. To enhance stability, the rain barrel includes circular footpads, effectively preventing any wobbling or tipping
- 【Easy to Store and Transport】 In contrast to bulky traditional wooden barrels, our rain barrel is foldable, making it easy to carry and store. Say goodbye to heavy, cumbersome containers and embrace convenience. Order our collapsible rain barrel today for effortless water conservation!
- 【Filtering Design】The top of our water storage container is equipped with a mesh design that prevents overflow and keeps leaves and debris out of your clean water. Rainwater collected through the faucet or overflow kit is clearer and can be reused for gardening, farm irrigation, car washing, and more—ideal for eco-conscious individuals
- 【Simple Installation and Exceptional Service】If you encounter any missing or damaged parts during installation, please contact us. We are dedicated to providing prompt replacements to ensure a worry-free experience for our customers
4. Check elevation, head and the complete route
Measure the usable height
Measure vertically from the water surface at the lowest planned operating level to the outlet or irrigation device. The relevant level is not the tank base and not the full-tank mark. If the tank is on a slope, use the actual outlet elevation and the lowest water surface that still leaves your intended reserve.
Every part of the route consumes some of the available pressure: long pipe runs, narrow pipe, upward sections, elbows, tees, valves, filters, meters, quick-connects and the final emitter or sprinkler. A low outlet close to the tank may work while a higher or distant outlet does not.
Use public-system pressure figures only as context
An EPA learner guide for small public water systems reports 35 psi as minimum operating pressure, 40–60 psi as preferred and 100 psi as a maximum. Those figures describe public distribution guidance, not a requirement for a garden rain barrel or a household gravity design. They illustrate why ordinary whole-house service can require substantial elevation and why systems spanning different elevations may need pressure zoning. See How to Conduct a Sanitary Survey of Small Water Systems: A Learner’s Guide.
Verify the end device’s requirement
Read the irrigation emitter, filter, hose nozzle or fixture documentation for its minimum pressure and flow. The reviewed guidance does not establish a universal pipe-diameter table or household flow target. Use manufacturer flow data and applicable plumbing or irrigation design guidance for the specific route; obtain professional help where local rules or building connections require it.
Quick wins for a faster PC:
Fix the driver behind crashes, sound loss and screen glitchesFind Drivers →Clear out junk files and repair common Windows errorsFree Scan →Scan for outdated or missing drivers - takes under a minuteDriver Scan →5. Select and place the tank
Choose a safe tank
For garden use, OSU describes food-grade barrels, linked barrels and larger tanks. Choose a container that has not held toxic materials, is opaque enough to inhibit algae, has covered and screened openings, and can be opened for cleaning and repair. A level indicator makes it easier to verify the lowest operating level used in your head calculation.
Design the foundation for the filled load
Water weighs about 8 pounds per gallon. A full 3,000-gallon tank therefore weighs more than 24,000 pounds before adding the tank itself, so the foundation and surrounding ground must be suitable for that load. Follow the tank maker’s foundation requirements, account for settlement and keep the structure stable during filling and emptying.
Plan access, climate and drainage
- Leave enough clearance to inspect the lid, screens, inlet, outlet and sediment.
- Protect exposed pipes and valves from freezing where that is a risk.
- Keep the tank away from unstable slopes and locations where a leak could undermine a building.
- Direct overflow away from the house foundation and septic drainfield.
6. Build the collection and inlet side
A typical roof-to-tank arrangement includes a roof catchment, gutters, an inlet screen, a first-flush diverter, a covered tank, an outlet fitting, a level indicator and an overflow. OSU also lists optional treatment, a pump, backflow prevention, a flow meter and a power supply among possible components. A gravity layout can omit the distribution pump only when the measured head and available flow are adequate.
Screen the inlet
Use a screen sized to keep leaves, insects, birds and small animals out while allowing the expected inflow. Screens and filters are maintenance items, not install-and-forget components. Make them reachable without climbing onto an unsafe tank.
Consider first-flush diversion
A first-flush device can divert the initial roof runoff, which may carry accumulated dust and debris. It reduces the amount entering storage but also reduces collected volume, so include that loss in the supply estimate. The appropriate arrangement depends on roof, climate and intended use.
7. Design an overflow that can actually discharge water
Overflow is a primary safety component, not an optional hole in the tank. The EPA’s 2017 inspection manual advises that overflow pipes have capacity equal to or greater than the inflow pipes, enough diameter and slope to drain while preserving freeboard, and screening against small mammals and birds. The discharge route must be acceptable for the site and arranged so it does not cause erosion. Confirm local drainage and building requirements.
- Identify the maximum inflow path, including the largest connected gutter area and the most intense expected design event required by local guidance.
- Size the overflow so inflow cannot force water through the lid, screened vent or tank wall.
- Provide a continuously falling route where possible, without low pockets that trap sediment or freeze.
- Screen the outlet while ensuring the screen cannot become the limiting restriction.
- Terminate on stable, erosion-resistant ground or an approved drainage feature, away from foundations and septic systems.
8. Match the outlet and distribution hardware to gravity flow
Use an outlet that can be maintained
Install a tank outlet or bulkhead fitting appropriate for the tank wall, with a shutoff valve outside the tank so the line can be serviced. Keep the outlet clear of settled sediment when possible. A drain or cleanout helps remove sludge without dismantling the distribution line.
Rank #3

- RELIABLE LONG-LASTING VERTICAL WATER STORAGE: The Elkhart Plastics 1500 Gallon Water Container is designed for a wide range of applications; Vertical tanks are versatile for bulk water, well water storage, rainwater collection, and fire suppression
- EASY TO USE: 2 16" Manway lids on the water tank give flexibility for top-down plumbing, filtrated catchment, and access; 1.5" fitting at highest point for optimized fill, 2" fittings at lowest point for maximum drainage; Air bleeds allow for max fill
- SAFE FOR DRINKING WATER: UV-resistant HDPE protects against the sun; Dark-colored tank will obstruct light from entering for pure, safe drinking water; Made from virgin polyethylene and compliant with FDA and NSF/ANSI 61 standards
- DURABLE WATER COLLECTION: Banded body and reinforced top make this tough water barrel sturdy and ready for a long service life; Built-in gallon indicators provide easy fill level identification; Rotomolded build is resistant to rust, chips, and cracks
- DELIVERY AND INSTALL: Tank is delivered via freight and may not fit in garage or through small gates; Recommended to sit on reinforced concrete block or pad for stability; Diameter: 72", Height: 94"
Keep the route simple
Short, gently sloping runs with few fittings preserve more of the available head. Avoid unnecessary elbows, undersized valves and restrictive filters. If filtration is needed, select a model whose flow and pressure-loss data fit the lowest operating head; a clogged filter can stop a system that was marginal even when clean.
Recommended Free Tools
Select the irrigation device last
Drip and soaker systems can reduce water use, but their pressure and flow needs vary. A gravity-fed line may need a low-pressure-compatible emitter or a small number of outlets. Sprinklers generally demand more flow and uniform pressure than a small elevated barrel can supply. Divide a garden into zones if one line would exceed the available flow.
Independent reader supportYour contribution helps us test, update, and keep practical guides available for everyone.9. Keep harvested water separate from potable plumbing
Never make an unprotected connection between rainwater and a drinking-water line. The EPA states: “A backflow preventer should be used to separate harvested rainwater from the main potable water distribution lines.” The exact device, air-gap arrangement, testing and hazard classification depend on local plumbing rules.
Indoor connections also raise questions about labeling, treatment, pipe identification, cross-connection control and inspection. Oregon-specific OSU guidance says potable rainwater systems require a plumbing permit and design by a registered or licensed design professional in Oregon; that statement should not be generalized to other jurisdictions. Consult your own building, plumbing, health and water authorities before connecting any cistern to a structure.
10. Installation sequence
- Map the site. Mark the catchment, tank, lowest water level, outlets, pipe route, overflow destination, foundation and service access.
- Confirm rules. Ask the local authority about rainwater harvesting, tank setbacks, drainage, plumbing, electrical work, backflow protection and potable use.
- Calculate supply and demand. Apply the
area × rainfall × 0.62equation, reduce it for collection losses, calculate the dry-period demand and choose a reserve target. - Check gravity at the reserve level. Measure the vertical difference to each outlet and account for pipe length, fittings, valves, filters and the end device.
- Prepare the foundation. Build the stable, level base specified for the filled tank load; do not place a large tank on an improvised platform.
- Install the tank and collection line. Fit screened inlet components, any first-flush diverter, a covered access opening and a level indicator.
- Install the overflow first-class. Route a screened overflow with at least the inflow capacity to an erosion-safe discharge point away from structures and septic systems.
- Fit the outlet and distribution line. Add a service shutoff, cleanout where practical, suitable pipe and the lowest-pressure-loss route that reaches the device.
- Test before routine use. Fill gradually, inspect for leaks, verify the overflow, measure flow at full and reserve levels, and confirm that the outlet device operates without unacceptable surging or stoppage.
- Document the system. Record tank capacity, lowest operating level, valve locations, filter type, cleaning dates and any permitted plumbing or backflow components.
11. Maintenance and troubleshooting
Routine checks
- Clear leaves and debris from roof gutters, inlet screens and filters.
- Inspect the tank for cracks, leaks, loose fittings, algae growth, sediment and damaged covers.
- Confirm that screened vents and overflow outlets remain open.
- Check that overflow discharge has not eroded soil or moved toward a foundation or septic drainfield.
- Clean sediment and service filters according to their condition and manufacturer instructions.
- At the start of each irrigation season, test flow at the tank’s normal low operating level.
Symptom: good flow when full, little or none when low
This is usually a head problem. Raise the tank or lower the outlet only if the site and structure permit it, reduce route losses, shorten the run, use fewer restrictive fittings, or select a lower-pressure end device. Do not assume a larger pump-free outlet will create pressure that elevation does not provide.
Do these 3 things before closing this tab:
1Fix the driver behind crashes, sound loss and screen glitches2Repair Windows errors before they cause bigger problems3Scan for outdated or missing drivers - takes under a minuteSymptom: flow falls after rain
Inspect the inlet screen, first-flush device, filter and sediment layer. Leaves or fine roof debris can restrict inflow or outlet flow. Clean only with a method appropriate for the tank material and intended water use.
Symptom: tank backs up or spills at the lid
Check for a blocked overflow, undersized overflow, poor slope or an outlet screen clogged with animals or debris. Restore a free discharge path and verify that overflow capacity is at least equal to inflow capacity.
Symptom: cloudy, foul-smelling or green water
Check whether the tank is opaque and covered, whether screens are intact, and whether sediment has accumulated. Do not use suspect water for drinking. Potable treatment and testing require a design appropriate to the source and local health requirements.
Symptom: water appears at a potable fixture unexpectedly
Stop using the connection and isolate the harvested-water system. A cross-connection or failed backflow device requires qualified inspection and correction before the potable system is placed back in service.
Design checklist
| Category | Questions to answer before purchase |
|---|---|
| Use | Is the water for exterior irrigation, indoor non-potable fixtures or drinking? |
| Supply | What catchment area and local rainfall apply during the storage period, and what collection losses are expected? |
| Storage | What reserve volume is needed, and can the foundation support the full filled weight? |
| Head | What is the height from the lowest water surface to each outlet or device? |
| Distribution | What flow and pressure does the selected filter, valve, hose, emitter or sprinkler require? |
| Water quality | Are the tank, screens, first-flush arrangement and maintenance plan appropriate for the intended use? |
| Overflow | Can it pass at least the inflow capacity and discharge without erosion or property damage? |
| Regulation | Are permits, backflow protection, treatment, water-rights review or professional design required locally? |
What the available evidence does not establish
There is no single correct tank height, pipe diameter, household flow target or potable treatment train for every property. Those values depend on project dimensions, terrain, rainfall, demand, water quality, local code and the chosen end-use equipment. Public-system pressure numbers should not be copied into a domestic garden design, and Oregon permit guidance should not be treated as law in another state or country.
Quick Recap
Product prices and availability are accurate as of the date/time indicated and are subject to change. Any price and availability information displayed on Amazon at the time of purchase will apply.

