Recommended Free Tools
Use a DISH OTA adapter if you want local over-the-air (OTA) stations inside the DISH guide. Connect the outdoor antenna’s coaxial cable to the adapter, connect the adapter’s USB cable to a compatible receiver, restart when prompted, and run an OTA scan. DISH documents this integrated workflow for Hopper with Sling, Hopper 3, and Wally receivers. You can also connect an antenna directly to your television, but that method uses the TV’s input and tuner rather than the DISH guide.
The complete setup is straightforward, but receiver compatibility, antenna placement, and the scan settings determine whether the result is useful. This guide covers both connection methods, the exact DISH scan workflow, recording limitations, and fixes for missing or weak channels.
As an Amazon Associate I earn from qualifying purchases.
What connecting an antenna to a DISH Hopper actually does
An outdoor antenna receives free local broadcast stations such as network affiliates, public television, and other digital broadcasts available at your location. The antenna does not add satellite channels to the DISH service. It supplies a separate terrestrial signal that the receiver or television tunes.
There are two different ways to use that signal:
- Direct-to-TV connection: The antenna coax goes to the television’s antenna/RF input. You switch the TV to its antenna or “TV” input and use the television’s channel tuner. The stations do not become part of the DISH on-screen guide.
- DISH guide integration: The antenna coax goes to a DISH digital OTA adapter, and the adapter connects by USB to a compatible DISH receiver. After scanning, selected OTA stations appear in the receiver’s guide and can be recorded on that setup.
DISH describes the guide-integration path on its HDTV Over-the-Air Antenna support page. The adapter is the bridge between the antenna’s coaxial signal and the receiver’s USB connection; plugging the antenna directly into a Hopper USB port will not perform the same function.
#1 Best Overall

- Enjoy 4K & 1080P Free HDTV Channels with Superior Signal Reception: Experience crystal-clear HD quality with our amplified outdoor antenna, featuring a built-in high-gain and low-noise amplifier designed to provide exceptional signal reception for up to 150 miles.
- 360° Motorized Rotation for Maximum Signal Strength: Easily adjust the antenna’s direction with the wireless remote control for optimal signal alignment, ensuring you never miss your favorite shows.
- Weatherproof and Durable Design for Outdoor Use: Built to withstand harsh weather conditions, our antenna ensures reliable performance all year round, making it perfect for urban and rural settings.
- Dual TV Outputs – Watch on Multiple Screens Simultaneously: Connect two TVs at the same time without needing a splitter or additional equipment, providing entertainment flexibility for your household.
- NEXTGEN TV (ATSC 3.0) Ready: Future-proof your TV experience with the latest over-the-air broadcast technology. Once available in your area, enjoy enhanced picture quality, immersive audio, a stronger signal, richer colors, faster refresh rates, and optional internet integration for added features and a superior viewing experience.
Check receiver compatibility before buying or installing anything
DISH specifically identifies these receivers for use with its OTA adapter and integrated guide workflow:
| Receiver | OTA adapter workflow documented by DISH | What to expect |
|---|---|---|
| Hopper with Sling | Yes | Scan OTA stations, select guide channels, and record selected OTA channels as usual. |
| Hopper 3 | Yes | Use the Hopper OTA scan settings after connecting the adapter and restarting. |
| Wally | Yes | Use the receiver’s OTA scan prompts and guide selection. |
| Other Hopper generations or configurations | Not established on the cited DISH pages | Confirm the exact model and software with DISH before purchasing an adapter. |
The phrase “Hopper” alone is not enough to establish compatibility. Look at the receiver’s front panel, system information screen, or account equipment record and identify whether it is a Hopper with Sling, Hopper 3, Wally, or another model. DISH’s support documentation does not promise that every Hopper generation accepts the same adapter.
If your receiver is not one of the three named models, you can still use the antenna directly with a television that has an antenna input. That gives you OTA viewing, but it does not establish that the DISH receiver can scan, display, or record those stations.
Hardware and prerequisites
Prepare the following before starting:
- Outdoor TV antenna: Install and orient it according to the antenna maker’s instructions. The sources do not establish a universal reception distance, channel count, or gain figure, so choose placement based on your local terrain, buildings, trees, and broadcast availability rather than a promised number of stations.
- Coaxial cable: Use the antenna’s coax lead, or an appropriately rated extension, to reach the adapter without loose or damaged connectors.
- DISH digital OTA adapter: This is required for the documented guide-integration method. Verify that the adapter is intended for your receiver model.
- USB cable: Connects the OTA adapter to the receiver. DISH’s Hopper settings instructions specifically say to connect the USB cable from the digital OTA adapter to the receiver.
- Compatible DISH receiver and remote: The receiver must be powered and able to restart when the setup prompts appear.
- Television input access: If you choose the direct-to-TV method, you need the TV’s antenna/RF input and its channel-scan menu.
Use weatherproof coax connections and grounding practices required by local electrical and building codes for an outdoor installation. Keep the antenna and cable away from avoidable physical damage, and seal exterior entry points so water cannot follow the cable indoors.
Rank #2

- FREE LOCAL HD TV — Watch local channels in crystal clear 1080p HD with no monthly fees; 4K and 8K Ultra HD for future ready performance
- 70+ MILE LONG RANGE RECEPTION — Captures VHF and UHF broadcast signals from up to 70+ miles away for reliable local channel access
- UNIVERSAL TV COMPATIBILITY — Works with all TV brands and converter boxes that use a standard coax cable connection
- HIDDEN ATTIC OR OUTDOOR MOUNTING — Designed for attic installation to stay out of sight; weather resistant and outdoor rated for flexible roof or mast mounting
- NEXTGEN TV READY — Supports ATSC 3.0 over the air broadcasts where available for improved signal strength, picture and sound
Install and connect the outdoor antenna
1. Position the antenna
Mount or place the antenna as its manufacturer specifies. Height, obstructions, and orientation can materially change reception. Start with a location that has a clear path toward the broadcast towers serving your area, but do not assume that higher or farther always means better; nearby structures and multipath reflections can also affect a digital signal.
2. Run the coaxial cable indoors
Route the coax from the antenna to the receiver area. Avoid sharp bends, crushed sections, and loose adapters. Label the antenna cable if several coaxial cables are present so you do not accidentally connect a satellite feed or another source to the OTA adapter.
3. Connect the antenna to the OTA adapter
Attach the antenna’s coaxial connector to the coax/RF input on the DISH digital OTA adapter. Tighten it finger-tight; forcing the connector can damage the fitting or cable.
Windows Errors? Fix Them Before They Spread
Repair common Windows errors and clear accumulated junk for a smoother, more stable PC - no reinstall needed.Free scan · no reinstallCrashes, No Sound, or Screen Glitches?
Random freezes, missing sound and display glitches usually trace back to one bad driver. Find and replace yours safely.Free scan · under a minute4. Connect the adapter to the receiver
Plug the adapter’s USB cable into a USB port on the compatible Hopper or Wally receiver. The antenna signal travels over coax to the adapter, while the USB connection carries the adapter’s data and tuner connection to the receiver. Do not substitute a random USB hub or cable arrangement unless DISH confirms it is supported.
Rank #3

- GET FREE HD CHANNELS WITHOUT CABLE — Watch local news, sports and primetime in 1080p HD with no subscription; ideal for cord-cutters or as a reliable backup during cable, satellite or internet outages
- 70-MILE LONG-RANGE TV ANTENNA — Outdoor/attic HDTV antenna captures VHF and UHF signals up to 70 miles for improved clarity and fewer signal interruptions
- 4K AND 8K TV COMPATIBLE PERFORMANCE — Designed for modern TVs, delivering clear over-the-air HDTV channels from major broadcast networks
- OUTDOOR OR ATTIC INSTALLATION OPTIONS — Weather-resistant design includes mounting bracket, mast clamp and J-mount for roof, wall or attic placement
- WHOLE-HOME TV READY — Distribute signal to multiple TVs with a splitter and coax cables (sold separately), making it ideal for larger households
DISH’s Hopper 3 setup transcript gives the same sequence: position the antenna according to its instructions, connect the antenna coax to the adapter, and connect the adapter USB to the Hopper. Its documented setup is available on the DISH Spanish-language OTA support page.
Run the DISH OTA scan
The labels can vary with receiver software and remote, but DISH’s current documented Hopper workflow follows the sequence below. Keep the antenna connected while scanning.
- Connect the USB cable and accept the restart prompt. When the receiver displays Attention 977, accept it to restart. A restart allows the receiver to initialize the OTA adapter.
- Open the OTA scan prompt. After restarting, accept Attention 1298 when it appears. On a Hopper 3, DISH’s setup transcript describes navigating to Settings > OTA > Scan.
- Choose Find Channels. Select Find Channels, then choose Scan and Continue as the receiver presents those options.
- Wait for the scan to finish. DISH’s Spanish-language setup transcript says a scan could take up to five minutes. That is an estimate for the documented setup, not a guarantee for every receiver, antenna, or software version.
- Select guide channels. Review the stations found and select the ones you want displayed in the DISH guide. Deselect unusable, duplicate, or unwanted entries if the receiver offers that choice.
- Save the selection. Save or continue from the channel-selection screen so the receiver adds the chosen OTA stations to its guide data.
- Open Guide to verify. Press Guide and look for the selected local stations. Tune to one station and confirm that audio and video remain stable for several minutes.
DISH’s Hopper Settings instructions describe the Attention 977 restart, Attention 1298 scan, Find Channels, Scan, Continue, channel selection, and save steps. If your on-screen wording differs, follow the equivalent OTA or antenna scan command shown by your receiver rather than assuming a missing menu means the antenna is defective.
The Tool Desk
Outbyte PC Repair FREERepair Windows errors before they cause bigger problemsFix Now →Outbyte Driver Updater FREEFix the driver behind crashes, sound loss and screen glitchesFind Drivers →Using OTA stations after the scan
Finding local stations
Once saved, selected OTA stations should be listed alongside the receiver’s other guide entries. Use the guide to tune them instead of changing the television to a separate input. If a station is absent from the guide, it may not have been selected during the final save, or the scan may not have detected a usable signal.
Rank #4

- Long-Range Reception: TV antenna uses four patented loops, Hi-VHF elements and reflectors to receive free TV signals over-the-air from broadcast towers
- Durable Construction: Powerful TV antenna measures 17.4" H x 27.8" W x 6" D with premium durable materials for installation indoors, in an attic, or outdoors in suburban and rural areas
- Compatibility: NEXTGEN TV, 4K, 8K UHD, Full HD 1080p, no Internet required to watch over-the-air TV
- Reception Considerations: Each market has TV towers located in different areas; Distance to the towers and obstructions like trees and your home's building materials will affect reception; an antenna cannot provide cable TV channels
- Enhanced Signal Protection: Reflectors add forward gain and focus antenna's power to protect incoming TV signal from interference that causes pixelation or complete loss of picture; 20-inch mast's pivoting base allows installation on vertical or horizontal surfaces
Recording OTA programming
DISH says selected OTA channels can be recorded as usual on a compatible receiver and adapter setup. Schedule a recording from the guide as you would for another channel, then check the receiver’s timer or DVR list to confirm the event was created.
PrimeTime Anytime limitation
DISH’s antenna support page states that PrimeTime Anytime does not work with OTA local channels. OTA recordings therefore should not be presented as interchangeable with that satellite-channel feature. Use ordinary DVR scheduling for the OTA station instead.
Direct-to-TV setup when you do not need DISH guide integration
If your receiver is not a documented compatible model, or you only want occasional local broadcasts, connect the antenna to the television itself:
- Connect the outdoor antenna coax to the television’s antenna/RF input.
- Open the television’s channel or tuner settings.
- Choose the antenna, terrestrial, or air source rather than cable.
- Run the TV’s automatic channel scan and save the results.
- Switch the television from the DISH receiver’s HDMI input to the TV/antenna input when you want OTA programming.
This arrangement has a separate tuner and guide from DISH. The exact input name and scan labels depend on the television manufacturer. It does not use the DISH OTA adapter unless you later change to the integrated receiver workflow.
Best Value
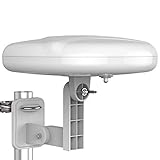
- Long Range Digital Amplified Outdoor TV Antenna: Exclusive Smart pass amplifier technology improves better reception than the old version and provides much better signal reliability on windy or rainy days; Please first find out where the local broadcast towers are in your area
- 360° Omni-Directional Reception: Receive UHF/VHF signals from all directions while providing clear 4K pictures, no need to rotate, no need the remote control as traditional huge outdoor antennas; No need to worry about local weather as it’s made of moisture-proof and flame-retardant materials; Say goodbye to endless adjustment
- One TV Output: The outdoor HDTV antenna is uniquely designed to support one TV; We recommend that you use only one antenna per television; When you add a splitter that divides the received signal strength between each television, it may mean that you may not get all of the channels you would get otherwise
- Built-in Pre-Amplifier And 4GLTE Filter: Allows you to boost signal right at the antenna, and removes interference and channel loss caused by 4G mobile phone signals, making up for the signal loss from long cable runs and splitters; According to the signal range, the amplifier enlarges suitable multiples to ensure the coverage extension
- Save On Installation Fees: No tools are needed for easy installation; For home, RV, attic, marine use, including a 32ft RG6U coaxial cable, which makes it easy to place the amplified HDTV antenna in high-reception areas; Compared with big-size traditional antenna, this modern antenna is much easier to install with our included accessories
Troubleshoot missing channels and weak reception
Work through the physical path first, then repeat the scan. Digital television often fails as a complete picture or disappears when the signal falls below a threshold, so a station that appeared briefly is not necessarily stable enough for viewing or recording.
| Symptom | Checks and corrective action |
|---|---|
| No OTA channels found | Confirm the antenna coax is attached to the adapter’s antenna input and the adapter USB is attached to the receiver. Restart if the receiver never recognized the adapter, then run the OTA scan again. |
| Some expected stations are missing | Move the antenna to another location, secure the coax connectors, and rescan. DISH specifically advises relocating the OTA antenna when channels are missing. |
| Picture breaks up or audio drops | Try a different antenna position or orientation, reduce cable stress, and rescan after moving it. A marginal signal may require a clearer placement rather than a receiver setting change. |
| Channels were found but are not in Guide | Run the channel-selection stage again and save the stations you want displayed. Finding a station during a scan does not necessarily mean every result is selected for the guide. |
| OTA menu or prompts never appear | Verify the receiver model, adapter USB connection, and receiver restart. If the model is not Hopper with Sling, Hopper 3, or Wally, compatibility is not established by DISH’s cited guidance. |
| OTA works on the TV but not through DISH | The antenna and broadcast signal are functioning, but the receiver path may be incompatible or incorrectly connected. The direct-to-TV method does not prove that a DISH receiver supports adapter integration. |
DISH’s primary troubleshooting advice for weak or missing reception is to move the OTA antenna to another location. Test one change at a time, then perform another scan so you can tell whether the new placement improved the result. Avoid relying on a published “maximum range” or expected channel number; the cited DISH pages provide neither, and actual reception is location-specific.
A practical placement and reliability checklist
- Start with the antenna installed according to its manufacturer’s orientation and mounting instructions.
- Prefer a location with fewer walls, roofs, large trees, and nearby metal obstructions between the antenna and the likely transmitter direction.
- Keep the coax connector fully seated at the antenna and adapter.
- Use a continuous, undamaged cable run where possible; replace visibly crushed or corroded sections.
- After any substantial antenna move, run a fresh OTA scan rather than expecting the previous channel list to update itself.
- Watch a marginal station for several minutes before scheduling an important recording.
- For an exterior installation, follow local grounding, lightning, and weather-sealing requirements.
Choosing the right connection method
| Your situation | Best fit | Trade-off |
|---|---|---|
| You own a Hopper with Sling, Hopper 3, or Wally and want one guide | DISH OTA adapter plus outdoor antenna | Requires the adapter, a receiver restart, and an OTA scan. |
| You have another receiver generation | Confirm compatibility first; otherwise connect the antenna directly to the TV | Direct TV use avoids receiver compatibility questions but requires switching inputs. |
| You only watch local broadcasts occasionally | Direct-to-TV antenna connection | OTA channels remain outside the DISH guide and DVR workflow. |
| You need OTA recording on a compatible receiver | Adapter-integrated setup and ordinary DVR scheduling | PrimeTime Anytime does not support OTA local channels. |
The key decision is not the antenna brand or a claimed reception distance. It is whether your receiver is one of the models DISH documents for adapter integration and whether your chosen antenna location produces a stable local signal.
When to contact DISH or replace a component
Contact DISH with the exact receiver model and adapter details when the receiver repeatedly fails to recognize a correctly connected adapter, the documented restart and scan prompts never appear, or you cannot determine whether your configuration is supported. Describe which Attention prompt, if any, appeared and whether the antenna works when connected directly to the television.
Consider replacing or repairing the physical installation only after checking the connectors and trying another antenna location. A new antenna cannot correct an incompatible receiver, and a compatible receiver cannot compensate for a disconnected coax or USB cable. Keep the setup modular: antenna, coax, adapter, USB link, receiver scan, and guide selection are separate checkpoints.
Quick Recap
Final verification before you finish
- Confirm the antenna is mounted and weather-protected according to its installation instructions.
- Confirm coax runs from the antenna to the OTA adapter, not to an unrelated satellite or cable input.
- Confirm USB runs from the OTA adapter to a documented compatible receiver.
- Accept Attention 977 to restart and Attention 1298 to scan when prompted.
- Use Find Channels, Scan, and Continue, then select and save the stations for the guide.
- Open Guide, tune a saved station, and test an ordinary recording if recording is important to you.
- If reception is weak or stations are missing, move the antenna and repeat the scan.
Product prices and availability are accurate as of the date/time indicated and are subject to change. Any price and availability information displayed on Amazon at the time of purchase will apply.

