The Tool Desk
Outbyte Driver Updater FREEScan for outdated or missing drivers - takes under a minuteDriver Scan →Outbyte PC Repair FREEClear out junk files and repair common Windows errorsFree Scan →The only reliable way to tell whether a laptop’s RAM is upgradeable is to verify the exact machine configuration in the manufacturer’s specifications and service manual. First record the full model, SKU, machine type, or service tag. Then confirm whether the memory is soldered, socketed, or hybrid; check the manufacturer’s maximum supported capacity and module requirements; and only then consider buying RAM or opening the chassis. The amount of memory shown by Windows tells you what is installed now, not whether an empty slot exists.
What “upgradeable memory” actually means
Laptop memory, usually called RAM, can be attached to the system board in several ways. A laptop may use memory chips soldered permanently to the board, one or more removable SO-DIMM modules, or a combination of both. Upgradeability means that the documented configuration provides a removable module and supports adding or replacing it within the manufacturer’s limits.
As an Amazon Associate I earn from qualifying purchases.
That distinction matters because a laptop can show 8 GB, 16 GB, or more in Windows while having no user-replaceable memory at all. Conversely, a machine with 8 GB installed might have an unused slot. The installed number is an inventory reading; it is not an upgrade specification.
Model families are another source of error. A retail name can cover several generations, processors, screen sizes, board revisions, and memory layouts. Two laptops that look identical and share a family name may accept different memory, have different maximum capacities, or have no socket at all. Treat the exact configuration—not the family name—as the unit you are checking.
#1 Best Overall

- Boosts System Performance: 32GB DDR5 RAM laptop memory kit (2x16GB) that operates at 5600MHz, 5200MHz, or 4800MHz to improve multitasking and system responsiveness for smoother performance
- Accelerated gaming performance: Every millisecond gained in fast-paced gameplay counts—power through heavy workloads and benefit from versatile downclocking and higher frame rates
- Optimized DDR5 compatibility: Best for 12th Gen Intel Core and AMD Ryzen 7000 Series processors — Intel XMP 3.0 and AMD EXPO also supported on the same RAM module
- Trusted Micron Quality: Backed by 42 years of memory expertise, this DDR5 RAM is rigorously tested at both component and module levels, ensuring top performance and reliability
- ECC Type = Non-ECC, Form Factor = SODIMM, Pin Count = 262-Pin, PC Speed = PC5-44800, Voltage = 1.1V, Rank And Configuration = 1Rx8
Step 1: Identify the exact laptop configuration
Before searching for RAM, write down the most precise identifier available. Depending on the manufacturer, this may be a complete model number, machine type, product number, SKU, serial number, or service tag.
Where to find the identifier
- Read the label on the underside of the laptop or inside its battery compartment, if the battery is removable.
- Open the manufacturer’s support application or support website and let it identify the device by serial number or service tag.
- Check the original purchase record, invoice, or product box. Retail listings often omit the suffix that distinguishes one memory configuration from another.
- Use the operating system’s system-information page to record the model and system-product name. Copy the complete string, including letters, numbers, and hyphens.
Do not stop at a name such as “Series 5,” “14-inch Pro,” or a processor designation. Those labels identify a family or platform, not necessarily the board installed in your laptop. If the support site returns several results, match every part of the identifier before using a specification sheet.
Record the information you will need later
Keep a note containing the exact model identifier, processor, currently installed memory, operating-system edition, and purchase region. The processor and region can help distinguish configurations, but the manufacturer’s model documentation remains decisive. If a service page lists several board options, use the information from the label or support tool to select the matching one.
Step 2: Find the manufacturer’s specifications and service manual
Search the manufacturer’s support site for the exact identifier, then open both the technical specifications and the service or maintenance manual. Lenovo’s support guidance specifically recommends checking the model specifications and searching its documentation for memory details. ASUS likewise directs users to the official technical specifications to determine whether an upgrade is supported and what maximum specifications apply.
Search for the right terms
Within the specification page or PDF, search for:
- memory
- maximum supported RAM
- memory module
- SO-DIMM or SODIMM
- soldered memory
- onboard memory
- system board
- expansion slot
- user-upgradeable
Manufacturers do not use one universal label. “Onboard” and “soldered” generally indicate fixed chips, while “memory module,” “SO-DIMM slot,” or “expansion socket” indicates a removable module. A service manual may show the physical layout even when the marketing specification only lists the total capacity.
Use the service manual for physical access
The service manual is the authority for opening the particular laptop. It can specify which bottom-cover screws must be removed, whether clips or a captive screw are used, whether the battery must be disconnected first, and what tool is required. A general RAM-installation guide is secondary to this model-specific procedure. Do not use a teardown video for a similar-looking laptop as a substitute; internal layouts can change between revisions.
Rank #2
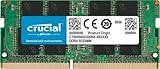
- Boosts System Performance:16GB DDR4 laptop memory that operates at 3200MHz to improve multitasking and system responsiveness for smoother performance
- Easy Installation: Upgrade your laptop RAM with ease—no computer skills required Follow step-by-step how-to guides available at Crucial for a smooth, worry-free installation
- Compatibility Guaranteed: Ensure seamless compatibility with your laptop by using the Crucial System Scanner or Crucial Upgrade Selector—get accurate recommendations for your specific device
- Trusted Micron Quality: Backed by 42 years of memory expertise, this DDR4 RAM is rigorously tested at both component and module levels, ensuring top performance and reliability for your Mac system
- ECC Type = Non-ECC, Form Factor = SODIMM, Pin Count = 260-pin, PC Speed = PC4-25600, Voltage = 1.2V, Rank and Configuration = 1Rx8 or 2Rx8
Step 3: Determine whether the memory is soldered, socketed, or hybrid
Classify the layout before thinking about capacity or price. Documentation may describe one of three common arrangements.
What’s actually slowing this PC down?
Pick the symptom - the matching free tool is one click away.
| Memory layout | What it means | Upgrade consequence |
|---|---|---|
| Soldered or onboard | Memory chips are attached directly to the system board. | The installed memory is not a normal user-replaceable module. A larger capacity generally requires a different system board or a different factory configuration. |
| Socketed | One or more removable memory modules fit into sockets, usually SO-DIMM slots. | You may be able to replace an existing module or add one, provided the exact model supports the intended capacity and module type. |
| Hybrid | Some memory is soldered and an additional portion uses one or more removable slots. | Only the socketed portion is a potential user upgrade. The fixed amount remains unchanged, and the combined total must stay within the documented limit. |
A hybrid design is easy to misunderstand. For example, a laptop could have a fixed base amount plus one slot. Installing a larger module may increase total memory, but it does not make the soldered portion replaceable. The service manual or specification must say how many sockets are present and how the fixed and removable memory are combined.
When the documentation is unclear
If the official documents do not state whether memory is soldered or show a slot, treat upgradeability as unconfirmed. Do not infer a slot from a removable-looking panel, a product photograph, or the fact that another configuration in the same family is expandable. Ask the manufacturer or an authorized service provider for the exact machine identifier and board configuration.
Step 4: Check the maximum supported capacity
After confirming that a removable slot exists, find the maximum supported memory for that exact machine. The limit may be expressed as a total capacity, a per-slot capacity, or a combination of fixed and removable memory. Use the manufacturer’s number, not a generic listing for the processor or laptop family.
Why processor specifications are not enough
A processor may have a theoretical memory capability that is higher than the laptop’s implemented limit. The laptop manufacturer can impose a lower maximum because of the system board, firmware, power design, slot count, or validation policy. Conversely, a family listing that claims a high maximum may describe a different board revision. The machine-specific specification overrides both general assumptions.
Check the complete module requirements
Record every requirement stated in the documentation:
Rank #3

- [Specs] DDR3L / DDR3 1600MHz PC3L-12800 / PC3-12800 204-Pin Unbuffered Non ECC 1.35V CL11 Dual Rank 2Rx8 based 512x8
- [Size] Module Size: 16GB KIT(2x8GB Modules) Package: 2x8GB
- [Voltage] JEDEC standard 1.35V, this is a dual voltage piece and can operate at 1.35V or 1.5V
- [Compatibility] Compatible with DDR3 Laptop / Notebook PC, Mini PC, All in one Device
- [Color] PCB Color is green
- Memory generation, such as DDR3, DDR3L, or DDR4.
- Module form factor, normally a laptop SO-DIMM rather than a desktop DIMM.
- Supported speed or speed range.
- Voltage requirements where the manufacturer specifies them.
- Maximum capacity per slot and total capacity.
- Required channel or pairing arrangement, if documented.
- Whether a particular slot must be populated first.
Do not choose a module because its label merely says “laptop RAM.” Memory selectors and product pages can show candidate modules, but they cannot enlarge the laptop’s documented limit or make an incompatible generation work.
Step 5: Use a compatibility selector as a cross-check
A model-based compatibility tool can reduce lookup errors after you have identified the exact laptop. Crucial’s Upgrade Selector asks for the computer manufacturer and model and warns that an upgrade is not compatible with every computer. Its System Scanner can report current memory and storage information and suggest compatible upgrades.
Use these tools as a second check, not as the final authority. Enter the complete model rather than a shortened family name, compare the result with the manufacturer’s specification and service manual, and investigate any disagreement before purchasing. A selector may group several regional or board variants under one commercial name, while the manufacturer’s documentation identifies the supported configuration for your machine.
What the selector can and cannot prove
- It can help identify a candidate memory generation, form factor, and capacity.
- It can expose the currently detected configuration when a scanner is available.
- It cannot prove that an undocumented slot exists if the official manual does not show one.
- It cannot override a lower maximum capacity stated by the manufacturer.
- It should not be used to decide whether opening the chassis is safe; follow the laptop’s own service procedure.
Step 6: Check how much memory is installed without confusing it with upgradeability
Read the installed physical memory to establish a baseline before planning an upgrade. In Windows, the system-information view and Task Manager’s Memory panel can show the amount currently recognized. ASUS also documents Windows methods for viewing installed physical memory.
Use that reading to answer “How much is installed now?” It does not answer “Is the memory soldered?” or “Is there an empty slot?” For example, an 8 GB reading could represent 8 GB soldered, one 8 GB module, two 4 GB modules, or a hybrid arrangement. Only the exact hardware documentation distinguishes those cases.
Interpret the number carefully
- A small difference between the installed label and the usable amount can result from hardware-reserved memory; it is not evidence of an empty slot.
- If the operating system reports less memory than the purchase configuration, first confirm that the system recognizes the installed modules before buying anything.
- A scanner’s current-configuration report is useful inventory, but it still does not replace the manufacturer’s slot and maximum-capacity documentation.
Step 7: Decide whether to open the laptop
Open the chassis only after the documentation confirms a removable memory procedure and identifies the required tools. Crucial’s general installation guidance mentions a screwdriver and the owner’s manual, but tool sizes and access steps differ by laptop.
Rank #4

- DDR4 8GB 3200MHz (PC4-25600) CL22 SODIMM 260-Pin Laptop Notebook Memory
- All new generation product of DRAM module
- 1.2V memory module
- Backed by lifetime warranty
- Save the exact service manual for your model and read the memory-removal and installation sections completely.
- Confirm the laptop is powered off, disconnected from external power, and prepared exactly as the manual requires. Follow any battery-disconnection or static-control instructions it gives.
- Use only the specified screwdriver or precision tool. Do not force screws, clips, or a cover that the manual says to remove in a different order.
- Locate the socket shown in the manual. If the interior does not match the diagram, stop and recheck the model identifier rather than guessing.
- Compare the existing module’s label and key notch with the documented memory type before installing a replacement.
- Seat the module at the angle and retention points shown in the manual, then reinstall the cover and test the system.
If the manual does not describe a memory-access procedure, or if it shows only soldered chips, do not buy a module for that machine. Contact the manufacturer or an authorized service provider if you need confirmation.
How to answer “Can I add RAM to this laptop?”
Use this decision sequence:
- Do you have the exact model or machine type? If not, identify it before doing anything else.
- Does the official specification or service manual show a removable slot? If it says only soldered or onboard memory, normal RAM addition is not supported.
- Is the layout hybrid? If so, calculate the total as fixed memory plus the removable module, and check the documented limit.
- What maximum and module requirements are listed? Match generation, form factor, speed, voltage, slot capacity, and total capacity.
- Does a compatibility selector agree? Use it to cross-check, then resolve any conflict in favor of the exact manufacturer documentation.
- Does the service manual provide an access procedure? If yes, follow that procedure; if no, do not assume the laptop is user-upgradeable.
How to compare two laptop configurations before buying
When choosing between configurations or evaluating a used laptop, compare the memory details directly rather than comparing family names.
| Comparison point | Question to ask | Why it matters |
|---|---|---|
| Memory layout | Is it soldered, socketed, or hybrid? | Determines whether a future physical upgrade is possible. |
| Fixed memory | How much is permanently attached to the board? | Fixed memory cannot be removed or replaced with a larger module. |
| Usable slots | How many removable sockets remain available? | An empty slot may permit adding memory; occupied slots may require replacement or pairing. |
| Supported maximum | What total and per-slot capacities does the manufacturer list? | Prevents buying a module the firmware or board will not support. |
| Module specification | Which generation, form factor, speed, and voltage are required? | Prevents mixing an incompatible module type with the laptop. |
| Access procedure | Does the service manual document removal and installation? | Shows whether the manufacturer provides a supported path and what tools are needed. |
Common mistakes and how to recover
Relying on the family name
Problem: A search result describes a different configuration in the same product family. Recovery: Return to the full SKU, machine type, or service tag and open the matching support page.
Assuming installed memory is removable
Problem: Windows reports 16 GB, so the buyer assumes a 16 GB module can be replaced. Recovery: Check for “soldered,” “onboard,” or a socket diagram in the official documentation.
Using the processor’s limit
Problem: A CPU specification suggests more memory than the laptop listing supports. Recovery: Use the laptop manufacturer’s exact-model maximum, which governs the implemented board.
Free tools Windows power users keep installed
One-click scans. No signup required.
Buying by DDR label alone
Problem: The generation appears correct, but the module form factor, voltage, slot capacity, or speed is wrong. Recovery: Match every requirement listed for the machine; “DDR4” or “laptop RAM” alone is insufficient.
Best Value

- 16GB Module ( 1x 16GB ) | DDR4 3200 MHz ( PC4-25600 / PC4-3200AA )
- DDR4 SO-DIMM ( 260-Pin ) | Non-ECC Unbuffered | 2Rx8 - Dual Rank x8 | 1.2V - DDR4 Standard Voltage
- High performance Memory RAM upgrade compatible with select DDR4 Laptop, Notebook, & All-in-One (AIO) Computers
- Boosts the performance of your system by speeding up loading times, improving system responsiveness, and increasing your system's ability to handle greater workloads
- All modules undergo quality assurance testing to ensure dependable and reliable performance
Trusting a selector without checking the manual
Problem: A compatibility tool groups several variants together or suggests a module for a similar model. Recovery: Re-enter the complete identifier and verify the result against the manufacturer’s specifications and service manual.
Opening the chassis too soon
Problem: The cover is removed before the access procedure or tool requirements are known. Recovery: Stop, obtain the exact manual, and follow its sequence. If the documentation does not confirm a slot, do not proceed with a purchase or installation.
Illustrative configurations
These examples show how to reason from documentation; they are not specifications for a particular brand or model.
Recommended Free Tools
All memory soldered
The specification lists 8 GB onboard and no memory module or expansion slot. The operating system reports 8 GB, which confirms the current amount but does not create an upgrade path. A larger capacity would require selecting a different factory configuration or replacing the system board, not installing a SO-DIMM.
One removable slot
The manual shows one SO-DIMM socket and the specification lists a supported total maximum. If the socket is empty, adding a module may be possible within that limit. If it already contains a module, increasing capacity may require replacing it with a larger compatible module.
Hybrid memory
The documentation lists a fixed amount on the board plus one removable slot. The fixed amount remains in place; the upgrade changes only the socketed portion. The final total must satisfy the manufacturer’s maximum, and the replacement module must meet the listed generation, form factor, and capacity requirements.
Final verification checklist
- Full model, SKU, machine type, or service tag recorded.
- Exact manufacturer specification opened.
- Matching service or maintenance manual found.
- Memory identified as soldered, socketed, or hybrid.
- Number of usable slots confirmed.
- Manufacturer-supported total and per-slot maximum recorded.
- Memory generation, SO-DIMM form factor, speed, voltage, and configuration checked.
- Current installed memory treated as inventory, not proof of upgradeability.
- Compatibility selector used only as a cross-check.
- Access procedure and required tools reviewed before opening the laptop.
If any of these checks is unresolved, the safe answer is not yet. Confirm the configuration with the manufacturer or an authorized service provider before spending money or removing the cover.
Do these 3 things before closing this tab:
1Fix the driver behind crashes, sound loss and screen glitches2Clear out junk files and repair common Windows errors3Scan for outdated or missing drivers - takes under a minuteQuick Recap
Product prices and availability are accurate as of the date/time indicated and are subject to change. Any price and availability information displayed on Amazon at the time of purchase will apply.

