Do these 3 things before closing this tab:
1Fix the driver behind crashes, sound loss and screen glitches2Repair Windows errors before they cause bigger problems3Scan for outdated or missing drivers - takes under a minuteThe reliable way to improve a Steam game’s performance is to measure a repeatable scene, change the game’s own graphics settings in small steps, and measure again. Steam does not provide a universal “best performance” preset, and no setting guarantees a particular FPS increase: the result depends on the game, your hardware, drivers, resolution, and what is running in the background.
Use Steam’s Performance Monitor to identify whether the problem is low frame rate or inconsistent frame delivery. Then lower the settings that are placing the greatest load on your system. Treat launch options as a game-specific tool, not a list of switches that works everywhere. Consider a graphics-card or memory upgrade only after you have identified a hardware limit and checked compatibility.
As an Amazon Associate I earn from qualifying purchases.
What to change first
Work in this order so that each change has an observable result:
Recommended Free Tools
- Measure a baseline. Enable Steam’s Performance Monitor and play the same section of the game for long enough to see normal behavior.
- Adjust the game’s video settings. Lower resolution or demanding visual options one step at a time, then repeat the same test.
- Remove competing workload. Close unnecessary applications and check the scene again.
- Use a launch option only when the game supports it. Enter it in the game’s Properties page and verify the developer’s documentation.
- Investigate hardware last. A video-card or memory upgrade can help in some cases, but only after you know which component is limiting the game.
This process avoids two common errors: changing several variables at once, and copying an engine command intended for a different game.
#1 Best Overall
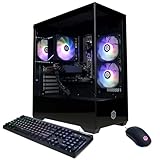
- System: AMD Ryzen 5 5500 3.6GHz 6 Cores | AMD B550 Chipset | 8GB DDR4 | 500GB PCIe 4.0 NVMe SSD | Windows 11 Home
- Graphics: AMD Radeon RX 6500 XT 4GB Graphics | 1x HDMI | 1x DisplayPort
- Connectivity: 4 x USB-A 3.2 | 4 x USB-A 2.0 | 1 x LAN | WiFi 5 | Bluetooth 5.0 | 7.1 Channel Audio
- Tempered Side Case Panel | Custom RGB Lighting | Keyboard and Mouse
- 1 Year Parts & Labor Warranty, Free Lifetime Tech Support
Measure performance before changing a setting
Enable Steam’s Performance Monitor
- Open the Steam desktop client.
- Choose Steam > Settings > In Game.
- Turn on Performance Monitor.
- Select a modest display level for ordinary play. Increase the detail level when diagnosing a problem.
- Launch the game and reposition the monitor if it obscures important information. Steam allows the display and graphs to be adjusted while you play.
The current Steam Support instructions are documented in Understanding the In-Game Overlay Performance Monitor. Menu wording and placement can change with Steam client updates, so use the closest current label if your client differs.
Choose the right detail level
Valve describes four monitor levels. They add diagnostic information progressively rather than changing the game’s rendering settings.
| Level | What appears | Best use |
|---|---|---|
| 1 | A single FPS value | A quick check while playing normally |
| 2 | FPS details | Watching frame-rate variation rather than one headline number |
| 3 | FPS plus CPU and GPU utilization | Checking whether processor or graphics work is limiting performance |
| 4 | FPS, CPU, GPU, and system RAM details | A fuller diagnosis of sustained load and memory pressure |
The monitor can show minimum and maximum values and graph FPS across a 90-second window. That window is useful for comparing the same encounter, race, map route, or replay segment before and after a setting change. It is not a benchmark that predicts every level in a game.
Read stutter, not just average FPS
A game can report a reasonable average FPS and still feel uneven if one frame takes much longer than the others. Steam explains that a single long frame can produce a visible hitch. Look for repeated or sustained dips during ordinary gameplay rather than a few isolated drops while a level loads, a menu opens, or a scene changes.
Record what was happening when the dip occurred. A repeatable hitch during combat or traversal is more actionable than a one-time pause during loading. Keep the camera route, character activity, resolution, and other conditions as similar as possible for each comparison.
Change the game’s own graphics settings
Start with the recommended configuration
Open the game’s video, graphics, or display menu rather than changing Steam launch options first. Steam Support warns that increasing resolution or video options beyond a system’s recommended level can reduce FPS, and that systems differ in what they can handle. A setting that is comfortable on one PC may overload another.
If the game offers an automatic recommendation, use it as a starting point, not a promise of a fixed frame rate. The useful result is the before-and-after measurement on your own machine.
Rank #2

- 8-Core 16-Thread Processing Power – Powered by the Ryzen 7 4700LE processor with Zen 2 architecture, delivering 8 cores and 16 threads with a boost clock up to 4.2GHz. Effortlessly handle multitasking, streaming, content creation, and demanding applications simultaneously without slowdowns.
- GeForce RTX 3050 8GB Graphics – Equipped with 8GB GDDR6 dedicated VRAM and real-time ray tracing support. Experience smooth 1080p gaming at 55-60 FPS in AAA titles like Cyberpunk 2077, 70+ FPS in Fortnite, and 90-100 FPS in Apex Legends with DLSS enabled. The 8GB buffer handles modern game textures comfortably – a step above 6GB variants
- High-Speed Memory & Storage – Paired with 16GB of DDR4 3200MHz dual-channel RAM (16GB), the PC ensures responsive multitasking—whether streaming while gaming or editing videos. It also includes a 512 GB NVMe M.2 SSD for lightning-fast boot times, quick game loads, and ample storage for your game library, creative projects, and files.
- Next-Gen WiFi 6 Connectivity – Stay connected with the latest WiFi 6 technology for faster speeds, lower latency, and improved network efficiency. Whether you're gaming online, streaming 4K content, or joining video conferences, enjoy stable, high-speed wireless connectivity.
- Ready-to-Use Value Desktop – Pre-built and ready to go right out of the box. Perfect for gamers, students, content creators, and home office users seeking reliable performance without the hassle of building a PC themselves. The mature AM4 platform with DDR4 memory offers excellent value and proven stability.
Use a one-change-at-a-time procedure
- Pick a repeatable test: the same save, route, match type, replay, or training area.
- Write down the current resolution and important graphics values, or take a screenshot of the menu.
- Change one demanding option by one preset step. If the game has no presets, reduce one value modestly.
- Apply the setting and replay the same situation for long enough to include normal movement and effects.
- Compare the monitor’s FPS stability and CPU/GPU readings with the baseline.
- Keep the change only if its visual trade-off is acceptable and the improvement addresses the original symptom.
Changing resolution and several visual options together may produce a larger difference, but it removes the evidence needed to know which option mattered. Small steps also make it easier to return to a satisfactory image if the improvement is not worth the loss of detail.
Balance image quality against frame consistency
Resolution and visual-detail controls can reduce rendering work when lowered, but the cost is visible image quality. Decide whether your priority is a steadier frame rate, sharper image detail, or a compromise between them. Do not treat a lower setting as automatically better: if the game already holds a stable frame rate, reducing quality may solve no real problem.
When the monitor shows GPU utilization rising during the dips, start with the game’s resolution or the visual options that place the most load on the graphics processor. When GPU utilization is not high but CPU activity is sustained, lowering resolution may have little effect; test another game setting or reduce competing applications instead. These readings are clues, not a universal diagnostic formula, because games distribute work differently.
If the PC uses integrated graphics
Steam Support specifically suggests trying low shader detail and windowed mode as troubleshooting steps for systems that use integrated graphics. Treat those as experiments, not rules for every integrated-GPU computer or every current game:
What’s actually slowing this PC down?
Pick the symptom - the matching free tool is one click away.
- Change shader detail to the game’s low setting, if that control exists.
- Switch to windowed mode.
- Replay the same scene and compare frame consistency.
- Keep the change only if it improves the problem without creating an unacceptable visual or input trade-off.
Some games use a borderless-window option or expose different shader labels. Use the closest setting the game actually provides rather than forcing a command from another title.
Reduce background work
Steam’s software-performance guidance recommends disabling or reducing unnecessary background applications. Close programs you do not need for the session, then repeat the same in-game test. This can remove competing CPU, GPU, memory, disk, or overlay activity, but it will not improve every PC by the same amount.
- Close applications that are actively rendering, recording, synchronizing, or processing large files when you do not need them.
- Leave only the utilities required for the game, communication, accessibility, or input devices.
- After closing an application, verify the game’s behavior instead of assuming the change helped.
If the problem returns only after a particular program starts, treat that program as a lead for further troubleshooting. Do not install a “booster” or cleanup utility as a substitute for identifying the workload; Steam’s own recommendation is to reduce unnecessary background applications and adjust the game.
Rank #3

- POWERHOUSE 8-CORE GAMING PERFORMANCE — Driven by the AMD Ryzen 7 8700F with 8 cores and 16 threads, boosting up to 5.0 GHz for smooth, responsive gameplay and the ability to handle AAA titles, streaming, and background tasks all at once
- NEXT-GEN BLACKWELL ARCHITECTURE — The NVIDIA GeForce RTX 5070 is powered by NVIDIA's cutting-edge Blackwell GPU architecture, delivering a massive generational leap in rasterization and ray tracing performance so you can experience your games the way they were meant to be played.
- Simplistic Design: Enjoy the latest generation of Windows 11 Home for your everyday needs. *MSI recommends Windows 11 Pro for business use.
- Cool While Gaming: In conjunction with an ARGB fan Air Cooler, the Codex R2 features four system cooling fans; three in the front and one in the rear to pull in cool air and push heat out of the PC.
- Turn on the Bright Lights: With the built-in RGB lighting, take your gaming experience to the next level by pressing the MSI LED button to cycle through lighting options. Customize lighting even further with MSI Center software.
Where to enter Steam launch options
Set an option for one game
- Open Library in Steam.
- Right-click the game and choose Properties.
- Stay on General.
- Find the Launch Options field and type the option exactly as documented for that game.
- Separate multiple options with spaces.
- Close the Properties window and launch the game to test the result.
Steam’s instructions are at Setting Game Launch Options. This field passes text to the game; it does not make an unsupported command valid.
The Tool Desk
Outbyte PC Repair FREERepair Windows errors before they cause bigger problemsFix Now →Outbyte Driver Updater FREEFix the driver behind crashes, sound loss and screen glitchesFind Drivers →Why most launch-option lists do not apply universally
The common examples on Steam’s launch-options page are mainly for Valve’s GoldSrc and Source games. They should not be copied into most third-party games. A switch can be ignored, prevent a game from starting, reset a configuration, or produce no useful change when the game’s engine does not recognize it.
Some console commands can be passed with a leading +, but not all commands work that way. Check the game developer’s official documentation or support page before adding a flag. Keep a note of the original field so you can remove one option at a time if startup or graphics behavior changes.
Use -autoconfig only where it is supported
Steam lists -autoconfig as a way to restore detected default video and performance settings for supported Valve games. Steam’s performance troubleshooting page presents it as an initial step for Valve-developed games, followed by gradual changes to identify which settings are too demanding. It is not a universal repair command for every Steam title.
If a supported game becomes unplayable after a graphics change, remove the experimental flags or use the documented reset procedure. Do not add unrelated engine flags simply because they appear in a list written for another game.
Match the symptom to the next test
Low FPS throughout normal play
- Check whether GPU or CPU utilization remains high in the Performance Monitor.
- Lower the game’s resolution or another demanding visual option by one step.
- Repeat the same scene and compare sustained FPS, not just the highest value.
- If the result is unchanged, restore the setting and test a different option or background workload.
Short, repeated hitches
- Use the 90-second graph and minimum values to confirm that the dips repeat.
- Check CPU, GPU, and RAM detail while the hitch occurs.
- Close unnecessary background applications and replay the same sequence.
- Test one game setting at a time so you can identify whether the hitch follows a particular visual load.
Stutter during loading or scene transitions only
A few isolated dips during level changes, menu transitions, or other loading events are not the same as a sustained gameplay problem. Compare ordinary gameplay separately. If the game is smooth once the scene is loaded, avoid lowering every graphics setting solely to address a transition that does not affect play.
Changes have no visible effect
Confirm that the setting was applied and that you repeated the same test. A setting may be CPU-limited, masked by a frame-rate cap, or irrelevant to the particular scene. Check the monitor’s utilization data and restore changes that reduce image quality without improving the symptom.
Rank #4

- POWERED BY RTX 5070 12GB + RYZEN 7 9700X - The GeForce RTX 5070 12GB GDDR7 graphics card pairs with an 8-core AMD Ryzen 7 9700X processor to drive smooth 1440p and 4K gameplay, giving this gaming PC the headroom for modern titles, streaming, and creative work.
- 32GB DDR5 6000MHz MEMORY & 1TB NVMe SSD - 32GB of high-speed DDR5 memory and a 1TB PCIe 4.0 NVMe solid state drive deliver quick load times, smooth multitasking, and generous storage, keeping this prebuilt gaming desktop responsive under heavy workloads.
- BUILT-IN 11.3-INCH Smart DISPLAY - An integrated smart screen shows real-time CPU and GPU temperatures, usage, and weather while you play, adding a distinctive and functional touch to your battlestation.
- 850W 80+ GOLD POWER SUPPLY, 360MM LIQUID COOLING & WiFi 7 - An 850W 80 Plus Gold certified power supply provides stable, efficient power with headroom for future upgrades, while a 360mm AIO liquid cooler, WiFi 7, and an ARGB mid-tower case keep the Ryzen 7 CPU cool and connected in a clean build.
- READY TO PLAY OUT OF THE BOX - Arrives fully assembled and tested with Windows 11 Home pre-installed, so your prebuilt gaming computer is ready to set up in minutes. Assembled in the USA, and backed by a one-year limited warranty and lifetime free technical support.
The game will not start after a launch option
- Return to Library > right-click the game > Properties > General > Launch Options.
- Remove the last option you added, or clear the field if several were entered together.
- Launch the game again.
- Consult the developer’s documentation before trying another option.
Do not assume that a successful launch proves the flag improved performance; measure the original problem after the game opens.
Independent reader supportYour contribution helps us test, update, and keep practical guides available for everyone.Consider hardware only after diagnosis
Steam Support says that upgrading a video card or memory may affect gameplay, but it does not recommend a particular model, capacity, benchmark, or expected FPS improvement. Treat an upgrade as a conditional decision:
- Check your current CPU, graphics hardware, installed memory, power supply, case space, and available expansion slots.
- Compare those specifications with the game’s stated requirements.
- Use the Performance Monitor to identify whether graphics, processor, or memory load is the recurring limit.
- Set a budget and verify compatibility before buying anything.
A graphics-card upgrade is relevant only when graphics work is the bottleneck and the rest of the system can support the card. A memory upgrade is relevant when the game and the rest of the workload are constrained by available RAM. Neither category can be narrowed responsibly to a specific product from Steam’s general troubleshooting guidance.
What Steam’s overlay does—and does not do
The Performance Monitor is an observation tool. Enabling it does not constitute a performance preset or evidence of an FPS gain. Valve’s June 30, 2025 Steam News announcement, Steam In-Game Performance Monitor, says: “The new performance overlay will show you frame rate values, similar to the old FPS counter, but it can also break out generated frames from DLSS or FSR vs actual game frame rate.”
That distinction matters when a game uses frame generation: a displayed generated-frame value is not the same measurement as the game’s actual rendered frame rate. Use the overlay to observe what is happening and to compare consistent tests, not to infer that opening it made the game faster.
The initial announcement focused on Windows and common GPU hardware and cautioned that some data might not appear on non-Windows platforms or uncommon or older GPUs. Current behavior can vary by Steam client version and hardware. If a CPU, GPU, or RAM field is missing, use the information that is available and avoid treating the missing field as zero load.
Free tools Windows power users keep installed
One-click scans. No signup required.
A repeatable 15-minute tuning workflow
- Prepare. Close unnecessary applications and record the game’s current resolution and graphics settings.
- Baseline. Enable the Performance Monitor at level 2 or 3, then play a repeatable scene for at least one normal gameplay cycle.
- Classify. Decide whether the problem is consistently low FPS, repeated stutter, or an isolated transition dip.
- Change one setting. Lower resolution or one demanding visual option by a single step. For integrated graphics, test low shader detail or windowed mode as separate experiments.
- Retest. Repeat the same scene and compare minimum, maximum, graph behavior, and CPU/GPU readings.
- Keep or revert. Keep the change only when it solves the measured problem at an acceptable visual quality.
- Escalate carefully. If the issue remains, test background applications, then consult game-specific launch-option documentation. Consider hardware only after the bottleneck is clear.
This workflow gives every change a clear purpose and a way back. It also keeps game-specific commands separate from ordinary graphics controls, where the compatibility risk is lower.
Source-backed troubleshooting references
For the current Steam procedures, use these official pages:
Quick Recap
- Understanding the In-Game Overlay Performance Monitor — monitor levels, FPS details, utilization data, and the graph window.
- Setting Game Launch Options — the per-game Properties path, spacing, and supported examples.
- Troubleshooting Game Performance Issues – Software — gradual graphics changes, reducing background applications, integrated-graphics suggestions, and the conditional hardware advice.
- Steam In-Game Performance Monitor — Valve’s June 30, 2025 feature announcement and platform caveats.
Product prices and availability are accurate as of the date/time indicated and are subject to change. Any price and availability information displayed on Amazon at the time of purchase will apply.

