Recommended Free Tools
The best capture method depends on what is on screen and where the file must go. On PS5, use the Create menu’s Capture Options, keep the original in Media Gallery, then choose a direct share, USB copy, or eligible PlayStation App transfer. On Windows, use Snipping Tool for desktop regions and Game Bar for most games. “High quality” is a workflow: the game or desktop must render a good source, the capture settings must suit it, and the export or sharing route must not remove detail you intended to keep.
What “high-quality screenshot” actually means
A screenshot is only as good as the image being captured. A game running at a lower internal resolution, a desktop displayed with scaling, or a scene containing motion blur can limit detail before any capture tool is involved. The capture utility then determines what part of the screen is recorded, which format and resolution choices are available, and whether the result is edited or compressed when you share it.
As an Amazon Associate I earn from qualifying purchases.
There is no single setting that is guaranteed to be best for every PS5 game, display, Windows configuration, or sharing destination. PlayStation and Microsoft document the controls and workflows, but the available PS5 choices and the final treatment applied by a social or messaging service can vary. For important images, preserve an untouched local file first. Crop, annotate, resize, or upload a copy rather than making the only copy your edited version.
Free tools Windows power users keep installed
One-click scans. No signup required.
Choose the capture route before you press the button
Start by identifying the material you need. A selected browser region, a complete desktop, and a full-screen game have different capture requirements. This comparison shows the practical trade-offs without treating one platform as universally superior.
#1 Best Overall

- 【1080P HD High Quality】Capture resolution up to 1080p for video source and it is ideal for all HDMI devices such as PS4, PS3, Xbox One, Xbox 360, Wii U, DVDs, DSLR, Camera, Security Camera and set top box. Note: Video input supports 4K30/60Hz and 1080p120/144Hz. Does not support 4K120Hz/144Hz. Output supports up to 2K30Hz.
- 【Plug and Play】No driver or external power supply required, true PnP. Once plugged in, the device is identified automatically as a webcam. Detect input and adjust output automatically. Won't occupy CPU, optional audio capture. No freeze with correct setting.
- 【Compatible with Multiple Systems】suitable for Windows and Mac OS. High speed USB 3.0 technology and superior low latency technology makes it easier for you to transmit live streaming to Twitch, Youtube, Facebook, Twitter, OBS, Potplayer and VLC.
- 【HDMI LOOP-OUT】Based on the high-speed USB 3.0 technology, it can capture one single channel HD HDMI video signal. There is no delay when you are playing game live.
- 【Support Mic-in for Commentary】Rybozen capture card has microphone input and you can use it to add external commentary when playing a game. Please note: it only accepts 3.5mm TRS standard microphone headset.
| Situation | Recommended built-in route | What it captures | Controls and editing | Important limitation |
|---|---|---|---|---|
| PS5 game or system screen | Create menu | PS5 gameplay or the current console screen | Capture Options exposes the screenshot and video format/resolution choices available on that console; Media Gallery provides crop, rotate/frame, and text tools | PlayStation’s guidance confirms the controls but does not list one fixed set of choices for every console |
| PS5 image that must be retained physically | Media Gallery to USB storage | An existing capture | Copy the selected file without relying on a mobile app | The support guidance does not specify a drive brand, capacity, or speed |
| PS5 image for a supported phone workflow | PlayStation App captures | Eligible screenshots and certain non-4K gameplay videos | View and share from the app after linking and enabling the feature | Availability depends on region and eligibility; captures remain available in the app for 14 days after creation |
| Windows desktop, browser, or application | Snipping Tool | Freeform, rectangular, window, or full-screen selection | Delay, notes and edits, save, and share from the tool | The default local location and any destination you choose should be checked before closing the capture |
| Most Windows PC games | Xbox Game Bar | The game shown while Game Bar is active | Use the camera action in the capture widget | Microsoft says it works with most PC games, not every game or every configuration |
For the underlying controls, see PlayStation’s PS5 captures and broadcasts guidance, its sharing instructions, and Microsoft’s Snipping Tool documentation.
How to take a high-quality screenshot on PS5
1. Open the Create menu and inspect Capture Options
- Press the controller’s Create button.
- Choose Capture Options and inspect the screenshot and video format and resolution controls shown on your console.
- Choose the option that matches your intended use. Do not assume a menu choice described for another region, software version, game, or display will appear on yours.
- Return to the Create menu and select Take Screenshot at the moment you want to preserve.
The same menu lists Save Recent Gameplay and Start New Recording. Those are video functions; select Take Screenshot when you need a still image. If the scene is difficult to time, first use the game’s pause or photo mode when available, then capture the composed frame. Photo-mode controls are game-specific, so their presence and output should not be treated as a PS5-wide feature.
2. Verify the original in Media Gallery
Open Media Gallery from the Games home screen and select the new image. Look at the entire frame before editing: confirm that the intended HUD, subtitles, character, or menu is present and that you did not capture a transition screen. This is also where you can create an edited copy for presentation while retaining the source file.
What’s actually slowing this PC down?
Pick the symptom - the matching free tool is one click away.
For simple composition changes, use the Media Gallery Edit controls. They include crop, rotate or frame adjustments, and adding text. Cropping can improve framing, but it cannot create detail that was never recorded. Treat annotations as a separate presentation version when the original may be needed later.
3. Share directly from Recently created or Media Gallery
- Press the PS button and open the Recently created card, or launch Media Gallery from Games home.
- Select the screenshot and choose Share.
- Add a message if useful, select the destination shown by your console, and confirm.
PlayStation allows up to four screenshots in one share and one video clip per share. If you need to send more stills, make separate shares rather than assuming the console will add the rest automatically. The exact destinations and account requirements shown in the share panel can change by region and service.
Rank #2

- 【1080P 60FPS Video Capture Card】 This HDMI game capture card is based on USB3.0 high speed transmission port, input resolution up to 4K@30HZ, output resolution up to 2K@30Hz or 1920×1080@60Hz. Type c and USB interface can meet most of the devices in daily life. Easily meet the online capture, real-time recording, online meetings, live gaming and other functions, so you have a better visual enjoyment. Note: For capture use only; requires capture software to function and is not intended for direct screen casting to a monitor or TV
- 【Ultra Low Latency Screen Sharing】 HDMI capture card is made of good quality aluminum alloy with strong heat dissipation, allowing you to enjoy ultra low latency while live gaming or video recording or live streaming, avoiding blue screens and lag. This HDMI to USBC capture card supports easy recording of good quality audio or HD video and transferring it to your computer or streaming platform, allowing you to record 60 fps HD video directly on your hard drive and real-time preview
- 【Plug and Play, Easy to Carry】 This HDMI 1080P video capture card does not require any additional drivers or external power supply, just plug and play for fast capture. The capture card is small and lightweight, so you can put it in your bag for emergencies, making it very portable for outdoor live streaming. It's also a great way to share content in game recording, video conference, video recorder and online teaching
- 【Wide Compatibility USB Capture Card】 Easily streams to Facebook, Youtube or Twitch. With the connection, this HDMI to USB C/3.0 video capture devices can be working on several Operating Systems and various software: Windows 7/ 8/ 10, Mac OS or above, Linux, Android, Laptop, Xbox One, PS3/PS4/PS5, Camera, DVDs, Set Top Box, Webcame, DSLR, Switch/Switch 2, TV BOX, HDTV, Potplayer/VLC, ZOOM, OBS Studio etc.
- 【Package Content & Note】 1x HD Audio Capture Card , 1x USB 3.0 to USB C Adapter (A-side 3.0, B-side 2.0), 1x user manual. Please note that you need to restart the OBS Studio software after the audio setup is complete, otherwise it will result in no sound output. When using an adapter, if the device is recognized as USB 2.0, try using the other side with the USB-C port. Simply flip the capture card and reconnect it to be recognized as USB 3.0
4. Copy a durable file to USB storage
USB export is the clearest PS5 route when you want a physical backup or a file you can move to another computer without depending on app availability.
- Connect compatible USB storage to the PS5.
- Open Media Gallery and select the screenshot.
- Open More (…) and choose Copy to USB Drive.
- Wait for the copy to finish before disconnecting the drive, then verify the file on another device if the image is important.
PlayStation’s instructions document the storage category and menu action, but do not endorse a particular drive brand, capacity, or transfer speed. USB storage is not required to take a screenshot or to use the console’s direct sharing controls.
5. Use PlayStation App only when its capture feature is available to you
The PlayStation App can provide a convenient phone-based route, but it requires the PS5 to be linked to the app and the capture feature to be enabled. Availability is region-dependent. When eligible, screenshots and certain non-4K gameplay videos upload automatically and can be viewed in the app for 14 days after creation. That time window makes the app a sharing bridge, not a permanent archive: copy important files to USB storage or another local location before the window ends. Follow the setup and eligibility details in PlayStation’s PS App capture instructions.
How to capture a high-quality screenshot on Windows PC
Use Snipping Tool for the desktop, browser, or an application
Microsoft describes Snipping Tool as a way to “Take a snapshot to copy words or images from all or part of your PC screen. Use Snipping Tool to make changes or notes, then save, and share.” It is the most flexible built-in choice when you need a selected region rather than a game-only frame.
- Open Snipping Tool from the Windows Start menu or search.
- Choose the snip mode that matches the target: Freeform, Rectangular, Window, or Full-screen.
- Select New and make the selection. For a menu that appears briefly, set a delay before starting the snip.
- Review the capture in Snipping Tool. Use its editing and annotation controls only after confirming the framing.
- Save the original. Windows says captures are automatically saved to the Screenshots folder by default; use Save as to choose a different location or file name.
- Share from the tool only after the local copy is safely stored.
Snipping Tool is appropriate for documentation, troubleshooting, web pages, and applications because you can isolate exactly the region or window required. If you need to resize, recolor, or make broader changes, its editing route can open the image in Paint. Resizing changes the delivered dimensions; it does not restore detail lost in the original capture.
Rank #3
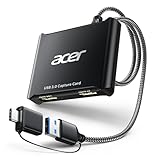
- 【4K Clarity, 1080P Performance】Enjoy stunning clarity with our USB 3.0 Video Capture Card—featuring 4K input and smooth 1080P@60Hz output. Featuring YUY2 technology, it delivers richer colors than MJPEG for lifelike live streaming and recording. Plus, it delivers high-quality video with minimal latency, making it perfect for gamers and content creators.
- 【Mic-in for Easy Commentary】Plug in a headset or mic directly to stream/record voice easily—no extra adapters. Great for real-time gaming commentary, online classes, or vlog dubbing. Paired with its low-latency tech, it keeps voice synced perfectly with video, eliminating post-editing hassle from mismatched audio-visuals. Fits most 3.5mm devices—ideal for gamers, teachers, creators.
- 【Plug and Play, no Extra-Drivers】No extra drivers or external power—just plug in and start capturing instantly. Small and lightweight, it fits easily in your bag for outdoor live streams, on-the-go recordings, or emergencies. Ideal for game capture, video conferences, and online teaching, it saves hassle while delivering smooth results.
- 【Wide Compatibility: Apps & Devices】No extra adapters—works flawlessly with your go-to platforms and gear. It pairs with streaming/recording apps like Twitter, YouTube, Facebook, OBS, XSplit, and VLC, plus devices including Switch/Switch2, PS5/PS4, Xbox, DSLR cameras, PC, macOS, and Android. Whether gaming, streaming, or hosting video calls, it keeps HD quality intact, eliminating "compatibility headaches".
- 【Worry-Free After-Sales Support】We are committed to delivering exceptional quality products that combine sophisticated design with affordable pricing, offering you the best solutions for seamlessly connecting your work and life. Whether you're a newcomer or a seasoned user, feel free to reach out anytime with any questions—your satisfaction is our top priority.
Use Xbox Game Bar for most PC games
- Launch the game and bring up Game Bar using the Windows shortcut configured on your PC.
- Open the Capture widget.
- Select the camera or Take screenshot action at the desired frame.
- Open the resulting capture from the Game Bar gallery or its notification, then confirm where Windows saved it before editing or sharing.
Microsoft says Game Bar works with most PC games. “Most” does not mean every title: a game can block overlays, use an incompatible display mode, or provide its own capture command. If the camera action does not appear or produces a blank image, use the game’s current screenshot control or the launcher’s documented capture feature instead of repeatedly changing image settings at random.
The Tool Desk
Outbyte PC Repair FREERepair Windows errors before they cause bigger problemsFix Now →Outbyte Driver Updater FREEScan for outdated or missing drivers - takes under a minuteDriver Scan →Game Bar is designed around the game view, while Snipping Tool is designed around a screen selection. Choose based on the source, not on a blanket claim that one always produces a better file. Microsoft’s current overview is available at Game Bar.
Where Steam fits—and where it does not
Steam’s support material currently focuses on Steam Game Recording and exporting a saved clip as a video file. That is useful when your goal is a replay or edited clip, but it does not establish Steam as a universal still-screenshot method. For a still image, use the game’s or launcher’s current screenshot control when that is the workflow your setup provides. Confirm the resulting file locally before deleting the in-game or launcher copy. Steam’s documented recording workflow is at Steam Game Recording support.
Use wdcapture.exe only for a developer workflow
Microsoft documents wdcapture.exe as a command-line tool built on Windows Graphics Capture APIs. It can save SDR stills as PNG or HDR stills as JXR. This is a specialized development path, not the sensible everyday choice for a player who wants one screenshot. Use it only when you already manage command-line capture and need its documented SDR/HDR output behavior; otherwise, Snipping Tool or Game Bar avoids unnecessary setup.
The command-line reference is maintained in Microsoft Learn’s Screen Capture documentation. The page’s tool requirements and syntax should be treated as authoritative for the installed developer environment, because they are not interchangeable with normal Windows screenshot shortcuts.
Rank #4

- High-Quality Video Capture, 4K HDMI Capture Card Ready: Capture smooth and vibrant video with this 4K HDMI capture card, engineered for gamers and content creators who demand crisp 1080P 60FPS video quality. Whether you're streaming to Twitch or recording gameplay for YouTube, your footage will look professional and detailed
- Plug-and-Play USB Capture Card, No Drivers Needed: Designed as a USB capture card for streaming, this device works instantly out of the box, just plug into your PC or laptop and start capturing. Fully compatible with popular software like OBS Studio, Streamlabs, and XSplit, making setup quick and stress-free for beginners and pros alike
- Universal Compatibility PS5, Xbox, Switch & More: Stream or record gameplay from virtually any HDMI-enabled device including Nintendo Switch, PS5, Xbox Series X, DSLR cameras, and PCs. The video capture card for gaming supports seamless passthrough so you can play without lag while your audience watches every frame in real time
- Low-Latency Performance for Smooth Streaming: This capture card for streaming minimizes delay between gameplay and broadcast, so you get reliable, low-latency capture that works well for competitive gaming, live broadcasts, and podcast sessions. Suitable for those building their channel with high-quality, engaging content
- Compact & Portable Design for Content Creators: Lightweight and portable, this USB 3.0 capture card works well for creators who travel or switch gaming setups often. Throw it in your bag and stream or record wherever you are, at home, events, LAN parties, streaming or studio sessions
Preserve quality while editing and sharing
Keep a two-file workflow
- Capture the frame and save or retain the untouched original.
- Duplicate it before cropping, adding text, rotating, or resizing.
- Make a presentation copy for a post, guide, or message.
- Open the final shared file on a second device or in the destination service to check that the text and details remain readable.
This workflow separates capture quality from delivery quality. A native crop or annotation tool can improve composition, but it cannot raise the source resolution. A messaging or social platform may also process an upload after you send it, so the copy you keep locally is the reliable reference.
Match the file to the audience
| Goal | Best practical path | What to check |
|---|---|---|
| Show one detail in a guide | Crop a duplicate in Media Gallery or Snipping Tool | Keep enough surrounding context that labels and controls are understandable |
| Send a quick PS5 image from the console | Share from Recently created or Media Gallery | Stay within the four-screenshot limit per share and review the selected recipients |
| Archive a PS5 capture | Copy it to USB storage, then make an additional computer backup if needed | Verify the file after copying and do not disconnect the drive during transfer |
| Move an eligible PS5 capture to a phone | Use the linked PlayStation App | Confirm that the feature is enabled in your region and move the file out of the app’s availability period |
| Document a Windows dialog | Use a window or rectangular Snipping Tool capture | Include the title bar or relevant error text, then save locally before sharing |
| Post a PC game moment | Use Game Bar when the title supports it, otherwise the game or launcher’s own screenshot command | Check for overlay compatibility and verify the saved image |
Troubleshoot the common failure points
The PS5 image is not framed correctly
Open Media Gallery and inspect the original before editing. If a HUD or subtitle is missing, capture the scene again with the desired game display enabled. Use crop and rotate/frame only for composition; those controls cannot recover pixels outside the captured frame.
The PS5 quality option you expected is missing
Return to Create > Capture Options and use the choices actually displayed on that console. PlayStation’s support page confirms that format and resolution controls exist, but it does not promise an identical menu for every system software version, region, game, or display. Do not substitute an unverified “universal” setting.
Sharing more than four PS5 screenshots fails
Reduce the selection to four screenshots and send another share for the remainder. The documented limit applies to screenshots in one share; it is not a limit on how many files you can keep in Media Gallery.
The PlayStation App does not show the capture
Check the prerequisites first: the PS5 must be linked to the app, the feature must be enabled, and the capture must be eligible in your region. Some gameplay videos are excluded even when screenshots appear. If the image is outside the app’s stated availability period or was never eligible, use Media Gallery and USB copy for the durable file.
Best Value

- 【1080P HD High Quality】Capture resolution up to 1080p for video source and it is ideal for all HDMI devices such as PS4, PS3, Xbox One, Xbox 360, Wii U, DVDs, DSLR, Camera, Security Camera and set top box.
- 【Plug and Play】No driver or external power supply required, true PnP. Once plugged in, the device is identified automatically as a webcam. Detect input and adjust output automatically. Won't occupy CPU, optional audio capture. No freeze with correct setting.
- 【Compatible with Multiple Systems】suitable for Windows and Mac OS. High speed USB 3.0 technology and superior low latency technology makes it easier for you to transmit live streaming to Twitch, Youtube, Facebook, Twitter, OBS, Potplayer and VLC.
- 【HDMI LOOP-OUT】Based on the high-speed USB 3.0 technology, it can capture one single channel HD HDMI video signal. There is no delay when you are playing game live.
- 【Support Mic-in for Commentary】Kedok capture card has microphone input and you can use it to add external commentary when playing a game. Please note: it only accepts 3.5mm TRS standard microphone headset.
USB copy is unavailable or incomplete
Reconnect the USB storage, reopen Media Gallery, select the file again, and use More (…) > Copy to USB Drive. Wait for the operation to finish before removing the drive. If the capture matters, open the copied file on a computer before deleting the console version. The official instructions do not define a required brand, capacity, or speed, so troubleshoot the physical drive and its compatibility rather than assuming a particular specification.
Snipping Tool captures the wrong area
Choose the appropriate mode before selecting New: rectangular for a precise box, freeform for an irregular outline, window for one application, or full-screen for the entire display. Use a delay when a menu disappears as soon as you click elsewhere. Save the image with Save as if the default Screenshots folder is not the location you need.
Game Bar produces no screenshot
Confirm that the game is visible when the capture widget is active and that the title permits the overlay. Microsoft’s “most PC games” wording leaves room for exceptions. Try the game’s own screenshot command or its launcher’s current tool. Do not infer a failed Game Bar capture means the game cannot produce a still image.
Do these 3 things before closing this tab:
1Fix the driver behind crashes, sound loss and screen glitches2Clear out junk files and repair common Windows errors3Scan for outdated or missing drivers - takes under a minuteA practical decision checklist
- Capturing a PS5 game: open Create, inspect Capture Options, take the screenshot, and verify it in Media Gallery.
- Sharing immediately from PS5: use Recently created or Media Gallery and select no more than four screenshots in one share.
- Keeping a permanent PS5 copy: use Media Gallery’s More (…) menu and Copy to USB Drive, then verify the transfer.
- Using a phone: link and enable the PlayStation App feature only if it is supported in your region, and move important captures out of the app’s 14-day window.
- Capturing Windows content: use Snipping Tool for a region, window, or full screen; use its delay for staged interfaces.
- Capturing a PC game: try Game Bar, but fall back to the game or launcher’s own screenshot control when overlays are incompatible.
- Protecting fidelity: retain the untouched local original and edit a duplicate.
Official instructions and changing labels
Console menus, app eligibility, and Windows labels can change with system software, region, and supported hardware. Use these official pages when a button is renamed or a capture does not behave as described: PS5 captures and broadcasts, sharing screenshots and clips on PS5, viewing captures and copying them from Media Gallery, PS App game captures, Snipping Tool, Game Bar, Steam Game Recording, and wdcapture.exe.
Quick Recap
Product prices and availability are accurate as of the date/time indicated and are subject to change. Any price and availability information displayed on Amazon at the time of purchase will apply.

