What’s actually slowing this PC down?
Pick the symptom - the matching free tool is one click away.
The safe way to adjust headlights is to follow the exact owner or service manual for your vehicle and lamp type, then verify the prescribed cutoff on a level, measured setup. Do not copy another model’s distance or target: headlamp housings, electronic controls, loading requirements and legal inspection criteria differ. If the lamp or body is damaged, the adjusters are unclear, or you cannot confidently identify the correct pattern, have a dealer or qualified repair shop perform an alignment check.
Why correct headlamp aim matters
Headlamps have to do two jobs at once: put useful light far enough ahead for you to see hazards and keep the intense part of the beam out of other drivers’ eyes. A beam aimed too low shortens your seeing distance. A beam aimed too high creates glare, even when the lamps are on low beam.
As an Amazon Associate I earn from qualifying purchases.
The National Highway Traffic Safety Administration (NHTSA) reported in its 2007 Nighttime Glare and Driving Performance report that sponsored testing found an upward aim of just one degree can reduce the distance at which an oncoming driver detects objects in the roadway. That is why a small adjustment error can have a large effect at night.
NHTSA’s 2009 literature summary found at least one headlamp outside the SAE tolerances in about 62% of the in-use vehicles in its study sample and in about 30% of the new vehicles measured. Those are historical sample results, not a current estimate of every vehicle on the road. The same summary defined mis-aim in that study as a vertical orientation at least 0.76 degrees from horizontal, using SAE standards published in 2002.
On hills, during acceleration or braking, and with a heavy load in the rear, the vehicle’s pitch changes the beam’s direction relative to the road. A careful garage setup reduces static error but cannot remove every dynamic glare condition. Automatic leveling can compensate on some vehicles, but a warning light, failed sensor or abnormal startup movement still requires attention.
#1 Best Overall

- 13 ft. Of reach*: allows for easy measurements when working alone (*based on maximum extension of average professional user)
- Compact size: easy to grip and store in any tool belt
- Easy grip design: extensive rubber overmold provides a comfortable grip and impact resistance
- Easy read fractions: fractions printed on the blade in alternating colors and heights for quick, easy measurements
- Includes: (1) CMHT37443S Tape Measure
Start with the vehicle-specific procedure
Before touching an adjuster, find the owner’s manual or service manual for the exact model year, market and headlamp system. Look for “Headlamp aiming,” “Headlight adjustment,” or a similar section. Confirm all of the following:
- Whether the procedure applies to halogen, high-intensity-discharge, LED, adaptive or matrix lamps.
- Which beam is used for aiming and whether a mechanical or electronic adjustment mode must be enabled.
- The required vehicle-to-wall distance, reference height, horizontal centerline and cutoff shape.
- Required fuel level, tire pressure, passenger or cargo load, and suspension preparation.
- Which adjuster controls vertical aim and which controls horizontal aim, if horizontal adjustment is permitted.
Print or display the correct procedure while you work so you do not rely on memory. A specification for one trim level may not apply to another lamp housing, a different market, or a replacement assembly. If the manual refers to a calibration routine, scan tool or service screen rather than a screw, treat that as a professional-equipment procedure.
Do not substitute a generic internet target for the manufacturer’s mark. A Chevrolet owner manual and Tesla’s Model 3 service procedure, for example, use different controls and instructions. The Tesla procedure explicitly requires a service adjustment mode; turning a screw without entering that mode would not follow the specified process.
When a professional alignment is the safer choice
Arrange a professional inspection rather than guessing when any of these conditions apply:
- The vehicle has been in a crash, struck a large pothole, or has a bent mounting panel.
- A lens, housing, bracket, leveling sensor or bumper is cracked, loose or displaced.
- The manual is unavailable, incomplete for your market, or does not identify the adjustment target.
- The beam pattern has no clear cutoff, has severe scatter, or changes unexpectedly when the vehicle starts.
- An electronic leveling or service mode will not activate, or a warning appears on the instrument panel.
- You have adjusted the intended control but cannot verify both lamps against the prescribed marks.
A shop can check mounting geometry and use calibrated aiming equipment. The General Motors owner material used here directs owners to dealer service when aiming is needed; it also warns that covering a lamp can cause heat damage. Never cover a lamp with cloth, cardboard or tape while it is operating. Do not keep turning an adjuster that reaches a stop, skips, or produces a diagonal movement: the mechanism or its mounting may be damaged.
Professional help is particularly sensible after replacing a complete headlamp housing. A new assembly can sit differently from the original if a bracket, bumper guide or fender is bent, and no amount of turning the adjuster corrects a displaced mounting point. Ask the shop to inspect the physical mounts as well as the beam aim.
The Tool Desk
Outbyte Driver Updater FREEFix the driver behind crashes, sound loss and screen glitchesFind Drivers →Outbyte PC Repair FREERepair Windows errors before they cause bigger problemsFix Now →Rank #2

- 20% more compact grip**: For improved ergonomics and control
- Integrated finger brake: For improved blade control
- Fractional blade graphics for quick and easy measuring
- Durable blade coating for longer blade life
Preparing a wall setup when your manual calls for one
A wall method is an example procedure, not a universal specification. Use it only after confirming that your manual permits it and supplies the target. You need a level surface, a light-colored vertical wall, a tape measure, masking tape or a removable marker, and enough room to place the vehicle at the specified distance. A tape measure is a modest, useful task-enabling item; it cannot substitute for the vehicle’s target, a level floor or an intact mounting structure.
Set the vehicle and surface
- Choose a flat area with a wall that is perpendicular to the vehicle’s direction of travel. A sloping driveway or wall that leans relative to the car can make a correct lamp appear wrong.
- Set tire pressures to the values on the vehicle’s tire-information label. Remove unusual cargo unless the manual specifies a load.
- Use the fuel level, driver-seat weight and other loading conditions the manual specifies. Do not assume an empty tank or an empty driver’s seat is correct.
- Clean the lenses and make sure the suspension has settled. Roll the vehicle forward and back a short distance, then stop without turning the steering wheel.
- Measure from the relevant part of the vehicle to the wall, not by pacing. Mark the vehicle centerline and each lamp’s centerline at the wall at the height required by the manual.
Keep the steering straight and leave enough space to stand safely beside the vehicle without changing its position. If the wall or floor cannot meet the manual’s geometry, do not compensate by inventing a different distance or angle. Find a suitable site or arrange an equipment-based check.
Example: the 2011 Chevrolet Silverado procedure
The 2011 Chevrolet Silverado owner manual hosted by NHTSA illustrates how specific a wall method can be. It calls for a light-colored wall 25 feet (7.6 meters) away, properly inflated tires, a full fuel tank and a load equivalent to the driver in the driver’s seat. It uses the low beams and provides model-specific reference marks and cutoff targets. Those numbers and loading conditions belong to that cited Silverado procedure; they are not a default for every car or truck.
That manual also states that the high beams will be correctly aimed when the low beams are aimed properly. This does not mean every vehicle works the same way, so follow your own manual if it gives separate high-beam instructions. If your vehicle uses a different lamp technology or a different target, copy neither the Silverado distance nor its marks.
Do these 3 things before closing this tab:
1Scan for outdated or missing drivers - takes under a minute2Clear out junk files and repair common Windows errors3Fix the driver behind crashes, sound loss and screen glitchesExample: Tesla Model 3 service-mode control
Tesla’s 2017–2023 Model 3 service procedure for the North American wall method is an example of an electronically controlled system. It directs the technician to enable a service adjustment mode before using the specified wall measurements and targets. A Model 3 owner should use that procedure for the applicable vehicle and software configuration rather than treating a conventional screw-adjustment method as interchangeable. If the service screen, software version or vehicle configuration does not match the instructions, stop and obtain the applicable procedure.
Marking and reading the beam pattern
Use the reference marks and cutoff definition in your manual. A sharp cutoff, a stepped pattern or a marked hot spot can look different depending on the lamp design. The correct target is the one the manufacturer identifies, not the brightest portion of the beam.
Rank #3

- 16-foot retractable measuring tape for personal or professional use
- Provides both SAE and metric measurements
- Wide 3/4-inch blade with easy readability
- Convenient belt clip and lanyard for easy access
- Molded, impact-resistant case with easy grip-ability
Identify the centerlines
With the vehicle square to the wall, transfer each lamp’s horizontal centerline and the vehicle centerline to the wall. Measure lamp height from the ground as instructed; do not estimate from the top of the hood or the wall’s base. If your manual specifies a vertical drop from lamp height, mark that exact drop at the stated distance. Use removable tape or marker so old marks do not confuse a later check.
Use low beam unless instructed otherwise
Low-beam patterns are normally used because their cutoff is the feature that limits glare. Keep the lamp on the beam setting named by the procedure. Do not aim by switching to high beam or by judging how far the light appears to reach down the road. If the manual says the high beams follow the low-beam adjustment, verify that relationship rather than making a second, unsupported adjustment.
Recommended Free Tools
Adjust one intended control at a time
- Locate the labeled vertical adjuster. Some vehicles provide a separate horizontal adjuster; others do not permit owner horizontal adjustment.
- Make small turns, then allow the pattern to settle and recheck the mark. Avoid forcing an adjuster at its stop.
- Keep the opposite lamp as a reference while you adjust the first, then verify both lamps together.
- If the pattern moves diagonally, jumps, or does not respond, stop. You may be turning the wrong adjuster or dealing with a damaged mount.
Brightness is not a target. A lamp can look bright while its cutoff is too high, and a dim-looking pattern can still be correctly placed if the lens or reflector design calls for it. Raising a beam because the road looks dark can create glare for oncoming drivers; lowering it until nobody flashes can remove the seeing distance you need.
Common wall-method mistakes to avoid
- Using a remembered 25-foot rule: that distance belongs to the cited Silverado example, not every vehicle.
- Pacing the distance: a small error at the wall changes the apparent cutoff, so measure from the reference point specified by the manual.
- Ignoring load: fuel, a driver, passengers and cargo change vehicle pitch. Match the stated conditions before marking the wall.
- Working on a slope: a level vehicle and perpendicular wall are part of the geometry, not optional neatness.
- Aiming at the brightest spot: the cutoff or reference mark, not intensity, is the control point.
- Adjusting the wrong lamp control: many housings have separate vertical and horizontal mechanisms, and some do not allow owner horizontal adjustment.
- Covering a lamp to see the other one: the General Motors material warns that covering an operating lamp can create heat damage.
- Forcing a stuck adjuster: a skipped or nonresponsive mechanism can indicate a loose mount or damaged housing that needs inspection.
After adjustment: verify the result in real conditions
Remove the wall marks and take a short nighttime drive on a safe, familiar road. Keep low beams on when meeting traffic. The beam should illuminate the lane and roadside within the manufacturer’s intended range without producing repeated flashes from oncoming drivers.
Flashing high beams can be a sign of incorrect vertical aim, as noted in the cited Chevrolet owner material, but it is not proof by itself. Check for a heavy rear load, an uneven road, a failed automatic-leveling system, a damaged housing or a mismatched replacement lamp before making another adjustment.
Recheck after suspension work, a collision, replacement of a lamp housing, or a change that alters ride height. If the vehicle has automatic leveling, observe whether the system completes its normal startup movement and whether any warning is displayed. A static wall check cannot reproduce every hill, braking event or acceleration condition, so it is a verification step, not a guarantee that glare is impossible in every situation.
Free tools Windows power users keep installed
One-click scans. No signup required.
Rank #4

- QUICK & EASY MEASUREMENTS: Fractions printed on the blade
- ADDED GRIP: Rubber overmold for added grip
DIY adjustment versus professional inspection
| Decision factor | DIY wall check may be reasonable | Professional check is preferable |
|---|---|---|
| Manufacturer instructions | The exact manual gives a complete target, distance and adjustment path. | The manual is missing, ambiguous or for a different lamp type or market. |
| Controls | Clearly labeled mechanical adjusters respond predictably. | The system requires electronic or service-mode commands, calibration or scan-tool access. |
| Vehicle condition | Both housings, brackets and body panels are intact. | There is crash, impact or water damage, or a lamp is loose or cracked. |
| Work area | The floor is level, the wall is perpendicular and the distance can be measured. | The only available surface is sloped, uneven or too short for the specified distance. |
| Pattern verification | You can identify the prescribed cutoff and reference marks. | The beam is scattered, asymmetrical in an unexplained way or impossible to match confidently. |
A tape measure is useful for reproducing the distance and lamp-height marks, but it cannot replace the vehicle’s instructions or compensate for a bent mounting structure. If you choose a shop, ask for an aim check that includes both lamps and an inspection of mounts and leveling components when damage or a warning is present.
Why one legal aiming number cannot be universal
Inspection rules depend on jurisdiction, lamp type and mounting height. The UK Driver and Vehicle Standards Agency (DVSA) MOT inspection manual, for example, uses an equipment-based test area and criteria that vary with the lamp and its mounting position. That is an inspection framework for the United Kingdom, not a universal rule for private adjustment in the United States or elsewhere.
Use your local inspection authority’s current requirements if the vehicle must pass a test, but keep the manufacturer’s procedure as the primary aiming reference. A vehicle can meet one visual garage target and still fail an equipment-based inspection if the lamp type or mounting-height category is different. Conversely, passing a visual wall check does not prove that a damaged mount or failed automatic-leveling system is safe.
Independent reader supportYour contribution helps us test, update, and keep practical guides available for everyone.Troubleshooting common symptoms
Oncoming drivers frequently flash their high beams
- Confirm that you are using low beams and that the cutoff is at the manual’s target.
- Check rear cargo and passenger loading, tire pressures and ride height.
- Inspect for a failed leveling sensor or a housing that shifted after an impact.
- Have the alignment checked professionally if the pattern remains high or uncertain.
The road ahead is poorly illuminated after aiming
- Verify that the wall was perpendicular and the vehicle was level.
- Check that the lamp lenses are clean and not hazed, and that the correct beam setting was used.
- Confirm that you followed the prescribed cutoff rather than lowering the beam until glare disappeared.
- Stop adjusting if the lamp will not hold position; a loose mount or damaged adjuster needs repair.
One lamp points differently from the other
Some asymmetric patterns are intentional, especially where the road-side cutoff or step differs by side. Compare the two lamps with the diagram or description in your manual. If the difference is not explained there, or if one lamp has a new housing or bulb, seek a professional inspection instead of forcing the pattern to look symmetrical.
The pattern changes when the car starts
A brief leveling movement can be normal on vehicles equipped with automatic systems, but an unexpected movement, a warning message or a lamp that settles high should not be corrected by guessing at a screw. Use the prescribed service procedure or have the system checked.
A safe decision sequence
- Identify the exact vehicle year, market and headlamp type.
- Read the manufacturer’s aiming procedure and note its distance, load, beam, marks and controls.
- Decide whether the vehicle condition and work area meet those requirements.
- Use the wall method only if the manual calls for it, measuring rather than estimating.
- Adjust only the specified control in small increments and match the prescribed cutoff.
- Verify both lamps, then perform a cautious nighttime check.
- Use a dealer or qualified alignment shop whenever damage, electronic controls or uncertainty prevents a confident verification.
Correct aim preserves your available seeing distance without transferring danger to the driver coming toward you. The vehicle’s own procedure—not a generic wall distance or a brightness-based guess—is the reliable starting point.
Best Value
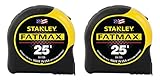
- 11-foot Standout; 16-inch and 19.2-Inch stud center markings simplify framing jobs
- Blade arm our coating on the first 3" maximizes durability of the blade
- Mylar polyester film extends life of entire blade
- Top-forward blade lock makes locking and unlocking easy
- High-impact ABS case with durable rubber-holds up to heavy use
Frequently Asked Questions
Can I use the 25-foot wall method on any vehicle?
No. Twenty-five feet (7.6 meters) is the distance in the 2011 Chevrolet Silverado example. Other vehicles specify different distances, marks, loads or electronic procedures, so use the exact owner or service manual for your model and year.
How do I aim my headlights at a wall?
Only when your manual calls for a wall method: use a level surface and perpendicular light-colored wall, set the specified tire pressure, fuel and driver or cargo load, measure the stated distance, mark lamp centerlines and the prescribed cutoff, then make small adjustments with the named control. Do not estimate the distance or aim at the brightest part of the beam.
Windows Errors? Fix Them Before They Spread
Repair common Windows errors and clear accumulated junk for a smoother, more stable PC - no reinstall needed.Free scan · no reinstallCrashes, No Sound, or Screen Glitches?
Random freezes, missing sound and display glitches usually trace back to one bad driver. Find and replace yours safely.Free scan · under a minuteWhy are oncoming drivers flashing their high beams at me?
Incorrect vertical aim is one possibility. Also check rear cargo, tire pressure, ride height, a failed leveling sensor, a shifted housing or an uneven road. Recheck the manual’s cutoff and arrange a professional inspection if the pattern remains high or uncertain.
Should I adjust high beams or low beams?
Use the beam specified by the vehicle procedure. The Chevrolet example uses low beams and says its high beams are correctly aimed when the low beams are aimed, but that relationship is not universal.
What if my headlamp has no clear cutoff?
Stop trying to match a generic line. Adaptive, LED and other designs may use different patterns, and severe scatter can indicate damage or a mounting problem. Use the manual’s diagram or have a qualified shop inspect and aim the assembly.
Do electronic headlights need a service mode?
Some do. Tesla’s 2017–2023 Model 3 North American wall procedure explicitly requires a service adjustment mode before its measurements and targets are used. Follow the applicable procedure rather than treating an electronically controlled lamp like a conventional screw-adjusted unit.
Is there one legal headlight angle that applies everywhere?
No. Inspection criteria vary by jurisdiction, lamp type and mounting height. The UK DVSA MOT manual, for example, uses an equipment-based test area with criteria that depend on those factors. Check your local rules while using the manufacturer’s procedure as the aiming reference.
The Bottom Line
Use the exact manual, measured level setup and prescribed cutoff. If damage, electronic controls or uncertainty prevents confident verification, have a qualified shop align the lamps.
Quick Recap
Product prices and availability are accurate as of the date/time indicated and are subject to change. Any price and availability information displayed on Amazon at the time of purchase will apply.

