To add RAM to a hosted VPS, resize its virtual machine plan or replace it with a larger plan from the same provider. You do not install a physical memory module, and attaching more disk storage does not increase RAM. Most upgrades require a shutdown, reboot, migration, or replacement instance, so take a current backup, plan a maintenance window, and verify the operating system and applications after the change.
Need a server to try this on? Antihost offers Linux VPS plans with NVMe storage, full root access and a 14-day free trial.
What “adding RAM” means on a VPS
A VPS receives virtual CPU, memory, storage, and network limits from a provider-defined plan. The provider controls the underlying server, so there is no DIMM slot or USB device that you can add yourself. Increasing the VPS plan’s memory is a form of vertical scaling: the provider allocates a larger virtual machine configuration, and the guest operating system detects the additional memory after the change.
As an Amazon Associate I earn from qualifying purchases.
The Tool Desk
Outbyte Driver Updater FREEFix the driver behind crashes, sound loss and screen glitchesFind Drivers →Outbyte PC Repair FREERepair Windows errors before they cause bigger problemsFix Now →Depending on the provider, the change is either an in-place resize or a snapshot-based replacement. An in-place resize can preserve the instance and its address, while a replacement workflow may assign a new public IPv4 address. A clean shutdown and a recent snapshot are the safest starting points in either case.
Check that RAM is really the bottleneck
Do not pay for a larger plan solely because a site feels slow. First establish whether the VPS is exhausting memory. Connect over SSH and run:
#1 Best Overall

- Boosts System Performance: 32GB DDR5 RAM laptop memory kit (2x16GB) that operates at 5600MHz, 5200MHz, or 4800MHz to improve multitasking and system responsiveness for smoother performance
- Accelerated gaming performance: Every millisecond gained in fast-paced gameplay counts—power through heavy workloads and benefit from versatile downclocking and higher frame rates
- Optimized DDR5 compatibility: Best for 12th Gen Intel Core and AMD Ryzen 7000 Series processors — Intel XMP 3.0 and AMD EXPO also supported on the same RAM module
- Trusted Micron Quality: Backed by 42 years of memory expertise, this DDR5 RAM is rigorously tested at both component and module levels, ensuring top performance and reliability
- ECC Type = Non-ECC, Form Factor = SODIMM, Pin Count = 262-Pin, PC Speed = PC5-44800, Voltage = 1.1V, Rank And Configuration = 1Rx8
free -h
vmstat 1 5
free -h shows total, used, available, and swap memory in human-readable units. vmstat samples memory pressure and swap activity over time. Take several samples during the slowdown rather than relying on one idle reading.
Also check the logs for out-of-memory events and inspect any limits imposed by a container runtime, hosting control panel, system service, or application pool. A VPS can have unused host memory while an individual container or PHP worker group is capped at a lower value.
| Observation | What it suggests | Next action |
|---|---|---|
| Available memory stays low and swap activity is persistent | The workload is under sustained memory pressure | Identify the largest processes, reduce unnecessary workers, and plan a larger memory plan |
| Kernel or service logs report out-of-memory kills | The operating system has terminated a process to recover memory | Capture the process name and workload, then add headroom or correct the process configuration |
| Memory remains available but CPU is saturated | More RAM may not improve response time | Investigate CPU usage, expensive queries, and application work before resizing |
| Memory is available but disk wait is high | Storage latency or insufficient I/O may be the limiting factor | Inspect disk performance and database or logging I/O; additional RAM alone is not a disk upgrade |
| Usage grows continuously from a stable baseline | A process may have a memory leak or an unbounded cache | Find the process and correct the leak or cache policy before relying on a larger plan |
Small Lightsail WordPress instances provide a concrete failure mode: when memory is exhausted, the Linux kernel may kill MariaDB. That symptom calls for both a capacity decision and an investigation of database, PHP-worker, and caching settings. If the application is not consistently memory-bound, examine CPU saturation, disk I/O, database configuration, worker limits, caching, and leaks first.
Choose the upgrade method
The important differences are whether memory can be changed independently, whether the provider replaces the instance, what happens to storage, and whether the public address survives.
| Provider workflow | How memory is increased | Storage and plan behavior | Address and interruption considerations |
|---|---|---|---|
| DigitalOcean Droplet | Resize the existing Droplet with either a CPU-and-RAM option or a CPU, RAM, and disk option | You can choose the RAM/CPU-only path when you do not want to enlarge the disk; the other path expands disk as well | Clean shutdown, snapshot, resize, boot, and verification are recommended; expect the Droplet to be unavailable during the operation |
| Amazon Lightsail | Create a snapshot, then create a new instance from that snapshot using a larger bundle | Bundles have fixed memory, vCPUs, storage, and transfer allowances, so memory is not selected independently | The default public IPv4 address changes after stopping and starting; a static IPv4 address can be remapped to the replacement |
| Vultr Cloud Compute | Open the instance, select Settings, choose Change Plan, and upgrade | The higher plan supplies more vCPUs, RAM, and storage together; the documented upgrade does not change instance data or the file system | The plan change can require an interruption; verify the instance and services after the upgrade |
Use the provider’s documented procedure for your exact product and region. Plan names, availability, and maintenance behavior can vary, so confirm the destination plan before committing.
Rank #2

- A-Tech 32GB RAM Kit (2 x 16GB Modules), DDR4 SO-DIMM 260-Pin, 2666MHz / 2667MHz PC4-21300 (PC4-2666V)
- Non-ECC Unbuffered, JEDEC DDR4 Standard 1.2V Operating Voltage
- Compatible with select DDR4 SODIMM capable Laptop, Notebook, Mini PC, and All-in-One (AIO) computer systems. Please verify your system's memory type, form factor, and maximum supported capacity before purchasing
- Not compatible with desktop (DIMM), DDR2, DDR3, DDR5, ECC Registered (RDIMM), ECC Load Reduced (LRDIMM), or ECC Unbuffered (ECC UDIMM) memory types
- Increases available memory capacity to enhance system responsiveness, application performance, and multitasking capabilities.
Resize a DigitalOcean Droplet
DigitalOcean documents two CPU Droplet resize choices: CPU and RAM only, or CPU, RAM, and disk. The RAM-only path is useful when the disk has adequate capacity and you want to avoid an unnecessary disk expansion.
- Record the current state. Note the output of
free -h, current swap, mounted volumes, service status, resource usage, and the Droplet’s IP address. Record any firewall, DNS, or monitoring dependencies that you will test later. - Take a current snapshot or backup. A snapshot gives you a recovery point immediately before the resize. Confirm that it completed successfully rather than assuming a previously scheduled snapshot is current.
- Schedule a low-traffic window. DigitalOcean recommends performing the shutdown from the command line to reduce the risk of data corruption. Notify users and stop long-running jobs that could be interrupted.
- Shut down cleanly over SSH. A typical Linux command is
sudo shutdown -h now. Wait for the SSH session to close and the Droplet to report as powered off in the control panel. - Open the Droplet’s resize controls. Select the larger plan and choose the CPU-and-RAM-only option if you need memory and CPU but not additional disk. Choose the CPU, RAM, and disk option when storage capacity must also grow.
- Apply the resize and boot the Droplet. Allow the provider to complete the resize or migration before starting services. Do not repeatedly power-cycle the instance while the operation is in progress.
- Verify memory and applications. After SSH returns, run
free -h, check mounts and firewall rules, confirm database connectivity, and exercise the application’s critical paths. Confirm that monitoring has resumed and that no service failed during the reboot.
Increasing a Droplet’s memory and CPU improves performance when memory or CPU is the constraint, but it does not repair a memory leak, an incorrectly sized worker pool, or slow storage. Keep the pre-resize snapshot until the new configuration has been stable long enough to meet your rollback policy.
Upsize an Amazon Lightsail instance
Lightsail uses fixed-size bundles containing memory, vCPUs, storage, and a transfer allowance. You cannot add only RAM to an existing bundle. The documented path is to create a snapshot and launch a replacement instance from that snapshot with a larger bundle.
- Measure and document the current instance. Record memory and swap, disk usage, mounted paths, running services, DNS records, and the current public IPv4 address.
- Create a snapshot. In the Lightsail console, open the instance’s snapshot controls and create a fresh snapshot. Wait until it is available before proceeding.
- Create the replacement. Open Snapshots, choose Create new instance, select the snapshot, and choose a bundle with more memory. Check the associated vCPU, storage, and transfer allowances because they change with the bundle.
- Start and validate the new instance. Confirm that the operating system, application files, databases, scheduled tasks, certificates, firewall configuration, and mounted storage are present and healthy.
- Handle the public address. The default public IPv4 address changes when an instance is stopped and started. If the service uses a static IPv4 address, remap that address to the replacement instance. Otherwise, update DNS records and allow for DNS caching before decommissioning the old instance.
- Switch traffic and retain rollback capability. Test the replacement directly, move production traffic, and keep the original snapshot or instance until monitoring confirms stable operation.
The snapshot workflow is effectively a migration, not a memory-only edit. Treat it as such: verify identity, network rules, scheduled jobs, and any external allowlists that reference the old address.
Change a Vultr Cloud Compute plan
Vultr’s documented Change Plan workflow activates a plan with more vCPUs, RAM, and storage and does not change the instance data or file system.
Rank #3

- [Specs] DDR3L / DDR3 1600MHz PC3L-12800 / PC3-12800 204-Pin Unbuffered Non ECC 1.35V CL11 Dual Rank 2Rx8 based 512x8
- [Size] Module Size: 16GB KIT(2x8GB Modules) Package: 2x8GB
- [Voltage] JEDEC standard 1.35V, this is a dual voltage piece and can operate at 1.35V or 1.5V
- [Compatibility] Compatible with DDR3 Laptop / Notebook PC, Mini PC, All in one Device
- [Color] PCB Color is green
- Open the instance in the Vultr control panel.
- Select Settings, then choose Change Plan.
- Select a higher plan and click Upgrade.
- Confirm the change and wait for the plan operation to finish.
- Log in and run
free -h; then check services, mounts, firewall rules, application health, and monitoring alerts.
Because the higher plan also changes vCPUs and storage, check application licensing, CPU scheduling assumptions, and disk capacity after the operation. Keep a backup before upgrading even though the documented workflow preserves instance data and the file system.
Use swap as a safety buffer, not as extra RAM
A swap file gives the operating system room to offload inactive memory to disk. It can reduce out-of-memory crashes on instances with less than about 1.5 GB of RAM, but disk is far slower than RAM. Swap does not increase the memory allocated by your VPS plan; heavy swapping can make an application feel slower while preventing an immediate crash.
AWS’s Lightsail guidance illustrates a 650 MB swap file and persistence through /etc/fstab. Before creating one, confirm that the root volume has free space and that your provider permits swap. A typical Linux sequence is:
sudo fallocate -l 650M /swapfile
sudo chmod 600 /swapfile
sudo mkswap /swapfile
sudo swapon /swapfile
free -h
printf '/swapfile none swap sw 0 0n' | sudo tee -a /etc/fstab
Check free -h after activation and reboot during a maintenance window to confirm that the entry in /etc/fstab is valid. The 650 MB value is an example, not a universal sizing rule. Do not treat a large swap file as a substitute for correcting an unbounded process or selecting a plan with sufficient physical memory.
PC Slower Than It Used to Be?
A free scan shows the junk files, broken settings and background clutter dragging Windows down - then fixes them in one click.Free scan · Windows 10 & 11Crashes, No Sound, or Screen Glitches?
Random freezes, missing sound and display glitches usually trace back to one bad driver. Find and replace yours safely.Free scan · under a minuteDo not confuse storage with memory
An attached block-storage volume increases disk capacity. It does not add RAM to the VPS. Use a volume when the problem is full disks, large uploads, backups, logs, or database files. Resize the compute plan when the operating system is running out of memory.
Rank #4

- Capacity – 32GB RAM KIT (2 x 16GB Modules) Speed up to 2666MHz Non-ECC Unbuffered 260-Pin 1.2V SODIMM.
- Specs – PCB Color (Green or Black) and Rank (1Rx8 or 2Rx8) may vary depending on production batch. Performance and quality remain consistent across all Timetec products.
- Compatibility – Designed for selected DDR4 Laptop, Notebook, Mini PCs, and All-In-One systems(AIO) that support 260-Pin SODIMM memory. NOT compatible with Desktop DIMM slots.
- Installation – Plug-and-Play Upgrade, Quick and Easy to Install, no expertise required (please refer to your system's manual for guidelines).
- Warranty – All Timetec products are high-quality and rigorously tested to meet stringent standards. Backed by Timetec Limited Lifetime Warranty and professional technical support based in the United States.
Network-attached block storage can also have different latency and availability characteristics from the boot disk. After attaching or resizing a volume, verify its mount point and application paths separately; a successful disk resize cannot resolve out-of-memory kills.
Prepare a safe resize
- Inventory resources: record RAM, swap, disk usage, IP addresses, mounts, services, scheduled jobs, and current CPU, memory, and disk activity.
- Protect recoverability: take a fresh snapshot or backup and verify that it is usable.
- Plan downtime: expect a reboot, migration, or brief service interruption, and choose a low-traffic period.
- Choose headroom: select enough memory for current peaks and credible growth, not merely the next size if demand is rising rapidly.
- Coordinate dependencies: notify users, pause jobs that cannot tolerate interruption, and prepare DNS or static-IP changes when using a replacement workflow.
- Define rollback: know whether you will revert to a snapshot, restart the original instance, or move traffic back to the old address.
Verify the VPS after the change
- Run
free -hand confirm that the expected memory is visible. - Run
vmstatduring normal and peak activity to see whether swap pressure has fallen. - Check that all expected mounts are present and that disk usage is unchanged or intentionally expanded.
- Confirm database connectivity and inspect application logs for startup errors, permission failures, and out-of-memory events.
- Test firewall rules, inbound and outbound connectivity, TLS certificates, scheduled tasks, and background workers.
- Check DNS resolution and the public IP, especially after a Lightsail replacement.
- Confirm that monitoring agents, alerts, backups, and log forwarding are reporting from the resized or replacement instance.
Only after the new configuration is stable should you remove an emergency swap file, raise worker limits, or increase cache sizes. Changing all of those variables immediately makes it difficult to determine which change fixed—or caused—the problem.
Do these 3 things before closing this tab:
1Repair Windows errors before they cause bigger problems2Scan for outdated or missing drivers - takes under a minute3Clear out junk files and repair common Windows errorsTroubleshoot common outcomes
The VPS still reports the old RAM amount
Confirm that the resize or replacement operation completed, that you booted the intended instance, and that the operating system was restarted if the provider required it. Run free -h again and compare the instance identifier, hostname, and IP with your change record.
The application remains slow after more RAM
Use vmstat, CPU metrics, disk-wait measurements, database logs, and application timings to identify the remaining constraint. More memory cannot compensate for saturated CPU, slow storage, inefficient queries, excessive PHP workers, or a leak that continues growing.
Out-of-memory kills continue
Identify the killed process in the kernel or service logs. Check container and control-panel limits, worker concurrency, database buffers, and cache sizes. If usage is legitimate and sustained, move to a plan with more headroom rather than repeatedly increasing swap.
Best Value
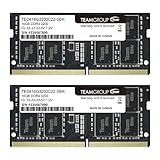
- Actual memory speed may vary depending on the system, CPU, motherboard, BIOS settings, and supported memory configuration. DDR4 3200MHz modules may operate at lower speeds such as 2933MHz or 2666MHz when supported by the host system. Please check your device specifications and compatibility before purchase.
- Adherence to JEDEC and compliance to RoHS with respect to environmental protection regulation, production and manufacturing
- All new generation product of DRAM module. Strict test and verification procedures are performed for products
- Lifetime warranty and Free technical support
- Installation video is attached in product image. ※Refer to the latest version on the official website. In case of discrepancies, the official website prevails.
The IP address changed
This is expected in the Lightsail snapshot-to-new-instance workflow when using the default public IPv4 address. Remap a static IPv4 address or update DNS and external allowlists before retiring the old instance.
Recommended Free Tools
Swap prevents crashes but performance worsens
Heavy swapping means the workload is still exceeding physical memory. Keep swap as a short-term safety margin, reduce the process or worker footprint, and schedule a plan upgrade. Do not describe the swap file as an increase to the VPS’s RAM allocation.
Disk space, not RAM, is exhausted
Adding a block-storage volume or choosing a plan with more disk addresses capacity. It will not change the memory shown by free -h; select the storage solution and the compute resize independently when both resources are constrained.
Decide whether to resize now
Resize when measurements show repeated low available memory, sustained swap activity, or out-of-memory kills under a workload that cannot be reduced safely. Before committing, correct avoidable limits and leaks, then choose a plan that leaves operating headroom for traffic spikes and planned growth. A snapshot, a low-traffic window, and post-change checks turn the operation from a risky guess into a controlled capacity change.
Quick Recap
Product prices and availability are accurate as of the date/time indicated and are subject to change. Any price and availability information displayed on Amazon at the time of purchase will apply.
What’s actually slowing this PC down?
Pick the symptom - the matching free tool is one click away.

