Short answer: the currently reviewed Privy documentation does not show a native embedded XRP Ledger (XRPL) wallet-creation or XRPL transaction-signing flow. Privy documents embedded and external wallet connection through connectOrCreate for EVM networks, and delegated signers for Ethereum or Solana. You should therefore treat Privy as an authentication and EVM-wallet component unless Privy confirms current XRPL support, then pair it with a separately verified XRPL-compatible wallet or signing service.
This distinction matters: a user can authenticate with Privy while a different component owns XRPL keys and signs XRPL transactions. The sections below show the documented Privy flow, how to keep it bounded to EVM use, and how to design an XRPL integration without promising a capability the documentation does not establish.
As an Amazon Associate I earn from qualifying purchases.
What Privy’s documentation actually supports
Privy’s connect-or-create documentation describes connectOrCreateWallet as a way to let an authenticated user connect an external wallet or create an embedded wallet. The page currently scopes that interface to EVM networks. It is not documentation for generating an XRPL account, storing an XRPL secret, or signing an XRPL transaction.
The Tool Desk
Outbyte PC Repair FREEClear out junk files and repair common Windows errorsFree Scan →Outbyte Driver Updater FREEFix the driver behind crashes, sound loss and screen glitchesFind Drivers →The separate delegated-signer documentation accepts a chainType of ethereum or solana. Delegation lets a server access wallets created on a user’s device within those documented chain types. No XRPL chain type is established there.
#1 Best Overall
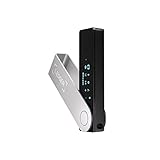
- Effortlessly build your crypto portfolio via the all in one Ledger Wallet app: buy, sell, send, receive, swap, stake and more across popular blockchains. 15,000+ coins & tokens in a single dashboard. Keep a close eye on the market. Compare service providers. Track performance. Get timely alerts. Build your portfolio with confidence.
- Enjoy Bluetooth connectivity, iOS access, and hours of battery use with this mobile-first, secure backup signer. Freedom you can depend on.
- Genuine Check: confirm your signer is authentic during setup with the Ledger Wallet app.
- Protect your signer: keep it in mint condition at all times with a bespoke Pod or Case to avoid scratches and everyday wear and tear.
That leaves a clear implementation boundary:
- Use Privy for the login experience and, where appropriate, embedded or external EVM wallets.
- Use an independently validated XRPL wallet or signer for native XRP Ledger accounts and transactions.
- Do not pass an XRPL address to an EVM-only wallet method or assume that an Ethereum/Solana delegated signer can produce a valid XRPL signature.
Check the linked pages again before committing to an architecture. Documentation and SDK behavior can change, and the reviewed pages have crawl dates ranging from several months to more than a year ago.
Authentication is not XRPL signing
Privy’s authentication overview lists email, SMS, passkeys, social login, OAuth systems, Ethereum wallets, and Solana wallets. An application can also integrate an existing OIDC-compliant identity provider. These choices establish who the user is to your application; they do not, by themselves, create an XRPL key pair or authorize an XRPL transaction.
A useful mental model is to keep three identities separate:
What’s actually slowing this PC down?
Pick the symptom - the matching free tool is one click away.
- Application identity: the user record, session, and permissions in your app.
- Privy wallet identity: an embedded or connected wallet record for a chain Privy documents, such as EVM.
- XRPL account identity: the XRPL address and key-management relationship held by the XRPL-specific component you select.
Your database can link these identities after the user has authenticated and completed an XRPL-wallet enrollment step. The link is an application decision; it is not proof that Privy controls or signs for the XRPL account.
The documented React pattern, correctly scoped to EVM
If you need the Privy portion of the flow, the React example uses useConnectOrCreateWallet from @privy-io/react-auth. The hook exposes connectOrCreateWallet, which you call from a user action. This is an EVM example and should not be presented as an XRPL implementation.
import { useConnectOrCreateWallet } from "@privy-io/react-auth";

export function ConnectWalletButton() {
  const { connectOrCreateWallet } = useConnectOrCreateWallet();

  return (
    <button type="button" onClick={() => connectOrCreateWallet()}>
      Connect or create EVM wallet
    </button>
  );
}
The exact return shape and optional arguments should follow the SDK version installed in your project. The important behavior is the user-initiated call: an existing external wallet can be connected, or an embedded wallet can be created after the configured authentication flow.
How to use this code in an XRPL product
Use the button only when your product genuinely needs an EVM wallet. If the user’s goal is an XRPL account, route them to the XRPL enrollment flow instead of silently creating an unrelated EVM wallet. If your product supports both chains, label the choices explicitly and store the selected chain beside the wallet record.
Rank #2

- Seedless by design, nothing to steal: Your private key is generated inside the EAL6+ chip and never leaves it. No seed phrase is shown or typed at setup, so a tampered device, keylogger, or phishing site has nothing to capture. 9+ years, millions of card.
- Tap once to manage your entire crypto wallet across 90 blockchains - no USB cables or Bluetooth, no batteries, no setup. Access 16,100+ coins & tokens, DeFi, NFTs, and staking instantly from your phone
- Backup without a seed phrase: Your wallet is copied to 2 backup cards with end-to-end encryption, so there are no words on paper to lose or leak. Keep them in separate places; if one card is lost, the others restore full access. Optional seed phrase for advanced users.
- Engineered to last up to 25 years: Waterproof (IP69K), shockproof and tested for extreme temperatures from −25°C to 50°C. A durable cold wallet with long‑term protection and independently audited security.
- Trusted by 6 million users worldwide - buy, sell, swap, stake, and spend cryptocurrency directly. The secure offline storage wallet designed for how people actually use crypto wallets
Do not take the address returned by this EVM flow and display it as an XRP Ledger account. Address formats, key algorithms, transaction serialization, and signing rules are chain-specific. A successful Privy callback therefore does not mean that an XRPL payment can be submitted.
A practical architecture for an XRPL app
Because the reviewed Privy pages do not establish native XRPL wallet support, design the integration as a boundary between authentication and XRPL signing.
1. Authentication and session layer
Configure the Privy login methods that fit your audience: email, SMS, passkeys, social or OAuth methods, Ethereum or Solana wallets, or an OIDC-compliant identity provider. Require a valid authenticated session before allowing a user to begin XRPL-wallet enrollment.
2. Application identity layer
Create an internal user record and a stable identifier that your own services can use. Keep this identifier independent of any blockchain address because a user may later connect more than one wallet or replace a wallet during recovery.
Outdated Drivers Are Slowing You Down
One free scan finds every outdated or missing driver and matches the right update for your exact hardware.Free scan · exact hardware matchWindows Errors? Fix Them Before They Spread
Repair common Windows errors and clear accumulated junk for a smoother, more stable PC - no reinstall needed.Free scan · no reinstall3. XRPL wallet and signer layer
Select an XRPL-compatible component only after verifying its current documentation. It must explain how XRPL keys are generated or imported, where keys are held, how signatures are produced, and whether signing occurs in the browser, on a server, or through a user-controlled device. The reviewed Privy sources do not identify a compatible provider or guarantee an integration recipe, so those claims must be validated separately.
4. Transaction service
Your application can prepare an XRPL transaction, show the user the destination and amount, request a signature from the XRPL component, and submit the signed transaction through the XRPL infrastructure you choose. Keep transaction preparation, signing, and submission as separate operations so a failed network request cannot be mistaken for a failed signature.
5. Audit and recovery layer
Record which authenticated user initiated an operation, which XRPL account was selected, what was displayed for approval, and whether signing and submission completed. Define recovery before launch: loss of a device, a rejected signature, an unavailable signer, a malformed transaction, and a network timeout all need user-facing outcomes.
Rank #3

- Unparalleled Security: Protect your assets with EAL 6+ Secure Element, offering robust defense and complete transparency
- Simple & Secure Interface: Manage your digital assets easily with a clear OLED screen for secure on-device confirmations
- Supports 1000s of Coins & Tokens: Securely handle thousands of assets, including Bitcoin, Ethereum, and more, all in one wallet
- Effortless Asset Management: Monitor and transact seamlessly with Trezor Suite, our intuitive desktop and mobile app
- Enhanced Backup Solution: Multi-share Backup eliminates single points of failure for secure cold wallet recovery
Verify XRPL support before writing integration code
Ask Privy and any prospective XRPL component for written, version-specific answers to these questions:
Do these 3 things before closing this tab:
1Scan for outdated or missing drivers - takes under a minute2Repair Windows errors before they cause bigger problems3Fix the driver behind crashes, sound loss and screen glitches- Can it create or import a native XRPL account, rather than an EVM account?
- Can it sign native XRPL transactions, and which transaction types are supported?
- Is key material embedded, externally connected, hardware-backed, or held by a service?
- Can signing happen in the browser, on your server, or only after an explicit user approval?
- Is there an SDK for your frontend framework and backend runtime?
- How are account recovery, device changes, revocation, and key rotation handled?
- Can the authentication identity and XRPL address be linked without exposing secrets?
- Which test and production networks are supported, and how are network mismatches prevented?
For Privy specifically, ask whether a current SDK now documents an XRPL chain type, native XRPL wallet creation, or XRPL transaction signing. Until an official, current page answers those questions, keep the XRPL signer outside the documented Privy wallet flow.
Implement the documented Privy portion step by step
Step 1: Decide whether you need EVM at all
Write down the chains your product will support. If the only requirement is XRP Ledger functionality, adding an EVM embedded wallet introduces an extra account type and an extra recovery path. If you also need EVM assets or contracts, expose EVM onboarding as a separate, clearly named option.
Step 2: Configure authentication
In the Privy dashboard, enable only the login methods you intend to support. If you use an existing identity system, confirm that it is OIDC-compliant and map its subject identifier to your internal user record. Authentication should complete before wallet creation or connection is attempted.
Step 3: Call the EVM connect-or-create hook
Install and configure the React SDK version used by your project, import useConnectOrCreateWallet, and call connectOrCreateWallet from a visible button or equivalent user action. Handle cancellation and provider errors in the UI; do not treat a returned EVM wallet as an XRPL account.
Free tools Windows power users keep installed
One-click scans. No signup required.
Step 4: Store a chain-qualified wallet record
Persist the wallet address together with its chain and ownership relationship. A minimal record should distinguish the internal user ID, chain name, wallet address, creation method, and status. Never infer the chain from an address string alone.
Step 5: Keep XRPL enrollment separate
When the user chooses XRP Ledger, call the XRPL-specific component you have independently verified. Show its consent and recovery instructions, then save the resulting XRPL address as a different wallet record linked to the same application user.
Rank #4

- UNPARALLELED SECURITY: Protect your assets with Trezor Safe 5's NDA-free EAL 6+ Secure Element, offering robust defense and complete transparency.
- EFFORTLESS NAVIGATION: Experience seamless crypto management with the vibrant color touchscreen, designed for intuitive and user-friendly interactions.
- ENHANCED USER EXPERIENCE: Enjoy tactile confirmation with Trezor Touch Haptic Engine, making each interaction precise and engaging.
- SUPPORTS 1000s OF COINS & TOKENS: Securely handle thousands of assets, including Bitcoin, Ethereum, and more, all in one wallet.
- EASY ASSET MANAGEMENT: Monitor and transact seamlessly with Trezor Suite, our user-friendly desktop and mobile app
Server-side Privy setup and secret handling
For a Node integration, Privy’s Node setup documentation says to obtain an app ID and app secret from the dashboard and initialize PrivyClient with those values. The page lists Node.js 20 LTS or later as a supported runtime.
Use a server-only configuration pattern:
const appId = process.env.PRIVY_APP_ID;
const appSecret = process.env.PRIVY_APP_SECRET;

// Initialize PrivyClient with appId and appSecret
// using the constructor and SDK version documented for your project.- Create the credentials in the Privy dashboard.
- Store them in your deployment platform’s secret store or server environment.
- Initialize the client only in backend code running Node.js 20 LTS or later.
- Expose narrowly scoped backend endpoints to the browser; never return the app secret.
- Rotate or revoke credentials according to your operational policy and update deployments safely.
The server client can support Privy operations for the documented wallet types. It does not turn those operations into XRPL signing APIs. Keep XRPL signing credentials and policies under the XRPL component’s security model.
Mapping users with Privy external IDs
Privy’s external ID feature lets an app assign its own identifier when creating a wallet through the API. The identifier is write-once, unique per app, and can be used to address that wallet through API endpoints. The documented example is an Ethereum wallet, so treat this as an application-level mapping aid rather than evidence of XRPL support.
Choose an ID that is stable but does not contain secrets or unnecessary personal information. Before creating a wallet, enforce uniqueness in your own user database and decide what happens if the account is merged, deleted, or recovered. For a multi-chain product, include the chain in your internal data model even when the external ID is shared across the user’s wallet records.
Security controls for a hybrid design
- Separate secrets: never place the Privy app secret, XRPL private key, seed, or signing credential in browser JavaScript, logs, analytics payloads, or client-visible error messages.
- Display before signing: show the XRPL account, destination, amount, network, and any fee information supplied by the signer or transaction service before requesting approval.
- Bind intent to identity: check that the authenticated session is authorized to act for the selected XRPL address. Do not trust a wallet address posted by the browser without server-side verification.
- Use least privilege: separate read-only account lookup from signing and submission permissions. A service that only prepares transactions should not hold signing authority.
- Protect against replay: use the XRPL component’s documented sequence, expiration, or equivalent safeguards, and make retries idempotent at the application layer.
- Audit outcomes: record request, approval, signature, submission, and final status as separate events. A timeout is not proof that a transaction was rejected.
- Plan recovery: document what users can do after losing a device or authenticator and what your support team can and cannot reset.
Common failure modes and fixes
| Symptom | Likely cause | Fix |
|---|---|---|
| An EVM wallet appears when the user expected an XRP Ledger account | The EVM connect-or-create method was used for an XRPL requirement | Label the flow as EVM and route XRPL users to a separately verified XRPL wallet component. |
A backend delegation request rejects chainType: "xrpl" |
The documented delegated-signer chain types are Ethereum and Solana | Do not retry with undocumented values; confirm current Privy support and use an XRPL-specific signer if necessary. |
| An XRPL address is stored against an EVM wallet record | The data model omitted a chain field | Make chain and address separate, required fields and migrate ambiguous records before enabling transactions. |
| Users can log in but cannot sign an XRPL transaction | Authentication succeeded, but no XRPL signing authority was configured | Complete XRPL component selection, key enrollment, consent, and signing integration independently of login. |
| The server cannot initialize Privy | Missing or incorrect app credentials, unsupported runtime, or a client/server boundary mistake | Check dashboard credentials, run the supported Node.js 20 LTS-or-later runtime, and keep initialization on the server. |
| A wallet lookup works for one record but not another | An external ID was reused or changed after creation | Respect the external ID’s write-once and unique-per-app rules, and keep your own immutable mapping. |
Choosing an implementation path
| Product requirement | Documented Privy fit | Architecture decision |
|---|---|---|
| EVM wallet onboarding | connectOrCreate documents external and embedded wallets on EVM networks. |
Use the React flow and the documented Privy server features. |
| Authentication for an XRPL app | Privy documents multiple web2 and web3 login methods. | Use Privy for identity, then connect a separately verified XRPL wallet or signer. |
| Native XRPL wallet creation and signing | The reviewed pages do not document it. | Pause implementation until Privy confirms support or select and validate an XRPL-specific component. |
| Server access to delegated wallets | Delegated signer documentation lists Ethereum and Solana. | Use only those documented chain types unless current official documentation adds another. |
This framework prevents a common architectural mistake: treating a successful login or EVM wallet callback as proof that the application can custody or sign for an XRP Ledger account.
Launch checklist
- Write the supported-chain list in product and technical documentation.
- Link every wallet record to an explicit chain value.
- Verify the current Privy pages for connect-or-create, delegated signers, authentication, Node setup, and external IDs.
- Obtain the app ID and app secret in the dashboard and keep both on the server.
- Run backend services on Node.js 20 LTS or later when following the documented Node setup.
- Test EVM connection, EVM embedded-wallet creation, cancellation, and provider failure independently.
- Test XRPL enrollment, signing refusal, network failure, retry, and recovery with the XRPL component you selected.
- Confirm that no browser bundle, log, or error response contains a server secret or private key.
- Have Privy confirm whether native XRPL support has been added since the documentation pages were published or crawled.
Until that confirmation exists, the accurate implementation is a hybrid: Privy can provide the documented authentication and EVM wallet experience, while an independently verified XRPL-compatible component handles native XRP Ledger account management and signing.
Recommended Free Tools
Quick Recap
Product prices and availability are accurate as of the date/time indicated and are subject to change. Any price and availability information displayed on Amazon at the time of purchase will apply.

