Recommended Free Tools
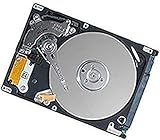
Removing the hard drive from an HP Pavilion is usually straightforward, but the exact steps depend on what you actually have inside: a 2.5-inch SATA drive (common in many Pavilion models) or an M.2 SSD (common on newer builds).
This guide covers both. Follow the section that matches your drive type, and take your time—HP laptops often have hidden screws and delicate battery connectors.
If you’re doing this to replace the drive, back up first. If you’re doing it for data recovery, avoid running the laptop repeatedly after the drive starts clicking or failing.
Before You Start: What to Confirm on Your HP Pavilion
The fastest way to avoid rework is to confirm the drive type before you remove anything. Most HP Pavilion laptops use either a 2.5-inch SATA bay or an M.2 slot (sometimes both).
Check what drive type you have (without opening the laptop)
On Windows 10 or Windows 11, you can often identify the drive type:
- Press Ctrl + Shift + Esc to open Task Manager.
- Go to Performance > look for Disk. Some systems show SSD vs HDD.
- Open Device Manager (right-click Start > Device Manager).
- Expand Disk drives to see the model name of your storage.
- If you see an M.2/NVMe model name, you likely have an M.2 SSD.
If you can’t identify it from software, use the physical checks in the next sections.
Confirm the model and generation (helps locate the right screws)
Look for the exact Pavilion model label on the bottom cover (example formats include 15-cs, 14-dw, 17t, etc.). The drive placement and bottom-cover screw pattern can vary by generation.
Tools and Supplies You’ll Need
You don’t need a full electronics kit, but you do need the right screwdriver and safe handling materials.
Do these 3 things before closing this tab:
1Clear out junk files and repair common Windows errors2Scan for outdated or missing drivers - takes under a minute3Repair Windows errors before they cause bigger problems- Precision screwdriver: commonly Phillips #0 or Phillips #1 for laptop bottom screws; sometimes Torx is used in select HP models.
- Plastic spudger or guitar pick to release the bottom cover without cracking tabs.
- ESD-safe method: at minimum, touch bare metal (or use an anti-static wrist strap if you have one).
- Small container for screws and a way to label where each screw came from.
- Optional: a USB-to-2.5-inch SATA enclosure or SATA-to-USB adapter for testing the removed drive.
Safety and Pre-Removal Prep
Before you open the chassis, treat this like a battery-powered device repair.
Back up and plan what you’ll do next
If your goal is replacement: copy your files first if the drive is still readable. If your goal is repair or recovery: avoid repeated boots and downloads.
Rank #2

- Migrate and clone data from old drives with ease using our free Seagate DiscWizard software tool
- Store more, compute faster, and do it confidently with the proven reliability of BarraCuda internal hard drives
- Build a powerhouse gaming computer or desktop setup with a variety of capacities and form factors
- The go to SATA hard drive solution for nearly every PC application—from music to video to photo editing to PC gaming
- Confidently rely on internal hard drive technology backed by 20 years of innovation
Power down correctly
- Shut down the laptop (not just sleep/hibernate).
- Unplug the AC adapter.
- Press and hold the power button for 10–15 seconds to discharge residual power.
Work on a clean, static-aware surface
Use a desk or table with good lighting. Keep the screws organized—some screws are longer and can damage components if installed in the wrong holes.
Step-by-Step: Remove a 2.5-Inch SATA Hard Drive (Most Common in HP Pavilion Laptops)
Use this section if you see a 2.5-inch drive bay (a metal caddy with a rectangular drive that looks like a typical laptop HDD/SSD bracket) and a SATA connection or ribbon/cable.
1) Remove the bottom cover
- Flip the HP Pavilion over and locate the screws on the bottom panel.
- Remove every bottom screw you see. Put them in labeled groups (for example: front, center, back).
- Use a plastic spudger to gently pry along the edges. Start near a corner and work slowly around tabs.
- If the cover won’t lift, check for missed screws—HP sometimes hides one under a rubber foot.
2) Disconnect the battery before touching the drive
Many HP Pavilion laptops have a small battery connector that must be unplugged to prevent accidental shorts.
- Locate the battery cable (usually a multi-pin connector on the motherboard).
- Unplug the battery connector by pulling the connector housing, not the wires.
If your Pavilion uses a different design (battery ribbon connector), disconnect it by releasing the latch mechanism—don’t force it.
3) Locate the 2.5-inch drive caddy/bay
Look for a metal bracket holding the drive, often near the center or toward one side. You may see a SATA data cable and sometimes a SATA power cable, depending on the design.
4) Remove the screws that secure the drive
- Find the screws attaching the 2.5-inch drive to the caddy or chassis.
- Remove those screws and keep them separate.
5) Disconnect the drive (and slide it out if required)
- If the drive is connected with a cable, carefully unplug the connector. Align and pull straight; don’t yank at an angle.
- Some caddies slide out first. If it resists, re-check screws—don’t force the connector.
- Once free, lift the drive out of the bay.
6) Inspect the drive and connections
Before you set it aside:
- Check for bent connector pins (rare but possible).
- Confirm the caddy isn’t left with a loose screw that could rattle later.
If Your Pavilion Uses an M.2 SSD Instead (No 2.5-Inch Drive Caddy)
Many newer HP Pavilion models ship with an M.2 NVMe SSD and may have little or no 2.5-inch bay. If you see a stick-like drive (about the size of a thumb) in a slot, use these steps.
Free tools Windows power users keep installed
One-click scans. No signup required.
Rank #3

- 1TB Capacity
- 8MB Buffer, SATA 3.0Gb/s Interface, 2.5inch Laptop Hard Drive
- 9.5mm High, Rotation Speed of 5400RPM
- Works for any brand SATA Interface Laptop, Macbook, Notebook, USB Enclosure and etc
1) Open the bottom cover (same safety steps)
Follow the same bottom-cover removal method: remove all screws, use a plastic spudger, and disconnect the battery connector first.
2) Locate the M.2 slot
Find the M.2 card slot on the motherboard. You’ll typically see one SSD already installed and a single screw holding it in place.
3) Remove the M.2 SSD
- Locate the retaining screw on the end of the M.2 SSD.
- Remove that screw and set it aside.
- Gently pull the SSD upward at a shallow angle (usually around 20–30 degrees) until it releases.
- Remove it from the slot.
4) Note the SSD size before buying a replacement
M.2 SSD lengths are commonly 2280, 2242, or 2230. The number refers to millimeters (e.g., 2280 = 22mm wide, 80mm long). You don’t want a mismatched length or standoff position.
After Removal: Handling, Testing, and Reinstalling
Once the drive is out, you have two jobs: protect it and plan your next boot.
Windows Errors? Fix Them Before They Spread
Repair common Windows errors and clear accumulated junk for a smoother, more stable PC - no reinstall needed.Free scan · no reinstallCrashes, No Sound, or Screen Glitches?
Random freezes, missing sound and display glitches usually trace back to one bad driver. Find and replace yours safely.Free scan · under a minuteHow to store the drive safely
- Use an anti-static bag if you have one.
- Avoid touching gold connector areas.
- Place the drive in a rigid container or SSD case to prevent flexing.
Reinstalling the old drive (or the new one)
Reverse the removal steps:
- Reconnect the drive or seat the M.2 SSD at the correct angle.
- Install the retaining screws (don’t overtighten).
- Reconnect the battery cable.
- Re-seat the bottom cover and press tabs into place.
- Reinstall all bottom screws in their original positions.
Testing the removed drive (optional but useful)
If you’re reusing the drive or troubleshooting, test it using a USB adapter/enclosure:
- For 2.5-inch SATA drives: use a SATA-to-USB enclosure.
- For M.2 NVMe drives: use an NVMe USB adapter that supports the key and protocol (NVMe vs SATA M.2 matters).
If the drive doesn’t show up in Disk Management, it may be dead or power/adapter incompatible.
Rank #4

- [ Fast and Extraordinary ]: KingSpec 2.5 SATAIII SSD adopts 3D NAND flash memory and semiconductor components, which makes it a high-performance and reliable storage device. Max Sequential read speeds are up to 550 MB/s and max sequential write speeds are up to 520 MB/s. which greatly improves the performance and efficiency of your computer. You get the experience of fast transfers and faster file loading
- [ High-Performance ]: KingSpec 2.5 SATA SSD has the characteristics of shockproof and anti-drop, so you don't have to worry even if the computer drops. Quiet and noiseless, low power consumption, high and low-temperature resistance, faster-booting speed, and program loading speed
- [ More Reliable &More Stable ]:The 2.5" SATA SSD supports wear leveling, garbage collection, over-provisioning, native command queuing, TRIM, S.M.A.R.T, etc, and also passed strict quality-test during the production process. That let it have stable and trustworthy performance, It's great for business and entertainment
- [ Wide Compatibility ]: The Internal SATA SSD compatible with windows 10 / 8.1/8 /7 or later, DOS, Linux, Unix. The interface SATA Rev. 3.0 (6Gb/s) is backward compatible with SATA Rev. 2.0. compatible with laptops, desktops, and all-in-one computers
- [ 3-Year Warranty ]: All KingSpec internal SSD is backed with a 3-year limited warranty, and enjoy lifetime technical support. We have strict control standards for our products, each hard drive has been tested countless times to ensure that there is no quality problem before sending it to you, Any questions or suggestions about the product, We will give you the most sincere service
Troubleshooting When You Can’t Remove the Drive
These are the issues you’ll actually run into on real HP Pavilion tear-downs.
Bottom cover won’t open
- Check for hidden screws: look under rubber feet, labels, and near ports.
- Stop forcing tabs: if you feel major resistance, the cover is likely still held by screws or a latch.
Battery connector won’t unplug
- Make sure the connector latch is released (some use a small plastic clip).
- Pull straight—don’t wiggle the cable aggressively.
Drive won’t lift after removing screws
- It may be clipped into a caddy alignment channel.
- For SATA drives, you might still be connected to a cable—double-check for a hidden connector.
- Re-check for an overlooked screw holding the metal bracket.
After reinstall, laptop won’t boot
Common causes:
- Battery not reconnected: open the bottom cover and confirm the battery connector is seated.
- Drive not seated: for M.2, the SSD must be fully inserted and secured with the retaining screw.
- Wrong drive type: NVMe won’t work in a SATA-only M.2 slot (and vice versa).
- Drive detection delay: wait longer; some BIOSes take extra seconds after first boot with a new drive.
Common Mistakes to Avoid
- Mixing screw lengths: long screws in short holes can puncture components.
- Skipping battery disconnect: it increases the chance of shorts when you touch connectors.
- Pulling cables by the wires: always grip the connector housing.
- Overtightening M.2 screws: you can strip the standoff or crack the board.
- Buying the wrong replacement: confirm whether you need 2.5-inch SATA (often 7mm height) or M.2 NVMe with a specific key/length.
Alternatives: Cloning or Replacing Without a Full Swap
If your Pavilion still boots and you just want a bigger/speedier drive, cloning can save time.
The Tool Desk
Outbyte Driver Updater FREEScan for outdated or missing drivers - takes under a minuteDriver Scan →Outbyte PC Repair FREERepair Windows errors before they cause bigger problemsFix Now →Clone the drive before you remove it
Common approaches include manufacturer tools or third-party cloning software. Once cloned, you can swap drives and boot immediately (assuming the target drive is supported and detected).
Use a fresh install if the current OS is unreliable
If the system is unstable or the drive has errors, a clean Windows install is often faster than repairing a failing setup. Plan for drivers and any app licensing you need afterward.
FAQs
Do I need to remove the battery to take out the hard drive?
Yes, for safety. Disconnecting the battery connector reduces the risk of shorting the motherboard while you unplug or reseat the drive.
Will removing the hard drive erase my data?
Removing the drive doesn’t erase it by itself. However, if you plan to replace it or format the new/old drive, data will be affected. If recovery matters, avoid formatting and try enclosure-based read tests first.
Best Value

- Reliable everyday computing
- WD quality and reliability
- Free Acronis True Image WD Edition cloning software
- WD F.I.T. Lab certified to work with a wide range of high-performance PC configurations
What’s the difference between an M.2 NVMe SSD and an M.2 SATA SSD?
NVMe SSDs use the PCIe protocol and typically install for best performance; SATA M.2 uses the SATA protocol. Not all laptops support both—your Pavilion’s slot support matters.
How can I tell if my Pavilion has a 2.5-inch bay?
Software tools can sometimes show HDD vs SSD, but the sure method is physical inspection after opening the bottom cover: look for a 2.5-inch metal caddy/bracket.
Can I use the removed drive as an external drive?
Often, yes. A 2.5-inch SATA drive can be used with a SATA-to-USB enclosure. An M.2 NVMe drive can be used with an NVMe USB adapter, but the adapter must match the SSD type and key.
Final Thoughts
If you treat this like a careful service job—power down fully, disconnect the battery, remove the correct screws, and match the drive type—you can swap storage in an HP Pavilion without surprises.
What’s actually slowing this PC down?
Pick the symptom - the matching free tool is one click away.
If anything feels stuck, stop and re-check screws and connectors. Most “it won’t come out” problems come from one missed screw, a clipped caddy alignment, or an M.2 vs 2.5-inch mismatch.
Quick Recap
Product prices and availability are accurate as of the date/time indicated and are subject to change. Any price and availability information displayed on Amazon at the time of purchase will apply.



