For a first dress, choose a genuinely simple beginner pattern, measure yourself against that pattern’s current chart, use the fabric and notions it specifies, and make a fitting check before cutting valuable cloth. Cotton or another stable woven fabric can be easier to handle, but the pattern’s required drape and structure come first. Careful preparation, accurate grainlines and markings, pressing, and clean finishing matter more to the result than buying a particular machine or premium material.
What makes a good first dressmaking project?
Your first garment should teach a small set of repeatable skills rather than combine every feature you eventually want to sew. Margaret Smith’s 1944 USDA National Agricultural Library guide, Making a Dress at Home, advises beginning with “a simple dress with few complicated details and clear sewing directions.” That practical principle still works: select a pattern with a manageable number of pieces, straightforward construction, and instructions you can follow without guessing.
As an Amazon Associate I earn from qualifying purchases.
Start with a pattern that limits unfamiliar techniques
Basic seams, darts, seam finishes, hems, and pressing establish the foundation for later garments. Sleeves, fitted waistbands, zips, buttonholes, facings, unusual closures, and complex gathers can each be learned, but putting several of them into the first project increases the number of places a beginner can become stuck. A pattern labelled “easy” may still assume knowledge of terms or techniques, so read its instructions and illustrations before buying fabric.
Free tools Windows power users keep installed
One-click scans. No signup required.
Define quality as a process, not a price tag
For a beginner garment, quality means that the design, fabric, and construction agree; the pieces were cut on the correct grain; the fit was checked; and seams, edges, hems, and pressing were handled carefully. A more expensive fabric or machine cannot correct an unsuitable pattern, inaccurate cutting, or skipped fitting. Available teaching guidance does not establish a laboratory durability score for a particular fiber, brand, or machine, so judge the finished work by these observable construction standards instead.
#1 Best Overall

- 27 Unique Built-in Stitches: The Brother XM2701 sewing machine includes 27 built-in stitches including decorative, blind hem, zigzag, and stretch stitches and an auto-size buttonhole
- Automatic Needle Threader and Drop-in Top Bobbin: This beginner sewing machine is also great for experienced users; it includes an automatic needle threader that perfectly pushes thread through the needle and a convenient, jam resistant drop-in top bobbin
- Included Accessories: The XM2701 comes with 6 sewing feet, 3-piece needle set, twin needle, 4 bobbins, manual and more
- Versatile Free Arm: This free arm sewing machine is a simple sewing machine, perfect for a wide range of everyday sewing projects, and users from beginners to advanced
- At Your Side Support: The XM2701 small sewing machine comes with Brother At your side support offering free technical support via online, live chat or phone for the life of your machine
How to choose a beginner dressmaking pattern
Before purchasing or cutting anything, inspect the pattern envelope or product listing and its guide sheet. The pattern itself should answer most of the practical questions that determine whether the project is suitable.
| Check before buying | What to look for | Why it matters |
|---|---|---|
| Skill level | A beginner designation, not merely a vague “easy” label | Difficulty labels vary; the instructions may still presume prior knowledge. |
| Views | Every version included, with its different details and piece list | A collar, sleeve, closure, or hem variation can change the difficulty and materials. |
| Measurement chart | The current body-measurement table and size range | Sewing sizes do not reliably match ready-to-wear labels. |
| Finished measurements | Finished garment dimensions, when supplied | They help you assess ease and plan fitting rather than relying on the body chart alone. |
| Fabric guidance | Recommended fiber types, weave or knit, weight, drape, and required width | The design depends on fabric behavior; a cloth that is easy to sew may still be wrong for the pattern. |
| Yardage | Amount for your selected size at the stated fabric width | The same size can require a different amount when the width changes. |
| Notions | Interfacing, zips, buttons, elastic, lining, or other listed supplies | Missing a small component can stop construction late in the project. |
| Instruction format | Illustrations, terminology, seam allowances, and a complete step sequence | Clear visuals and definitions reduce guesswork during assembly. |
| Fitting help | Adjustment guidance or a reliable explanation of where measurements are used | Preliminary fitting is easier when the pattern explains its intended checkpoints. |
Read the guide sheet before you shop
The guide sheet identifies which pieces belong to each view, shows the fabric layout, and gives step-by-step construction instructions. Read the entire sequence once. Note any step that uses a term you do not know, then decide whether you can learn it from a trusted sewing lesson or practice it on scraps. This is faster than discovering halfway through the garment that a required closure or facing was omitted from your shopping list.
Use a pattern with illustrated instructions
For a first project, diagrams are not decoration: they show right and wrong sides, alignment points, and the order in which layers meet. Compare patterns on the clarity of their illustrations and wording, the number of unfamiliar techniques, the fabric and notion requirements, the included views, and the availability of fitting help. No single publisher or size system can be treated as universal; choose using these features rather than a brand name.
How to choose your pattern size and check the fit
Measure your body using the points requested by the selected pattern, write the measurements down, and compare them with that pattern’s current chart. Do not select a sewing size simply because the number resembles your usual shop size.
Why clothing-label size is not a reliable guide
Smith’s 1944 advice is direct: “Don’t get the same size in a pattern as you do in ready-to-wear clothes.” The warning is historical, but its practical lesson remains sound. Pattern companies use their own measurement standards, and those standards can differ from one another. Use the chart printed for the pattern and edition you are making; do not transfer a number from a different company or from a shop garment.
Rank #2

- 17 built-in stitches
- 4-step buttonhole style
- Reverse button
- Free arm for sewing
- LED lighting for the work area
Compare body and finished measurements
Body measurements tell you which size line to begin with. Finished garment measurements, when provided, tell you how much room the design includes. Compare both before cutting. If different body areas point to different size lines, trace or blend the relevant lines as the instructions allow rather than forcing your body into one number. The pattern’s adjustment guidance should control where and how you alter it.
Make a preliminary fitting check
Many experienced sewers adjust a pattern before cutting their final fabric. A test version made from inexpensive cloth, or a fitting check at an early construction stage, can reveal that the neckline, bust, waist, hip, or length needs attention. Threads’ beginner guidance recommends measuring and preliminary fitting because correcting paper or test cloth is safer than discovering a problem after cutting expensive fabric. Mark any adjustment clearly, transfer it to the pattern, and only then cut the fabric you intend to wear.
What fabric is easiest for a beginner?
The pattern’s recommended fabric is the controlling requirement. It reflects the garment’s intended drape, structure, stretch, and weight. Hobbycraft identifies cotton as a beginner-friendly choice because it is generally easy to handle, and a plain, stable woven can make layout and cutting less frustrating. That is a practical starting point, not a universal rule: cotton that is too light, stiff, slippery, or unsuitable for the design can still produce a poor result.
Match fabric behavior to the design
- Read the recommendation first. If the pattern calls for a fabric with drape, substituting a rigid cloth changes the silhouette. If it requires structure or stability, an overly fluid fabric may not support the intended details.
- Favor uncomplicated handling for the first attempt. A stable woven with a clear, even surface is usually easier to position and mark than a slippery, highly stretchy, loosely woven, or heavily textured cloth. This is a beginner-oriented inference, not permission to ignore the pattern.
- Buy for the stated width and size. Use the yardage row for your size and the width printed in the instructions. A narrower bolt can require more fabric than the headline quantity suggests.
- Inspect before cutting. Check for visible flaws, strong directional designs, and a clear selvedge so you can follow the layout diagram accurately.
Preshrink washable fabric appropriately
The Wiley sewing-book excerpt recommends preshrinking washable fabric before sewing so later laundering is less likely to change the finished garment’s size. Follow the care instructions for the actual cloth. There is no single treatment that is correct for every fiber, coating, finish, or fabric that cannot be washed. Let the fabric dry as its care label directs and press it sufficiently flat for accurate cutting.
Materials and tools for a first dress
You do not need a premium equipment package. Assemble the items the pattern requires, then add a small set of tools that make measuring, cutting, marking, and pressing reliable.
Rank #3
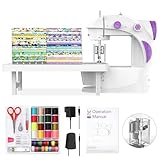
- 【Fabric Bundles】Equipped with 20pcs 8” x8”in and 100% cotton fabrics square with different patterns, it helps to create your unique sewing project, do the patch work or school projects. And it is also the great practice tool for sewing.
- 【Tutorial Videos】Accompanying the fabrics provided, we prepared a lot of videos which is always keep updating. You would be inspired to create your craft project with our videos!!
- 【For Beginner】Finger guard makes this portable sewing machine more safe for a starter. And we equipped a slow and a standard stitching speed for more users.
- 【Double thread】Although the size is mini, it is designed with double-thread as full size sewing machine which is able to sew at most 5-layer fabrics without manual knot ending.
- 【Full Tool Kits】It comes with abundant sewing tools to help start sewing as bobbins, scissor, measuring tape, thimble, needle threader and needles. And welcome to contact us to get different language of manual including German/French/Italian/Spanish/English/Japanese.
| Item | Role in the project | Beginner guidance |
|---|---|---|
| Pattern and guide sheet | Supplies the pieces, layout, measurements, and construction order | Keep the envelope and all instructions together throughout the project. |
| Recommended fabric | Provides the garment’s drape and structure | Buy the amount for your size and the stated fabric width; preshrink washable cloth as appropriate. |
| Fabric scissors | Cuts cloth cleanly | Reserve them for fabric so the edge remains dependable; cut on a stable surface. |
| Flexible tape measure | Records body measurements and checks lengths | Use the measurement points named by the pattern, not a clothing-label size. |
| Pins or another securing method | Holds paper and fabric layers in position | Use enough to prevent shifting while respecting the pattern’s recommended method. |
| Marking tool | Transfers notches, darts, fold lines, and other symbols | Test that marks are visible and removable on a scrap first. |
| Iron and pressing surface | Sets seams and keeps pieces accurate | Press during construction rather than waiting until the end; use the fabric’s care guidance. |
| Sewing machine or approved hand-sewing method | Joins the garment according to the pattern | The instructions determine what equipment is required; no particular model is established as necessary. |
| Pattern-specified notions | Interfacing, buttons, zips, elastic, lining, or other components | Buy the exact type and quantity listed for your chosen view. |
Threads’ getting-started material and the SEW-lutions index also treat marking, pressing, fabric, notions, fitting, and garment techniques as core subjects. They do not establish that every beginner needs a particular machine feature, specialty presser foot, or premium iron. Start with the equipment your instructions actually require and add tools when a later project demonstrates a real need.
Recommended Free Tools
A reliable preparation and cutting sequence
Preparation is where many avoidable errors are removed. Work through this sequence before the first permanent seam.
- Select one view. Circle or otherwise identify the exact version you are making. Separate the pieces and notions for that view from options you will not use.
- Read all requirements. Confirm skill level, size chart, finished measurements, fabric type, yardage at the stated width, seam allowances, and notions. Resolve unfamiliar terms before cutting.
- Measure and choose the size. Take the requested body measurements, compare them with the current chart, and note any areas that call for an adjustment. Check finished measurements where supplied.
- Buy and prepare the fabric. Purchase the listed quantity for your size and width. Preshrink washable fabric according to its care instructions, then dry and press it so it lies flat.
- Inspect and orient the cloth. Find the selvedges, identify any nap or one-way design, and check that the fabric is not distorted. A directional surface can require every piece to face the same way.
- Prepare the paper pieces. Use only the size line you need, or blend lines where your measurements require it. Preserve notches, grainlines, fold symbols, and other markings.
- Follow the layout diagram. Place each piece as shown for your size and fabric width. Keep every grainline parallel to the selvedge unless the instructions explicitly specify another orientation.
- Secure, cut, and mark. Pin or otherwise secure the paper, cut accurately, and transfer darts, notches, fold lines, and matching points. Mark the wrong side when the fabric makes orientation difficult.
- Test unfamiliar techniques. Sew a scrap using the same fabric and construction conditions before committing to a visible seam. Use the sample to understand the operation and check that your settings produce the result the instructions describe.
How to sew the garment without losing control
Keep the instruction order
Pattern steps are sequenced so that enclosed seams, facings, closures, and pressing remain accessible. Read the next step before sewing the current one, confirm which pieces and sides are involved, and stop if the shapes or markings do not agree. Do not improvise a shortcut simply because two pieces appear to fit; an early change can make a later facing, sleeve, or closure impossible to attach correctly.
Press as you build
Pressing sets seams and keeps subsequent edges from drifting. Follow the fabric’s care guidance and press each completed seam when the instructions call for it. A cleanly pressed seam allowance is easier to match, finish, and hem than one left rumpled until the garment is complete.
Use fitting checkpoints
Pause at the preliminary-fitting point identified by the pattern or before a major section becomes difficult to alter. Check the garment against the wearer and compare it with the intended finished measurements. If it needs an adjustment, record what changed and transfer that information consistently to the remaining pieces. The purpose is not to chase an abstract “perfect” size; it is to catch a mismatch while correction is still practical.
What’s actually slowing this PC down?
Pick the symptom - the matching free tool is one click away.
Rank #4
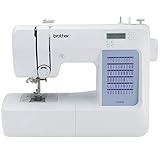
- 60 UNIQUE BUILT-IN STITCHES: The Brother CS5055 sewing machine includes 60 built-in stitches including utility, decorative and heirloom stitch functions, and 7 1-step auto-size buttonholes
- IMPROVED NEEDLE THREADER: Easier than ever to use, the automatic needle threader reliably pushes the thread through the needle. The convenient, jam resistant drop-in top bobbin easy to load and helps ensure your bobbin stays in place
- INCLUDED ACCESSORIES: The CS5055 includes 7 sewing feet, 4 bobbins, a needle set, a trilingual English/Spanish/French user manual and more
- METAL FRAME and FIXED NEEDLE BAR: The durable metal frame construction allows your machine to tackle any project, and the needle is fixed in place while you work, allowing for cleaner stitching and even lines
- LARGE NEEDLE-TO-ARM WORKSPACE: A larger workspace with increased width in needle-to-arm space allows users to work on larger projects
| Checkpoint | What to verify | If it is wrong |
|---|---|---|
| After cutting | All required pieces are present, correctly sized, and marked | Stop before sewing; compare the piece names and symbols with the chosen view. |
| After the first major joins | Matching notches, seams, and grain direction agree | Unpick and realign rather than forcing the next piece to fit. |
| At preliminary fitting | Key body areas and garment length correspond to the intended measurements | Document the adjustment and apply it to the pattern or remaining pieces. |
| Before closures and hems | Edges are even, the garment hangs as intended, and the chosen view is still correct | Resolve alignment or length issues before permanently finishing the edge. |
| Final finish | Seams, edge finishes, hems, and pressing are neat and secure | Trim or rework only where the instructions and fabric allow; do not hide a structural error with extra bulk. |
Building skill after the first dress
Once the first garment is wearable, repeat the skills that caused the most uncertainty before adding several new variables. A sensible progression is:
- Foundation: straight seams, accurate seam allowances, pressing, and simple hems.
- Shaping: darts, controlled ease, and fitting adjustments.
- Finishing: seam finishes, facings, and clean neckline or armhole edges.
- Closures and structure: zips, buttonholes, buttons, interfacing, and more involved waist treatments.
- Complex garment details: sleeves, collars, lining, gathers, and designs that combine several techniques.
This progression follows the teaching emphasis in Threads and the SEW-lutions garment-technique index: master basic construction and fit before stacking on elaborate details. Keep notes about the pattern, fabric behavior, adjustments, and steps that required practice. Those notes become a personal reference for the next project.
Common beginner mistakes and how to recover
Choosing by the shop size
Symptom: The garment is unexpectedly tight or loose even though the printed number matched a familiar clothing label. Recovery: Return to the selected pattern’s body chart and finished measurements. Record actual measurements and use the pattern’s adjustment guidance; do not assume a different ready-to-wear label will solve it.
Ignoring fabric width or the layout diagram
Symptom: The purchased amount does not fit all pieces, or a directional design runs the wrong way. Recovery: Check the yardage row for your size and the stated width, then repeat the layout with the selvedges and any nap or one-way design correctly oriented. Do not cut until every required piece fits the diagram.
Crashes, No Sound, or Screen Glitches?
Random freezes, missing sound and display glitches usually trace back to one bad driver. Find and replace yours safely.Free scan · under a minuteWindows Errors? Fix Them Before They Spread
Repair common Windows errors and clear accumulated junk for a smoother, more stable PC - no reinstall needed.Free scan · no reinstallCutting before preshrinking
Symptom: The finished garment changes size after its first wash. Recovery: For future washable projects, preshrink according to the cloth’s care instructions before cutting. For the current garment, follow its care label and assess whether an alteration is possible; do not assume every fiber can be corrected the same way.
Best Value
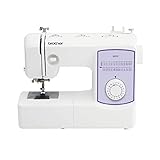
- 37 unique built-in stitches: The GX37 features 37 unique, built-in stitches and an auto-size buttonhole
- Automatic needle threader and drop-in top bobbin: This sewing machine includes an automatic needle threader that perfectly pushes the thread through the needle and a convenient, jam resistant drop-in top bobbin
- Included accessories: The GX37 includes 6 sewing feet, needle set, bobbins, manual and more
- Versatile free arm: The Brother GX37 is perfect for a range of everyday sewing and quilting projects, for every user from beginner to the advanced
- At your side support: The GX37 sewing machine sewing machine comes with Brother at your side support offering free technical support via online, live chat or phone for the life of your machine
Skipping the fitting check
Symptom: A major fit problem appears only after expensive fabric has been assembled. Recovery: Make a preliminary fitting or test version on the next project, and transfer any adjustment to the paper pattern before cutting final cloth. Threads specifically recommends preliminary fitting and adjustment as part of the beginner process.
Continuing when pieces do not match
Symptom: Notches, seam lengths, or right and wrong sides disagree. Recovery: Stop and compare the piece names, chosen view, markings, and instruction step. Unpick and correct the source of the mismatch; stretching or forcing the pieces can distort the garment and conceal the real error.
What “good quality” means for a beginner garment
A successful first dress does not need couture-level complexity. It should show that you made informed choices and controlled the process:
- The pattern difficulty matches your current skills and its instructions are complete enough to follow.
- The fabric suits the design’s drape and structure, was bought for the correct width, and was prepared according to its care requirements.
- Grainlines, fold placements, directional designs, and markings were respected during layout and cutting.
- Fitting was checked before the garment became difficult to alter.
- Seams, darts, edges, closures, and hems are constructed in the order specified and pressed as required.
- The final garment is evaluated by how well it fits and functions, not by an unsupported claim that one fiber, machine, or pattern company is inherently superior.
That is the durable lesson behind Smith’s 1944 reassurance: “The job will not be hard if you take it step by step with care and attention to detail.” The tools and styles available now have changed, but a manageable pattern, measurement-based sizing, suitable fabric, and deliberate checkpoints remain the safest route from a paper envelope to a wearable dress.
Quick Recap
Product prices and availability are accurate as of the date/time indicated and are subject to change. Any price and availability information displayed on Amazon at the time of purchase will apply.

