Do these 3 things before closing this tab:
1Scan for outdated or missing drivers - takes under a minute2Clear out junk files and repair common Windows errors3Fix the driver behind crashes, sound loss and screen glitchesSolomon is a space-control hero built around chess pieces. Use Setup Bishop to seed damaging squares and trigger item effects, use Kingside Knight and Rook Battery to disrupt attacks or protect an area, then place Develop Queen where several enemies must move. A practical first build emphasizes Spirit power, Bishop-square proc opportunities and cooldown reduction, while defensive purchases should change with the opposing team.
This guide reflects the unofficial Solomon community reference and the unofficial October 9, 2026 update archive. Deadlock is actively updated, so ability values, upgrade costs, item behavior and build order can change in the live client. The recommendations below are a starting framework, not proof of an optimal or personally tested build.

As an Amazon Associate I earn from qualifying purchases.
What Solomon does in a Deadlock match
Solomon is the chess-themed hero described as available in the October 9, 2026 update. The update note presents him as a character who commands bishops, a charging knight barrier, paired rook walls and a queen that can execute low-health heroes. A separate October 11 feature describes him as a chess-loving older character introduced in the City Never Sleeps update.
What’s actually slowing this PC down?
Pick the symptom - the matching free tool is one click away.
In practical terms, Solomon converts parts of the map into dangerous zones. His pieces do not all serve the same purpose: Bishops create repeatable pressure, the Knight interrupts a committed advance, Rooks shape lines of fire and the Queen supplies a large delayed threat. The strongest sequences therefore begin with positioning rather than with an immediate ultimate.
The play pattern described here is an inference from the documented kit and community item notes. It is useful for learning the hero, but it is not a report of controlled testing.
Solomon’s abilities, one piece at a time
Setup Bishop
Setup Bishop places bishops on the battlefield. They fire damaging squares, giving Solomon recurring area pressure instead of a single burst of damage. A square can make a lane, doorway or retreat route costly to cross, and multiple placements let you influence where an opponent is willing to stand.
The ability is also the center of the community build advice. The reference repeatedly treats Bishop squares as a way to trigger item effects, so Spirit power, increased area or range and proc-oriented items can improve more than the raw damage shown on the ability. Think of each placement as both a zoning tool and a chance to activate your item package.
Do not scatter Bishops without a reason. Place them where an enemy must contest a wave, pass through a narrow approach, stand during an objective interaction or retreat after being hit by another piece. Their value is highest when the opponent has limited movement options.
Kingside Knight
Kingside Knight summons a knight barrier that charges forward. The ability reference lists an immobilize when it hits an enemy, making it useful for stopping an advance, interrupting a retreat or buying time while your squares and weapons deal damage.
The Knight is not only an offensive stun. The barrier can occupy the space between Solomon and an approaching threat, allowing you to protect yourself or an ally while the charge travels. Use it before an enemy reaches your position when possible; waiting until you are already surrounded reduces the room available for the barrier to matter.
Rank #2
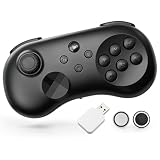
- CLASSIC 6-BUTTON LAYOUT FOR FIGHTING GAMES – Designed specifically for fighting game enthusiasts, the classic 6-action-button layout gives you precise control in games like Street Fighter and King of Fighters. Ergonomic button placement lets you execute combos naturally and consistently, making it the ideal wireless gamepad for retro and modern fighting titles alike.
- HALL EFFECT JOYSTICK WITH ADJUSTABLE KEYCAP HEIGHT – Equipped with a magnetic Hall Effect joystick for ultra-precise, drift-free analog input that lasts longer than traditional joysticks. Adjustable keycap height accommodates different grip styles and thumb lengths, letting every player dial in their perfect feel — whether you're a casual gamer or a competitive player.
- 8-WAY D-PAD, MECHANICAL SHOULDER BUTTONS & 8K WIRELESS RECEIVER – The 8-directional disc D-pad makes diagonal inputs and special moves effortless. Mechanical light-touch shoulder buttons ensure ultra-fast actuation and quick rebound for frame-perfect execution. Includes an 8K USB receiver for PC, supporting a polling rate of 6000Hz+ to deliver near-zero wireless latency rivaling a wired connection.
- TURBO FUNCTION & MACRO BACK BUTTON SUPPORT – Built-in TURBO function allows rapid-fire input with a single button hold, perfect for repetitive attack sequences. Programmable macro back buttons let you map complex combos or shortcuts, giving you a competitive edge without taking your thumbs off the joystick during intense matches.
- WIDE COMPATIBILITY & ADJUSTABLE ASYMMETRIC VIBRATION MOTOR – Seamlessly connects to Nintendo Switch, PS3, PS4, PC (Windows), Android phones and tablets via wireless Bluetooth — no adapter needed for most platforms. The built-in asymmetric vibration motor with adjustable intensity delivers immersive haptic feedback, inspired by the iconic design style of for Sega Genesis & Mega Drive controllers.
Its listed upgrades add a fire-rate reduction and damage based on the target’s current health. Those effects and their exact values are patch-sensitive. In general, the upgrades make a successful hit more disruptive against weapon-dependent targets and more punishing against a healthy target, but verify the current tooltip before committing points.
Quick wins for a faster PC:
Repair Windows errors before they cause bigger problemsFix Now →Scan for outdated or missing drivers - takes under a minuteDriver Scan →Rook Battery
Rook Battery deploys reflecting walls. The walls alter how opponents can approach and can force a choice between taking a longer route and fighting in a space Solomon has prepared.
The current reference lists a fire-rate reduction when a wall hits an enemy and an upgrade that adds damage based on current health. This gives the Rook a defensive and offensive role: it can reduce incoming pressure while also making a committed push less comfortable. Set the walls to divide an engagement, close a side angle or protect the area where your Bishops are already active.
Because the walls are positional tools, they are strongest when you have a clear purpose for the space they create. A wall placed after everyone has already spread out may have little effect; a wall placed as an opponent enters a narrow route can determine the shape of the entire exchange.
Develop Queen
Develop Queen summons a queen that crashes down for area Spirit damage. After a delay, it releases damaging squares and stuns. The Queen can move to a target location and can be recalled early, so it is both a threat and a tool for controlling where opponents are allowed to stand.
Free tools Windows power users keep installed
One-click scans. No signup required.
The Queen works best when enemies are grouped, slowed, boxed in by Rooks or already trying to escape through Bishop squares. The delayed portion matters: cast where an opponent will need to be, not only where they are at the instant of activation. Recalling early can deny a location or reset your threat when the fight moves elsewhere.
The page lists a two-point upgrade that allows checkmate executions against heroes below 200 health. Treat that threshold and the upgrade cost as live-game data that may change. When the upgrade is available, track enemy health before using the Queen as an execution tool; otherwise, use it primarily to force movement and create a follow-up opportunity.
How to play Solomon: a practical fight sequence
- Choose the fight space. Before spending abilities, identify the route enemies must use. Solomon gains more from prepared terrain than from throwing every piece at the nearest target.
- Start with Bishop pressure. Place Bishops so their squares cover the approach, a wave path or a retreat line. This establishes recurring damage and gives proc-focused items repeated opportunities to work.
- Wait for a commitment. When an enemy walks into the prepared area or begins a push, use the Knight to immobilize or repel the most important target. The barrier can also buy time for an ally or for another ability to come off cooldown.
- Shape the next angle with Rooks. Deploy the reflecting walls to close a flank, divide the enemy formation or keep a weapon-focused opponent from firing comfortably. Use the fire-rate reduction when the wall connects, but remember that the wall’s main value is controlling space.
- Place the Queen on the forced route. Once movement is limited, call the Queen into the cluster, the escape path or the location enemies must contest. The delayed squares and stun are easier to realize when the Knight and Rooks have already narrowed their choices.
- Decide whether to recall. If the fight relocates before the Queen’s delayed effect matters, recall it rather than leaving the threat in an empty area. If enemies remain trapped or low, let the sequence finish.
- Convert low health into a finish. With the checkmate upgrade, look for targets below the listed health threshold. Without it, use the Queen’s damage and stun to create a conventional follow-up instead of assuming it will execute.
This sequence is not a mandatory combo. A Knight-first interruption can be correct when an enemy is already diving, and an early Rook can save an ally from a weapon-heavy push. The key is to make each piece change the opponent’s movement before spending the next one.
Ability progression and when to spend points
The displayed default progression on the current community reference unlocks Setup Bishop first, Kingside Knight second, Rook Battery third and Develop Queen fourth. That order gives Solomon his basic zoning tool before adding the barrier, walls and ultimate.
The same page shows later point allocation across the abilities, but it is a published reference rather than evidence of a universally optimal order. Exact point costs and upgrade details should be checked in the live client because Deadlock can change them between updates.
- Prioritize Bishop when you need stable lane or objective pressure. More reliable square coverage increases the number of positions the opponent must respect.
- Prioritize Knight when the enemy’s engage or retreat is the immediate problem. Its immobilize and listed upgrade effects reward hitting a high-value target.
- Prioritize Rook when fights are decided by approach angles. The walls matter most when denying a flank, separating targets or reducing weapon pressure.
- Prioritize Queen when team fights are clustering or when an execution threshold is relevant. The ultimate’s delayed damage, squares and stun become more valuable as enemies have fewer safe routes.
Do not copy a point sequence solely because it is labeled default. Match the next upgrade to the type of engagement occurring in your lane and around objectives.
A workable Solomon build for a first game
Community advice currently leans toward Spirit power, Bishop-square synergies and cooldown reduction. The following framework combines the displayed default list with the separate community build that emphasizes Bishop procs. Item names and effects are taken from those community references; the choices are starting points rather than a guaranteed shopping script.
Rank #4

- 6-axis gyro sensor makes the pro controller switch quickly detect the actions and help you make a quick response.
| Stage | Starting direction | Why it fits Solomon | When to change course |
|---|---|---|---|
| Early | Mystic Burst, Extra Regen, Extra Spirit and Extra Stamina | Provides early ability damage, lane sustain, Spirit scaling and mobility resources while the kit is coming online. | Replace or delay a damage purchase if lane harassment prevents you from safely holding the area. |
| Early alternative | Mystic Expansion imbued into Setup Bishop | The community notes specifically connect Mystic Expansion with Bishop-square coverage and proc opportunities. | Use a different opening when the lane is too dangerous to establish squares or when the opposing damage type demands defense first. |
| Middle | Improved Spirit, Enchanter’s Emblem, Mystic Vulnerability, Compress Cooldown and Healbane | Builds Spirit output, adds utility, improves ability availability and supplies options for fights where healing matters. | Choose only the pieces that answer the match; do not buy every option automatically. |
| Middle alternative | Spirit Shredder instead of Mystic Vulnerability | The community notes suggest Spirit Shredder for shred and sustain, particularly for players who do not reliably hit weapon shots. | Keep Mystic Vulnerability when your shots are reliable enough to exploit its purpose, subject to the current item tooltip. |
| Late | Greater Expansion, Boundless Spirit and Spiritual Overflow | Extends the range or scale of the Spirit-and-Bishop plan and supplies additional late-game power. | Use defensive, cooldown or matchup-specific choices when survival or repeated casting matters more than maximum Spirit. |
A separate copy of the community page also lists several cooldown, Spirit and damage options later in the build. The variation between community builds is important: it shows that Solomon has more than one plausible opening and that the displayed list should be treated as a baseline, not a solved build.
The Tool Desk
Outbyte Driver Updater FREEScan for outdated or missing drivers - takes under a minuteDriver Scan →Outbyte PC Repair FREERepair Windows errors before they cause bigger problemsFix Now →How to choose items instead of following a fixed list
1. Decide whether Bishop procs are your win condition
If you can repeatedly establish squares in places enemies must cross, favor Mystic Expansion and later range or proc options such as Mystic Reverb where the current item descriptions support them. This approach asks you to play around prepared zones and to value repeated triggers over a single weapon burst.
2. Buy for ability uptime when fights are long
Cooldown reduction is a recurring theme in the community build. Compress Cooldown is specifically suggested for Develop Queen, followed by Superior Cooldown. More frequent Queens and more frequent control pieces help when fights reset and restart rather than ending in one exchange.
3. Choose Spirit or weapon investment deliberately
The documented recommendations favor Spirit, but the reference also contains optional gun-focused and utility choices. Spirit investment makes sense when your damage and control come primarily from Bishop, Rook and Queen effects. A weapon-oriented adjustment can be reasonable when your team needs sustained basic attacks or when opponents consistently avoid your prepared zones. Do not split resources automatically; identify which damage source you can apply reliably.
4. Solve the lane before maximizing damage
Extra Regen appears in the displayed early build, and the community notes allow healing or defensive purchases based on lane pressure. If you cannot remain in the area long enough to place Bishops, a defensive or sustain purchase may produce more real value than an earlier offensive component.
5. Respond to the enemy’s damage and crowd control
The reference lists defensive choices for Spirit damage, bullet pressure, crowd control and melee threats. Treat those as situational categories. Against Spirit-heavy opponents, select the relevant Spirit defense; against weapon pressure, use the bullet-oriented answer; against repeated disables, value crowd-control resistance or recovery; against melee divers, favor tools that let you survive the initial contact and create space for Knight and Rook.
Best Value

- Ghost RGB LED Lighting – The controller reveals a hidden PAC-MAN design when the RGB LED lighting is activated and has 4 unique lighting modes bringing the design to life in your hands.
- Advanced Gaming Buttons – Get an edge over the competition with two mappable buttons you can program on the fly, mid-game—no system settings to configure
- Rechargeable Battery – Get up to 10 hours of battery life on a single charge. Includes an extra-long 10 ft. USB-C cable to recharge the internal battery*
- Wireless Freedom – Play wirelessly on Nintendo Switch – OLED Model, Nintendo Switch, and Nintendo Switch Lite
- Immersive Motion Controls - Dive even deeper into your games with fluid, responsive motion controls that provide an intuitive way to aim, steer, fly, and more
Matchup and positioning principles
Against ranged weapon pressure
Use Rook walls to deny clean firing lanes and avoid placing every Bishop in an exposed location. A square that cannot be defended may still force movement, but repeatedly spending abilities where you cannot contest the space wastes Solomon’s main advantage.
Against melee threats
Keep a Bishop route behind your position rather than only in front of it. The Knight can interrupt a charge, while Rooks can split the approach. Save one control piece when possible so a diver cannot force you to spend the entire kit before the real fight begins.
Against Spirit damage and ability-heavy teams
Adapt your defensive item slot instead of assuming the Spirit build is always correct. Cooldown reduction remains useful only if you live long enough to cast again, and a modest defensive purchase can preserve more total damage than a greedier upgrade.
Against crowd control
Do not begin every engagement with the Queen. If the opposing team can disable Solomon before the delayed effect lands, use terrain and the Knight or Rook to create a safer casting window. Repositioning the Queen or recalling it early is preferable to leaving the ultimate in a location you can no longer contest.
What the current win-rate number does—and does not—tell you
One available Deadlock.io snapshot reports a 44.2% win rate across 190,647 matches. The page labels the data as covering October 6–12, 2026, in normal mode, combining ranked and unranked games across all ranks, and credits the Deadlock API.
Those qualifications are part of the statistic. It is a dated, mixed-population snapshot, not a forecast of your personal results and not a permanent judgment on Solomon’s balance. The number can move as players learn the hero, as matchmaking populations change and as patches alter abilities or items.
How to keep this guide current
The Solomon reference accessed October 13, 2026 identifies itself as an unofficial community project and says it is not affiliated with Valve. The update archive is also an unofficial fan-made site. The build database presents its default builds as drawn from Valve game files, but it remains a third-party presentation.
Outdated Drivers Are Slowing You Down
One free scan finds every outdated or missing driver and matches the right update for your exact hardware.Free scan · exact hardware matchPC Slower Than It Used to Be?
A free scan shows the junk files, broken settings and background clutter dragging Windows down - then fixes them in one click.Free scan · Windows 10 & 11- Read the live ability tooltips before relying on a damage value, health threshold, stun duration or upgrade cost.
- Check whether item names, imbue behavior and cooldown effects still match the community build notes.
- Confirm the current progression in the client rather than assuming the displayed order has not changed.
- When quoting a win rate, include the mode, rank pool, date range, sample size and data source.
That verification matters especially for the Queen’s checkmate threshold, the Knight and Rook upgrade effects and any item interaction involving Bishop squares.
Bottom line for a first Solomon build
Unlock and learn the pieces in the displayed order—Bishop, Knight, Rook, then Queen—while treating later point allocation as adaptable. Start with a Spirit-and-Bishop plan, consider Mystic Expansion for square coverage, use Compress Cooldown and Superior Cooldown when ultimate availability is the limiting factor, and switch toward sustain or defense when the lane or matchup demands it. Solomon succeeds when his pieces control where the fight happens; he is less effective when every ability is spent as an isolated burst.
Quick Recap
Product prices and availability are accurate as of the date/time indicated and are subject to change. Any price and availability information displayed on Amazon at the time of purchase will apply.

