What’s actually slowing this PC down?
Pick the symptom - the matching free tool is one click away.
Chronolapse is a free, open-source Windows application for turning scheduled screenshots or webcam stills into time-lapse and stop-motion videos. You choose one or more monitors or webcams, set a capture schedule, optionally crop, scale, rotate, or combine frames as picture-in-picture, then encode the image sequence at a selected frame rate. You can add audio to the finished video or save numbered or timestamped images for another editor.
This guide explains how to plan a capture, configure the source, process frames, satisfy the MEncoder rendering requirement, and recover from the problems most likely to interrupt a long project.
As an Amazon Associate I earn from qualifying purchases.
What Chronolapse does
Chronolapse was created by Collin Green and released as free, open-source software. Its core workflow is deliberately simple: capture still images on a schedule, perform light processing, and combine the sequence into a video ready to share. The capture can come from a screen, a webcam, or more than one source.
Do these 3 things before closing this tab:
1Repair Windows errors before they cause bigger problems2Scan for outdated or missing drivers - takes under a minute3Clear out junk files and repair common Windows errorsThat makes Chronolapse useful when continuous video recording would create unnecessarily large files or when you want a deliberate, frame-by-frame look. Typical projects include a painting taking shape, a 3D model being built, gameplay or software work on a monitor, a mechanical engine rebuild, and stop-motion scenes assembled from successive poses. The same program can also capture images from medical-research work, although the appropriate interval and lighting depend on the experiment.
#1 Best Overall

- 【48MP Imaging and 4K Video】This 4K time-lapse camera features a starlight-level 5-megapixel sensor, a 1/2.78" image sensor, and records 48MP images and 4K/10FPS video. It can capture a series of still images, which can then be edited into sped-up videos or short films.
- 【Supports 2.4G WiFi connectivity】Features WiFi control and Bluetooth Low Energy 5.0, allowing for pre-setting and shooting of outdoor time-lapse photography via a WiFi connection on the same frequency band. Requires downloading the mobile app: TrailCam Go.
- 【Simple Three-Step Time-Lapse Photography Setup: Turn off with the three-position toggle switch — Settings — Start Time-Lapse. Experience quick and easy setup. Insert a memory card, and the time-lapse camera will continuously record in a loop, providing a seamless solution for long-duration time-lapse photography.
- 【Three mounting methods】Suitable for different scenarios: The suction cup bracket is suitable for indoor courtyard tiles, the self-tapping screws are suitable for tree trunks and rock crevices, and the claw clips are suitable for mounting on pillars and iron poles. Combined with a windproof and rainproof housing, it is designed specifically for harsh outdoor shooting environments.
- 【Efficient Task Management】To optimize time-lapse footage and save power, you can strategically plan your shooting schedule by setting up to six shooting periods per day, week, or specific dates (e.g., 08:00-17:00). This allows the camera to work only when needed, avoiding ineffective shooting and obtaining ideal footage.
Chronolapse 2.0 is described by the project as a rewrite with cleaner code, more configuration control, new functionality, and removal of unused features. The available documentation does not provide a current Windows-version support matrix, a performance benchmark, or a formal list of compatible webcam models, so test your exact computer and camera before committing to an unattended capture.
Plan the project before opening Chronolapse
Choose the capture source
A screen capture is best when the subject exists entirely on your desktop: a design session, a coding task, a game, or a simulation. It avoids camera focus and lighting changes, but anything outside the selected monitor will not appear.
A webcam is suited to physical subjects such as drawing, crafts, construction, laboratory setups, or a stop-motion set. A USB webcam is a practical accessory because Chronolapse explicitly supports webcam still-image capture. Compatibility and image quality vary by camera and Windows configuration; the documentation does not promise support for a particular model.
Quick wins for a faster PC:
Clear out junk files and repair common Windows errorsFree Scan →Scan for outdated or missing drivers - takes under a minuteDriver Scan →Repair Windows errors before they cause bigger problemsFix Now →If the project needs both a desktop and a physical view, Chronolapse can schedule captures from one or more monitors and webcams. Picture-in-picture processing lets you combine views, provided the resulting layout fits your chosen output dimensions.
Rank #2
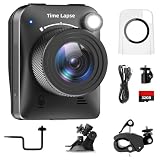
- 【High-Definition 4K Imaging】 Dsoon (TL3000)Timelapse Camera features an advanced chip and fill light technology, ensuring crystal-clear image capture even in challenging low-light conditions. The IPS display is versatile, allowing a 90-degree flip for convenient shooting angle adjustments.
- 【Extra Long-Time Stanby】 Forget the hassle of constantly charging your construction camera. With a remarkable battery life of up to half a year, you can confidently embark on long-term projects without worrying about power. The battery lasts up to 180 days with a 5-minute capture interval.
- 【Effortless Time-lapse Setup】 Experience quick and hassle-free setup! Connect to the power supply, and the time-lapse camera will continuously cycle through shots until the SD card reaches full capacity, providing a seamless solution for extended time-lapse photography.
- 【Versatile Shooting Modes】 Whether you're into timed shooting, video time-lapse, or photo time-lapse, our camera has you covered. With manual macro focus capability, you can capture both macro and infinity shots. Document long-term environmental changes, create short video clips, or even produce entertaining stop-motion Lego animation movies!
- 【Professional-Grade Equipment】 Engineered with IP66 protection and housed in a waterproof casing, this timelapse camera is suitable for both indoor and outdoor use. The comprehensive package includes the Timelapse Camera, Sucker Bracket, Circular Tube Bracket, Nail Bracket, Waterproof Housing, SD card, USB Cable, and User Manual. Capture every moment with confidence and precision
Pick an interval that matches the motion
The interval controls how much real time is represented by each frame. Fast activity needs frequent captures; a plant, construction site, or long experiment can use a much longer interval. Think in terms of the final frame rate as well: at 30 frames per second, 900 still images produce about 30 seconds of video. At 24 frames per second, the same 900 images produce 37.5 seconds.
| Example capture plan | Images captured | Approximate duration at 30 fps | Use case |
|---|---|---|---|
| One image every 1 second for 10 minutes | 600 | 20 seconds | Fast screen activity or a quick demonstration |
| One image every 10 seconds for 1 hour | 360 | 12 seconds | Painting, modeling, or a short build |
| One image every 60 seconds for 8 hours | 480 | 16 seconds | Long construction or environmental change |
These are planning examples, not limits imposed by Chronolapse. Leave enough storage for the still images, and run a short trial to check that the chosen interval produces smooth motion instead of abrupt jumps.
Decide whether you need an editor
Chronolapse can lightly process frames, render the sequence, and add audio. If you need titles, transitions, color grading, detailed sound mixing, or multiple music tracks, save the sequential images or the rendered video and finish in a separate editor. Saving numbered or timestamped images is also useful when another application or an archival workflow needs the original frames.
Set up Chronolapse for a screen or webcam capture
- Install Chronolapse and prepare the computer. Use a Windows system that meets your own project needs. Close notifications, disable sleep, and make sure the selected monitor or camera will remain available for the entire capture. Because the published material does not state a current Windows support matrix, verify operation with a short test rather than assuming every modern edition behaves identically.
- Connect and check the source. For a webcam project, connect the USB camera before configuring the capture and confirm that no other application has exclusive control of it. For a screen project, arrange windows and select the monitor or desktop area you intend to record. If several sources are required, check each one independently before scheduling them together.
- Set the schedule. Choose the capture interval and the start or end conditions available in your build. Use a short interval for quick motion and a long interval for slow change. A test lasting only a few minutes can reveal framing, exposure, or storage problems before the real run.
- Choose the image naming method. Chronolapse can save sequentially numbered images or timestamped images. Numbered files are convenient when an encoder expects a continuous sequence; timestamps preserve the capture time for scientific, engineering, or audit-oriented work.
- Run a preview capture. Inspect several consecutive frames at full size. Look for a moving camera, a changing webcam exposure, a cursor or notification that should not be visible, and any source that drops out between captures. Correct those problems before beginning the long run.
Process frames without losing the subject
Chronolapse provides light processing controls rather than a full image-editing suite. Use them to make the sequence consistent:
Rank #3

- 【1080P High Definition Picture Quality】: Dsoon Time-lapse camera is equipped with an advanced imaging sensor, fill-light technology, and a 110° wide-angle starlight lens, capturing remarkably clear 1080p Full HD videos even in challenging lighting conditions. Whether recording construction progress or tracking weather changes, it delivers vivid details, a broad view, and excellent low-light performance.
- 【Extra Long-Time Standby】: Designed for long-term projects, this time-lapse camera is powered by 12 AAA alkaline batteries (batteries not included Package), providing up to 180 days of continuous operation at 5-minute Time intervals. Thanks to its ultra-low-power design, it eliminates the need for frequent battery replacements, making it ideal for remote construction sites or extended outdoor environmental monitoring. Say goodbye to power limitations and focus on capturing your project’s progress.
- 【Effortless Time-Lapse Setup】: Experience quick and hassle-free setup! Simply install the batteries, and the time-lapse camera will continuously cycle through shots until the SD card reaches full capacity, providing a seamless solution for extended time-lapse photography.
- 【Flexible Shooting with Multiple Modes 】:With functions like timed shooting, video time - lapse, photo sequences, and manual macro focus, it can handle both close - up and distant scenes with ease. It serves as an ideal tool for documenting construction progress, conducting scientific research, or creating stop - motion animations, meeting the diverse needs of professionals and creative enthusiasts.
- 【Professional-Grade Equipment】: This outdoor time-lapse camera features an IP66-rated waterproof casing and durable metal brackets, making it suitable for both indoor and outdoor use. Your package includes: TL2100 Time-Lapse Camera, Wall Bracket, Round Tube Bracket, Clip Bracket, Installation Straps and Ropes, 32GB SD Card, USB Cable, and User Manual. Capture every moment with confidence and precision.
- Crop away unused borders or a portion of the desktop that contains private information.
- Scale frames to a common output size. Keeping every frame at the same dimensions prevents uneven borders or encoder errors.
- Rotate images when a camera was mounted in portrait or upside-down orientation.
- Picture-in-picture a webcam view over a screen capture, or combine sources when the project benefits from context and close-up detail.
Apply the same processing choices to the whole sequence. A crop that changes halfway through the project will make the video jump. Likewise, a webcam that automatically changes exposure can flicker even when the framing is correct; lock exposure or improve the lighting in the camera’s own settings when those controls are available.
Render a video with MEncoder
Rendering is the step that converts still images into a playable video. The project README identifies MEncoder as Chronolapse’s rendering dependency. MEncoder must either be installed and available on the system path or selected through Chronolapse’s video tab. If Chronolapse captures successfully but rendering fails, this dependency is the first item to verify.
- Install MEncoder. Obtain a Windows-compatible MEncoder build from a legitimate distribution appropriate for your system. The Chronolapse documentation does not specify a single current build or version, so confirm that the executable launches on your machine.
- Make it discoverable. Add the directory containing MEncoder to the Windows system path, or open Chronolapse’s video tab and select the executable directly. Avoid selecting a folder when the control expects the executable file.
- Select the image sequence. Point Chronolapse at the captured frames and confirm that the first and last files belong to the intended run. If you used timestamped names, make sure the application can order them correctly; numbered names make sequence order easier to inspect.
- Set the output frame rate. A higher rate makes motion appear smoother and shortens the finished duration for a fixed number of images. A lower rate extends the duration and can emphasize each pose in a stop-motion piece. Choose a rate that matches the look you want rather than assuming the capture interval alone determines playback speed.
- Start a short render. Render a small section first and play it in your target media player. Check orientation, cropping, picture-in-picture placement, frame order, and whether the output contains the expected number of frames.
- Render the complete sequence. Keep the source images until the video has been checked. They are your recovery path if the output is corrupted or you later choose a different frame rate.
No published benchmark states how many frames or monitors a particular computer can process, so render time and resource use should be measured on your own hardware. Large, high-resolution webcam images consume more storage and may take longer to encode than modest screen captures.
Make a time-lapse video
A time-lapse emphasizes change over a period that would otherwise be too slow to watch. Mount the webcam securely, keep the subject and lighting consistent, and choose an interval that captures meaningful progress without filling the drive with near-identical frames.
Rank #4

- HD 1080P Video: Brinno time-lapse camera is for documenting construction, nature observations, or outdoor events. With HDR feature enabled, you can record from day to night. Equipped with a 118 degree field of view and storage up to a 128GB Micro SD card.
- Designed for Outdoors: The Adjustable Clamp features 360 degree rotating joint for perfect placement. The IPX4 Water-Resistant housing repels splashing water from any angle. This camera is durable, capable of withstanding various weather conditions.
- Easy to Operate: User-Friendly Menu allows you to schedule & set intervals from a 1.44 inch crystal IPS LCD screen display. Daily Timer allows you to choose recording sessions during working hours. The multilingual interface is available in 8 languages.
- Long Lasting Battery: Never worry about battery power again when shooting long-term projects. BCC300-C requires 4 AA batteries to save power and save your budget. Battery lasts up to 100 days using a 5-min capture interval.
- What’s Included: You’ll receive a TLC300 Brinno time lapse camera, IPX4 water-resistant housing (Model # ATH120), Adjustable Clamp, 2 bungee cords, 4 AA batteries, SD card, lens cover and a Quick Guide manual.
- Frame the subject and perform a short webcam test.
- Set the interval based on how quickly the subject changes. For a painting session, capture often enough to show individual strokes; for a long build, capture less frequently.
- Disable computer sleep and prevent the camera or monitor from being taken over by another application.
- Start the scheduled capture and avoid moving the camera or subject outside the intended action.
- Review the stills, apply crop, scale, rotation, or picture-in-picture, and render through the video tab after confirming MEncoder is available.
- Add audio in Chronolapse if a simple soundtrack is sufficient, or take the rendered video into an external editor for narration and detailed mixing.
Make a stop-motion video
Stop motion uses discrete poses rather than continuous recorded movement. Chronolapse’s scheduled still-image workflow can produce this style when you move the subject between captures and keep the camera fixed. The documentation lists stop-motion video as a supported use, but it does not publish a separate manual-trigger specification; use the scheduling controls available in your build and test the timing before a full scene.
- Secure the webcam or monitor viewpoint so it cannot shift between poses.
- Arrange the first pose and capture a test frame.
- Move the subject a small, repeatable amount between scheduled captures. Smaller changes create smoother motion; larger changes create a more stylized, stepped effect.
- Keep lighting, focus, and exposure as constant as possible. Automatic camera adjustments can make adjacent frames look as if the set moved.
- Use crop, scale, and rotation consistently. Picture-in-picture is useful when you want to show both the set and a close-up view.
- Render a short section at the intended frame rate before completing the entire sequence.
Screen capture versus webcam capture
| Decision point | Screen capture | Webcam capture |
|---|---|---|
| Best subjects | Software, gameplay, design, simulations, and monitor-based work | Physical builds, painting, experiments, crafts, and stop-motion sets |
| Primary setup concern | Selecting the correct monitor or desktop area and keeping unwanted windows hidden | Camera framing, focus, exposure, lighting, and physical stability |
| Hardware dependency | The display and computer running Chronolapse | A compatible webcam, commonly connected by USB; exact model support is not formally listed |
| Typical failure | Notifications, screen changes, or the wrong monitor entering the sequence | Camera access conflicts, flicker, movement, or changing illumination |
| Useful processing | Crop away desktop areas; picture-in-picture can add a camera view | Rotate a mounted camera, crop the set, and scale for the output |
Troubleshoot failed or poor results
Chronolapse captures images but will not render
Check MEncoder first. Confirm that it is installed, that Windows can find it on the system path, or that the executable is selected in the video tab. Then verify that the source directory contains complete, readable images in the expected order. A short test render helps distinguish a dependency problem from a damaged or misnamed sequence.
The video is too fast or too slow
Playback duration is determined by the number of frames divided by the selected frame rate. Re-render the same images at a different frame rate before repeating the capture. If the motion itself contains large jumps, change the capture interval or make smaller stop-motion movements; changing playback speed cannot recreate missing intermediate frames.
Crashes, No Sound, or Screen Glitches?
Random freezes, missing sound and display glitches usually trace back to one bad driver. Find and replace yours safely.Free scan · under a minutePC Slower Than It Used to Be?
A free scan shows the junk files, broken settings and background clutter dragging Windows down - then fixes them in one click.Free scan · Windows 10 & 11The image jumps, flickers, or changes size
Look for a moved webcam, automatic exposure changes, inconsistent crop or scale settings, and a source that changed resolution. Stabilize the camera, improve constant lighting, and apply one set of processing values to every frame. For screen captures, remove notifications and keep the target window in the same position.
Best Value
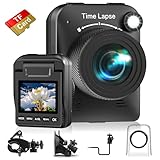
- 【Powerful 4K】 Timelapse camera 4k equipped with advanced chip & fill light can capture images clearly even in low light conditions. IPS display can be flipped 90 degree to adjust the angle, shooting viewing angle is more convenient.
- 【Working Time Up to Half a Year】Never worry about construction camera battery power again when shooting long-term projects. Battery lasts up to 180 days using a 5-min capture interval.
- 【Easy Time Lapse】Quick setup! As long as the power supply is connected, the shooting can be cycled until the SD card storage space is full and stop. Provides a solution for long-term time-lapse photography.
- 【Multipurpose】Timed shooting, Video time lapse shooting, Photo time lapse shooting. Manual macro focus, can shoot macro and infinity. Capture long-term environmental changes, a short video clip, or even a fun stop motion lego animation movie!
- 【Professional Equipment】IP66 protection & waterproof housing allows you to use this camera indoor or outdoor. Package contains: Time-lapse Camera, Sucker Bracket, Circular Tube Bracket, Nail Bracket, Waterproof Housing, SD card, USB Cable, User Manual. (Video format: AVI)
A webcam is unavailable
Close other camera applications, reconnect the USB device, and test it with a short capture. Because the project does not publish a comprehensive webcam compatibility list, a failure with one model does not establish that all webcams are unsupported; try a known-working camera or a different driver configuration.
The computer runs out of storage
Estimate the still-image count before starting, monitor free space, and choose a practical image resolution. Do not delete the source frames until the rendered video has been inspected and backed up if it matters. Saving timestamped or numbered images is valuable only if the storage plan can retain them.
What Chronolapse can and cannot replace
Chronolapse covers scheduled capture, basic frame processing, encoding, and simple audio addition in one free application. It is a good fit when the project is defined by still frames and predictable scheduling. It is not documented as a complete non-linear editor, a camera-control platform with a published compatibility matrix, or a tool with guaranteed performance figures for a particular number of monitors or webcams.
Use Chronolapse alone for a straightforward time-lapse or stop-motion sequence. Use its numbered or timestamped image output as an intermediate stage when you need advanced titles, transitions, color correction, narration, or a more elaborate sound mix elsewhere. In either case, keep the original frames until the final video has passed your quality check.
Quick Recap
Capture and rendering checklist
- Subject, monitor, or webcam selected and tested.
- Interval chosen for the subject’s rate of change.
- Computer sleep and disruptive notifications disabled.
- Camera, lighting, and framing stabilized.
- Crop, scale, rotation, and picture-in-picture decisions made before the long run.
- Numbered or timestamped file naming selected for the intended workflow.
- MEncoder installed and either on the system path or selected in the video tab.
- Short capture and short render reviewed before the full project.
- Source images retained until the final video and audio are verified.
Product prices and availability are accurate as of the date/time indicated and are subject to change. Any price and availability information displayed on Amazon at the time of purchase will apply.

