A mirror selfie can look effortlessly natural—until you realize you’re either staring at the phone lens or fumbling the camera at the worst possible moment. The goal here is simple: capture the shot without seeing (or constantly checking) the camera.
That usually means two things: you remove the timing variable (so you aren’t trying to line up a shot mid-motion) and you control framing/exposure so the photo holds up even when you’re looking at your reflection instead of the device.
As an Amazon Associate I earn from qualifying purchases.
Below is a practical, repeatable playbook you can use with iPhone, iPad, or Android—covering remote shutter methods, mirror placement, and the settings that make mirror photos look sharp and flattering.
Do these 3 things before closing this tab:
1Scan for outdated or missing drivers - takes under a minute2Repair Windows errors before they cause bigger problems3Fix the driver behind crashes, sound loss and screen glitchesWhat It Means to Take a Mirror Selfie Without Seeing the Camera
“Without seeing the camera” usually means you’re looking at your reflection and posing normally while the phone takes the photo automatically. You’re not aiming the lens while the shutter is about to fire, and you’re not adjusting the phone by feel.
#1 Best Overall
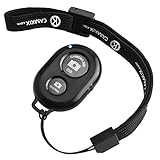
- Handy Little Gadget ►This Bluetooth remote makes it exciting to take selfies, group and steady shots hands-free! Post amazing photos and videos on Snapchat, Instagram, Facebook or YouTube with the help of this shutter.
- Lightweight and Convenient to Carry ►The remote is easy to store. You can bring it anywhere! Just slip it in your pocket and keep it on a keychain. It comes with an adjustable wrist strap for quick access when in use.
- Smooth Pairing Guaranteed ►The CamKix Remote Control Camera Shutter uses Certified Bluetooth Wireless Technology for maximum reliability and fast operation. It can trigger your phone and tablet even if it is 30ft (10m) away. You only need to pair it once and it will be automatically recognized on your next use.
- Capture Pictures and Video Instantly ►The remote has two buttons for taking photos and videos. Press the small button for Android and the big button for iPhone. It also has a separate ON/OFF switch.
- Compatible with a wide range of Devices ►The remote pairs perfectly with phones and tablets operating on Android 4.2.2 OS and up / Apple iOS 6.0 and up. Option to use in-built app or Camera 360 app. It can be used with a wide range of devices including iPhone Xs, Xs Max, X, 8, 8 Plus, 7, 7 Plus, SE, 6s, 6s Plus, 6, 6 Plus, 5S, 5C, 5, 4s, 4; iPad Pro, 4, 3, 2, Mini 2, Mini, Air; Samsung Galaxy S9, S9+, S8, S8+, S7, S7 Edge, S6, S6 Edge, S5, S5 Mini, S4, S4 Mini, Note 9, 8, 7, 5, 4, 3, 2.
That’s why the best results come from:
- Automation: timer, remote shutter, voice control.
- Consistency: fixed phone placement, consistent lighting, reliable focus/exposure behavior.
- Geometry: mirror angle and phone height so your eyes appear to meet the “camera direction.”
Prerequisites: Gear and Setup That Make This Reliable
You don’t need a studio, but you do need consistency. Here’s what makes the difference between “good on the first try” and “why is it blurry again?”
- Phone on a stable support: tripod, phone clamp on a shelf, or a stack of books that won’t wobble.
- A clean mirror: streaks and fingerprints show up fast under flash or overhead lights.
- Lighting you can control: daylight near a window or two soft lights at face level.
- A shutter trigger method: timer, wired earbud volume button, Bluetooth remote, Apple Watch remote, or voice.
If you want “bookmark-worthy” reliability, spend 30 seconds marking your phone position (tape on the floor or a small pencil dot on a stand).
Method 1: Use the Camera App Timer (Fast, Works Everywhere)
This is the simplest way to avoid looking at the camera during capture. You aim once, start the timer, then pose while the countdown runs.
On iPhone and iPad (Camera app)
- Open Camera.
- Choose Photo mode.
- Tap the timer icon (often near the top/side of the screen).
- Select 3s for quick poses or 10s for more deliberate setups.
- Frame yourself in the mirror, focus on your eyes, then press the shutter.
Pro move: use 10s if you tend to “freeze” mid-countdown or if you need to straighten your outfit.
On Android (Camera app varies by brand)
- Open your Camera app.
- Switch to Photo mode.
- Find the timer option (often labeled Self-timer or shown as a clock icon).
- Select 3s or 10s.
- Frame once, press shutter, and pose while the countdown finishes.
Different brands place the timer in different spots, but the behavior is the same: your phone takes the photo after the delay.
Method 2: Trigger the Shutter From a Distance (No Looking Needed)
Timers work, but remote triggers remove the last bit of “I hope I clicked in time” tension. You start the shot, then you pose uninterrupted.
Option: iPhone or iPad with Wired Headphones + Volume Button
Many iPhone models support using the Volume Up/Volume Down on wired earbuds as the shutter button. That means you can stand at your mirror position and fire without touching the phone.
- Plug wired headphones into your iPhone or iPad.
- Open Camera in Photo mode.
- Set your framing in the mirror once.
- Press the Volume button to capture.
If it doesn’t work on your exact setup, switch to a different trigger method below—don’t waste time troubleshooting for 30 minutes.
Option: Bluetooth Remote Shutter
A Bluetooth shutter remote is the most universal “no-camera-looking” approach. Many remotes cost little and behave consistently.
- Pair the remote to your phone (follow the remote’s pairing instructions).
- Open Camera and keep the mirror framing steady.
- Press the remote shutter while you look at your reflection.
Gotcha: some remotes require a specific camera app mode or an app companion. Test with a single photo before you start posing.
Rank #2
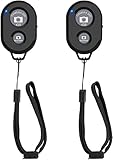
- CONVENIENT AND EASY HANDS-FREE SHUTTER CONTROL FOR MOBILE DEVICES: Perfect for taking selfies and steady tripod shots.【Update】: compatible with Instagram and Snapchat(long press for taking video and short press for photo
- SMALL ENOUGH TO KEEP ON A KEYCHAIN OR IN YOUR POCKET: The remote is very small and lightweight, so it is convenient to carry with you
- OPERATIONAL UP TO 30 FEET (10M): Take photos even when at a distance from your device
- COMPATIBLE WITH ANDROID 4.2.2 OS AND UP / APPLE IOS 6.0 AND UP: Option to use in-built app or Google Camera 360 app
- COMPATIBLE WITH WIDE RANGE OF DEVICES: Including iPhone17 17 pro 17pro max 17 air, iPhone 16,16 Pro,16 Pro max, iPhone 15 15 pro 15 Pro max , 14, 14pro, 14 pro max, 13 13 pro max, iPhone 12 pro max, 12 pro, 12, 11, 11 pro, 11 Pro max, Xs, Xs max, XR, X, 8, 8 Plus, 7, 7 Plus, 6, 6 Plus, ; iPad 3, 4,5,6, Mini , Pro, Air; Samsung Galaxy S24 S23,S22,S21,S10, Note 20, NOTE 10 NOTE 10 PLUS S9+, S9, S8, S7, S7 Edge, S6, ; and other smart andriod device.
Option: Use an Apple Watch Remote Shutter
If you’re in the Apple ecosystem, Apple Watch can act as a remote camera trigger. You don’t touch the phone at all.
Quick wins for a faster PC:
Repair Windows errors before they cause bigger problemsFix Now →Fix the driver behind crashes, sound loss and screen glitchesFind Drivers →- On your iPhone, confirm your devices are signed into the same Apple ID and Bluetooth/Wi‑Fi are enabled.
- Open the Camera Remote feature on Apple Watch (availability depends on watchOS version).
- Start the camera view on the watch.
- Use the watch shutter button to capture the shot.
If your watch doesn’t show a remote camera option, use timer + tripod or a Bluetooth remote instead.
Option: Voice Trigger on iPhone
If your iPhone supports voice activation for shutter controls in your environment, you can fire hands-free. This is useful when your hands are occupied styling or holding accessories.
- Enable voice features in Settings (varies by iOS version).
- Open Camera.
- Try a voice command compatible with your setup (wording varies by feature availability).
- Use a test shot to confirm it fires correctly.
Because voice command availability can vary, treat this as a “nice to have” rather than your only plan.
Method 3: Use Front/Back Camera Tricks to Avoid the “Lens Stare”
Most people use the front camera because it’s easiest to see your framing. But if you want more flattering optics and less distortion, you can use the back camera—while still making eye contact through the mirror.
Outdated Drivers Are Slowing You Down
One free scan finds every outdated or missing driver and matches the right update for your exact hardware.Free scan · exact hardware matchPC Slower Than It Used to Be?
A free scan shows the junk files, broken settings and background clutter dragging Windows down - then fixes them in one click.Free scan · Windows 10 & 11Option: Back Camera + Mirror Placement for Eye Contact
Here’s the concept: when you use the back camera, your phone is “facing away” from you, but the mirror shows your eyes. With the right angle and height, your eyes appear closer to the lens direction.
- Switch to back camera in Camera.
- Mount the phone slightly above or around eye level on a stable support.
- Angle the phone so the mirror captures your face fully without cropping.
- Use a remote trigger (timer, volume button, Bluetooth remote, etc.).
- Take 2–3 test shots and adjust only once.
Common correction: if your face looks “stretched,” lower the phone a bit; if you look like you’re looking up, raise it slightly.
Option: Use a Tripod and One Fixed Mark
If you want repeatable results, stop treating every photo as a new setup. Fix the phone position and reference it every time.
- Set your phone on a tripod or clamp and don’t change height.
- Use tape on the floor to mark where you stand.
- Use tape or a marker on the tripod to lock the exact tilt.
- Only change your pose and expression.
This is how people get consistent “mirror series” photos without constantly checking alignment.
What’s actually slowing this PC down?
Pick the symptom - the matching free tool is one click away.
How to Position Your Phone and Mirror for the Most Natural Look
Mirror selfie quality is mostly geometry. The right setup makes you look like you’re facing the camera even when you’re looking at the reflection.
Rank #3
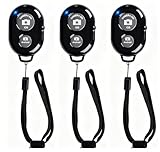
- CONVENIENT AND EASY OPERATION: Just by pushing the on/off of the remote, open your phone Bluet function on and fine the "ab shutter3" from the list, and select to connect. Perfect for taking selfies and steady tripod shots.
- SMALL AND LIGHTWEIGHT: The remote is very small and lightweight, also it come with a wrist strap, so it is convenient to carry with you.
- [UPDATE] OPERATIONAL UP TO 50 FEET (15M): you can take photos easily even when at a long distance from your device. A nice gift for your family and friend
- COMPATIBLE WITH ANDROID 4.2.2 OS AND UP / APPLE IOS 6.0 AND UP: Option to use in-built app or Google Camera 360 app.
- COMPATIBLE WITH MOST SMART DEVICES: compatible with iphone 16, 15, 14, 13, 13pro,13 pro max, 12, 12 pro,12 pro max, 12 mini, iPhone 11, 11 pro, 11 Pro max, Xs, Xs max, XR, X, 8, 8 Plus, 7, 7 Plus, 6, 6 Plus, ; tablet like: iPad 2, 3, 4, ipad mini, ipad air, ipad pro; Samsung Galaxy note 20 S20 S10, S10+, NOTE 10 NOTE 10 PLUS S9+, S9, S8, S7, S7 Edge, S6, S6 Edge,; and other devices.
Angle math: where the camera sits vs. where your eyes land
Try this rule: aim the camera so it sits slightly above your eye line, pointing down just a touch. That usually avoids heavy under-eye shadows and keeps facial proportions more natural.
If your mirror selfie looks odd, it’s usually one of these:
- Phone too high: you’ll look like you’re staring down.
- Phone too low: you’ll get “upward” distortion and harsher shadows.
- Phone too close: wide-angle distortion exaggerates your face.
- Phone too far: you may lose detail and end up with a cramped frame.
Mirror distance and focal length choices
Distance affects distortion. If your phone offers a zoom/telephoto option, use it.
- Too wide (ultra-wide or very close): face distortion increases.
- Moderate zoom: often looks more flattering and closer to natural perspective.
On iPhone models that allow it, try moving to a slightly longer focal length (e.g., 2x) for portraits. On Android, use the tele lens option if available.
Exposure and Focus: Make the Photo Look Sharp, Not Blown Out
A mirror selfie can be perfectly framed and still look bad due to focus missed on your eyes or exposure blown by bright lights.
Lock exposure and focus (what to tap and why)
Most phone cameras let you tap to focus on your face. For consistent results, lock it so it doesn’t jump during the countdown.
- Open Camera in your chosen mode (Photo is usually the safest for mirror shots).
- Tap your face in the mirror view—aim for the eye area.
- If your app shows a focus/exposure lock indicator, keep it until you capture.
- Use timer/remote so you’re not moving right before capture.
If the camera keeps hunting, reduce flicker lighting or move to a steadier light source.
Use HDR and manage highlights
HDR helps when you have bright lights behind you or overhead fixtures. But if your photo looks “crispy” or over-processed, HDR may be too aggressive for your scene.
- If highlights (forehead, hair, jewelry) blow out, try turning HDR off or reducing backlight.
- If you’re in mixed lighting, HDR usually improves skin tone separation.
Lighting setups that flatter (and ones that fail)
Two lights placed like studio lamps—left and right near face level—tend to flatter more than a single overhead bulb.
Quick lighting rule:
- Good: soft, directional light; consistent brightness; minimal overhead glare.
- Fail: harsh overhead lights that create under-eye shadows and shiny forehead hotspots.
If you only have one light, angle it slightly from above eye level rather than straight down.
Rank #4

- 【Zoom in & out】This remote shutter with zoom feature (Must open zoom in accessibility setting for iPhone/iPad) can help you easily zoom in and out from a distance when taking photos and videos, bringing great convenience and making your shooting more professional
- 【Front & Rear Camera Switch】There is a bluetooth button on the side of the wireless remote control that can switch the camera. Click once to switch the system camera, and double-click to switch the camera within the application. This unique feature can help you easily and quickly switch between front and rear cameras, making it perfect for content creation
- 【Video Scrolling & Page Turner】Compared to other single function remote controls, our upgraded wirless remote control not only has a shutter function, but also multiple functions such as zooming, switching between front and rear cameras, flipping pages, scrolling short videos and adjusting volume. This Versatile remote control can meet all your needs for taking photos & videos, Tiktok and reading e-books at the same time
- 【Reachageable & Portable】This camera remote control only takes 1 hour to charge and can last for 30 days of standby after being fully charged. The weight of 28 grams and compact size make it easy to store and carry, making it convenient to use both indoors and when traveling
- 【Widely Compatible】The Multi-functional wirless shutter is compatible with all iPhone, iPad, iPod and most smartphones and tablets with Android systems, compatible with most camera applications
Composition Cheats That Save Time
Once the technical stuff is stable, composition becomes fast. These small choices reduce the number of retakes.
The Tool Desk
Outbyte PC Repair FREERepair Windows errors before they cause bigger problemsFix Now →Outbyte Driver Updater FREEFix the driver behind crashes, sound loss and screen glitchesFind Drivers →Keep the horizon straight
Mirrors can trick you. Use the phone’s level cues (grid or level indicator) so the frame doesn’t tilt.
Use the grid overlay
The grid overlay helps with centering and symmetry, especially for face-framing shots.
- Open Camera.
- Enable Grid in camera settings (iPhone: Settings > Camera > Grid; many Android apps include a grid toggle inside Camera settings).
- Position your eyes along the upper third line for a natural look.
Control what’s inside the frame
Mirror selfies often capture unintended background clutter: doors, laundry baskets, outlets, bright wall text. Decide your “keep list” and physically block distractions (coat over an open door, move the phone slightly, or reposition).
Independent reader supportYour contribution helps us test, update, and keep practical guides available for everyone.Edge Cases and Gotchas (Why Your Mirror Selfies Keep Going Wrong)
Phone reflection showing the camera
This happens when the phone is too directly facing you or the mirror angle catches it. Fix it by shifting the phone position a few centimeters, or by placing it slightly higher/lower and tilting the camera just enough to keep your face centered.
Free tools Windows power users keep installed
One-click scans. No signup required.
- Try moving the phone sideways a little so only your face shows.
- Use a matte case or remove any bright accessories that reflect the room.
Motion blur from countdown timing
Blur often comes from moving right at the shutter moment. If you use a 3s timer and you’re still adjusting your hair, switch to 10s or use a remote so you can fully “settle” before capture.
Also check stability: if your stand flexes, use a heavier base.
Foggy mirrors and smudges
Bathroom mirrors are the classic failure. Even if you wipe it once, steam can creep back quickly.
- Wipe with a microfiber cloth right before you shoot.
- Turn on ventilation briefly if you can.
- Leave a small gap between you and the mirror to reduce heat transfer.
Rear-camera selfies look wider than expected
Back camera + ultra-wide lens is a common culprit. It can make your face look stretched or your head larger than life.
Recommended Free Tools
Switch to a more natural focal length (if your phone offers 1x/2x/tele options) and increase distance slightly while keeping framing similar.
Best Value

- CAPTURE STUNNING PHOTOS & VIDEOS REMOTELY WITH EASE - Say goodbye to blurry photos. Eliminate camera shake for razor crisp photos every time. Snap photos and Start/Stop video recording with the click of a button. Compatible with all iPhone, iPad, iPod models (iOS 5.0+) and Android smartphones and tablets (4.3+) including Samsung Galaxy, Note, Google Pixel and more. Not compatible with Windows phones.
- PAIRS INSTANTLY. NEVER MISS ANOTHER PHOTO MOMENT - Auto-connects to your phone in split-seconds. Blue indicator light lets you know at a glance that shutter is paired and ready for action. Easy access ON/OFF switch makes powering on and off a cinch for those special moments when you only have seconds to capture the perfect shot.
- RELIABILITY AND CONVENIENCE BUILT TO LAST - Xenvo Shutterbugs are equipped with advanced American, Ericsson Bluetooth 3.0 technology you can depend on; zero shutter lag, wider smartphone compatibility, and longer battery life guaranteed. Compact, convenient, and portable design clips easily to your bag or keychain for easy access anytime. Experience the ultimate remote control shutter today.
- 30 FEET RANGE GIVES YOU ROOM TO ROAM - Unchain yourself from your phone. Snap selfies and group photos with friends and family from afar. Position your phone, jump in the shot, and click the Xenvo Shutterbug from up to 30 feet away. Excellent for nature photography too. Setup your phone and snap photos from a distance without disturbing your subject.
- IRON-CLAD LIFETIME WARRANTY - When you invest in tech, you want it to work for years to come—not just a few short weeks or months. We stand behind every remote shutter we make. Each Xenvo Shutterbug comes with a lifetime warranty so you can rest easy knowing that whatever happens, we've got you COVERED.
Troubleshooting Checklist When It Still Doesn’t Work
When you miss, don’t guess randomly. Run this quick checklist.
| Problem | Try this first | Why it works |
|---|---|---|
| Your face is blurry | Tap to focus on your eyes; increase lighting; stabilize phone | Phones hunt focus in low light and during motion |
| Photo is too bright or washed out | Reduce backlight; lock exposure; consider HDR off | Mirrors amplify glare and highlights |
| Eyes don’t look sharp | Change focus point; use timer/remote to avoid movement at shutter | Small face motion ruins eye focus |
| You look like you’re looking sideways | Adjust phone height and angle; test with 2–3 quick shots | Lens direction relative to mirror changes eye alignment |
| You see the phone reflection | Move phone slightly; tilt differently; reposition stand | Reflection appears when angles align |
If your top result is always “almost good,” it’s usually either lighting inconsistency or phone focal distance. Lock one variable at a time.
Mirror Selfie Alternatives: Get the Same Result Without a Mirror
If you want “no lens stare” but mirrors are annoying (fog, glare, messy backgrounds), you can still replicate the effect.
Do these 3 things before closing this tab:
1Fix the driver behind crashes, sound loss and screen glitches2Clear out junk files and repair common Windows errors3Scan for outdated or missing drivers - takes under a minuteLow-angle or eye-level stand photos
Place the phone on a stand at eye level or slightly above. Then look at the screen just before the shutter via timer/remote, not continuously.
Front camera with a “look-at” cue
Use a tiny mark on your phone screen area to aim where you should look, then use timer/remote. Your eyes land where the lens “expects” even if you don’t stare at it.
Selfie using a timer + fixed framing
Even without a mirror, the key is fixing framing first, then triggering automatically. Mark phone distance and angle so you’re not repositioning mid-pose.
FAQs
Can I take a mirror selfie without distortion?
Yes. Avoid ultra-wide framing and keep the phone slightly farther away while using zoom (when available). Distortion mostly comes from close distance + wide-angle optics.
What timer length should I use?
Use 3s if your pose is instant and your trigger is stable. Use 10s if you need a deliberate expression, adjusting hair/clothes, or stepping into position.
Why does my phone keep refocusing at the moment of capture?
Low light and face movement are the usual culprits. Tap to focus on your eyes, lock focus/exposure if available, and use a longer countdown or remote so you’re not moving right as the shutter fires.
How do I stop the camera from showing in the mirror?
Shift the phone position and change the tilt slightly. Often moving the phone a few centimeters sideways (or raising it) prevents the lens reflection from appearing.
Does iPhone Portrait mode work for mirror selfies?
It can, but it’s more prone to edge errors when hair or glasses catch light. For the most consistent mirror results, Photo mode with stable lighting typically wins.
Free tools Windows power users keep installed
One-click scans. No signup required.
Bottom Line
The best mirror selfies where you don’t see the camera come down to a stable setup plus a trigger that removes timing pressure. Use a tripod or fixed placement, lock focus/exposure by tapping your eyes, and capture with a timer or remote so you can pose while looking at your reflection.
Once you’ve found your phone height, distance, and lighting style, you’ll repeat the same “wow, that looks natural” result with far fewer retakes.
Quick Recap
Product prices and availability are accurate as of the date/time indicated and are subject to change. Any price and availability information displayed on Amazon at the time of purchase will apply.

