Free tools Windows power users keep installed
One-click scans. No signup required.
For most blueprints, scan in Blueprint or old-blueprint mode at 300 dpi, then move to 600 dpi when dimension text, arrowheads, extension lines, or other fine marks occupy only a few pixels. Use grayscale when you need background removal, invert blue or dark originals so lines become dark on a light field, deskew the page, preserve its full aspect ratio, and save with little or no compression. If the CAD program can export a vector PDF, use that instead of scanning a raster image: vector geometry gives OCR and AI systems cleaner edges and more reliable line relationships.
These settings improve the input; they do not guarantee a particular recognition percentage. Accuracy depends on the drawing quality, the AI model, and the dimension style. Validate the workflow on representative sheets whose dimensions are already known.
As an Amazon Associate I earn from qualifying purchases.
Recommended starting settings
Start with the following profile for a typical architectural, mechanical, or civil blueprint:
Recommended Free Tools
| Setting | Starting choice | Change it when | Why it matters for AI |
|---|---|---|---|
| Original type | Blueprint or old-blueprint mode | The scanner lacks that mode; use grayscale and perform the equivalent cleanup manually. | These modes are designed to create a light background and dark linework, the contrast most OCR and vision models expect. |
| Resolution | 300 dpi | Use 600 dpi for tiny dimensions, thin lines, dense details, or black-and-white output. | More pixels preserve small characters, arrowheads, extension lines, and center marks. |
| Color mode | Grayscale | Try black-and-white only after checking that fine marks survive thresholding. | Grayscale retains weak gray information and supports background-removal workflows. |
| Inversion | On for blue or dark-background paper | Turn it off for a conventional white sheet with dark ink. | It changes blue-background linework into dark marks on a light field. |
| Deskew | On | Inspect manually when the sheet has a damaged edge or a border that the scanner may misread. | Correct orientation helps the model associate text, arrows, and extension lines. |
| Background cleanup | Moderate or smart removal | Reduce it if faint dimensions or hatch lines disappear. | Removes paper tone and stains without erasing meaningful marks. |
| Page geometry | Original sheet size and aspect ratio | Only crop after confirming that no title-block, border, or dimension lies outside the crop. | Scaling or cropping can change apparent spacing and remove context needed to interpret a dimension. |
| Output | Lossless or low-loss image; vector PDF when available | Use a raster file only when vector export is impossible. | Compression blocks and softened edges can merge characters with lines. |
HP describes its Blueprint mode as “for scanning blueprint originals with optimum results.” On devices that expose separate controls, select the blueprint preset first, then verify every automatic adjustment in a preview at 100% or greater.
#1 Best Overall

- [Office-friendly] - The S30 can scan documents up to 12 inches wide, meeting a wide range of business needs. A fast, powerful, large-format desktop scanner ideal for high-volume office use.
- [Cost Savings] - The S30 can scan A4/Letter size and 12" wide documents at the same time, so you won’t have to spend extra on a separate scanner just for a few wide-format documents.
- [Flexible Paper Handling] - The S30 handles a wide range of documents, from standard office paper in various sizes to blueprints, architectural plans, and engineering drawings, as well as thin papers like purchase orders and delivery notes.
- [Broad Compatibility] - Horizontal mode suit for matrix printer paper, thin or fragile documents can use carrier sheet protect during scanning. larger than Tabloid but smaller than Cut Sheet size, fold in carrier sheet and scan to save as a single image
- [Job Button] - The included software lets you register frequently used scanning tasks to the job button on the scanner. Once set up, you can simply press the job button to perform one-touch scanning.
Choose the right resolution
Why 300 dpi is the practical baseline
U.S. Geological Survey scanning specifications place standard documents and line drawings in the 300–600 dpi range. At 300 dpi, a full-size sheet remains manageable while ordinary dimension text and linework receive enough samples for OCR. Adobe Acrobat’s 2025 optimization guidance likewise uses 300 dpi for grayscale or color scans.
Use 300 dpi when the original is clean, the dimension text is comfortably readable at normal size, and the sheet is too large for convenient 600 dpi handling. It is a baseline, not a promise that every 3 mm character or hairline will be recognized.
When 600 dpi is worth the file size
Choose 600 dpi when characters, arrowheads, center marks, or extension lines are very small in the final scan; when the original uses thin pen lines; or when you intend to convert the result to black and white. Adobe recommends 600 dpi for black-and-white optimization because thresholding can otherwise remove narrow strokes.
Higher resolution cannot restore ink that is missing or a fold that covers a number. It does preserve more edge detail for the model, but it also increases file size and processing time. Before scanning an entire archive at 600 dpi, test one representative sheet and confirm that the AI actually reads more dimensions rather than merely producing a larger image.
Set color, contrast, and inversion deliberately
Use grayscale for mixed or uneven originals
Grayscale is usually the safest first choice for line or mixed originals. It retains weak marks that a hard black-and-white threshold might delete and works with smart background-removal tools. This is especially useful for aged paper, blue-line copies, pencil annotations, and sheets with both dark and faded dimensions.
Rank #2

- 🎯 2400 DPI High-Resolution Output with 48-bit Color – Capture every detail with stunning clarity. The scanner delivers maximum 2400 x 2400 DPI optical resolution, producing up to 196 million effective pixels per image. Important Note: For full A3 size at 2400 DPI, use MacOS with native ICA driver support. Windows users achieve 1200 DPI for A3 via ViiScan software.
- 🚀 Fastest 4-Second A3 Scanning at 200 DPI – Achieves maximum scanning speed of 4 seconds for A3 color documents at 200 DPI resolution. Important: This is the fastest speed under specific conditions (200 DPI, A3 size, color mode). Actual scanning time varies based on resolution, document size, and scan settings. Perfect for high-volume office environments where efficiency matters.
- 🔧 Frameless Design & Intelligent Auto-Scan – The frameless scanner glass allows edge-to-edge scanning of large materials. Auto-Scan function automatically starts when the lid closes, boosting productivity in continuous scanning workflows. Four-button control panel (Scan/Email/Print/PDF) simplifies operation.
- 💻 Windows & MacOS Compatibility with Global Power – Works seamlessly with Windows 7/8.1/10/11 (TWAIN/WIA drivers) and MacOS 10.15+ (ICA driver). Universal power adapter (AC 100-240V) ensures worldwide compatibility—no extra converters needed. Compliance Note: WIA driver on Windows is limited to 600 DPI due to Microsoft restrictions.
- 📐 Perfect for CAD Drawings, Blueprints & Large Documents – Handle oversized materials that standard scanners can't accommodate. Ideal for engineering drawings, architectural blueprints, legal documents (up to 12" x 17"), newspapers, magazines, and painting albums.
After scanning, inspect thin dimension lines, leaders, hatch boundaries, and center marks at full size. If a background-removal slider makes any of them discontinuous, back off the setting before sending the file to an AI system.
Use black and white only after visual inspection
Pure black-and-white output can produce excellent contrast when the source is clean and the lines are strong. It can also erase a faint extension line or close the gap between a character and a nearby rule. Make a test scan, compare it with grayscale, and choose the version in which every dimension has an intact text string, arrowhead, and extension geometry.
Do these 3 things before closing this tab:
1Clear out junk files and repair common Windows errors2Scan for outdated or missing drivers - takes under a minute3Repair Windows errors before they cause bigger problemsInvert blueprints with a dark background
Enable inversion when the source is blue or otherwise dark-background. Blueprint mode commonly performs this conversion automatically, but preview the result rather than trusting the preset. Look specifically for missing arrowheads, shortened extension lines, and vanished center marks. If the inverted image still has a mottled background, apply gentle background removal while preserving the line weight.
Protect geometry during cleanup
Deskew the page
Turn on deskew so horizontal dimensions and vertical construction lines are actually horizontal and vertical in the file. Even a small rotation can separate a dimension string from its extension lines or make a model treat a nearby note as the label for a different feature. Autodesk Raster Design documents deskew along with despeckle, inversion, mirroring, aspect-ratio bias correction, and pixel touch-up.
Review automatic deskew on sheets with torn edges, heavy borders, or a skewed title block. A scanner can align to the wrong edge; correct the angle manually if the drawing itself is the more reliable reference.
Rank #3
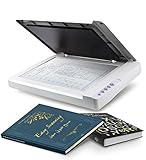
- Maximum Scan size - 11.7"x 17" (297 x 431.8 mm) Large Format Scanning, easy digital Tabloid or A3 size paper.
- No more waiting - by LED Light Source, Save Energy, No Warm Up
- Hassle fre operation - Pre Set Function One-Touch Button for Your Quick Use.
- Powerful software bundle - Enhanced OCR Accuracy with ABBYY, and DocAction for File Sharing
- Scan mode - 48 bit Color /16 bit Gray-Scale for Scan Art, Documents and Other Items
Preserve the original size and aspect ratio
Set the input size to the actual sheet size and keep proportional scaling enabled. HP warns that an incorrect input size can crop an original or add margins and emphasizes aspect-ratio preservation for CAD plots. Use this guidance at HP’s scanning documentation when configuring the device.
Do not crop away borders, title blocks, revision notes, or dimension strings simply to reduce file size. Those areas can provide units, scale, view names, and context that an AI model needs to resolve an ambiguous number. If you must crop for a second pass, retain an uncropped master.
Remove noise without removing information
Despeckle, descreen, and background removal can make text stand out, but aggressive settings erase small dots, decimal points, slash marks, and arrowheads. Adobe documents deskew, background removal, descreen, and text sharpening as separate optimization operations; apply them conservatively and in that order only when the preview improves.
For isolated defects, a pixel touch-up or a manually repaired copy can be safer than globally increasing contrast. Keep the untouched scan so any repair remains auditable.
Prefer vector PDF when the CAD source exists
A scan is a raster approximation of a drawing. If the authoring system can export the original sheet to PDF, request a vector PDF instead. Autodesk’s Drawing Authoring Guide states that drawings generated from the original design software should be exported to vector PDF for optimal OCR readability. Vector text and lines retain exact edges at any zoom, avoid scanner skew, and eliminate paper noise.
Windows Errors? Fix Them Before They Spread
Repair common Windows errors and clear accumulated junk for a smoother, more stable PC - no reinstall needed.Free scan · no reinstallCrashes, No Sound, or Screen Glitches?
Random freezes, missing sound and display glitches usually trace back to one bad driver. Find and replace yours safely.Free scan · under a minuteRank #4

- This scanner's wider feed mechanism allows for the scanning of large and odd shaped document. With a gentle, straight paper path, important customer documents can be scanned both safely and quickly
- Day in and day out reliability with industry leading image quality
- Superior paper handling technologies reduce jams minimizing labor costs
- Included PaperStream ClickScan software delivers scanning simplicity and works alongside of any workflow to meet your imaging needs. Place paper in the scanner, push the scan button, and send to email, print, or folder - simple as one, two, three.
- Integrates with ECM solutions across all industries via TWAIN / ISIS and Kofax VRS Compatibility
Use a raster export only when vector output is unavailable or when the physical sheet contains annotations not present in the CAD file. Autodesk recommends at least 150 dpi for raster drawing exports without significant compression artifacts; for a physical scan intended to recover small dimensions, the 300–600 dpi choices above remain the more useful target.
Step-by-step workflow for an AI-ready scan
- Identify the source. Record whether the sheet is a blue-line original, a white paper copy, a sepia or aged print, or a CAD export. Note the sheet size, units, and whether annotations must be retained.
- Check for a vector source. Ask for a vector PDF from the original design software before scanning. If one exists, use it as the primary input and scan only physical marks that are absent from the file.
- Clean the scanner glass and guides. Dust creates spots that resemble decimal points or symbols. Align the sheet squarely against the guide without bending it.
- Select Blueprint or old-blueprint mode. If unavailable, choose grayscale, enable background-removal controls, and plan to test inversion manually.
- Set 300 dpi. Raise to 600 dpi when the smallest dimension text or line is hard to distinguish in a 300 dpi preview, or when black-and-white output is required.
- Set the color treatment. Use grayscale for mixed or uneven originals. Enable inversion for blue or dark backgrounds.
- Set the exact page size and proportional scaling. Disable automatic cropping unless you have confirmed that the entire sheet is inside the capture area.
- Enable deskew and moderate cleanup. Use despeckle or descreen only if the preview improves. Avoid sharpening that creates halos around characters.
- Preview at 100%. Inspect representative dimensions in every drawing region: small notes, crowded details, long dimension chains, and the title block. Confirm that decimal points, arrowheads, extension lines, and center marks remain visible.
- Save a master. Prefer a lossless or low-loss image. Keep the original scan before any thresholding, cropping, or manual repair.
- Run the AI and verify. Compare extracted values with known dimensions on the sheet. Check units, decimal placement, sign or diameter symbols, and which extension lines the model associated with each value.
Troubleshoot missed or incorrect dimensions
| Symptom | Likely cause | Adjustment |
|---|---|---|
| Small numbers are skipped entirely | Insufficient pixel detail or over-aggressive thresholding | Rescan at 600 dpi in grayscale; compare with a carefully inspected black-and-white version. |
| Blue linework disappears after processing | Inversion or background removal was not applied correctly | Enable blueprint inversion, reduce cleanup strength, and check the preview for continuous lines. |
| Values are read but assigned to the wrong feature | Skew, cropping, or missing extension/leader lines | Deskew, preserve the full page, and rescan with the surrounding geometry intact. |
| Decimal points or arrowheads vanish | Despeckle, sharpening, or black-and-white threshold removed tiny marks | Return to the grayscale master and lower cleanup strength; use 600 dpi if necessary. |
| Circles become ovals or distances seem inconsistent | Non-proportional scaling or scanner aspect-ratio bias | Restore proportional scaling and verify the scanner’s aspect-ratio correction. |
| Text looks blocky and OCR confidence falls | JPEG or other heavy compression artifacts | Export lossless or low-loss and avoid repeated save cycles. |
| A whole edge or title block is absent | Incorrect input size or automatic crop | Set the real sheet size, disable auto-crop, and use the uncropped master. |
What to compare when choosing a scanner or workflow
For full-size plans, compare the workflow rather than a headline megapixel number. The practical capabilities are:
- Effective optical resolution: Confirm that the stated dpi is optical detail, not only an interpolated setting.
- Sheet capacity: The scanner must accept the complete sheet or a controlled, overlap-safe tiling process.
- Grayscale and black-and-white controls: Separate modes let you preserve faint marks before testing thresholding.
- Blueprint inversion: A dedicated inversion option reduces manual editing for blue-line originals.
- Background removal and deskew: These should be adjustable rather than an irreversible one-click effect.
- Aspect-ratio handling: Look for explicit proportional scaling and controls that prevent edge cropping.
- Output quality: Lossless or low-loss files protect thin lines and small punctuation.
- Vector preservation: If the workflow accepts CAD-exported vector PDFs, use that path whenever possible.
A large-format document scanner is the relevant hardware category when sheets exceed ordinary office sizes. Choose one that exposes these controls and verify the output on your own drawings; no setting or device specification alone establishes AI recognition accuracy.
How to validate recognition quality
Because there is no published cross-model accuracy percentage for blueprint dimension recognition, create a small validation set. Select sheets with different line weights, paper colors, scales, text sizes, and levels of wear. Mark a reference list of dimensions directly from the originals or authoritative CAD files, including units and symbols.
Run the same sheets through 300 dpi grayscale, 600 dpi grayscale, and—only where appropriate—600 dpi black and white. Record missed values, wrong digits, decimal errors, symbol errors, and incorrect associations between a value and its geometry. Also record processing time and file size. Keep the profile that reduces consequential errors, not merely the one that produces the highest OCR character count.
Best Value

- COMPATIBILITY NOTICE: The bundled scanning software OfficeCam supports only x64 and x86 architectures on Windows PCs and macOS. Not compatible with ARM-based devices, such as the Surface Pro X.
- [A2 Large Format Scanner] The S21 scanner is a perfect A2 large format overhead document camera. Large A2 Size scanning at 594x420 mm, ideal for scanning large format journals, manuscripts, newspapers, and maps. Overhead scanner height adjustable (A2/A3) design with a 90-degree foldable hinge. And the S21 allows for taking snapshots, books, documents, business cards, 3D objects, Remote Collaboration, and recording videos
- [Excellent Scanning Quality] When paired with VIISAN’s scanning software, the document scanner can deliver up to 26MP (5888 × 4522 pixels) resolution, and supports Software-Enhanced up to 600 DPI for capturing stunning detail. It features an adjustable height (A2/A3) with a 90-degree foldable hinge, making it easy to adapt to different scanning needs. Ideal for scanning snapshots, books, documents, business cards, 3D objects, and supporting remote collaboration and video recording.
- [Intelligent Scanning Software] You can use the bundled VIISAN scanning software with the smart device to get great results while scanning books. For example, it can automatically digitally flattens curved pages, erases fingers from the scanned photos, repairs the damaged edges of documents, and automatically splits double-page into separate images. and the embedded OCR feature you can convert all the scanned files into PDF or editable Word/Excel/Epub/Txt files
- [Built-in 3-Level LED Light Control] Portable document scanner built-in high brightness LED lamp that allows you to take clear photos even in the dark. (Note: It is not recommended to use the built-in LEDs of the book scanner in bright light. And very glary papers are NOT recommended.)
Repeat the check after any scanner firmware change, preprocessing change, or AI-model update. A model may improve at text while still confusing a dimension chain, so evaluate both the value and its geometric assignment.
Practical recipes for common blueprint conditions
Clean white sheet with dark ink
Use blueprint mode if available, otherwise grayscale at 300 dpi, deskew on, proportional scaling on, and light cleanup. If all fine marks remain intact, a 600 dpi black-and-white version can be tested for higher contrast.
Blue-line print with a pale or dark field
Use blueprint or old-blueprint mode, inversion on, grayscale, and moderate background removal. Inspect arrowheads and center marks after inversion before sending the file to AI.
Faded, stained, or mixed-media sheet
Use 600 dpi grayscale, conservative background removal, and deskew. Avoid immediate thresholding; preserve faint dimensions first, then create a separate high-contrast derivative if needed.
Very large sheet with tiny annotations
Capture the full sheet at 300 dpi for context, then rescan critical regions at 600 dpi without changing their aspect ratio. Keep both files so the AI can use the overview to understand context and the detail scan to read small text.
Bottom line
Use 300 dpi Blueprint-mode grayscale as the default, 600 dpi for genuinely small or thin detail, inversion for blue or dark backgrounds, careful deskew and background cleanup, and exact page geometry. Prefer a vector PDF from CAD whenever possible. Treat every setting as a way to preserve evidence for the AI, then verify extracted dimensions against known values instead of assuming that a cleaner-looking scan is a more accurate one.
Quick Recap
Product prices and availability are accurate as of the date/time indicated and are subject to change. Any price and availability information displayed on Amazon at the time of purchase will apply.
What’s actually slowing this PC down?
Pick the symptom - the matching free tool is one click away.

