Dehancer Pro and FilmConvert Nitrate are the two most relevant film-emulation alternatives for editors who are not using ARRI Film Lab. Dehancer documents the broader set of film, print, grain, halation, bloom and color-pipeline controls; FilmConvert is the more practical candidate when you need a plugin family that runs across Premiere Pro, After Effects, DaVinci Resolve and Final Cut Pro. Neither is a proven universal winner. The right choice depends on your host application, color-management path, footage and how much control you want over the analog-film treatment.
Quick verdict
| Plugin | Best fit | What is documented | Main qualification |
|---|---|---|---|
| Dehancer Pro | Resolve editors who want a deep film-processing toolkit | 60+ film profiles, print films, grain, halation, bloom, film damage, overscan, LUT generation, camera profiles, and DWG, ACES and Cineon pipelines | The captured product page lists version 7.4.1, Resolve 19 or newer and macOS 13 or newer; verify requirements for your exact system |
| FilmConvert Nitrate | Editors who need film emulation in a multi-application workflow | FilmConvert documents compatibility with Premiere Pro, After Effects, DaVinci Resolve and Final Cut Pro | The available product page does not provide enough detail for a precise feature-by-feature Nitrate comparison or a current price |
| FilmConvert CineMatch | Mixed-camera projects that need camera matching | A tool for making footage from different cameras look as though it came from one camera; listed from $119 on the accessed page | It is adjacent to film emulation, not a substitute for a film-stock emulation plugin |
| ARRI Film Lab 1.5 | A current reference point for OpenFX film-look work | 8 mm, 16 mm, 35 mm and 65 mm looks, adjustable grain size and detail rendition, ACES 2.0 ACEScc and ACEScct input/output options, and ARRI’s claim of up to four-times-faster processing | ARRI’s speed statement is a vendor claim, not an independent benchmark |
Use the table as a starting point, not an image-quality ranking. The available documentation is from the vendors and does not establish which plugin produces the most accurate emulation.
As an Amazon Associate I earn from qualifying purchases.
What ARRI Film Lab does—and why it is the comparison point
ARRI describes Film Lab as a license-based OpenFX plugin that adds analog-film characteristics to RGB images from any camera. You do not need an ARRI camera simply to qualify technically. The plugin is documented for Resolve, Baselight and Nuke, and for LogC3 (AWG3) and LogC4 (AWG4) workflows.
Recommended Free Tools
Its controls cover the parts of a film treatment that usually need to be separated during grading: film grain, color, halation and gate weave. ARRI also says the bundled ARRI Look Library version contains 87 predefined looks, with three intensities for each look. That combination—stock-like starting points plus adjustable physical artifacts—is why Film Lab is a useful baseline even when it is not in your toolset.
#1 Best Overall

- Pre-loaded with ISO 400 speed film with 27 exposures per camera
- Built-in 10’ flash range and a continuous flash switch
- 2 pack - Total 54 exposures
What changed in Film Lab 1.5
ARRI announced Film Lab 1.5 on October 12, 2026. The release adds 8 mm, 16 mm and 65 mm looks alongside the existing 35 mm format options, controls for grain size and detail rendition, and ACES 2.0 ACEScc and ACEScct input/output choices. ARRI says processing is up to four times faster. Treat that number as ARRI’s stated capability, not as a result from an independent test.
These additions matter when you compare alternatives: a plugin that offers many stock profiles but no useful way to place it in your color-managed pipeline may be less suitable than one with fewer presets and predictable transforms.
Dehancer Pro: the control-heavy alternative
Dehancer’s DaVinci Resolve Pro page lists more than 60 film profiles, print films, grain, halation, bloom, film damage, overscan, LUT generation and camera profiles. It also lists color pipelines including DaVinci Wide Gamut (DWG), ACES and Cineon. That is a broad set of controls for an editor who wants to build a look in stages instead of applying one opaque preset.
What’s actually slowing this PC down?
Pick the symptom - the matching free tool is one click away.
Why Resolve users may prefer it
- Stock and print separation: You can choose a film profile and a print-film treatment as distinct parts of the look, rather than treating “film” as one slider.
- Artifact controls: Grain, halation and bloom are documented separately, with additional film-damage and overscan tools for projects that need a visibly aged image.
- Pipeline options: The listed DWG, ACES and Cineon paths give Resolve colorists several ways to place the plugin in a managed workflow.
- Camera-aware setup: Camera profiles can be useful when your footage begins in a log or manufacturer-specific encoding and you want a defined starting transform.
- Deliverable flexibility: LUT generation is listed for workflows that need to carry a look beyond the grading timeline.
Compatibility and version caveat
The captured page identifies Dehancer Pro version 7.4.1 and lists DaVinci Resolve 19 or newer and macOS 13 or newer among its requirements. Software hosts, operating systems and GPU support change frequently, so confirm the current requirements for your Resolve edition, operating system and hardware before licensing or upgrading a project.
The 60-plus profile count is a vendor-listed figure. It tells you the breadth of the library, not how closely every profile will match a particular historical stock, scan or exposure.
FilmConvert Nitrate: the cross-application option
FilmConvert describes Nitrate as part of a product family covering film emulation and lists compatibility with Premiere Pro, After Effects, DaVinci Resolve and Final Cut Pro. That host coverage is the clearest reason to consider it: an editor who cuts in one application, hands shots to another and wants the same product family available in both may value portability more than an extensive list of secondary artifacts.
Rank #2

- 📷 This bundle included one roll of Kodak Ultramax400 24exp film, battery not included.
- 📷 The included roll of Ultramax film will be either the Kodak Alaris packaging (pictured) or the Eastman Kodak packaging depends on availability.
- 📷 Film-saving: You can have twice as many images per roll. For example, a film roll with 24 exposures can yield around 48 half-frame photos - doubled!
- 📷 Lightweight and Easy-to-use: The pocket-size camera is light and tiny, and hence convenient for you to bring along daily. Since its instructions are simple, it is suitable for all analog hobbyists.
- 📷 Built-in Flash: Turning on the flash by adjusting the silver ring around the lens so that you can use KODAK EKTAR H35 during days and nights, outdoor and indoor.
The available FilmConvert homepage does not provide enough captured detail to make a responsible feature-by-feature comparison of Nitrate’s controls, profile count or current license price. Check the current Nitrate product page for the exact host versions, supported operating systems, camera coverage, trial terms and license conditions that apply to your setup.
Nitrate versus CineMatch
FilmConvert presents CineMatch as a camera-matching product. Its purpose is to make mixed-camera footage look as if it came from one camera, which is a problem that occurs before—or alongside—the creative film-look stage. CineMatch is therefore relevant to a multicamera documentary, interview series or event project, but it should not be presented as a direct replacement for a film-stock emulation plugin.
The accessed FilmConvert page listed CineMatch from $119. That is a volatile listed price, not a guaranteed current price or a statement about Nitrate’s cost. The same page listed Halation from $99, but a separate halation product does not establish what controls are included in Nitrate.
How the three workflows differ
| Decision area | Dehancer Pro | FilmConvert Nitrate | CineMatch | Film Lab 1.5 reference |
|---|---|---|---|---|
| Primary job | Film and print treatment with additional analog artifacts | Film-emulation workflow across several editing hosts | Camera matching for mixed-camera footage | Analog-film characteristics in an OpenFX plugin |
| Host information documented here | DaVinci Resolve; captured page lists Resolve 19+ | Premiere Pro, After Effects, DaVinci Resolve and Final Cut Pro | Confirm the current host list for your camera profiles and editor | Resolve, Baselight and Nuke |
| Profile or look information | 60+ film profiles and print films, according to the vendor | Not stated in the available captured material | Camera profiles rather than film-stock profiles | 87 predefined looks, each in three intensities; 8 mm, 16 mm, 35 mm and 65 mm looks in version 1.5 |
| Documented processing controls | Grain, halation, bloom, film damage, overscan, LUT generation and camera profiles | Exact Nitrate controls not established by the available page | Camera-matching controls; exact feature list not established here | Grain, color, halation and gate weave; 1.5 adds grain-size and detail-rendition controls |
| Color-management information | DWG, ACES and Cineon options are listed | Verify the current product documentation for your intended pipeline | Verify the transform and camera-profile workflow before use | LogC3 (AWG3), LogC4 (AWG4), plus ACES 2.0 ACEScc and ACEScct input/output in 1.5 |
| Published price in the available material | Not stated | Not stated | From $119 on the accessed page | Not stated |
Choose by host application first
DaVinci Resolve
Resolve users have the widest documented choice in this comparison. Dehancer’s captured requirements explicitly mention Resolve 19 or newer, and its page lists DWG, ACES and Cineon pipelines. FilmConvert also lists Resolve compatibility. Film Lab is an OpenFX option for Resolve, with ARRI documenting LogC3 and LogC4 support and the newer ACES 2.0 options.
Check whether the plugin supports your exact Resolve major version, operating system and GPU before opening a long-form project. A technically attractive look is not useful if a host update breaks loading, caching or render performance.
Premiere Pro, After Effects or Final Cut Pro
FilmConvert’s documented application coverage is the strongest reason to start there when your primary grade happens outside Resolve. Do not assume that a Resolve-focused tool will have an equivalent implementation in another host; verify the current plugin format, host version and render behavior for the application you actually use.
Rank #3

- One-Time-Use camera
- Great for indoors and outdoors
- Easy to use
- Continuous flash switch
Baselight or Nuke
ARRI specifically lists Baselight and Nuke among Film Lab’s compatible grading environments. The alternatives in this comparison need separate host verification. If a plugin cannot load in the finishing application that owns your color pipeline, application breadth elsewhere does not solve the problem.
Color management: place the plugin deliberately
Film-emulation plugins can behave very differently depending on whether they receive camera log, a scene-referred working space or a display-referred image. Before comparing looks, write down the input encoding, the working space and the output transform for each candidate.
- Documented Dehancer paths: Its page lists DWG, ACES and Cineon options. Select the path that matches your project rather than stacking an untracked conversion before and after the plugin.
- ARRI workflows: Film Lab documents LogC3/AWG3 and LogC4/AWG4 support. Version 1.5 adds ACES 2.0 ACEScc and ACEScct input/output options.
- FilmConvert and CineMatch: Confirm the current documentation for the intended camera profiles, transforms and host. The available material does not establish a universal placement rule.
Keep exposure and white-balance normalization consistent during testing. Otherwise a plugin may appear to win simply because one input was brighter, cleaner or already closer to the target display transform.
PC Slower Than It Used to Be?
A free scan shows the junk files, broken settings and background clutter dragging Windows down - then fixes them in one click.Free scan · Windows 10 & 11Crashes, No Sound, or Screen Glitches?
Random freezes, missing sound and display glitches usually trace back to one bad driver. Find and replace yours safely.Free scan · under a minuteA controlled way to compare the looks
No vendor page can tell you which emulation is best for your footage. A short, repeatable test is more useful than a preset gallery.
- Build a representative reel. Include daylight, tungsten or mixed light, skin, saturated colors, fine texture, underexposure and any difficult camera you expect on the real project. Include every camera body if the project is multicamera.
- Lock the technical setup. Use the same timeline resolution, frame rate, input transforms, output transform, exposure normalization and monitoring conditions for every plugin.
- Start with neutral settings. Choose one comparable film-oriented profile or starting look, keep grain and artifact intensity conservative, and avoid judging a plugin from an extreme preset.
- Test the controls you actually need. Adjust color, grain, halation and bloom separately. If the project needs weave, damage or overscan, test those features on motion and on a clean title-safe frame.
- Render short sections. Export matching clips rather than relying only on a live viewer. Check gradients, shadows, highlights, skin, motion and fine detail at the delivery resolution.
- Check repeatability. Reopen the project, clear caches if appropriate, and confirm that the result is stable across shots and renders. Note any host-specific limitations.
- Record the decision. Save the plugin version, host version, operating system, profile, intensity and color-management settings with the project documentation.
This method measures fit for your images and workflow. It does not create a universal accuracy ranking, and the available vendor material contains no independent side-by-side image tests.
Controls that change the character of a film look
Film or print profile
A film profile changes the broad color and contrast response. A print-film stage can further shape density and palette. Dehancer explicitly lists both film profiles and print films; Film Lab’s Look Library supplies predefined looks in three intensities. Treat a preset as a starting point and evaluate neutral grays, skin and saturated colors before increasing intensity.
Rank #4
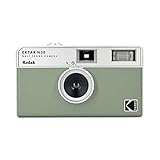
- 📷 Film-saving: You can have twice as many images per roll. For example, a film roll with 36 exposures can yield around 72 half-frame photos - doubled!
- 📷 Lightweight and Easy-to-use: The pocket-size camera is light and tiny, and hence convenient for you to bring along daily. Since its instructions are simple, it is suitable for all analog hobbyists.
- 📷 Built-in Flash: Turning on the flash by adjusting the silver ring around the lens so that you can use KODAK EKTAR H35 during days and nights, outdoor and indoor.
- 📷 Perfect for Beginners: The point-and-shoot camera is easy to use for new analogue hobbyists.
- 📷 Five colors: Off-white, black, brown, sage and sand. Neat and natural.
Grain
Grain should support the image rather than obscure focus or compression artifacts. Film Lab 1.5 adds grain-size control, while Dehancer lists grain as a separate feature. Match grain scale and amount to the delivery resolution and viewing distance, then check moving shots for temporal stability.
Do these 3 things before closing this tab:
1Scan for outdated or missing drivers - takes under a minute2Repair Windows errors before they cause bigger problems3Fix the driver behind crashes, sound loss and screen glitchesHalation and bloom
Halation places a colored response around bright boundaries; bloom spreads highlights more broadly. Dehancer documents both controls. Film Lab documents halation among its adjustable controls. Keep these effects separate during testing so you can identify whether a pleasing result comes from the stock response or from added glow.
Weave, damage and overscan
Gate weave and damage are stylistic choices, not requirements for every “film” grade. Film Lab includes gate weave; Dehancer lists film damage and overscan. Use them only when the project calls for a visibly aged or scanned presentation, and verify that titles, reframing and stabilization still hold up.
Independent reader supportYour contribution helps us test, update, and keep practical guides available for everyone.Licensing, prices and version checks
The published figures available for this comparison are limited and volatile.
| Item | Published figure | How to interpret it |
|---|---|---|
| Dehancer Pro profile library | 60+ film profiles | Vendor-listed count on the DaVinci Resolve Pro page; not an image-quality score |
| Dehancer captured version and requirements | Version 7.4.1; Resolve 19+ and macOS 13+ | Captured October 13, 2026; verify current requirements before purchase |
| ARRI Film Lab Look Library | 87 looks, each in three intensities | ARRI product-page figure accessed October 13, 2026 |
| FilmConvert CineMatch | From $119 | Volatile listed price captured October 13, 2026; not Nitrate’s price |
| FilmConvert Halation | From $99 | Separate listed product; does not establish Nitrate’s included controls or price |
| FilmConvert Nitrate and ARRI Film Lab licenses | Not stated in the available material | Check the current product and licensing pages for edition, term, machine limits, upgrades and trial conditions |
Budget for the complete workflow, not only the plugin name. A license that loads in your editor but requires a different host, an unsupported operating system or a separate camera-matching stage may cost more in time than its sticker price suggests.
Quick wins for a faster PC:
Repair Windows errors before they cause bigger problemsFix Now →Scan for outdated or missing drivers - takes under a minuteDriver Scan →Clear out junk files and repair common Windows errorsFree Scan →Common mistakes and how to avoid them
Using CineMatch as the film look
CineMatch solves camera consistency. If the creative goal is a particular film-stock character, use a film-emulation product after the cameras are normalized, or choose a product that performs both tasks when its documentation supports that workflow.
Best Value

- 📷 This bundle included one roll of Kodak Ultramax400 24exp film, battery not included.
- 📷 The included roll of Ultramax film will be either the Kodak Alaris packaging (pictured) or the Eastman Kodak packaging depends on availability.
- 📷 Film-saving: You can have twice as many images per roll. For example, a film roll with 24 exposures can yield around 48 half-frame photos - doubled!
- 📷 Lightweight and Easy-to-use: The pocket-size camera is light and tiny, and hence convenient for you to bring along daily. Since its instructions are simple, it is suitable for all analog hobbyists.
- 📷 Built-in Flash: Turning on the flash by adjusting the silver ring around the lens so that you can use KODAK EKTAR H35 during days and nights, outdoor and indoor.
Comparing presets with different exposure
Normalize exposure and white balance first. Otherwise a darker or more saturated preset can appear more “cinematic” simply because it changes the shot’s baseline.
Ignoring the working color space
Do not insert a plugin without knowing whether it expects log, scene-referred or display-referred data. Use the documented DWG, ACES, Cineon, LogC or ACES 2.0 options where applicable and verify undocumented paths with the current vendor manual.
Assuming a new host version is safe
Version numbers and operating-system requirements change. Test the plugin on a copy of the project after a host update, and keep a renderable version of the previous environment until the delivery is complete.
Judging only a still frame
Grain, halation, weave and damage are temporal effects. Review motion, cuts, gradients and titles at the final delivery size before committing to a look.
Recommendations by editor profile
Choose Dehancer Pro when
- You grade primarily in Resolve and want the broadest documented set of film, print and analog-artifact controls in this comparison.
- You need to work in a DWG, ACES or Cineon pipeline and want those options exposed by the product documentation.
- You expect to generate LUTs or use camera profiles as part of a repeatable workflow.
Choose FilmConvert Nitrate when
- Your work moves between Premiere Pro, After Effects, Resolve or Final Cut Pro and host availability is the deciding constraint.
- You prefer a cross-application product family and are prepared to verify the exact current Nitrate controls, camera support and license terms.
- You want to evaluate the look on your own footage rather than rely on a claimed industry-wide ranking.
Choose CineMatch alongside a film plugin when
- The project combines cameras that do not match cleanly out of the box.
- Your first problem is consistent color and contrast between cameras, with the film character applied afterward.
Stay with Film Lab when
- Your facility already runs its documented OpenFX hosts and LogC or ACES workflows.
- You need the specific 1.5 format, grain/detail and ACES 2.0 additions and are comfortable evaluating ARRI’s stated performance claim on your own system.
Bottom line
For editors who do not use ARRI Film Lab, start by testing Dehancer Pro and FilmConvert Nitrate on the same representative clips. Dehancer is the documented choice for a Resolve-centered, control-rich workflow; FilmConvert is the practical candidate when support across several editing applications matters most. Add CineMatch only when camera matching is part of the problem. Verify host and operating-system support, place the plugin correctly in your color pipeline, and make the final decision from rendered footage—not from profile counts, testimonials or vendor claims alone.
Quick Recap
Product prices and availability are accurate as of the date/time indicated and are subject to change. Any price and availability information displayed on Amazon at the time of purchase will apply.

