For this guide, “DJI Pocket” means the DJI Osmo Pocket 3. Start with 4K at 24, 25, or 30 fps (matching your edit and local lighting), shutter near twice the frame rate, Auto ISO within the normal video range, and a stable white-balance setting when the light is consistent. Add light indoors before pushing ISO; use an ND filter outdoors only when brightness forces a shutter faster than the motion look you want. These are practical starting points, not DJI-prescribed presets.
What this guide covers—and what it does not
The Osmo Pocket 3 is the reference model here. Its settings, accessories, and menu paths should not be assumed to apply to the original Osmo Pocket or Pocket 2. DJI states that Pocket 3 accessories are not compatible with Pocket 2, so check the exact model before buying a filter, grip, tripod, or other add-on.
As an Amazon Associate I earn from qualifying purchases.
DJI documents the Pocket 3’s controls and operating limits, but does not publish one “best” indoor or outdoor recipe for every room, skin tone, light source, or video platform. The choices below explain how to make a repeatable setup and when to change it. Record a short test clip in your actual location and inspect faces, highlights, motion, and audio before a long take.
A dependable starting setup for most vlogs
Use this as a baseline, then adjust one control at a time:
#1 Best Overall
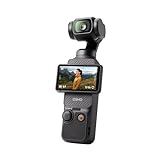
- Capture Stunning Footage - Osmo Pocket 3 vlogging camera features a 1-inch CMOS sensor and records in 4K resolution at an impressive 120fps. Capture breathtaking night views and sunsets with enhanced clarity.
- Effortlessly Frame Your Shots - Get the ideal composition with Osmo Pocket 3's expansive 2-inch touch screen that rotates for both horizontal and vertical shooting.
- Ultra-Steady Footage - Say goodbye to shaky videos! Osmo Pocket 3's advanced 3-axis mechanical stabilization delivers superb stability. Enjoy smooth footage while dancing, chasing pets, or hiking.
- Create Captivating Vlogs With ActiveTrack 6.0 - Stay effortlessly in focus as you record on the go. Set Osmo Pocket 3 up on a tripod and jump, dance, or spin, but remain center-frame.
- Fast and Accurate Focusing - Osmo Pocket 3 digital camera locks onto your subject for sharp, clear footage. Whether filming action-packed scenes or still shots, it ensures every detail is captured.
- Resolution: 4K for cropping flexibility and detailed delivery; use 2.7K or 1080p when storage, editing speed, or delivery requirements make that more practical.
- Frame rate: 24, 25, or 30 fps for ordinary talking-head footage. Choose the rate your editor, platform, and local lighting workflow expect. Use 50 or 60 fps when you need smoother motion or intend to slow the clip down.
- Shutter: Begin near twice the selected frame rate. That means roughly 1/48 or 1/50 at 24/25 fps, 1/60 at 30 fps, and 1/120 at 60 fps. This is a general videography convention, not a Pocket 3 rule.
- ISO: Leave Auto ISO on for a moving solo vlog, or use manual ISO in Pro mode when lighting is stable and you want consistent noise and brightness.
- White balance: Use Auto when you move between changing or mixed light. Use a fixed preset or manual value when the light is stable and color continuity matters.
- Gimbal: Follow is the normal walking and talking choice. Tilt Locked helps keep a level horizon for static or deliberately composed shots; FPV follows more of the camera’s roll and is a stylistic option.
- Focus and framing: Enable Face Auto-Detect or Dynamic Framing when appropriate, and verify that your face remains inside the intended composition before recording.
The Pocket 3 records MP4 using H.264 or HEVC. Its one-inch CMOS sensor, 20 mm-equivalent lens, and f/2.0 aperture influence how much light and field of view you have, but those specifications do not guarantee a particular low-light result.
How to reach manual exposure controls
On the Pocket 3 screen
- Swipe left on the Pocket 3 display.
- Tap PRO.
- Choose Exposure, then select M (Manual).
- Set shutter and ISO while watching the live image and the brightest parts of the scene.
In DJI Mimo
- Open the camera view in DJI Mimo.
- Open the exposure control currently labeled AUTO.
- Switch it to M and adjust shutter and ISO.
DJI’s video Pro controls also include white balance, color, focus, channel, wind-noise reduction, and directional audio. Menu labels can change with firmware; DJI’s User Manual v1.0 is dated 2023-10-25, and the download center lists release notes dated 2025-08-26, so consult the current documentation if your interface differs.
Choosing resolution and frame rate
What the camera supports
| Capture option | DJI-listed choices | When it makes sense |
|---|---|---|
| 4K normal video (16:9) | 24, 25, 30, 48, 50, or 60 fps | High-detail vlogs, reframing in post, or delivery that benefits from 4K. |
| 2.7K normal video | Multiple frame rates up to 60 fps | A middle ground for smaller files or faster editing. |
| 1080p normal video | Multiple frame rates up to 60 fps | Full-HD delivery, limited storage, or lightweight editing. |
| 4K slow motion | DJI lists 4K/120 fps as a slow-motion capability | Short action details or deliberate slow motion, not ordinary dialogue. |
These are product limits, not a command to use 4K/60 for every recording. Higher resolution and frame rate consume more storage and can increase editing demands. Pick the rate before shooting so clips from the same project cut together naturally.
What’s actually slowing this PC down?
Pick the symptom - the matching free tool is one click away.
Match the rate to motion and lighting
Twenty-four or 25 fps gives a conventional cinematic or regional-broadcast cadence; 30 fps is common for general online talking-head work. Fifty or 60 fps makes pans, walking, and hand movement look smoother and gives you more flexibility for slow motion. The tradeoff is that a higher frame rate generally needs a faster shutter and therefore more light.
Indoor lights can flicker when the shutter interacts with their electrical frequency. If you see bands or rhythmic brightness changes, try the frame rate and shutter combination that matches your local power system, or change the offending light. Do not sacrifice a clean, flicker-free image simply to preserve a theoretical shutter value.
Exposure settings indoors
Light the subject before raising ISO
Place a window or lamp in front of you rather than behind you, move closer to a larger soft source, or add a light aimed at the subject. Better light usually produces a cleaner image than pushing sensitivity. The Pocket 3’s listed normal-video ISO range is 50–6400; its Low-Light Video mode lists ISO 50–16000. Those are available ranges, not measurements of acceptable noise at every value.
Rank #2

- Capture Stunning Footage - Osmo Pocket 3 vlogging camera features a 1-inch CMOS sensor and records in 4K resolution at an impressive 120fps. Capture breathtaking night views and sunsets with enhanced clarity.
- Effortlessly Frame Your Shots - Get the ideal composition with Osmo Pocket 3's expansive 2-inch touch screen that rotates for both horizontal and vertical shooting.
- Ultra-Steady Footage - Say goodbye to shaky videos! Osmo Pocket 3's advanced 3-axis mechanical stabilization delivers superb stability. Enjoy smooth footage while dancing, chasing pets, or hiking.
- Create Captivating Vlogs With ActiveTrack 6.0 - Stay effortlessly in focus as you record on the go. Set Osmo Pocket 3 up on a tripod and jump, dance, or spin, but remain center-frame.
- Fast and Accurate Focusing - Osmo Pocket 3 digital camera locks onto your subject for sharp, clear footage. Whether filming action-packed scenes or still shots, it ensures every detail is captured.
Manual indoor starting point
For a stable talking-head shot, select 24/25/30 fps, set shutter near 1/48–1/60 as appropriate, and raise ISO only until the face is properly exposed. Watch bright windows, white shirts, and practical lamps as well as skin. If the room changes from window light to a ceiling fixture, Auto ISO can be less disruptive than repeatedly chasing manual values.
Do these 3 things before closing this tab:
1Fix the driver behind crashes, sound loss and screen glitches2Clear out junk files and repair common Windows errors3Scan for outdated or missing drivers - takes under a minuteWhen you must move through a dim room, keep the chosen frame rate and allow Auto ISO to respond, or use Low-Light Video if you accept its different operating behavior. DJI states that ActiveTrack is not supported in Low-Light mode, so do not choose it when automatic subject tracking is essential.
Focus and distance indoors
DJI lists a minimum focus distance of 20 cm. Do not hold the camera closer than that and expect a sharp face or product. For a desk presentation, place the Pocket 3 beyond the minimum distance, confirm focus on the screen, and leave enough space for natural gestures.
Exposure settings outdoors
Protect highlights first
Sunlit faces, clouds, pale walls, and reflective water can clip before a shaded face looks bright enough. Reframe, turn the subject toward softer light, or move into open shade. Recheck exposure whenever you pass from sun to shade; a setting that works on a street corner may fail under an awning.
Use an ND filter only for a real need
In bright daylight, maintaining a shutter near twice the frame rate may leave the image overexposed even at low ISO. A neutral-density filter reduces light entering the lens so you can retain that motion rendering. DJI lists a compatible Magnetic ND Filters Set for Pocket 3; verify the exact kit and current availability before purchase. An ND filter is optional, not a requirement for every outdoor vlog.
Outdated Drivers Are Slowing You Down
One free scan finds every outdated or missing driver and matches the right update for your exact hardware.Free scan · exact hardware matchWindows Errors? Fix Them Before They Spread
Repair common Windows errors and clear accumulated junk for a smoother, more stable PC - no reinstall needed.Free scan · no reinstallIf you do not have an ND filter, a faster shutter can protect exposure, but motion may look crisper or less natural. Decide whether that visual change is preferable to carrying an accessory. Remove or reduce the filter when you enter shade so the camera is not unnecessarily starved of light.
Rank #3

- Capture Stunning Footage - Osmo Pocket 3 vlogging camera features a 1-inch CMOS sensor and records in 4K resolution at an impressive 120fps. Capture breathtaking night views and sunsets with enhanced clarity.
- Effortlessly Frame Your Shots - Get the ideal composition with Osmo Pocket 3's expansive 2-inch touch screen that rotates for both horizontal and vertical shooting.
- Ultra-Steady Footage - Say goodbye to shaky videos! Osmo Pocket 3's advanced 3-axis mechanical stabilization delivers superb stability. Enjoy smooth footage while dancing, chasing pets, or hiking.
- Create Captivating Vlogs With ActiveTrack 6.0 - Stay effortlessly in focus as you record on the go. Set Osmo Pocket 3 up on a tripod and jump, dance, or spin, but remain center-frame.
- Fast and Accurate Focusing - Osmo Pocket 3 digital camera locks onto your subject for sharp, clear footage. Whether filming action-packed scenes or still shots, it ensures every detail is captured.
Outdoor white balance
Auto White Balance is convenient while walking through sun, shade, and storefronts, but it can shift color during a take. For a stand-up shot in one consistent location, lock a suitable preset or manual white-balance value after checking skin and neutral objects. DJI confirms white balance is adjustable in video Pro mode but does not publish one universal indoor or outdoor Kelvin value.
White balance, color, and focus decisions
When to lock white balance
- Lock it: interviews, scripted pieces, or any scene where multiple clips must match.
- Use Auto: travel walks and changing environments where the light genuinely changes.
- Watch mixed light: daylight plus warm household bulbs can make one side of a face different from the other. Reposition the subject or turn off one source before trying to correct color in settings.
Keep color choices consistent
DJI exposes color controls in video Pro mode. Choose a look that suits the intended edit and keep it consistent across a sequence. If you plan substantial grading, avoid changing color settings between clips unless you understand how the files will be matched.
Frame yourself reliably
The Pocket 3 offers Face Auto-Detect and Dynamic Framing. Use the screen to confirm headroom, eye position, and the background before pressing record. A compatible wide-angle lens broadens the field of view to 108°, which can help a close solo setup include more surroundings; it can also make nearby facial features and room edges look more exaggerated. Treat it as a composition tool rather than a mandatory upgrade.
Recommended Free Tools
Gimbal modes and solo tracking limits
Follow
Follow is the general-purpose choice for walking, panning, and handheld narration. It lets the camera respond smoothly while avoiding the more dramatic roll behavior of FPV.
Tilt Locked
Tilt Locked is useful when you want a level, steady horizon or a fixed talking-head composition. It is a natural match for a mini-tripod setup or a careful walk where vertical framing should not chase every hand movement.
FPV
FPV allows more of the camera’s roll and can make movement feel energetic. Use it intentionally; it is less forgiving when the goal is a calm, conventional vlog.
Rank #4

- Capture Stunning Footage - Osmo Pocket 3 vlogging camera features a 1-inch CMOS sensor and records in 4K resolution at an impressive 120fps. Capture breathtaking night views and sunsets with enhanced clarity.
- Effortlessly Frame Your Shots - Get the ideal composition with Osmo Pocket 3's expansive 2-inch touch screen that rotates for both horizontal and vertical shooting.
- Ultra-Steady Footage - Say goodbye to shaky videos! Osmo Pocket 3's advanced 3-axis mechanical stabilization delivers superb stability. Enjoy smooth footage while dancing, chasing pets, or hiking.
- Create Captivating Vlogs With ActiveTrack 6.0 - Stay effortlessly in focus as you record on the go. Set Osmo Pocket 3 up on a tripod and jump, dance, or spin, but remain center-frame.
- Fast and Accurate Focusing - Osmo Pocket 3 digital camera locks onto your subject for sharp, clear footage. Whether filming action-packed scenes or still shots, it ensures every detail is captured.
ActiveTrack and its exclusions
DJI describes selecting ActiveTrack by double-tapping a subject in Photo or Video mode. ActiveTrack is not supported in Low-Light, Panorama, Slow Motion, or Timelapse modes. If tracking is central to the shot, use a supported normal Photo or Video mode, test the subject selection, and keep the person sufficiently distinct from the background.
Audio settings and microphone choices
The Pocket 3 has three built-in microphones and supports DJI Mic 2 transmitter connections. DJI’s FAQ also states: “Yes. You can connect Osmo Pocket 3 with a third-party microphone through USB-C digital signals or a 3.5mm port adapter.” The connection method and adapter are therefore part of the setup; do not assume every 3.5 mm microphone plugs directly into the camera body.
In a quiet room, make a short test and listen for clothing rustle, fan noise, room echo, and clipping. Outdoors, position the microphone close to the speaker and use the available wind-noise and directional-audio controls when they suit the scene. A microphone is most valuable when the camera must be far from the speaker or the environment is noisy; it is not required for every vlog.
Storage and recording preparation
The Pocket 3 has no built-in storage and requires a microSD card. DJI recommends at least UHS-I Speed Grade 3 for optimal transfer speed. Use DJI’s current compatibility list rather than guessing a card model, especially if you plan long 4K recordings or frequent transfers.
- Insert and format the card in the camera before an important shoot, after backing up anything you need.
- Check remaining capacity after choosing resolution and frame rate; 4K/60 and slow-motion clips can fill a card faster than ordinary 24–30 fps footage.
- Record a short clip, stop, replay it, and confirm both picture and sound before starting the full take.
- Carry a spare card or a transfer plan for travel days; a camera without internal storage cannot continue recording when the card is full.
Useful accessories—and when to skip them
| Accessory | Solves | Skip it when |
|---|---|---|
| Magnetic ND Filters Set | Too much daylight when you want a slower, natural-looking shutter. | You can expose correctly without exceeding your preferred shutter, or you are mostly indoors. |
| UHS-I Speed Grade 3 microSD card | Required recording storage and the transfer performance DJI recommends. | Never skip the card entirely; the camera has no built-in storage. |
| DJI Mic 2 or compatible external microphone | Closer, clearer voice capture when the camera is distant or the environment is loud. | The built-in microphones are already clear enough for the location and framing. |
| Osmo Mini Tripod | Stable, fixed talking-head, desk, or room shots. DJI says it attaches through the threaded handle or battery grip. | You are walking continuously or already have a secure support solution. |
| Compatible wide-angle lens | Expands the field of view to 108° for tight solo setups or more environmental context. | You want a more natural perspective or have sufficient distance from the camera. |
Confirm that an accessory is for Pocket 3. Pocket 3 accessories are not automatically compatible with Pocket 2.
Troubleshooting common indoor and outdoor problems
The indoor image is dim or noisy
- Move or add light so it reaches the face from in front.
- Confirm the shutter has not been set unnecessarily fast for the selected frame rate.
- Use Auto ISO or raise manual ISO only as far as needed, checking shadow noise.
- If the scene remains very dark, consider Low-Light Video, but remember that ActiveTrack is unavailable in that mode.
The outdoor image is blown out
- Check the brightest areas and reframe or move into open shade.
- Lower ISO and verify that exposure is not being held from a darker previous scene.
- Add a compatible magnetic ND filter if you need to retain a slower shutter in bright sun.
- Recheck exposure after moving between direct sun and shade.
Motion looks too sharp or smeared
Compare the shutter with the frame rate. A shutter much faster than twice the frame rate can make movement look harsh; a shutter much slower can create excessive blur. Indoor flicker, low light, or a deliberate style may justify departing from the convention.
Best Value

- DJI Osmo Pocket 3- 3-Axis Gimbal Mechanical Stabilizer, 1" CMOS Sensor, Full-Pixel Fast Focusing, Up to 4K120 Resolution, 2" Rotatable Screen, Smart Horizontal/Vertical Shooting, D-Log M & 10-Bit Support, Active Track 6.0, Stereo Recording, Up to 166 Minutes of Battery Life, USB-C PD Cable Included, Wi-Fi & Bluetooth Support
- DJI Battery Handle for Osmo Pocket 3- For DJI Osmo Pocket 3, Built-In 950mAh Battery, Increases Operating Time by 62%, 1/4"-20 Mounting Thread, Supports Hot Swapping, Weighs Only 2.2 oz, USB-C Port for External Audio Devices, DJI Osmo Mini Tripod- Mini Tripod with Non-Slip Design, + Transport or store your DJI Osmo Pocket 3 and select accessories in this Carrying Bag from DJI. The sleek zippered bag also accommodates the full DJI Creator Combo.
- Quick Capture for Vlogging Anywhere, Anytime-Built for travel, the Pocket 3 is compact and always ready to capture any special moment. Single-handed operation allows you to begin shooting in one second to capture photos and videos at the speed of life and in your preferred vertical or horizontal aspect ratio.
- Pocket Sized with 2" Rotatable Screen-Pocket-sized and extremely portable, the DJI Osmo Pocket 3 is a tiny camera that lets you single-handedly record memorable moments. Equipped to stabilize movement and take sharp photos and smooth videos, it gives you the freedom to create magic at hand.
- Dual Microphone Wireless Lavalier Microphone- The wireless lapel lavalier microphone can be clipped on the collar to free your hands for audio and video recording. Note: You need to take off the receiver to be able to hear the audio playback. Omnidirectional wireless lavalier microphone is built with professional-grade intelligent noise reduction chips, providing effective identification of the original sound and clear recording in noisy environment
Color changes halfway through a take
Auto White Balance may be reacting to a changing or mixed scene. Lock a suitable white-balance setting for a stable setup, simplify the light sources, and record a new clip rather than trying to match a visibly shifting take.
Face tracking does not start
Double-tap the subject in a supported Photo or normal Video mode. Check whether you selected Low-Light, Panorama, Slow Motion, or Timelapse; DJI lists ActiveTrack as unsupported in all four.
The camera stops recording or cannot save footage
Check that a microSD card is inserted, has free space, and meets at least UHS-I Speed Grade 3. Review the card in the camera and test a short recording before troubleshooting other settings.
Free tools Windows power users keep installed
One-click scans. No signup required.
The voice is distant or windy
Move the microphone closer, shield it from wind, and test the built-in microphones against an external USB-C digital microphone or a microphone connected through a 3.5 mm port adapter. Listen to the recorded file, not only the live monitoring impression.
A repeatable pre-shoot checklist
- Confirm the camera is an Osmo Pocket 3 and the accessory fit is correct.
- Insert a compatible microSD card and check available space.
- Choose resolution and frame rate for the edit and delivery before recording.
- Set shutter near twice the frame rate, then check for indoor flicker.
- Decide between Auto and manual ISO based on whether the light will change.
- Choose Auto or locked white balance according to how stable the light is.
- Select Follow, Tilt Locked, or FPV for the movement style.
- Test Face Auto-Detect, Dynamic Framing, or ActiveTrack if the shot depends on them.
- Check focus distance, headroom, highlights, and the background.
- Record and replay a short clip to verify exposure and audio.
Practical decision rules
Choose 24/25/30 fps when the shot is ordinary speech and you want manageable files. Choose 50/60 fps when movement smoothness or slow motion matters and you have enough light. Choose manual exposure when the camera will remain in one controlled setup and consistency matters. Choose Auto exposure when you are walking through changing brightness and a gradual adjustment is preferable to sudden clipping. Add light indoors before treating high ISO as the solution. Add ND outdoors only when it solves a specific overexposure problem while preserving your desired shutter.
DJI’s published limits give you room to make those choices: normal video ISO 50–6400, Low-Light Video ISO 50–16000, shutter from 1/8000 second down to the limit imposed by the selected frame rate, and 4K normal video up to 60 fps. They describe what the Pocket 3 can set, not what will look best in every situation.
Quick Recap
Product prices and availability are accurate as of the date/time indicated and are subject to change. Any price and availability information displayed on Amazon at the time of purchase will apply.
The Tool Desk
Outbyte PC Repair FREEClear out junk files and repair common Windows errorsFree Scan →Outbyte Driver Updater FREEFix the driver behind crashes, sound loss and screen glitchesFind Drivers →
