What’s actually slowing this PC down?
Pick the symptom - the matching free tool is one click away.
A DIY wireless sensor hub built with an ESP32, Arduino sensor nodes, and NRF24L01 radios is a practical way to collect temperature, humidity, motion, soil moisture, battery voltage, or other sensor data without relying on Wi-Fi at every node. The ESP32 works well as the central gateway because it has plenty of processing power, built-in Wi-Fi/Bluetooth for forwarding data, and enough GPIO for connecting an NRF24L01 module.
The Arduino-based nodes keep the remote sensor hardware simple and inexpensive, while the NRF24L01 modules provide low-cost 2.4 GHz wireless communication between each node and the hub. With careful wiring, stable power, and a clear packet format, this setup can become a reliable foundation for home monitoring, garden automation, workshop telemetry, or custom IoT experiments.
As an Amazon Associate I earn from qualifying purchases.
This guide walks through the complete build: choosing components, wiring the radios correctly, configuring the firmware, structuring wireless messages, and testing the system for range, reliability, and power consumption. It also covers common NRF24L01 and ESP32 issues so the finished hub is easier to debug and expand.
Quick wins for a faster PC:
Clear out junk files and repair common Windows errorsFree Scan →Fix the driver behind crashes, sound loss and screen glitchesFind Drivers →Required Components and System Architecture
The system is built around one ESP32 gateway and one or more Arduino-based wireless sensor nodes. Each node reads a local sensor, packages the measurement, and sends it over an NRF24L01 2.4 GHz radio link. The ESP32 hub receives those packets and can forward them to a serial monitor, local display, MQTT broker, web dashboard, or home automation platform. This split keeps the sensor nodes simple and low-cost while giving the hub enough processing power and network connectivity for logging and integration.
#1 Best Overall

- HiLetgo 4pcs NRF24L01+ Wireless Transceiver Module
- Multi-frequency: 125 frequency points
- Low operating voltage : 1.9 ~ 3.6V low voltage operation
Core components
- ESP32 development board: Acts as the central receiver and gateway. A common ESP32 DevKit board is suitable because it provides SPI pins, USB programming, Wi-Fi, Bluetooth, and enough memory for buffering sensor data.
- Arduino sensor nodes: Arduino Nano, Pro Mini, or Uno boards work well. For battery-powered nodes, a 3.3 V Arduino Pro Mini is often the best choice because it can run at lower power than a full-size Uno.
- NRF24L01 radio modules: Standard PCB antenna modules are fine for short indoor links. NRF24L01+ PA/LNA modules with an external antenna provide better range but need cleaner power and careful placement.
- Sensors: Choose sensors based on the application, such as DHT22 or BME280 for temperature and humidity, DS18B20 for waterproof temperature readings, soil moisture sensors for gardening, or reed switches for doors and windows.
- Power supplies: The ESP32 hub normally runs from USB or a regulated 5 V adapter. Sensor nodes can use USB, AA batteries with a regulator, Li-ion cells with protection, or a dedicated 3.3 V supply.
- Decoupling capacitors: Add a 10 µF to 100 µF capacitor across VCC and GND near each NRF24L01 module. This is especially useful with PA/LNA modules, which draw short current bursts during transmission.
The NRF24L01 communicates over SPI, so every board needs connections for SCK, MOSI, MISO, plus two control pins: CE and CSN. The radio itself is a 3.3 V device and its VCC pin must not be connected to 5 V. Many Arduino boards use 5 V GPIO levels, and while many hobby builds connect them directly, a more robust design uses a 3.3 V Arduino or level shifting on the SPI and control lines. The ESP32 already uses 3.3 V , making it a natural fit for the hub side.
Recommended architecture
Use a star topology: all sensor nodes transmit directly to the ESP32 hub. This is simpler than a mesh network, easier to debug, and enough for many homes, workshops, greenhouses, and small outdoor installations. Assign each sensor node a unique numeric ID, such as 1 for the living room, 2 for the garden bed, and 3 for the garage. The hub listens on a shared radio address and separates incoming data by node ID inside the packet.
| Part | Role in the system | Selection guidance |
|---|---|---|
| ESP32 DevKit | Central wireless gateway | Use a board with accessible SPI pins and stable USB power |
| Arduino Pro Mini or Nano | Remote sensor controller | Choose 3.3 V versions for battery nodes and easier radio compatibility |
| NRF24L01+ | Wireless communication | Use standard modules for short range, PA/LNA modules for longer links |
| Environmental or digital sensors | Measurement input | Prefer low-power sensors with simple Arduino library support |
A practical first build is one ESP32 hub and two Arduino nodes: one with a BME280 sensor for temperature, humidity, and pressure, and another with a DS18B20 probe for remote temperature. Once that setup is reliable, additional nodes can be added by reusing the same wiring pattern and changing only the node ID, sensor type, and reporting interval.
Free tools Windows power users keep installed
One-click scans. No signup required.
Wiring the ESP32 Hub and Arduino Sensor Nodes
The wiring for this project has two repeated parts: one NRF24L01 radio connected to the ESP32 gateway, and one NRF24L01 radio connected to each Arduino sensor node. The NRF24L01 uses SPI, so each device needs SCK, MISO, MOSI, CSN, and CE, plus stable 3.3 V power and ground. The most common wiring mistake is powering the NRF24L01 from 5 V; the module is a 3.3 V device and can be damaged by 5 V on its supply pin.
For the ESP32 hub, use the default VSPI pins unless your board layout requires otherwise. A typical connection is SCK to GPIO18, MISO to GPIO19, MOSI to GPIO23, CSN to GPIO5, and CE to GPIO4. Connect NRF24L01 VCC to the ESP32 3.3 V pin and GND to GND. If you are using an NRF24L01+PA+LNA long-range module, do not power it directly from the ESP32 3.3 V pin; use a separate 3.3 V regulator capable of at least 250 mA, with the grounds tied together.
| NRF24L01 Pin | ESP32 Hub Pin | Arduino Uno/Nano Node Pin |
|---|---|---|
| VCC | 3.3 V | 3.3 V regulator output |
| GND | GND | GND |
| CE | GPIO4 | D9 |
| CSN | GPIO5 | D10 |
| SCK | GPIO18 | D13 |
| MOSI | GPIO23 | D11 |
| MISO | GPIO19 | D12 |
| IRQ | Not connected | Not connected |
On Arduino Uno or Nano sensor nodes, the SPI pins are fixed in hardware: D13 for SCK, D12 for MISO, and D11 for MOSI. Use D10 for CSN and D9 for CE to match common RF24 library examples. The Arduino’s 3.3 V pin is often too weak or noisy for reliable NRF24L01 operation, especially during transmit bursts. A small AMS1117-3.3 module, MCP1700 regulator, or buck converter is a better choice. Place a 10 µF to 47 µF electrolytic capacitor across VCC and GND close to the radio, and add a 100 nF ceramic capacitor if you have one.
Because many Arduino Uno and Nano boards run at 5 V, the SPI and control pins also output 5 V . In practice, many NRF24L01 modules survive direct connection, but it is safer to use a 3.3 V Arduino Pro Mini, a 3.3 V ATmega328P board, or level shifting on SCK, MOSI, CSN, and CE. The MISO line from the radio back to the Arduino is already 3.3 V and is normally read correctly by a 5 V Arduino. If you keep a 5 V Arduino, at least use resistor dividers or a proper logic-level shifter on the Arduino-to-radio lines.
Sensor wiring on each Arduino node
After the radio is connected, wire the actual sensor to the remaining Arduino pins. For example, a DHT22 can use VCC, GND, and a single data pin such as D2 with a 10 kΩ pull-up resistor. A soil moisture sensor can connect its analog output to A0, while a door reed switch can connect between D3 and GND with the internal pull-up enabled in firmware. Keep sensor wiring separate from the radio antenna area, and avoid running long unshielded sensor leads directly beside the NRF24L01 module.
- Use common ground: the radio, microcontroller, sensors, and external regulator must share GND.
- Keep radio wires short: long jumper wires on SPI lines can cause intermittent packet loss.
- Label every node: mark the node ID on the enclosure before firmware testing.
- Check antenna clearance: keep the NRF24L01 antenna away from metal cases, USB cables, and batteries.
Configuring the NRF24L01 Wireless Modules
Once the ESP32 hub and Arduino sensor nodes are wired, the next step is to configure the NRF24L01 radios so every device speaks on the same wireless settings. The NRF24L01 is a 2.4 GHz transceiver, so it does not join Wi-Fi and does not use IP addresses. Instead, each radio is configured with a channel, data rate, transmit power, address, payload size, and acknowledgment behavior. For a sensor hub, a reliable starting setup is a low data rate, moderate transmit power, and auto-acknowledgment enabled.
Rank #2
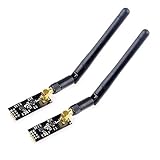
- High-performance wireless data transmission chip NRF24L01 +, an increase of high-power PA and LNA chips, RF switches, band-pass filters and other professional full bidirectional RF power amplifier, making the effective communication distance has been greatly expanded.
- NRF24L01P + PA + LNA wireless module works in the license-free 2.4G ISM band, can be point-to-point applications can also form a star network.
- In the RF part of a large number of optimized matching debugging, making the highest transmission efficiency, the smallest harmonic, making NRF24L01P + PA + LNA wireless module to external radio equipment to achieve the lowest radio frequency interference, but also not susceptible to interference from other devices, extremely large Improve the stability of the work.
- NRF24L01P + PA + LNA wireless module is highly integrated, the size of only 41mm * 15.5mm, easy to embed in any space-stressed products.
- Customers only need to add one MCU to control NRF24L01P + PA + LNA through SPI port ,Wireless module to complete ultra-long-range wireless data transmission system design.Do not need to worry about R & D of RF part, drastically reduce R & D expense and shorten R & D cycle.
Recommended radio settings
Use the same radio channel and data rate on the ESP32 hub and every Arduino node. The channel should avoid busy Wi-Fi traffic where possible. Wi-Fi channels 1, 6, and 11 occupy large parts of the 2.4 GHz band, so NRF24L01 channels near the upper range often work better in homes with many routers. A channel value such as 90, 100, or 110 is a practical first choice, but test locally because interference varies by site.
| Setting | Suggested value | Purpose |
|---|---|---|
| Channel | 90 to 110 | Moves traffic away from common Wi-Fi congestion |
| Data rate | 250 kbps | Improves range and receive sensitivity |
| PA level | Low or High | Controls transmit strength and current draw |
| Auto ACK | Enabled | Lets nodes confirm that the hub received a packet |
| CRC | 16-bit | Helps reject corrupted packets |
The common RF24 Arduino library works with both AVR Arduino boards and ESP32 boards. In firmware, initialize the radio after SPI is ready, then set the channel, data rate, power amplifier level, retry timing, and address pipes. For example, the ESP32 hub can open one reading pipe per sensor node, while each Arduino node opens a writing pipe pointed at the hub address. If you expect more than six nodes, use a shared receive address and include a node ID inside each packet, since the NRF24L01 supports only a limited number of hardware receive pipes.
Do these 3 things before closing this tab:
1Fix the driver behind crashes, sound loss and screen glitches2Repair Windows errors before they cause bigger problems3Scan for outdated or missing drivers - takes under a minuteAddressing plan
Keep addresses short, fixed, and documented. NRF24L01 addresses are typically 5 bytes. For a small network, assign one hub address and give every node a numeric ID in the payload. This is easier to expand than creating a unique pipe for every sensor. A simple plan might look like this:
- Hub receive address: HUB01
- Node 1 ID: temperature and humidity sensor in the living room
- Node 2 ID: soil moisture sensor near plants
- Node 3 ID: garage door or motion sensor
Power configuration matters as much as software configuration. The NRF24L01 is sensitive to voltage dips, especially the amplified PA+LNA versions with external antennas. Always power the module from a stable 3.3 V source, not directly from a weak regulator on an overloaded Arduino clone. Add a 10 µF to 47 µF capacitor across VCC and GND close to the radio module. If packets fail randomly, the capacitor and power supply should be checked before changing firmware. For short-range bench testing, set transmit power to low; for room-to-room testing, increase it gradually and monitor stability.
Finally, confirm that every module uses the same SPI mode through the library defaults and that CE and CSN pins match the pin numbers defined in firmware. On the ESP32, choose GPIO pins that do not interfere with boot strapping, serial logs, or flash operation. On Arduino Uno or Nano nodes, hardware SPI pins are fixed, so only CE and CSN are freely assigned. After configuration, run a basic transmit-and-receive sketch before adding sensor code; this isolates radio setup from sensor reading problems and makes the complete hub much easier to debug.
Writing Firmware for Sensor Nodes and the ESP32 Hub
The firmware has two distinct roles: each Arduino-based sensor node reads local sensors and transmits compact messages, while the ESP32 hub listens continuously, validates incoming packets, and forwards the data to Serial, MQTT, HTTP, Home Assistant, or another local service. For the NRF24L01 radios, the most common starting point is the RF24 library by TMRh20, available through the Arduino Library Manager. Install it in both the Arduino IDE environment for the sensor nodes and the ESP32 board package environment used for the hub.
On each Arduino sensor node, keep the main loop short and predictable. Initialize the radio once in setup(), read sensors at a fixed interval, build a small data packet, transmit it, then optionally enter sleep mode to save power. If the node is battery powered, avoid long blocking delays and disable unnecessary peripherals where possible. For a simple temperature and humidity node, the firmware flow is: wake, read DHT22 or BME280, measure battery voltage through a divider, send one packet, wait for acknowledgement if enabled, then sleep.
Sensor node firmware structure
- Include libraries: RF24, SPI, and any sensor-specific libraries such as Adafruit_BME280 or DHT.
- Define pins: CE and CSN pins for the NRF24L01, plus sensor and battery measurement pins.
- Configure radio: set channel, data rate, power level, address, and acknowledgement behavior.
- Read sensors: collect values and convert them into integers where possible to reduce packet size.
- Transmit packet: send a fixed-size struct to the ESP32 hub address.
- Handle failures: count failed transmissions and retry only a limited number of times.
A typical Arduino node can use a fixed payload structure such as node ID, sensor type, temperature mullied by 100, humidity multiplied by 100, battery millivolts, and a sequence counter. Using scaled integers instead of floating-point values makes packets smaller and avoids differences in float handling between boards. Keep the struct identical on both the transmitter and receiver, including field order and data types.
The ESP32 hub firmware should run the NRF24L01 receiver independently from any network publishing task. A practical design is to receive radio packets in the main loop and push valid readings into a small queue or buffer. A second routine can periodically publish the latest values over Wi-Fi. This prevents Wi-Fi delays from causing missed radio messages, especially when mulle sensor nodes transmit at similar intervals.
Rank #3

- nRF24L01 is a single chip radio transceiver for the worldwide 2.4 - 2.5 GHz ISM band. Compatible with Arduino and Raspberry Pi
- Applications: Wireless peripherals, remote control systems such as RC vehicles and consumer remote electronics, wireless voice transmission such as VoIP, wireless sensor networks, wireless networks, home and commercial automation
- Ultra Small: 15x29mm (including: built-in 2.4GHz antenna), for easy implementation into designs without additional hardware
- Auto-acknowledge and auto-retransmit function
- You can find several resources available online easily, such as tutorials, data sheets, and notes
ESP32 hub firmware structure
- Start Serial: print startup status, radio configuration, and received packet details for debugging.
- Initialize SPI and RF24: use the ESP32 CE and CSN pins selected during wiring.
- Open reading pipe: match the node transmit address exactly.
- Listen continuously: call
radio.available()frequently and read all pending packets. - Validate data: check node ID, packet size, sequence counter, and sensible sensor ranges.
- Forward data: publish to MQTT, send HTTP requests, write to a display, or log to Serial.
For the first working version, leave Wi-Fi and cloud integration disabled and print received packets to the Serial Monitor. Once the radio link is stable, add MQTT or HTTP publishing. This staged approach makes debugging easier because you can tell whether a problem is in the wireless NRF24L01 link, the sensor reading code, or the ESP32 network layer.
Use consistent radio settings across every device. The same channel, data rate, address width, CRC setting, and payload size must be configured on both sides. A conservative setup for reliability is 250 kbps data rate, high or low PA level depending on distance and power supply quality, and enabled CRC. If nodes are close to the hub, lowering the PA level can actually improve stability by reducing current spikes and receiver overload.
Designing the Data Packet and Communication Flow
A reliable sensor hub starts with a small, predictable packet format. The NRF24L01 has a maximum payload size of 32 bytes, so the packet should contain only the fields the ESP32 needs to identify the node, interpret the reading, and reject bad or repeated data. Avoid sending long text labels such as temperature or living_room; use numeric IDs instead and map them to friendly names on the ESP32 side or in your dashboard software.
Suggested packet structure
| Field | Size | Example | Purpose |
|---|---|---|---|
| nodeId | 1 byte | 3 | Identifies the Arduino sensor node |
| packetId | 2 bytes | 1842 | Increments with each transmission to detect duplicates or missed packets |
| sensorType | 1 byte | 1 | Defines the reading type, such as temperature, humidity, motion, or battery |
| value1 | 4 bytes | 23.64 | Main sensor value |
| value2 | 4 bytes | 61.20 | Optional second value, such as humidity beside temperature |
| batteryMv | 2 bytes | 3970 | Battery voltage in millivolts |
| flags | 1 byte | 0 | Status bits for low battery, sensor error, or alarm state |
This structure fits comfortably inside the NRF24L01 payload limit and is easy to represent as a C/C++ struct in both Arduino and ESP32 firmware. If you want to make the packet even more robust, use fixed-point integers instead of floating-point values. For example, transmit temperature as 2364 to represent 23.64°C. This reduces payload ambiguity between different boards and avoids float formatting differences.
Communication flow
For a simple home sensor network, use a hub-and-spoke design. Each Arduino node wakes up, reads its sensors, sends one packet to the ESP32 hub, waits briefly for an acknowledgment, then returns to sleep. The ESP32 remains powered and keeps the NRF24L01 in listening mode. This approach is efficient for battery-powered nodes and keeps the radio traffic easy to debug.
The Tool Desk
Outbyte PC Repair FREEClear out junk files and repair common Windows errorsFree Scan →Outbyte Driver Updater FREEFix the driver behind crashes, sound loss and screen glitchesFind Drivers →- The Arduino node loads its configured nodeId and increments its packetId.
- The node reads the sensor values and battery voltage.
- The node sends the packet to the ESP32 hub address using the NRF24L01 writing pipe.
- The ESP32 receives the packet, checks the node ID and packet ID, then stores or forwards the data.
- If auto-acknowledgment is enabled, the ESP32 radio returns an ACK at the hardware level.
- The node retries a limited number of times if delivery fails, then sleeps to save power.
Use a separate address or pipe for each node only if you need per-node isolation. For many DIY builds, a shared hub address works well when nodes transmit at different intervals. To reduce collisions, avoid having every node wake exactly on the minute. Add a small randomized delay, such as 0 to 1500 ms, before transmission. For sensors that report slowly changing values, intervals between 30 seconds and 10 minutes are usually practical.
On the ESP32 side, treat incoming packets as events. After receiving a valid packet, convert numeric fields into readable labels, apply scaling to fixed-point values, and publish the result to Serial, MQTT, HTTP, InfluxDB, Home Assistant, or a local display. Track the last packet ID received from each node so the hub can detect duplicates after retries. Also store a timestamp for the last successful message; if a node has not reported within its expected window, mark it offline rather than assuming the sensor value is still current.
Testing Range, Reliability, and Power Usage
Once the ESP32 hub and Arduino sensor nodes can exchange packets on the bench, move to structured testing before installing anything permanently. Test one variable at a time: distance, obstacles, antenna orientation, transmit power, retry settings, and node sleep timing. Keep the ESP32 hub in its intended location if possible, because walls, appliances, metal enclosures, and Wi-Fi routers near the hub can change NRF24L01 performance dramatically.
Range test procedure
Start with a single sensor node sending a numbered packet every 1–2 seconds. The ESP32 hub should log the node ID, packet counter, RSSI-like status if available from your library, acknowledgement result, and timestamp. NRF24L01 does not provide true RSSI, so packet loss and retry count are your most useful indicators. Walk the node away from the hub in steps, pausing for 30–60 seconds at each point, and record how many packets arrive successfully.
Recommended Free Tools
Rank #4

- It can be wildly used to wireless remote control, somatosensory devices, RFID, NFC, smart grid, smart home, wireless audio etc.
- 5PCS NRF24L01 8 Pin Socket Breakout Adapter Board: On-board AMS1117-3.3 chip, a simple socket breakout board which is for 8-Pin NRF24L01 wireless module
- 5PCS NRF24L01+PA+LNA RF Transceiver Module with SMA Antenna: Built-in 2.4Ghz antenna: available software to set the address, only received local address when output data(Provide interrupt instruction), can be directly connected to a variety of microcontrollers
- RF24L01+ Breakout Adapter: Small power on SMD LED indicator, On-board 3.3V voltage regulator, which accepts +5V power supply input and provides 3.3V for the attached "nRF24L01+" module.
- The packing list includes: 5 * NRF24L01+PA+LNA Wireless Transceiver RF Transceiver Module; 5* SMA Antenna 2.4G 1100m; 5 * NRF24L01+ Breakout Adapter
| Test Location | Distance | Obstacles | Packets Sent | Packets Received | Result |
|---|---|---|---|---|---|
| Same room | 3 m | None | 100 | 99–100 | Excellent |
| Next room | 8 m | One wall | 100 | 95–100 | Good |
| Garage or outdoor edge | 15–30 m | Multiple walls | 100 | Variable | Needs tuning |
For better range, use the lower NRF24L01 data rate such as 250 kbps, increase PA level only if the power supply is stable, and add a capacitor close to the radio module. A 10 µF to 100 µF electrolytic capacitor across VCC and GND on each NRF24L01 module often fixes random dropouts caused by transmit current spikes. If you are using the high-power NRF24L01+PA+LNA version with an external antenna, power it from a dedicated 3.3 V regulator rather than the Arduino’s weak onboard 3.3 V pin.
Reliability testing
After basic range testing, run a longer soak test. Let each node transmit at its normal reporting interval for several hours while the ESP32 records packet counters. Missing counter values reveal packet loss, while repeated counter values may indicate retransmission or firmware reset behavior. If your protocol uses acknowledgements, include a retry limit and a failure counter on the node so you can distinguish radio problems from sensor read failures.
- Packet delivery rate: received packets divided by expected packets over the test period.
- Duplicate rate: repeated packet counters received by the ESP32 hub.
- Node uptime: include a boot counter or uptime field to detect unexpected resets.
- Latency: compare send time and receive time if the nodes have synchronized timing or predictable intervals.
Power testing is especially for battery-powered Arduino nodes. Measure sleep current and transmit current separately with a multimeter or USB power meter. A typical always-on Arduino Uno is inefficient for battery use, while a bare ATmega328P, Arduino Pro Mini with regulator LED removed, or low-power board can sleep in the microamp range. During active transmission, the NRF24L01 may draw around 10–15 mA, while PA+LNA modules can draw much more. Estimate battery life using the average current across a full reporting cycle, not only the sleep current.
For example, if a node wakes every 60 seconds, reads a sensor for 200 ms, transmits for 50 ms, and then sleeps for the remaining time, the sleep current will dominate if the board is optimized. If the node reports every 5 seconds, radio activity and sensor warm-up time become much more significant. Once the numbers look acceptable, repeat the range test with the actual battery pack and enclosure, because low battery voltage, long jumper wires, and plastic or metal mounting boxes can all affect the final wireless performance.
Crashes, No Sound, or Screen Glitches?
Random freezes, missing sound and display glitches usually trace back to one bad driver. Find and replace yours safely.Free scan · under a minutePC Slower Than It Used to Be?
A free scan shows the junk files, broken settings and background clutter dragging Windows down - then fixes them in one click.Free scan · Windows 10 & 11Troubleshooting Common NRF24L01 and ESP32 Issues
Most NRF24L01 problems come down to power stability, SPI wiring, pin conflicts, or mismatched radio settings between the ESP32 hub and Arduino sensor nodes. When debugging, change only one thing at a time and test with a very small packet, such as a node ID plus one counter value. This makes it easier to separate radio link issues from sensor-reading bugs, JSON formatting mistakes, or hub-side parsing problems.
Radio module does not respond
If the module fails during initialization or returns invalid configuration values, first check the SPI wiring. On a typical ESP32 using the VSPI bus, SCK is GPIO18, MISO is GPIO19, and MOSI is GPIO23. CE and CSN can be assigned to free GPIO pins, but the same values must be used in firmware. On an Arduino Uno or Nano, SCK is D13, MISO is D12, MOSI is D11, CSN is often D10, and CE is often D9. Avoid ESP32 boot strapping pins where possible, especially GPIO0, GPIO2, GPIO12, and GPIO15, because they can interfere with startup if pulled to the wrong level.
| Symptom | Likely Cause | Fix |
|---|---|---|
| Radio init fails | Wrong CE/CSN pins or SPI wiring | Verify pin definitions and continuity with a multimeter |
| Works near USB, fails on battery | Voltage dips during transmit | Add a 10 µF to 100 µF capacitor across VCC and GND at the radio |
| Packets never arrive | Different address, channel, or data rate | Match pipe address, RF channel, payload size, and speed on both ends |
| Random missing readings | Interference or weak signal | Use 250 kbps mode, move away from Wi-Fi routers, and add retries |
Unstable power and noisy 3.3 V rails
The NRF24L01 is sensitive to poor power. Even though it draws little average current, short transmit bursts can cause brownouts if powered from a weak regulator or long jumper wires. Do not power the radio from a 5 V pin. Use a clean 3.3 V source and place a capacitor directly across the module’s VCC and GND pins. For PA+LNA versions with an external antenna, use a dedicated 3.3 V regulator capable of at least 250 mA. Keep radio power wires short, and connect all grounds together between the ESP32, Arduino, sensors, and radio modules.
Mismatched radio configuration
Both sides of the link must use the same RF channel, address width, pipe address, CRC setting, data rate, and payload strategy. If the ESP32 hub uses dynamic payloads but the Arduino node sends fixed-size structs, received packets may appear corrupted or may be ignored. For early testing, use a fixed packet size and a single pipe address. After the basic link is stable, add mulle node addresses, acknowledgements, and retry handling.
- Use a quiet RF channel: channels above the busiest Wi-Fi range often perform better, such as 100 to 120, depending on local noise.
- Lower the data rate: 250 kbps usually gives better range and reliability than 1 Mbps or 2 Mbps.
- Keep payloads small: send compact binary structs instead of long text strings when using many nodes.
- Add sequence numbers: a counter helps identify duplicate packets, missed transmissions, and node resets.
ESP32-specific conflicts
The ESP32 has mulle SPI-capable pins, but libraries often assume a default bus unless configured. If you are also using an SD card, display, or Ethernet module, confirm that each device has a unique CS pin and that inactive CS pins stay high. Watch for watchdog resets caused by blocking radio loops; use timeouts instead of waiting forever for acknowledgements. If Wi-Fi is enabled on the ESP32 at the same time as the NRF24L01, place the radio module a few centimeters away from the ESP32 antenna and test several NRF channels to reduce 2.4 GHz interference.
Best Value

- The nRF24L01+ is a 2.4GHz ISM band transceiver Compatible with arduino IDE.
- The module has 5V tolerant inputs which allows for direct connection of SPI pins to the compatible with ArduinoIDE.
- Range: 800+ meters line of sight, Weight: 13.28 g (0.468 oz).
- Auto-acknowledge and auto-retransmit abilities.
- In the RF part of a large number of optimized matching debugging, making the highest transmission efficiency, the smallest harmonic, making NRF24L01P + PA + LNA wireless module to external radio equipment to achieve the lowest radio frequency interference, but also not susceptible to interference from other devices, extremely large Improve the stability of the work.
A reliable troubleshooting flow is to test one Arduino node and the ESP32 hub on the bench, powered from known-good supplies, with the modules one to two meters apart. Print radio configuration details on both serial monitors, send a counter once per second, and confirm that acknowledgements work before adding sensors, sleep modes, batteries, enclosures, or mulle nodes. Once the simple link is repeatable, scale the system gradually and log packet loss so problems can be traced to a specific node, location, or power source.
Frequently Asked Questions
Can I connect an NRF24L01 module directly to an ESP32?
Yes, the NRF24L01 works with the ESP32 over SPI, but it must be powered from 3.3V only. Use the ESP32’s SPI pins or define custom SPI pins in firmware, and connect CE and CSN to free GPIO pins. For stable operation, add a 10µF to 100µF capacitor across VCC and GND close to the radio module.
How many Arduino sensor nodes can one ESP32 hub handle?
A single ESP32 hub can handle many NRF24L01 sensor nodes if each node has a unique address or node ID. In practical DIY setups, 5 to 20 nodes is usually manageable without complex scheduling. For larger networks, use fixed transmit intervals, acknowledgements, and retry limits to reduce packet collisions.
What is the best way to power battery-operated Arduino sensor nodes?
For battery nodes, use a low-power Arduino-compatible board such as a Pro Mini 3.3V, and put the microcontroller and sensors into sleep mode between readings. Power the NRF24L01 only when sending data if your design supports switching it with a transistor or MOSFET. Avoid full-size Arduino Uno boards for battery nodes because their onboard regulator and USB interface waste power.
How do I make NRF24L01 communication more reliable?
Use a clean 3.3V power supply, short wires, and a decoupling capacitor near each NRF24L01 module. Set a moderate data rate such as 250kbps for better range, choose a channel away from busy Wi-Fi traffic, and enable auto-acknowledgement with retries. For outdoor or longer-range links, use NRF24L01+ PA/LNA modules with proper antennas and stable external power.
What should be included in each sensor data packet?
Each packet should include a node ID, sensor type or channel, measured values, battery voltage, and a sequence number. The sequence number helps the ESP32 detect missed or repeated packets during testing. Keep the packet compact because NRF24L01 payloads are limited to 32 bytes.
Bottom Line
Building a DIY wireless sensor hub with an ESP32, Arduino nodes, and NRF24L01 radios is a practical way to create a flexible, low-cost monitoring network you can expand over time. Once the wiring, power stability, addressing, and message structure are solid, the system becomes much easier to debug, maintain, and scale.
Recommended Free Tools
Your next step is to assemble one gateway and one sensor node first, verify reliable communication at short range, then add sensors, acknowledgments, and additional nodes gradually. Keep s on pin mappings, payload formats, and test results so future upgrades are straightforward.
Quick Recap
Product prices and availability are accurate as of the date/time indicated and are subject to change. Any price and availability information displayed on Amazon at the time of purchase will apply.

