Adding text in DaVinci Resolve is one of the simplest ways to make your videos clearer, more polished, and easier to follow. Whether you need a basic title, a lower third, captions, labels, or an animated intro, Resolve gives you built-in text tools that work directly on the Edit page.
Beginners can start with the standard Text title for quick edits, then move to Text+ when they want more control over styling, animation, and effects. Once you understand where the text controls are and how clips behave on the timeline, editing titles becomes fast and predictable.
How to Add Basic Text in DaVinci Resolve
The quickest way to add a simple title in DaVinci Resolve is from the Edit page. This method is best for basic on-screen text such as names, captions, location labels, chapter titles, short callouts, or a simple intro title. You do not need to use Fusion for this; the built-in Text title works directly on the timeline and is easy to edit from the Inspector.
- Open your project in DaVinci Resolve and go to the Edit page.
- Open the Effects panel in the upper-left corner.
- Click Titles under the Toolbox section.
- Find the basic Text title.
- Drag Text onto a video track above your footage, usually V2.
- Select the text clip on the timeline.
- Open the Inspector in the upper-right corner to type and format your text.
Text should usually sit on a video track above your main clip because Resolve layers higher tracks over lower tracks. For example, if your footage is on V1, place your title on V2. If you drop the text onto the same track as your footage, it may overwrite or split the video depending on your edit mode. Keeping titles on a separate track makes them easier to move, trim, duplicate, and adjust later.
Recommended Free Tools
#1 Best Overall

- Small and Portable with Built-In Battery
- Built-In Search Dial
- Keyboard Shortcuts Match Edit Functions
- Bluetooth or USB Connectivity
- Bundle Includes DaVinci Resolve 17 Studio (Activation Card)
After you select the title clip, use the Inspector to replace the default wording. In the Title field, type the exact text you want to appear on screen. You can add mulle lines by pressing Enter or Return inside the text box. The basic Text title is ideal for clean, readable overlays, but it is still flexible enough for common formatting changes such as font, size, tracking, line spacing, color, opacity, alignment, and screen position.
Basic Text vs. Text+
DaVinci Resolve includes both Text and Text+ in the Titles section. For a beginner workflow, start with Text. It is lighter, simpler, and faster to adjust for standard titles. Text+ is more powerful and connects to Fusion controls, which makes it better for advanced animation, stylized motion graphics, and more complex title designs. If you only need a name tag, lower third, simple subtitle-style label, or title card, the basic Text generator is usually enough.
| Title Type | Best For | Where You Edit It |
|---|---|---|
| Text | Simple titles, labels, and clean overlays | Edit page Inspector |
| Text+ | Animated titles and advanced design controls | Inspector and Fusion |
To preview your title, move the playhead over the text clip and look at the viewer. If you do not see the text, check that the title is placed above the video, the clip is not disabled, and the playhead is actually parked over the title clip. You can also zoom into the timeline to make the text clip easier to select and adjust its length by dragging either edge.
How to Add Text+ for More Advanced Titles
Text+ is DaVinci Resolve’s more powerful title tool. While the basic Text title is great for simple captions, lower thirds, and quick labels, Text+ gives you access to Fusion-based controls for more detailed styling and animation. You can use it for titles with outlines, shadows, gradients, tracking adjustments, write-on effects, and smoother motion graphics without building everything from scratch in the Fusion page.
To add Text+, open the Edit page and go to the Effects panel. Under Toolbox, choose Titles, then find Text+. Drag it onto a video track above your footage in the timeline. If you want the title to appear over your video, place it on a higher track, such as V2, while your clip stays on V1. If you place Text+ on an empty part of the timeline, it will appear over a transparent background in the viewer.
Editing the Text+ content
After adding the Text+ clip, select it on the timeline and open the Inspector in the top-right corner. In the Title tab, type your wording into the text box. You can change the font, style, size, alignment, line spacing, and character spacing from this same panel. Text+ also includes extra controls that are not available in the basic Text title, such as more flexible shading layers and detailed layout options.
- Styled Text: Enter the title, subtitle, name, or caption text.
- Font: Pick the typeface and weight, such as regular, bold, or italic.
- Size: Increase or decrease the overall text scale.
- Tracking: Adjust spacing between letters for a wider or tighter look.
- Line Spacing: Control the vertical space between multiple lines.
- Alignment: Set text to left, center, or right alignment.
For more advanced styling, scroll through the Inspector and open the Shading controls. Text+ uses separate shading elements, which let you build a more polished title. For example, you can enable a main fill, add an outline, then add a soft drop shadow behind it. This is useful when placing text over bright or busy footage because outlines and shadows help the words stay readable. You can also change opacity, softness, offset, and color for each enabled shading layer.
When to use Text+ instead of basic Text
Use Text+ when your title needs more control than a simple static label. It is a better choice for animated intros, stylized lower thirds, lyric videos, YouTube titles, callouts, and any design where readability and motion matter. Basic Text is faster for quick edits, but Text+ gives you more room to refine the look directly in the Inspector.
What’s actually slowing this PC down?
Pick the symptom - the matching free tool is one click away.
Rank #2
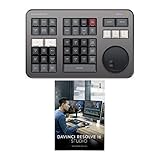
- Small and Portable with Built-In Battery
- Built-In Search Dial
- Keyboard Shortcuts Match Edit Functions
- Bluetooth or USB Connectivity
- Bundle Includes DaVinci Resolve Studio (Activation Card)
| Title type | Best use |
|---|---|
| Basic Text | Simple captions, quick labels, plain lower thirds |
| Text+ | Animated titles, outlines, shadows, advanced formatting |
If Text+ feels slower or heavier than a basic title, that is normal because it uses Fusion tools behind the scenes. For smoother editing, finish your wording first, keep effects simple until the design is approved, and only add extra shadows, outlines, or animations once the title is in the right place on the timeline.
How to Edit Font, Size, Color, and Position
After you add a title to the timeline, most text styling happens in the Inspector. Select the text clip on the timeline, then open the Inspector in the top-right corner of the Edit page. For a basic Text title, the main controls are usually under the Title tab. For Text+, you will see more detailed controls, often separated into sections such as text, layout, shading, and transform settings.
To change what the title says, click inside the text field in the Inspector and type your new words. From there, choose a font using the Font Family menu and, if available, a style such as regular, bold, italic, or condensed. If your font does not appear, make sure it is installed on your computer and restart DaVinci Resolve so the program can reload the system font list.
Basic formatting controls
- Font: Changes the typeface used for the selected title.
- Size: Makes the text larger or smaller without changing the clip length.
- Tracking: Adjusts the spacing between letters, useful for cinematic titles and lower thirds.
- Line spacing: Changes the vertical space between lines in multi-line titles.
- Alignment: Aligns text left, center, or right inside its text box.
To change the color, look for the color swatch in the Inspector. Click it to open the color picker, then choose a preset color, enter exact values, or sample a color from your footage. Basic Text titles usually give you straightforward color controls, while Text+ allows more advanced styling through Shading. In Text+, the main face color is commonly controlled by the first shading element. You can also add outlines, shadows, and background-style effects by enabling additional shading elements.
Position can be adjusted in two common ways. The simplest method is to use the Transform or Position controls in the Inspector and change the X and Y values. You can also drag the title directly in the viewer if on-screen controls are active. For lower thirds, place the text away from the edges so it does not feel cramped. For centered titles, use the viewer guides or reset the position values if the text has drifted out of alignment.
Text vs. Text+ controls
| Control | Basic Text | Text+ |
|---|---|---|
| Font and size | Simple Inspector controls | More detailed text controls |
| Color | Basic color picker | Shading controls for face, outline, and shadow |
| Position | Inspector or viewer dragging | Layout and transform controls |
If the text is hard to read, increase contrast rather than only increasing size. A white title may need a subtle drop shadow over bright footage, while dark text may need a light background bar. Keep your formatting consistent across the project by using the same font, size range, and placement for repeated elements such as speaker names, captions, and section titles.
How to Trim, Move, and Duplicate Text on the Timeline
Once your title is on the timeline, you can edit it much like a video clip. Text clips have a start point, an end point, a position in the timeline, and can be copied or duplicated for repeated captions, labels, lower thirds, or chapter titles. These timeline controls are handled on the Edit page, so you do not need to open Fusion or rebuild the title every time you want to adjust its timing.
Trimming text duration
To make a text clip shorter or longer, move your cursor to the left or right edge of the title clip on the timeline. When the trim cursor appears, drag the edge inward to shorten it or outward to extend it. For example, if a title stays on screen too long after someone finishes speaking, drag the right edge left until it ends at the right moment. If the title disappears too quickly, drag the right edge to the right to keep it visible longer.
Windows Errors? Fix Them Before They Spread
Repair common Windows errors and clear accumulated junk for a smoother, more stable PC - no reinstall needed.Free scan · no reinstallOutdated Drivers Are Slowing You Down
One free scan finds every outdated or missing driver and matches the right update for your exact hardware.Free scan · exact hardware matchRank #3

- Advanced node-based color correction
- New Fairlight Processing Audio Engine
- Complete non-linear professional editor
- Collaboration New Multi User
- Includes activation code
You can also place the playhead where you want the text to end and use the blade tool to cut the clip. Select the Blade Edit Mode tool, click the text clip at the playhead, then delete the extra portion. After cutting, switch back to the Selection Mode tool so you do not accidentally slice other clips. For precise timing, zoom into the timeline with the zoom slider or keyboard shortcuts, then trim by smaller amounts.
Moving text to a different time or track
To move a title, click and drag the text clip left or right along the timeline. Moving it left makes it appear earlier; moving it right makes it appear later. If snapping is enabled, the clip may jump to nearby cuts, markers, or playhead positions, which is useful when aligning text with dialogue or scene changes. If you need freer movement, temporarily disable snapping by clicking the magnet icon or using the snapping shortcut.
You can also drag text clips up or down to different video tracks. Text usually needs to sit on a video track above your main footage so it appears over the image. For instance, if your footage is on V1, place the title on V2 or higher. If a title is hidden, check that it is not sitting underneath another full-screen video clip and that the destination track is enabled.
Duplicating text clips
Duplicating text is one of the fastest ways to keep a consistent style across a project. Select the finished text clip, then copy and paste it using your standard keyboard shortcuts. Move the duplicated clip to the next location on the timeline, select it, and update only the wording in the Inspector. The font, color, size, alignment, shadow, and other styling choices will remain intact.
Free tools Windows power users keep installed
One-click scans. No signup required.
- Copy and paste: Best for reusing a title in another part of the edit.
- Alt-drag or Option-drag: Quickly creates a duplicate by dragging a copy to a new position.
- Duplicate to another track: Useful when stacking titles, subtitles, or graphic elements.
- Reuse a styled title: Create one polished lower third, duplicate it, then change names and details as needed.
For a faster workflow, build one “master” text clip with your preferred font, size, color, background, and position. Keep it near the beginning of your timeline or in a dedicated section, then duplicate it whenever you need another title. This helps your video look consistent and saves time compared with formatting each text clip from scratch.
How to Animate Text with Keyframes
Keyframes let you change a text property over time, which is how you create simple motion such as a title sliding in, fading out, growing larger, or moving across the screen. In DaVinci Resolve, you can animate both basic Text titles and Text+ titles from the Inspector on the Edit page. The process is the same in most cases: place the playhead where the animation should begin, enable a keyframe for the property you want to animate, move the playhead forward, then change that property.
For a simple slide-in animation, select your text clip on the timeline and open the Inspector. Go to the Video tab for basic transform controls, or use the Title controls if you are animating Text+ layout settings. Move the playhead to the first frame of the text clip. Under Transform, adjust the Position X value so the text starts off-screen. Click the small diamond icon next to Position to add a keyframe. Then move the playhead about one second later and change Position X so the text sits in its final on-screen location. Resolve automatically creates the second keyframe, and the text will move between those two points.
Common text animations you can create
- Fade in: Set Opacity to 0 at the start, add a keyframe, move forward, then set Opacity to 100.
- Fade out: Start at Opacity 100, add a keyframe near the end of the clip, move to the final frame, then set Opacity to 0.
- Scale pop: Set Zoom slightly smaller at the start, then increase it to normal size a few frames later.
- Lower-third slide: Animate Position X or Position Y so a name title slides in from the side or bottom.
- Slow drift: Add two subtle position keyframes over the full length of the title for gentle movement.
To view and fine-tune your keyframes directly on the timeline, select the text clip and click the small keyframe diamond icon on the clip, or open the keyframe controls in the timeline area. This helps when you want to move an animation earlier or later without changing the text itself. You can drag keyframes closer together to make the movement faster, or spread them farther apart to make it slower. If the motion feels too sudden, right-click a keyframe where available and choose an easing option such as Ease In or Ease Out to smooth the start or end of the movement.
Rank #4

- Multi-Cam Editing: The Blackmagic Design DaVinci Replay Resolve Editor is an editor panel specifically designed for multi-cam editing for news cutting and live sports replay
- Fast and Efficient: It includes buttons to make camera selection and editing extremely fast. It connects via Bluetooth or USB‑C
- Unlimited Storage: The Blackmagic Cloud Store Max has been designed for replay because it's fast and has a large capacity. So it easily handles multiple record channels
- Replay Palette: The replay controls can be accessed using the replay palette above the viewer, plus there are also dedicated buttons on the DaVinci Resolve Replay Panel for quick control
- Unlimited Record Channels: By adding multiple HyperDeck recorders to a Blackmagic Cloud Store Mini or Max, you can record as many channels as you need
Text+ also gives you more animation options, especially if you open the clip in the Fusion page. However, beginners can do a lot from the Edit page alone. For most YouTube titles, captions, labels, and lower thirds, animating Position, Zoom, Rotation Angle, and Opacity is enough. Once you build an animation you like, copy the text clip with Alt or Option drag, then edit the words while keeping the same motion. This is one of the fastest ways to create consistent animated titles throughout a project.
Independent reader supportYour contribution helps us test, update, and keep practical guides available for everyone.How to Fix Common Text Problems in DaVinci Resolve
Most text issues in DaVinci Resolve come from clip placement, Inspector settings, font compatibility, or timeline performance. If a title does not look the way you expect, start by selecting the text clip on the timeline, opening the Inspector, and checking the settings under Title, Settings, and, for Text+, the available Fusion-style controls. Many problems are fixed by confirming that the correct clip is selected and that the playhead is parked over the title on the timeline.
Text does not appear in the viewer
If your title is missing, first check that the text clip is on a video track above your footage. Text placed below a video clip can be hidden behind it. Also make sure the text clip is long enough and that the playhead is positioned inside the clip’s duration. If the title is still invisible, select it and look in the Inspector for settings such as Opacity, Position, Zoom, and Color. White text on a bright background, black text on a dark background, or a title moved off-screen can make it seem like nothing is there.
- Move the title to a higher video track, such as V2 above footage on V1.
- Extend the title clip by dragging its edge if the playhead is outside its duration.
- Reset position or zoom controls if the text has been moved out of frame.
- Change the text color or add a shadow if the background makes it hard to read.
Text looks blurry, pixelated, or low quality
Blurry text is often caused by scaling, timeline resolution, render settings, or playback quality. Avoid enlarging a small title too much with the transform controls; instead, increase the font size in the title settings. If you are using Text+, adjust size inside the Text+ controls rather than stretching the clip heavily in the viewer. Also check that your project timeline resolution matches the format you plan to export, such as 1920×1080 or 3840×2160.
Do these 3 things before closing this tab:
1Repair Windows errors before they cause bigger problems2Fix the driver behind crashes, sound loss and screen glitches3Clear out junk files and repair common Windows errorsDuring editing, DaVinci Resolve may show lower-quality playback to keep performance smooth. This does not always mean the final export will be blurry. For a clearer preview, set timeline proxy resolution back to full when checking titles, disable overly aggressive optimized media settings if needed, and review a short test export. If the exported title still looks soft, use a higher export resolution and bitrate, and avoid placing text inside heavily compressed footage or scaled compound clips.
Fonts, spacing, or styles are not working as expected
If a font does not show up in DaVinci Resolve, install it on your computer first, then restart Resolve so the font list refreshes. Some fonts may not support every character, symbol, accent, or language, which can cause missing letters or unexpected substitutions. In that case, choose a more complete font family or convert the wording to simpler supported characters. For inconsistent spacing, check tracking, line spacing, alignment, and any manual line breaks in the text box.
Text animation is not working correctly
When animated text does not move, fade, or scale as planned, the issue is usually keyframe placement. Select the text clip, open the Inspector, and look for active keyframe diamonds beside the property you animated, such as Position, Zoom, or Opacity. Make sure there is a starting keyframe and an ending keyframe with different values. If the animation happens too quickly, drag the keyframes farther apart. If it starts too late, move the keyframes closer to the beginning of the clip.
| Problem | Quick fix |
|---|---|
| Title is hidden | Place it on a video track above the footage |
| Text is hard to read | Change color, add shadow, or use a background box |
| Font is missing | Install the font and restart DaVinci Resolve |
| Animation does not play | Check that keyframes exist and have different values |
If a title still behaves strangely, copy its text, delete the title clip, and add a fresh Basic Text or Text+ clip. This is often faster than hunting through many changed settings. For longer projects, keep a few clean title presets or duplicated working titles on a spare part of the timeline so you can quickly replace broken text without rebuilding the style from scratch.
Best Value
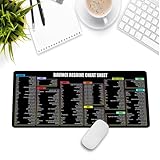
- Extra Large & Comfortable: Measuring 31.5 x 11.8 inches with a 3mm thickness, this XL mouse pad offers ample space for your mouse, keyboard, and more - ensuring comfort and reducing noise.
- Smooth & Precise Control: Enjoy effortless mouse movement with the ultra-smooth surface, perfect for both gaming and office work.
- Non-Slip Rubber Base: The anti-slip rubber base keeps the pad securely in place during intense gaming or work sessions.
- Durable & Stylish Design: Invisible stitching prevents edge wear while maintaining a sleek look, extending the pad’s lifespan.
- Waterproof & Easy to Clean: The water-resistant coating allows for quick cleaning—spills and stains wipe away easily.
Frequently Asked Questions
What is the difference between Text and Text+ in DaVinci Resolve?
Text is the quickest option for simple titles, captions, and lower thirds on the Edit page. Text+ uses Fusion-based controls, so it gives you more options for animation, styling, shading, outlines, and advanced title effects. If you only need basic text, use Text; if you want more control or motion graphics, use Text+.
How do I make text stay on screen longer in DaVinci Resolve?
Select the text clip on the timeline and drag its left or right edge to change its duration. You can also move the entire text clip above the video clip where you want it to appear. If the edge will not drag farther, make sure there is enough empty space on the timeline or move nearby clips out of the way.
How do I change the font, size, color, and position of text?
Click the text clip in the timeline, then open the Inspector in the top-right corner. Use the Title controls to change the font, size, tracking, color, alignment, and other style settings. To reposition text, adjust the Position values in the Inspector or drag the text directly in the viewer when on-screen controls are available.
Can I copy the same text style to other titles?
Yes, select the finished text clip, copy it, and paste it elsewhere on the timeline, then replace the words in the Inspector. This keeps the same font, color, size, position, and animation settings. For repeated title designs, you can also save a styled title in a Power Bin so it is available in other projects.
The Tool Desk
Outbyte PC Repair FREERepair Windows errors before they cause bigger problemsFix Now →Outbyte Driver Updater FREEFix the driver behind crashes, sound loss and screen glitchesFind Drivers →What should I do if my text is not showing in DaVinci Resolve?
First, check that the text clip is on a video track above your footage and that the track is not disabled. Make sure the playhead is over the text clip and that the text color is not blending into the background. If you are using Text+, open the Inspector and confirm the text field contains words and the opacity or blend settings have not been reduced to zero.
Bottom Line
Adding and editing text in DaVinci Resolve is straightforward once you know where to find Titles, Text, and Text+ on the Edit page. Start with a basic title for simple captions, then use Text+ when you need more control, animation, or advanced styling.
For the fastest workflow, keep your text clips organized on the timeline, reuse styles when possible, and preview your titles at full size before exporting. Open a project, add a simple title, adjust the font and timing, then experiment with animation to build confidence step by step.
Quick Recap
Product prices and availability are accurate as of the date/time indicated and are subject to change. Any price and availability information displayed on Amazon at the time of purchase will apply.
Quick wins for a faster PC:
Scan for outdated or missing drivers - takes under a minuteDriver Scan →Repair Windows errors before they cause bigger problemsFix Now →