Some links on this page are affiliate links: if you buy through them we may earn a commission, at no extra cost to you.
For most gaming monitors, leave Sharpness at its factory default or neutral value. There is no universal best number: 50 may be neutral on one display and an enhancement setting on another. Sharpness can make edges look more pronounced, but it cannot restore detail lost to a low resolution or blurry upscaling. Start with your monitor’s native resolution, then add only a little sharpening if the picture still looks soft.
What monitor Sharpness does
A monitor’s Sharpness control usually applies edge enhancement: it increases contrast around boundaries, making light edges look lighter and dark edges darker. That can make details seem crisper, but it does not add pixels or recover information that was never rendered.
Too much sharpening can create bright or dark halos, harsh text outlines, grain around foliage, jagged edges, or shimmering when objects move. A still image may look more detailed while actual gameplay looks noisier. For general calibration, RTINGS recommends the default Sharpness value as the typically most accurate starting point.
What’s actually slowing this PC down?
Pick the symptom - the matching free tool is one click away.
How to find the right setting
- Open the monitor’s on-screen display (OSD) with its buttons or joystick. Look under Picture, Image, or Clarity for Sharpness. The exact path and labels depend on the model; some also offer options such as Super Resolution or Edge Enhancement.
- Choose the default picture mode and set Sharpness to its factory default or neutral value. Turn off extra clarity, edge-enhancement, and noise-reduction features while you compare.
- Check small HUD text, high-contrast text, diagonal lines, foliage, and distant edges. Compare more than one setting, then test in motion as well as on a static image.
- If the image is genuinely soft, raise Sharpness in small steps. Stop at the first sign of outlines, halos, grain, or flicker; if those appear, back down.
Do not assume “50” is correct. Manufacturers use different scales and may put the neutral point at 0, 5, 10, 50, or another value. A control may also be unavailable or behave differently in certain picture modes or HDR.
#1 Best Overall

- ACHIEVE TRUE COLOR - Ensures your monitor displays colors accurately, critical for photography, design, and video editing, with unlimited gamma, whitepoint, and brightness settings.
- OPTIMIZE DISPLAY PERFORMANCE - Calibrate a wide range of backlight types including Wide LED, Standard LED, OLED, and Mini LED, ensuring consistent and accurate color across all your screens.
- ENHANCE WORKFLOW EFFICIENCY - Projector Calibration feature allows for accurate color representation during presentations, while Display Analysis/MQA provides comprehensive screen quality assessment.
- WIDE DEVICE COMPATIBILITY - Supports unlimited number of displays and offers an integrated USB-C cable, ensuring seamless connectivity with modern laptops and desktop computers for streamlined use.
- USER-FRIENDLY SOFTWARE - Features an intuitive interface supporting multiple languages, including English, Spanish, Chinese and Japanese, making calibration accessible to a global audience.
Start with native resolution
Before changing Sharpness, make sure the display is receiving the right resolution. In Windows 11, open Start → Settings → System → Display, select the monitor, and choose the resolution marked Recommended. This is generally the appropriate desktop resolution, though you can verify the monitor’s native specification if troubleshooting. Microsoft warns that using a resolution below native can make text less sharp and may result in a small, centered, bordered, or stretched image; see its Windows resolution guidance.
Set refresh rate separately at Settings → System → Display → Advanced display → Choose a refresh rate. Select a rate the monitor, GPU, and connection support, then confirm that the resolution has not changed. Some refresh-rate choices may not support the current resolution. Higher refresh rates mainly improve motion fluidity and responsiveness; they do not add static image detail. Microsoft explains the selection and compatibility caveat in its refresh-rate instructions.
Game resolution, render resolution, and sharpening
Keep the game’s output resolution at the monitor’s native resolution where practical. If performance is the problem, first look for a separate Render Resolution or Resolution Scale control, or a supported upscaler such as DLSS, FSR, or XeSS. These can render internally below native and reconstruct an image for the display; they are different from simply sending a low-resolution image to the monitor. Use the game’s own sharpening control, if available, sparingly and judge it in motion.
Rank #2

- QUICK & EASY COLOR CALIBRATOR: Whether you're editing photos, designing graphics, or producing content, SpyderExpress helps you view colors with precision and confidence; Ideal for creators who want accurate, lifelike colour in both digital and print
- READY FOR THE LATEST DISPLAYS: The only calibrator of its kind to currently support the latest Liquid Retina XDR displays, including the MacBook M4 mini-LED screen, alongside everyday monitors; Upgrade the software for OLED and advanced mini-LED support
- 3x FASTER THAN TYPICAL ENTRY-LEVEL TOOLS: Get edit-ready color in just 90 seconds - see skin tones, shadows, and highlights as they’re meant to be, with consistent, trustworthy results
- GROW YOUR TOOLKIT WITH SOFTWARE UPGRADES: Unlock advanced features like ambient light adjustment, multi-display profiling, and DevicePreview - shows how your work will appear across different devices; No new hardware needed, upgrade when you're ready
- REAL COLOUR, REAL EASY: Download the software, plug in the device, and follow the 3 simple steps. Save profiles, calibrate up to 3-connected displays per workstation, and recalibrate before editing to ensure your screen always shows true-to-life color
If a game has only one resolution setting and you lower it, the GPU or monitor must scale that image. Sharpening may emphasize edges, but it cannot restore the missing spatial detail. Avoid stacking aggressive game sharpening, GPU sharpening, and monitor sharpening: choose one control to adjust, then add another only if there is a clear reason.
Monitor, game, and GPU sharpening are not the same
| Control | Where it works | When it can help |
|---|---|---|
| Monitor Sharpness | In the display’s image processor, often across sources | A mild global adjustment, including for a console with few picture controls |
| In-game sharpening | In the game’s rendering pipeline | Per-game tuning, especially alongside that game’s upscaler |
| GPU sharpening | In graphics-driver software | A game lacks a useful control and the driver supports the feature for that title |
| Upscaler sharpening | As part of a reconstruction or scaling implementation | To tune the result of that particular upscaler, when its controls allow it |
| Windows scaling | Changes the apparent size of text and apps | Accessibility and desktop layout, not restoring game detail |
If you use DLSS, FSR, or XeSS, start with its own quality and sharpening controls where available. Implementations vary by game, and not every upscaler exposes the same options. A monitor’s Super Resolution feature is another separate processing stage; compare it against other sharpening rather than enabling everything at once.
NVIDIA
NVIDIA Image Scaling can upscale a lower-resolution render to the display resolution and apply sharpening. NVIDIA documents controls under NVIDIA Control Panel → Manage 3D settings → Image Scaling, with driver versions and menu labels varying. See the NVIDIA Control Panel reference and its Image Scaling overview. Prefer a per-game setting when available, and avoid automatically layering Image Scaling sharpening over a game’s own upscaler sharpening.
Rank #3

- 𝗘𝗡𝗦𝗨𝗥𝗘 𝗔𝗖𝗖𝗨𝗥𝗔𝗧𝗘 𝗖𝗢𝗟𝗢𝗥: Groundbreaking lens-based color engine provides a higher level of color accuracy for multiple monitors. Spyder X Pro features room-light monitoring, automatic profile changing and significantly more precise screen color, shadow detail and white balance.
- 𝗘𝗔𝗦𝗬-𝗧𝗢-𝗨𝗦𝗘: Spyder X Pro is so intuitive, you don’t have to be a color expert. It features quick and easy single-click calibration and wizard workflow with 12 predefined calibration targets for advanced color accuracy.
- 𝗤𝗨𝗜𝗖𝗞 𝗖𝗢𝗟𝗢𝗥 𝗖𝗔𝗟𝗜𝗕𝗥𝗔𝗧𝗜𝗢𝗡: Calibrating your monitor to achieve color precision is quick and easy, taking just a minute or two.
- 𝗖𝗢𝗠𝗣𝗔𝗥𝗘 𝗕𝗘𝗙𝗢𝗥𝗘 & 𝗔𝗙𝗧𝗘𝗥: SpyderProof functionality provides before-and-after evaluation of your display and allows you to see the difference using your own images.
- 𝗖𝗔𝗟𝗜𝗕𝗥𝗔𝗧𝗘 𝗠𝗨𝗟𝗧𝗜𝗣𝗟𝗘 𝗗𝗜𝗦𝗣𝗟𝗔𝗬𝗦: Spyder X software allows you to calibrate multiple laptops and desktop monitors.
AMD
AMD Software: Adrenalin Edition includes Radeon Image Sharpening on supported configurations. AMD’s support page explains how to find and adjust it in the software: Radeon Image Sharpening. AMD GPU Scaling is a separate fit-to-display option; it can preserve aspect ratio with borders instead of stretching, as described in AMD’s GPU Scaling guide. Integer Scaling is different again: it scales by whole-number pixel multiples for crisp, pixelated retro graphics, not as a general fix for modern 3D games (AMD Integer Scaling). Availability and menu labels vary with hardware and software.
Diagnose blur and artifacts before raising Sharpness
| What you notice | Likely cause or next check |
|---|---|
| Desktop text and games both look soft | Check native resolution, Windows scaling, monitor scaling, and the selected signal format before sharpening. |
| Windows is clear but one game is blurry | Check that game’s internal render resolution, dynamic resolution, anti-aliasing, upscaler quality, motion blur, and sharpening. Monitor Sharpness may make the desktop harsher without fixing the game. |
| Halos or double-edged text | Reduce the most recently added sharpening filter. Turn off the monitor, game, and driver filters, then re-enable one at a time. |
| Foliage, fences, or thin wires shimmer in motion | Sharpening may be too strong, or the game’s temporal reconstruction or anti-aliasing may be unstable. Reduce game or GPU sharpening first. |
| Moving objects leave trails or bright inverse trails | This is motion response or overdrive behavior, not ordinary Sharpness. Tune the monitor’s Overdrive or Response Time setting separately; aggressive modes can cause inverse ghosting. |
| Image looks blurry after changing resolution or refresh rate | Recheck Windows and in-game resolutions, scaling mode, aspect ratio, and whether the refresh-rate selection changed resolution. |
| Sharpness control seems to do nothing | A picture mode may lock it, HDR may use another profile, or the monitor may apply it only to certain inputs. Try a standard or custom picture mode and disable other enhancements. |
| Settings change when switching HDR | SDR and HDR may use different picture profiles or processing paths. Set and assess each mode separately. |
Sharpness and Overdrive solve different problems. Sharpness alters apparent edge definition; Overdrive changes pixel transitions to affect motion response. Raising Sharpness will not fix ghosting. OLED and LCD monitors also differ in their menus and available processing controls, so use the options your model actually provides.
Independent reader supportYour contribution helps us test, update, and keep practical guides available for everyone.Connection and special cases
DisplayPort is not automatically sharper than HDMI, or vice versa. The important question is whether the chosen port, cable, GPU output, and monitor input support your intended resolution, refresh rate, HDR, variable refresh rate, color depth, and chroma format. If a desired refresh rate is missing, check the monitor’s manual and the specifications of the entire signal path.
Rank #4
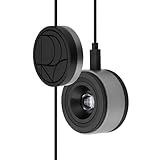
- 3-in-1 multiple function with Colorimeter, Display OSD control and ASUS Dial features
- Integrated colorimeter, both with Hardware and Software Calibration via ASUS exclusive software tool to keep long-term color accuracy and consistency
- Measuring up to 10000 nits for precise HDR calibration, seamlessly compatible with LED, OLED, Mini-LED, and more
- 5-way navigator and shortcut key provide intuitive Display OSD control accessible within the reach of your hand
- Integrate ASUS Dial provide customize shortcuts for easy, precise control of your creator software
For a console, use the display’s native output resolution where the console and connection support it, then leave monitor Sharpness neutral as a starting point. For HDR, begin neutral and assess HDR separately rather than assuming an SDR sharpness adjustment will carry over.
Windows 11 Auto SR is a specialized upscaling feature, not a monitor Sharpness control. Microsoft lists requirements including Windows 11 version 24H2 or later, supported hardware, a 1080p-or-higher display, current drivers, and supported games; availability is limited to compatible configurations. See Microsoft’s Auto SR guidance.
Quick baseline and recovery
- Use the monitor’s native resolution and a supported refresh rate.
- Set Sharpness to the factory default or neutral value; do not assume a specific number.
- Turn off Super Resolution and other enhancement modes while diagnosing.
- Use the game’s render scale or a suitable upscaler before lowering output resolution.
- Adjust one sharpening control at a time and keep it modest.
- Tune Overdrive separately if the problem is motion ghosting.
If the picture gets worse, return Sharpness to default, disable enhancement modes, and reset the monitor picture profile if needed. Restore Windows to the Recommended resolution, set the game to native output resolution, and turn off GPU sharpening. Re-enable one sharpening method at a time; restart the game if it does not recognize a driver-level scaling or resolution change.
The practical rule is simple: establish a native-resolution, neutral-sharpness baseline first. If a game still looks soft, identify whether the softness comes from rendering, scaling, or motion before applying a small amount of sharpening.
Quick Recap
Product prices and availability are accurate as of the date/time indicated and are subject to change. Any price and availability information displayed on Amazon at the time of purchase will apply.

