Some links on this page are affiliate links: if you buy through them we may earn a commission, at no extra cost to you.
The i5-6600K is unlocked, so a Z170 or Z270 motherboard can raise its CPU multiplier for an all-core overclock. A sensible first target is 4.2 GHz: keep the base clock at 100 MHz, start with a conservative voltage, and test temperatures and stability before trying 4.3 or 4.4 GHz. No frequency or voltage is guaranteed for every chip. Overclocking can cause crashes, shorten component life, and affect warranty coverage; back up important data and know how to reset your BIOS before changing settings.
At a glance: a conservative starting point
| Setting | Starting point |
|---|---|
| Motherboard | Z170 or Z270 with multiplier controls and an adequate VRM |
| BCLK | 100 MHz |
| All-core ratio | 42, for approximately 4.2 GHz |
| Core voltage | Manual voltage during initial testing; a board- and chip-dependent starting range is about 1.20–1.25 V, not a guaranteed target |
| Load-line calibration (LLC) | Moderate, not maximum; check actual voltage under load |
| Memory | Default settings until the CPU is stable; test XMP separately afterward |
| Cooling | A capable tower air cooler or liquid cooler, with good case airflow |
| Temperature | Aim to keep sustained full-load temperatures below roughly 80–85°C; lower is preferable |
This is a starting profile, not a promise that every i5-6600K will run it. If the system is unstable or hot, reduce the ratio or stop. Intel’s general overclocking guidance recommends staying at or below 80°C for longer workloads and says traditional cooling should not exceed 1.4 V; neither statement makes a particular voltage universally safe for every chip or board. See Intel’s unlocked-processor overclocking guidance.
What an i5-6600K overclock can—and cannot—do
The Skylake i5-6600K has four cores and four threads, a 3.5 GHz base frequency, up to 3.9 GHz Turbo Boost, 6 MB of cache, and a 91 W stock TDP. Its K-series multiplier is unlocked. Intel lists support for dual-channel DDR4-2133 or DDR3L-1600, but the motherboard determines which memory type you can use; DDR4 and DDR3L are not interchangeable on a given board. The specifications are in Intel’s 6th-generation Core desktop product brief.
Do these 3 things before closing this tab:
1Clear out junk files and repair common Windows errors2Scan for outdated or missing drivers - takes under a minute3Repair Windows errors before they cause bigger problemsRaising the clock can help workloads that benefit from faster individual cores, including some older games, emulation, and everyday tasks. Moving from 3.5 to 4.5 GHz is about a 28.6% increase in raw clock rate, but that is not a prediction of application performance: actual gains vary with workload, cooling, GPU limits, and the CPU’s changing Turbo behavior. A higher clock also cannot add threads. Modern games and multitasking workloads that need more than four threads may remain limited even after an overclock.
#1 Best Overall

- Brand New in box. The product ships with all relevant accessories
Many enthusiast discussions use 4.3–4.5 GHz as a target range, but results depend on the individual CPU, motherboard, BIOS, cooling, and required voltage. Treat 4.2 GHz as a starting point, not a minimum, and 4.5 GHz as an experiment rather than an expectation.
Check the platform before changing settings
CPU multiplier overclocking normally requires a compatible Z-series board for this processor—typically Z170 or Z270—with a BIOS that exposes ratio and voltage controls. Intel outlines the general hardware requirements and overclocking risks. A board’s chipset alone does not guarantee equally good power delivery: board design, VRM cooling, BIOS options, and the condition of an older motherboard all matter.
- Use a capable tower air cooler or liquid cooler. A stock Intel cooler is not an appropriate recommendation for a sustained overclock.
- Check cooler mounting, thermal paste condition, dust, and case airflow. CPU temperature can look acceptable even while motherboard VRMs are running hot.
- Use a reliable power supply and verify the CPU power connectors are seated.
- Confirm the exact motherboard model and download its manual. Menu names and recovery procedures differ by manufacturer.
- Back up important data. Overclocking can cause crashes and data loss.
- Find the manual’s instructions for Clear CMOS, safe boot, or BIOS recovery before testing. Do not assume every board recovers the same way.
Intel warns that changing clock frequency or voltage can reduce stability, security, performance, and component life, and may affect warranty coverage. Read the warning in its overclocking requirements article before proceeding.
Rank #2
![Intel Core i5 6600K 3.50 GHz Quad Core Skylake Desktop Processor, Socket LGA 1151, 8MB Cache [BX80662I56600K]](https://m.media-amazon.com/images/I/41z38RJyX7L._SL160_.jpg)
- A new level of Intelligent performance
- Do more at once
- Speedy content creation
- Get your game on
Establish a baseline first
- Record the motherboard model and current BIOS version, then consult the manual. Do not flash a BIOS casually: use the file and procedure for the exact board, and avoid interrupting the update.
- Install monitoring software such as HWiNFO and CPU-Z. HWiNFO can help track temperatures, voltage, clock speeds, throttling, and hardware errors; CPU-Z can confirm processor, board, and memory information.
- At stock settings, record idle and load temperatures and run a repeatable benchmark. Keep the score and conditions so you can judge whether tuning made a useful difference.
- Watch the voltage the board actually supplies under load. Automatic voltage can rise more than expected when you increase the multiplier.
- Dust out the cooler and case, and confirm the cooler is mounted correctly before interpreting high temperatures as a voltage problem.
Intel recommends benchmarking before tuning and monitoring the result; its BIOS overclocking guide also explains the basic ratio and base-clock relationship.
BIOS overclocking, step by step
Enter UEFI/BIOS during startup, commonly by pressing Delete or F2. Use the motherboard manual if those keys do not work. BIOS labels vary: “CPU Ratio,” “CPU Core Ratio,” and “multiplier” generally refer to the same control, while voltage may appear as “CPU Core Voltage” or “Vcore.”
- Load optimized defaults. This removes unknown settings left by a previous configuration. Save or note anything you need before doing so.
- Leave BCLK at 100 MHz. CPU frequency is approximately BCLK multiplied by the core ratio: 100 MHz × 42 = 4,200 MHz, or 4.2 GHz. Avoid changing BCLK at first; it can affect other buses and complicate troubleshooting.
- Set the all-core ratio to 42. Choose the board’s equivalent of “Sync All Cores,” then enter 42. Keep cache/ring ratio at stock or conservative. An aggressive cache overclock adds another variable and is usually not the first priority.
- Set a manual core voltage for initial testing. Some systems may begin testing 4.2 GHz around 1.20–1.25 V, but this is only a reference range—not a safe setting guaranteed to work for your chip. If it is unstable and temperatures are comfortably controlled, adjust in small increments and retest. Intel describes incremental voltage adjustment in its overclocking guide. Never raise voltage simply to force a target frequency.
- Choose moderate LLC. LLC affects how voltage changes under load. Maximum LLC can cause overshoot; the right setting depends on the board. Check actual load voltage in monitoring software rather than assuming the BIOS value is what the CPU receives.
- Leave memory at default for now. Do not enable XMP at the same time as the initial CPU overclock. This makes it easier to identify which change caused an error.
- Keep power-saving settings unless troubleshooting. C-states and SpeedStep can usually remain enabled. BIOS options and behavior differ, so change them only when there is a specific stability reason. Some older BIOSes may not offer an AVX offset; do not assume that option exists.
- Save and boot. In Windows, use CPU-Z or HWiNFO to confirm the expected frequency, active cores, actual voltage, temperatures, and whether the CPU is throttling.
Intel Extreme Tuning Utility (XTU) is not the preferred route for a final Skylake configuration. Its support depends on software version and platform; do not assume a current release supports every i5-6600K and Z170/Z270 board. Check Intel’s XTU requirements for the exact setup. BIOS settings are persistent and easier to audit.
Rank #3

- LGA 1151
- Unlocked Processor
- DDR4 & DDR3L Support
- Display Resolution up to 4096x2304
- Intel Turbo Boost Technology
Test stability in stages
A system that boots is not necessarily stable. A short benchmark is a sanity check, not proof that the PC will handle every game or workload. Test at default memory settings first, and record the test, duration, settings, peak temperature, and observed load voltage.
The Tool Desk
Outbyte PC Repair FREERepair Windows errors before they cause bigger problemsFix Now →Outbyte Driver Updater FREEFix the driver behind crashes, sound loss and screen glitchesFind Drivers →- Quick check: Run several loops of Cinebench R23 or another repeatable benchmark. Stop if temperatures become excessive, the system crashes, or monitoring shows throttling.
- Moderate CPU test: Run OCCT, AIDA64, or a comparable CPU workload for 30–60 minutes while watching temperature, voltage, and errors. OCCT is available from its official site; check that site for current edition details. Prime95 is another option, but settings and versions differ, and AVX-heavy workloads can create more heat than typical games.
- Test your real workload: Run the games and applications you actually use. For important work, validate for longer—several hours of representative use, plus an appropriate longer stress test.
- Test AVX-heavy work if relevant: Video encoding, compression, and scientific applications may stress the CPU differently from games. Monitor temperatures closely.
- Test memory separately: Once the CPU is stable, enable XMP and retest. XMP applies a memory profile beyond standard settings, and stability depends on the kit, motherboard, and BIOS. If errors begin after enabling it, test or reduce memory settings rather than immediately adding CPU voltage.
No one test certifies universal stability. A system that is stable in games but fails a stress test may be suitable only for that gaming use; call it gaming-stable, not fully stable. Conversely, passing Prime95 does not rule out a crash in a particular application.
Fine-tune without chasing a number
Once 4.2 GHz is stable, you can try ratio 43, then 44, repeating the same testing process after each change. Prefer the lowest voltage that is stable for your real workload, and stop when a small frequency increase demands disproportionate voltage or heat. A lower-voltage 4.3–4.4 GHz configuration is often a better choice than a hot, high-voltage attempt at 4.6 GHz.
Rank #4
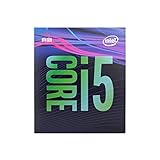
- 6 Cores /6 Threads
- Up to 4.4 GHz
- Compatible with Intel 300 Series chipset based motherboards
- Bios update may be required for motherboard compatibility
- Supports Intel Optane Memory
Manual voltage is useful while learning because it makes test results easier to interpret. Advanced users can try adaptive voltage after establishing a stable manual configuration, but motherboard offsets and behavior under Turbo or AVX loads can make it less predictable. Recheck actual load voltage and stability after switching.
Only after CPU stability is established should you enable XMP. If errors follow, lower memory speed or return to manual memory settings and test RAM separately. Likewise, keep the cache ratio conservative until core and memory stability are understood. Raise fan speeds or improve case airflow if temperatures are the limiting factor; do not use extra voltage as a substitute for cooling.
Recommended Free Tools
Example targets—not guaranteed profiles
| Profile | Ratio / frequency at 100 MHz BCLK | How to approach it |
|---|---|---|
| Conservative | 42 / 4.2 GHz | Good first test, particularly when prioritizing quiet operation. Validate voltage and temperature on your system. |
| Balanced | 43–44 / 4.3–4.4 GHz | Try only after the previous setting is stable. Add voltage only as needed and retest. |
| Aggressive | 45 or higher / 4.5 GHz or higher | Chip, board, voltage, and cooling dependent. Do not assume another owner’s result applies to your CPU. |
These are tuning targets, not Intel specifications or voltage recipes. Do not treat 1.4 V as a universal daily-safe limit: it is a ceiling in Intel’s general guidance for traditional cooling, not a guarantee of longevity or safety for every Skylake system. Stop if voltage approaches that guidance, temperatures are too high, or the performance gain is not meaningful.
Best Value
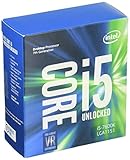
- Socket LGA 1151
- Intel 200/1001 Series Chipset Compatibility (1. Excludes Intel Octane Technology support)
- Intel HD Graphics 630
- Intel Turbo Boost 2.0 Technology
- Intel Hyper-Threading Technology1
Troubleshooting and recovery
| Symptom | What to try |
|---|---|
| Won’t boot or repeatedly fails startup | Use the board’s retry or safe-boot feature if available. Otherwise power down and clear CMOS using the manual’s procedure, load defaults, then lower the ratio or voltage target. |
| Crash or blue screen during CPU load | Reduce the ratio first. If temperatures are well controlled, make a small voltage adjustment and retest; review LLC and actual load voltage. |
| Errors appear only after a long test | Treat the setting as unstable. Reduce the ratio, adjust voltage cautiously, or improve cooling; retest the same workload. |
| Temperature is too high | Stop the test. Reduce voltage or frequency, check cooler mounting and dust, and improve airflow. Do not continue at excessive temperatures to chase a benchmark. |
| CPU looks stable, but errors appear after enabling XMP | Return to default memory settings, test the RAM separately, or reduce memory speed. Keep CPU and memory tuning isolated while diagnosing. |
| WHEA hardware errors appear | Count them as instability even if the benchmark finishes. Reduce the overclock and retest. |
| Unexpected storage or USB issues after changing BCLK | Return BCLK to 100 MHz and retest. |
| Load voltage is much higher than expected | Do not trust the BIOS target alone. Replace Auto voltage with a controlled setting if appropriate, reduce LLC, and verify under load. |
| Temperatures are acceptable, but crashes continue | Simplify the configuration: default memory, conservative cache ratio, 100 MHz BCLK, then retest the CPU core before changing anything else. |
Do not delid the processor as a routine step. Delidding introduces physical risk and is unnecessary for many modest overclocks; consider it only if experienced and there is a clear reason.
Is an i5-6600K overclock still worth it?
It can be a low-cost way to extend a system if you already own a suitable Z170/Z270 board and cooler. The more your software depends on a few fast cores, the more useful a clock increase may be. If modern games stutter under CPU-heavy scenes, or multitasking and threaded applications are the problem, four cores and four threads may be the real limit. An overclock cannot fix that.
Before buying a replacement cooler or an expensive used Z170/Z270 motherboard, compare the total cost with moving to a newer used or entry-level platform. Include the motherboard, CPU, and memory you would need, and weigh newer features and more threads against the cost of keeping the old system. If the board you own already supports multiplier overclocking, first establish whether a modest, cool 4.2–4.4 GHz setting helps your actual workload. Sometimes cleaning the cooler and improving airflow are the only purchases—or changes—you need.
Quick Recap
Product prices and availability are accurate as of the date/time indicated and are subject to change. Any price and availability information displayed on Amazon at the time of purchase will apply.

