Use your operating system’s built-in selection tool. On Windows 10 or 11, press Windows+Shift+S, then drag over the area. On a Mac, press Shift+Command+4, drag the crosshair, and release. In GNOME on Linux, press Print, select the region in the overlay, and click the capture button. These methods require no extra software or hardware.
Choose the shortcut for your computer
| Platform | Start a region capture | Default result |
|---|---|---|
| Windows 10 or 11 | Windows+Shift+S | Snipping Tool opens the snip for copying, saving, annotation and sharing |
| macOS | Shift+Command+4 | The image is saved to the desktop by default |
| GNOME on Linux | Print, then select an area in the overlay | Saved in Pictures/Screenshots and can also be copied |
The Linux steps here are specifically for GNOME. KDE Plasma, Cinnamon, Xfce and other desktop environments can use different shortcuts and screenshot applications.


For reference, see Microsoft’s Snipping Tool instructions, Apple’s Mac screenshot guide and GNOME’s screenshot help.
How to capture part of the screen in Windows 10 or 11
1. Open the Snipping Tool overlay
Press Windows+Shift+S. The screen dims and the Snipping Tool capture bar appears. Microsoft documents this shortcut for both Windows 10 and Windows 11.
Crashes, No Sound, or Screen Glitches?
Random freezes, missing sound and display glitches usually trace back to one bad driver. Find and replace yours safely.Free scan · under a minutePC Slower Than It Used to Be?
A free scan shows the junk files, broken settings and background clutter dragging Windows down - then fixes them in one click.Free scan · Windows 10 & 11#1 Best Overall
![Debut Video Capture Software to Record from a Webcam, Computer Screen or Device [Download]](https://m.media-amazon.com/images/I/91wYZySob4L._SL160_.jpg)
- Capture video directly to your hard drive
- Record video in many video file formats including avi, wmv, flv, mpg, 3gp, mp4, mov and more
- Capture video from a webcam, network IP camera or a video input device (e.g.: VHS recorder)
- Screen capture software records the entire screen, a single window or any selected portion
- Digital zoom with the mouse scroll wheel, and drag to scroll the recording window
2. Select a capture mode
Choose Rectangle to capture a conventional rectangular area. Choose Freeform when you need to draw an irregular outline. The same overlay also offers window and full-screen modes, but those are not partial-area captures.
3. Drag around the content
Click and drag across the part of the display you want. Release the mouse or trackpad button to take the snip. If you selected Freeform, trace the boundary around the shape before releasing.
4. Copy, edit or save
Snipping Tool opens the result so you can annotate, crop, save or share it. Press Ctrl+C to copy the snip, or Ctrl+S to save it. To create another copy in a different place or with a different filename, use Save as. Microsoft says the automatic save folder and behavior can be changed in Snipping Tool settings.
Canceling or correcting a selection
If the outline is wrong, take another snip rather than trying to resize the selection after release. Press Escape before completing the drag to cancel the current capture.
Do these 3 things before closing this tab:
1Clear out junk files and repair common Windows errors2Scan for outdated or missing drivers - takes under a minute3Repair Windows errors before they cause bigger problemsHow to capture part of the screen on a Mac
1. Start crosshair selection
Press Shift+Command+4. The pointer changes to a crosshair.
Rank #2

- Record videos and take screenshots of your computer screen including sound
- Highlight the movement of your mouse
- Record your webcam and insert it into your screen video
- Edit your recording easily
- Perfect for video tutorials, gaming videos, online classes and more
2. Select the portion you need
Press and hold the mouse or trackpad button, drag around the area, and release. The release completes the screenshot. Press Escape while selecting if you decide not to capture.
3. Reposition the selection while dragging
Hold the Space bar while dragging to move the selected box without changing its dimensions. This is useful when the box is the right size but starts in the wrong place.
4. Choose a file or clipboard result
macOS saves the screenshot to the desktop by default. Hold Control with the screenshot shortcut to copy the capture to the clipboard instead. You can also use the thumbnail’s context menu after capture.
Use the Screenshot app for additional controls
Press Shift+Command+5 to open the Screenshot app. Apple says this app is available in macOS Mojave 10.14 and later. It provides additional controls, including changing the save location and setting a timer.
How to capture part of the screen in GNOME on Linux
1. Open the screenshot overlay
Press the Print key. You can also open the system menu and choose its screenshot button.
2. Select the region
In the overlay, drag the handles or crosshair around the area you want. GNOME’s interface also includes screen and window modes; stay with the area-selection mode for a partial screenshot.
3. Capture and find the file
Click the round capture button. GNOME documents shortcut captures as being saved under Pictures/Screenshots. The result can also be copied to the clipboard for pasting into another application.
If your Linux desktop is not GNOME
Do not assume the Print workflow applies to every distribution. Desktop environments choose their own screenshot utility and shortcut mapping. Check the desktop’s keyboard settings or help pages for the equivalent region-capture command.
Rectangle, freeform, clipboard or file?
Use a rectangle for most work
A rectangular selection is easiest to align with a paragraph, application panel, chart or browser area. It also avoids accidentally including nearby content.
Use freeform when the outline matters
Windows’ Freeform mode is the documented built-in option for a non-rectangular outline. macOS and GNOME use a dragged region with a crosshair or handles rather than naming a separate freeform mode in the cited instructions.
Rank #4
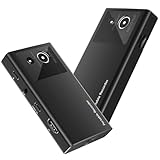
- 【4K60FPS HD Recorder】Recorder supports 4K60FPS high-definition Input, It also supports 1080p60 Recording.Utilizing the H.264 encoding format, it ensures high video quality while effectively controlling the size of the video files. This device is suitable for live streaming, game recording, content creation, device mirroring, and other scenarios.
- 【Multi-interface Compatibility】Supports HDMI or DisplayPort input through a USB-C interface (compatible with DP1.2/1.3/1.4), automatically adapting to resolution, offering flexible connection options suitable for a variety of devices including Phone,Media Player,Computer,TV Sticks,Video Disc Player,Set-top Boxes,Digital Camera,Game Console,Cable TV Receivers,Camcorder.
- 【Plug&Play】 Enjoy a true plug and play experience without the need for additional drivers. The straightforward setup process makes video capture and recording quick and convenient. A Type-C to C cable is included for use with smartphones or computers that have a DisplayPort output.
- 【Instant Preview and Playback】The Recorder supports instant viewing and playback of video clips stored on the TF card via a smartphone, enabling quick review and sharing of recorded content. It ensures that the recorded videos meet expectations and captures the desired scenes in a timely manner. Moreover, it is no longer limited to specific environments, as users can quickly access and share recorded video content from anywhere, increasing the flexibility of use.
- 【Portable Design】The Recorder is compact in size (107x60x18mm), making it easy to carry around. It also features an AUX interface for integrating external audio. You can easily connect headphones or a microphone to embed commentary or ambient sound into the live stream without needing any additional equipment, which greatly facilitates gamers' video recording
Copy when you need to paste immediately
Clipboard output is convenient for a message, document or issue report. Windows uses Ctrl+C; macOS uses Control with the capture shortcut; GNOME can copy the captured image from its screenshot workflow.
Free tools Windows power users keep installed
One-click scans. No signup required.
Save when you need a reusable file
Saving creates an image you can rename, archive or attach later. Windows exposes Save as; macOS writes to the desktop by default; GNOME uses Pictures/Screenshots for shortcut captures.
Practical capture checklist
- Close or move anything that should not appear in the image.
- Choose Rectangle, Freeform or the platform’s area mode before dragging.
- Include enough surrounding context that another person can understand the capture.
- Check the result immediately for clipped text, a missing edge or an accidental notification.
- Copy it for an immediate paste, or save it when you need a file and filename.
A partial screenshot records what is visible at the moment of capture. If a page, menu or dialog is still changing, wait for it to settle before dragging the selection.
Independent reader supportYour contribution helps us test, update, and keep practical guides available for everyone.Troubleshooting partial screenshots
The shortcut does nothing on Windows
Confirm that you are pressing the Windows logo key, Shift and S together. If the overlay appears but the image is not where expected, open the Snipping Tool result and use Save as; its settings control automatic-save behavior.
The Mac capture is the wrong size
Start again with Shift+Command+4 and drag from one corner to the opposite corner. Hold Space during the drag to reposition the box without resizing it. Press Escape to abandon a selection.
The Mac file is not in the clipboard
The normal shortcut saves to the desktop. Hold Control with the shortcut when you need clipboard output instead.
GNOME saved the image somewhere unexpected
Look in Pictures/Screenshots, the folder GNOME documents for shortcut captures. If you used a different desktop environment, its destination and utility may differ.
The screenshot includes too much
Repeat the capture with a smaller selection. On Windows, Rectangle or Freeform lets you define the boundary before the image is created; on macOS and GNOME, the drag defines the boundary.
You need a web page without overlays
Operating-system shortcuts capture the pixels currently displayed on your monitor. A cookie banner, newsletter prompt or chat widget that is visible in the browser will therefore be part of the image. For automated website captures, use the browser-oriented option below.
Recommended Free Tools
Or skip the browser setup
If your goal is a repeatable screenshot of a website rather than a one-off picture of your desktop, ScreenshotNeo returns a PNG, JPEG, WebP or PDF from one GET request. Before capture it accepts cookie or consent banners and removes more than 60 known consent platforms, newsletter popups and chat widgets; each cleanup step can be disabled. Only clean shots are billed: bot checks or CAPTCHAs, blank pages, timeouts, failed loads and cache hits cost nothing, and the response identifies the result with X-Page-Verdict and X-Billed headers.
One-call cURL example
See the ScreenshotNeo documentation for parameters and response details.
curl -G "https://api.screenshotneo.com/v1/shot" -d access_key=YOUR_API_KEY --data-urlencode url=https://stripe.com -o shot.webpPython
import requests
r = requests.get("https://api.screenshotneo.com/v1/shot", params={"access_key": "YOUR_API_KEY", "url": "https://stripe.com"}, timeout=90)
open("shot.webp", "wb").write(r.content)
Node.js
const q = new URLSearchParams({ access_key: 'YOUR_API_KEY', url: 'https://stripe.com' });
const res = await fetch(`https://api.screenshotneo.com/v1/shot?${q}`);
Options for production captures
- Capture a full page with lazy-loaded images, or capture one element by CSS selector.
- Set a dark mode, one of 12 device presets or any viewport, plus a retina scale.
- Produce PDFs with paper size, margins, landscape orientation and page ranges.
- Render supplied HTML/CSS, run custom JavaScript, click an element, hide selectors, or wait for a selector, delay or network idle.
- Block ads, trackers, requests or resource types; provide custom headers, cookies, a user agent or Authorization.
- Set timezone and geolocation, use a transparent background, resize the image, and cache with a TTL you choose.
- Create signed links for public
<img>tags, submit asynchronous jobs with signed webhooks, capture up to 100 URLs per bulk call, query usage, or use the OpenAPI specification. Parameter names used by other screenshot APIs also work for easier migration.
ScreenshotNeo also provides an MCP server for AI agents, including Claude, Cursor and other MCP clients, with take_screenshot, get_page_info and capture_pdf tools.
Cost and billing behavior
| Plan | Included shots | Price |
|---|---|---|
| Free | 1,000 per month | $0, no card |
| Starter | 3,000 | $5 |
| Growth | 15,000 | $15 |
| Pro | 60,000 | $39 |
| Scale | 250,000 | $99 |
| Business | 1,000,000 | $249 |
Yearly billing gives two months free, and every feature is available on every plan. The paid plans start at $5 for 3,000 shots. To try it, create a free ScreenshotNeo account with 1,000 screenshots per month and no card.
The Tool Desk
Outbyte PC Repair FREEClear out junk files and repair common Windows errorsFree Scan →Outbyte Driver Updater FREEFix the driver behind crashes, sound loss and screen glitchesFind Drivers →Quick Recap
Product prices and availability are accurate as of the date/time indicated and are subject to change. Any price and availability information displayed on Amazon at the time of purchase will apply.




