Some links on this page are affiliate links: if you buy through them we may earn a commission, at no extra cost to you.
For most Windows users, install Telnet Client—not a Telnet server. Telnet Client is an optional Windows feature that adds the telnet.exe command for outbound TCP connections. You can enable it through Windows Features, DISM, or PowerShell; Windows Server also supports Server Manager and Install-WindowsFeature.
Use Telnet only for legacy systems or limited connectivity checks. It does not encrypt interactive traffic, so OpenSSH is the safer choice for remote administration, while PowerShell’s Test-NetConnection is usually better for a simple port test.
What installing Telnet actually enables
Windows 10, Windows 11, and documented Windows Server releases include the Microsoft Telnet client as an optional feature. Installing it adds a command-line client that can initiate an outbound connection to a hostname or IP address and TCP port. Microsoft documents the command for Windows 10, Windows 11, Windows Server 2016, 2019, 2022, and 2025; the client must be installed before the command can be used.
Installing Telnet Client does not:
- Turn the computer into a Telnet server.
- Create a service that accepts inbound Telnet sessions.
- Open TCP port 23 on the computer.
- Prove that a remote application is healthy or secure.
A Telnet server is a separate component or service on the destination system. Do not enable an inbound Telnet service merely because a troubleshooting guide says to “turn on Telnet.”
#1 Best Overall

- 𝐇𝐢𝐠𝐡-𝐒𝐩𝐞𝐞𝐝 𝐔𝐒𝐁 𝐄𝐭𝐡𝐞𝐫𝐧𝐞𝐭 𝐀𝐝𝐚𝐩𝐭𝐞𝐫 - UE306 is a USB 3.0 Type-A to RJ45 Ethernet adapter that adds a reliable wired network port to your laptop, tablet, or Ultrabook. It delivers fast and stable 10/100/1000 Mbps wired connections to your computer or tablet via a router or network switch, making it ideal for file transfers, HD video streaming, online gaming, and video conferencing.
- 𝐔𝐒𝐁 𝟑.𝟎 𝐟𝐨𝐫 𝐅𝐚𝐬𝐭𝐞𝐫, 𝐌𝐨𝐫𝐞 𝐒𝐭𝐚𝐛𝐥𝐞 𝐃𝐚𝐭𝐚 𝐓𝐫𝐚𝐧𝐬𝐟𝐞𝐫𝐬- Powered via USB 3.0, this adapter provides high-speed Gigabit Ethernet without the need for external power(10/100/1000Mbps). Backward compatible with USB 2.0/1.1, it ensures reliable performance across a wide range of devices.
- 𝐒𝐮𝐩𝐩𝐨𝐫𝐭𝐬 𝐍𝐢𝐧𝐭𝐞𝐧𝐝𝐨 𝐒𝐰𝐢𝐭𝐜𝐡- Easily connect your Nintendo Switch to a wired network for faster downloads and a more stable online gaming experience compared to Wi-Fi.
- 𝐏𝐥𝐮𝐠 𝐚𝐧𝐝 𝐏𝐥𝐚𝐲- No driver required for Nintendo Switch, Windows 11/10/8.1/8, and Linux. Simply connect and enjoy instant wired internet access without complicated setup.
- 𝐁𝐫𝐨𝐚𝐝 𝐃𝐞𝐯𝐢𝐜𝐞 𝐂𝐨𝐦𝐩𝐚𝐭𝐢𝐛𝐢𝐥𝐢𝐭𝐲- Supports Nintendo Switch, PCs, laptops, Ultrabooks, tablets, and other USB-powered web devices; works with network equipment including modems, routers, and switches.
When no port is specified, the Telnet command uses TCP port 23 by default. A destination service may use another port, such as 443, 25, 587, or 3389. See Microsoft’s Telnet command documentation.
Before you begin
- Have local administrator rights, or ask an administrator to install the feature.
- Use an elevated Command Prompt or PowerShell window for command-line installation.
- If Windows needs to download the feature payload, ensure Windows Update or your organization’s configured feature source is available.
- Know the destination hostname or IP address and TCP port you intend to test.
- Only test systems and services you are authorized to access.
On managed computers, Group Policy, WSUS, offline servicing policies, or a missing component source can prevent optional-feature installation. Windows client devices commonly obtain required content through Windows Update. Windows Server can use local component storage, Windows Update, policy-defined sources, or another specified source. Microsoft’s guidance on optional Windows features and Windows Server Features on Demand explains these source requirements.
Install Telnet on Windows 10 and Windows 11
Option 1: Windows Features dialog
This is the simplest method and works even when you do not want to remember a command.
PC Slower Than It Used to Be?
A free scan shows the junk files, broken settings and background clutter dragging Windows down - then fixes them in one click.Free scan · Windows 10 & 11Outdated Drivers Are Slowing You Down
One free scan finds every outdated or missing driver and matches the right update for your exact hardware.Free scan · exact hardware match- Press Windows + R.
- Enter
optionalfeatures, then press Enter. - In the Windows Features window, find Telnet Client.
- Select its checkbox and click OK.
- Wait while Windows applies the change. Restart only if Windows requests it.
- Open a new Command Prompt or PowerShell window and run
telnet.
If the Telnet client context or Telnet-related output appears instead of a “not recognized” error, the command is available.
Option 2: Settings
The Settings location varies by Windows release and update. On current Windows 11 builds, look under Settings > System > Optional features; some builds place the page under Settings > Apps. On Windows 10 22H2, it is commonly under Settings > Apps > Optional features.
Because Microsoft changes these labels and locations, optionalfeatures is the more consistent shortcut. If Settings does not show the expected page, use that command or one of the command-line methods below.
Option 3: DISM from an elevated Command Prompt
Open Command Prompt as administrator and run:
dism /online /Enable-Feature /FeatureName:TelnetClientDISM should display operation progress and finish successfully. A restart may or may not be required.
What’s actually slowing this PC down?
Pick the symptom - the matching free tool is one click away.
Rank #2
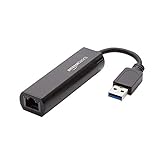
- Connects a USB 3.0 device (computer/laptop) to a router, modem, or network switch to deliver Gigabit Ethernet to your network connection. Does not support Smart TV or gaming consoles (e.g.Nintendo Switch).
- Supported features include Wake-on-LAN function, Green Ethernet & IEEE 802.3az-2010 (Energy Efficient Ethernet)
- Supports IPv4/IPv6 pack Checksum Offload Engine (COE) to reduce Cental Processing Unit (CPU) loading
- Compatible with Windows 8.1 or higher, Mac OS
To inspect the feature state:
dism /online /Get-FeatureInfo /FeatureName:TelnetClientIf the identifier differs in a particular Windows image, search the available feature list:
dism /online /Get-Features | findstr /i telnetOption 4: PowerShell
Open PowerShell as administrator and run:
Enable-WindowsOptionalFeature -Online -FeatureName TelnetClientTo identify the feature before enabling it:
Get-WindowsOptionalFeature -Online |
    Where-Object {
        $_.FeatureName -match 'Telnet' -or
        $_.DisplayName -match 'Telnet'
    }
Then verify its state:
Get-WindowsOptionalFeature -Online -FeatureName TelnetClientThe Windows client feature-management commands and state values are documented by Microsoft in its optional-features guidance.
Install Telnet Client on Windows Server
Server Manager on Desktop Experience
- Open Server Manager.
- Select Manage > Add Roles and Features.
- Choose Role-based or feature-based installation.
- Select the target server.
- Continue to the Features page.
- Check Telnet Client.
- Select Next, then Install.
- When installation finishes, open a new command shell and run
telnet.
This workflow can add features to a local or remotely managed server. Microsoft’s Server Manager documentation covers the wizard and its target-server options.
PowerShell on Windows Server
In an elevated Windows PowerShell session, run:
Install-WindowsFeature -Name Telnet-ClientCheck the feature before or after installation:
Get-WindowsFeature -Name Telnet*Do not use Install-WindowsFeature as the normal installation command on Windows 10 or Windows 11. It is a Windows Server cmdlet. Client editions use Windows Features, DISM, or Enable-WindowsOptionalFeature.
Recommended Free Tools
Install it on a remote server
With appropriate remoting configuration and administrative credentials, you can target another Windows Server:
Install-WindowsFeature `
    -Name Telnet-Client `
    -ComputerName SERVER01 `
    -Credential (Get-Credential)
The command supports additional parameters such as -Source and -Restart. Its documented requirements and remote-installation behavior are described in Microsoft’s Install-WindowsFeature reference.
Server Core
Server Core does not provide the normal full local Server Manager interface. Use PowerShell or DISM locally, or manage the server remotely through Server Manager or another supported management method. The PowerShell command is:
Rank #3
![BENFEI USB 3.0 to Ethernet Adapter, USB C to RJ45 Gigabit LAN (1000Mbps) Network Adapter, Compatible with MacBook/Pro/Air, Surface Pro, Windows 11/10/8/7, Mac OS [Aluminium Shell&Nylon Cable]](https://m.media-amazon.com/images/I/41fk9DHmdwL._SL160_.jpg)
- COMPACT DESIGN - The compact-designed portable BENFEI USB A/C to Ethernet adapter connects your computer or tablet to a router,modem or network switch for network connection. It adds a standard RJ45 port to your Ultrabook, notebook or Macbook Air for file transferring, video conferencing, gaming, and HD video streaming.
- SUPERIOR STABILITY - Built-in advanced IC chip works as the bridge between RJ45 Ethernet cable and your USB A/C devices. The driver-free installation with native driver support in Chrome, Mac, and Windows OS; The USB A/C Ethernet adapter dongle supports important performance features including Wake-on-Lan (WoL), Full-Duplex (FDX) and Half-Duplex (HDX) Ethernet, Crossover Detection, Backpressure Routing, Auto-Correction (Auto MDIX).
- INCREDIBLE PERFORMANCE - Supports full 10/100/1000Mbps gigabit ethernet performance over USB A/C's 5Gbps bus, faster and more reliable than most wireless connections. Link and Activity LEDs. USB powered, no external power required. Backward compatible with USB 2.0/1.1.✅ To reach 1Gbps, make sure to use CAT6 & up Ethernet cables.
- BROAD COMPATIBILITY - The USB A/C-Ethernet adapter is compatible with Windows 11/10/8.1/8/7/Vista/XP, Mac OSX 10.6/10.7/10.8/10.9/10.10/10.11/10.12, Linux kernel 3.x/2.6, Android and Chrome OS.Compatible with IEEE 802.3, IEEE 802.3u and IEEE 802.3ab. Supports IEEE 802.3az (Energy Efficient Ethernet).❌Do Not Support Windows RT. (NOT compatible with Nintendo Switch.)
- 18 MONTH WARRANTY - Exclusive BENFEI Unconditional 18-month Warranty ensures long-time satisfaction of your purchase; Friendly and easy-to-reach customer service to solve your problems timely.
Install-WindowsFeature -Name Telnet-ClientVerify that Telnet is installed
Run these checks in a new Command Prompt or PowerShell window:
telnet
where telnet
telnet /?
where telnet should locate the executable, commonly in the Windows system directory. telnet /? displays command syntax and options.
To check the Windows feature itself:
Windows 10/11:
Get-WindowsOptionalFeature -Online -FeatureName TelnetClientWindows Server:
Get-WindowsFeature -Name Telnet*Typical states mean:
- Enabled or Installed: the client is present and enabled.
- Disabled or Available: the feature exists but is not enabled.
- Not Present: the payload is absent or unavailable.
- Unknown command: the client may not be installed, installation may have failed, or an old shell needs to be closed and reopened.
Use Telnet to test a host and TCP port
The basic syntax is:
telnet hostname portExamples using documentation-only IP addresses include:
telnet example.com 443
telnet 192.0.2.10 25
telnet mail.example.com 587
telnet server01.contoso.com 3389
To connect using the default Telnet port, omit the port:
telnet example.comA successful connection indicates that DNS resolved the hostname, if applicable, the destination was reachable, and something accepted the TCP connection. It does not prove that the expected application protocol is running, authentication will succeed, the application is healthy, or the service is secure.
Do these 3 things before closing this tab:
1Scan for outdated or missing drivers - takes under a minute2Clear out junk files and repair common Windows errors3Fix the driver behind crashes, sound loss and screen glitchesHow to interpret common results
- Timeout: traffic may be filtered, the host may be unreachable, routing may be broken, or the service may silently drop requests.
- Connection refused: the host is generally reachable, but no service is listening on that port or a firewall actively rejected the connection.
- Name-resolution failure: the hostname may be wrong, or DNS may be unavailable or misconfigured.
- Immediate disconnect: the service may accept the TCP handshake and close because Telnet is not the correct application protocol.
- Blank screen: the TCP connection may be open while the service waits for protocol-specific input, or it may not provide a readable banner.
If a connection opens to a blank screen, press Enter once only when appropriate. Do not enter credentials unless you know the service and network are suitable for unencrypted communication.
Exit a Telnet session
Press:
Ctrl+]At the Telnet prompt, type:
quitMicrosoft documents the escape character and Telnet command context in its Telnet reference.
Rank #4

- Dual USB-A/C Port Design: This USB hub with ethernet adapter features dual connectors for both USB C and USB A devices, ensuring wide compatibility across laptops, tablets, and smartphones. It includes 1x Gigabit Ethernet port and 3x USB A 3.0 ports, all usable at the same time for smooth and efficient connectivity. 📌Note: When using USB-A to connect devices, please ensure the USB-C is securely attached to the USB-A connector.
- Stable Gigabit Ethernet Adapter: Get fast, wired Internet up to 1000Mbps with this USB C to ethernet adapter. Backward compatible with 10/100Mbps networks for flexible connectivity across various setups. Ideal for streaming, gaming, and large file transfers. 📌Note: Ensure the RJ45 connector is plugged in securely in the port and use CAT6 & above Ethernet cable is required to reach 1 Gbps.
- 5Gbps Data Transfer: Transfer large files, photos, and videos in seconds with this USB 3.0 hub supporting speeds up to 5Gbps—10× faster than USB 2.0. Backward compatible with USB 2.0 and 1.1 devices, this USB splitter expands one port into three for connecting keyboards, mice, and flash drives for everyday use. 📌Note: The three USB-A 3.0 ports share a total 5Gbps bandwidth.【NO HDMI port, NO USB-C data port, and NO PD charging】
- Plug and Play: Reliable USB to ethernet adapter ready to use in seconds. Instantly connects with USB-A and USB-C devices including MacBook Pro/Air, iPad Pro, iMac, Surface Laptops, Chromebook, XPS, tablets, Steam, and smartphones. Works with Windows, macOS, Linux, Chrome OS, and Android. 📌XP/Win7 may need driver. Older systems may not recognize this product due to its USB 3.0 chip. Please refer to the “Installation Manual” to manually download and install the driver.
- Durable & Portable Build: Made with sturdy aluminum alloy, this RJ45 to USB-C adapter delivers long-term durability, efficient heat dissipation, and stable performance for offices, corporate deployments, classrooms, and campus workstations—while its slim, portable form factor makes it ideal for business travel, educators, and mobile professionals.
Use PowerShell instead for a basic port test
If you only need to determine whether a TCP port is reachable, use PowerShell:
Test-NetConnection example.com -Port 443For a simple Boolean result:
Test-NetConnection example.com -Port 443 -InformationLevel QuietThis is usually preferable to Telnet because it provides diagnostic context without opening an interactive legacy client. It still tests TCP connectivity rather than the complete health of the application protocol.
The Tool Desk
Outbyte PC Repair FREEClear out junk files and repair common Windows errorsFree Scan →Outbyte Driver Updater FREEFix the driver behind crashes, sound loss and screen glitchesFind Drivers →Telnet security: when to use it
Telnet does not provide the encrypted communications and integrity protections associated with SSH. Interactive sessions and data sent through Telnet can be exposed to interception on an untrusted network.
Use Telnet only when a legacy device or service specifically requires it, the connection is confined to a controlled network, the purpose is a limited TCP test, and sensitive credentials will not be entered. Do not enable or expose an inbound Telnet server merely to make a test work.
For remote administration, install and use OpenSSH where supported. Microsoft documents the OpenSSH client as a Feature on Demand on Windows 10 version 1809 and later and Windows Server 2019 and later, with installation defaults varying by release. To install the client:
Add-WindowsCapability -Online -Name OpenSSH.Client~~~~0.0.1.0Then connect with:
ssh [email protected]See Microsoft’s OpenSSH installation and first-use guide for release-specific details.
Troubleshoot installation and connection problems
“Telnet is not recognized”
- Run
where telnet. - Check the feature state:
Get-WindowsOptionalFeature -Online |
    Where-Object {
        $_.FeatureName -match 'Telnet' -or
        $_.DisplayName -match 'Telnet'
    }
If the feature is disabled, enable it with:
Enable-WindowsOptionalFeature -Online -FeatureName TelnetClientClose and reopen the shell after installation. On a restricted corporate image, contact the administrator if the feature is blocked.
Best Value

- [Expansion Ports] The USB C to Ethernet Adapter expands the device to three USB 3.0 ports and one Gigabit Ethernet port. Provides you more peripheral ports while maintaining a stable network connection, plug and play, no driver required.
- [Gigabit Network Port] ALL-LUCKY USB Ethernet Adapter transmission rate up to 1000Mbps, also compatible with 10/100Mbps bandwidth. It allows you to enjoy a smooth and stable network connection and avoid too much lag. (Note: To reach 1Gbps, please use CAT6 or above Ethernet cable connection)
- [Convertible Connector]This usb hub with ethernet not only has USB-A connector, but also can be converted to USB-C connector, so that you can easily convert the connector according to the device port, improve the convenience of use.
- [High-Speed Data Transfer] The usb to ethernet adapter adopts USB 3.0 transmission technology, supports up to 5Gbps transmission rate, and is compatible with USB 2.0(480Gbps),USB 1.0(12Mbps), easily transfer video, files and other data for you in seconds. (Note: Maximum output current is 900mA, does not support charging devices.)
- [Widely Compatible]The usb c ethernet adapter for iMac, MacBook Pro, iPad Pro, XPS and many other devices. Compatible with Windows 11/10/8.1/8, Mac OS, iPad OS, Chrome OS.(Note: Driver is required on Win 7) It can be used in office, school, library and other occasions, compact and portable, easy to carry around.
DISM reports missing source files
Confirm that Windows Update is available and check whether Group Policy or WSUS controls optional-feature sources. If the computer is offline, use a matching Windows installation source or the source approved by your organization. Do not use a source from a different Windows build without validating compatibility.
For Windows Server, an alternate source can be specified:
Install-WindowsFeature `
    -Name Telnet-Client `
    -Source "\serversharesourcessxs"
The source must be accessible to the target computer. For a remote installation, a path on the administrator’s local computer may not be visible to the remote server. Repeated failures may require reviewing the DISM log and your organization’s component-source policy.
Port 23 is closed
This does not necessarily mean the host is offline. The service may use another port, be disabled, be blocked by a firewall, accept only approved source addresses, require a VPN, or not support Telnet at all. Do not open TCP port 23 just to make a test succeed; verify the destination service and firewall policy according to the product’s documentation.
The hostname fails but the IP address works
This usually indicates a name-resolution problem rather than a Telnet installation problem:
nslookup hostname.example.com
telnet 203.0.113.10 443
Compare DNS results, IPv4 versus IPv6 resolution, VPN state, routing, local firewall and security software, and the network locations used by each computer.
Telnet works from one computer but not another
Compare the two machines’ DNS responses, VPN and network segment, routes, local firewall rules, proxy or security software, address family selection, and source IP restrictions on the destination. A difference in network path can produce different results even when the Telnet installation is identical.
Quick wins for a faster PC:
Clear out junk files and repair common Windows errorsFree Scan →Fix the driver behind crashes, sound loss and screen glitchesFind Drivers →Quick Recap
Remove Telnet Client
Windows 10 and Windows 11
- Press Windows + R, enter
optionalfeatures, and press Enter. - Clear Telnet Client.
- Select OK and allow Windows to remove the feature.
Or use elevated PowerShell:
Disable-WindowsOptionalFeature -Online -FeatureName TelnetClientWindows Server
Use elevated Windows PowerShell:
Uninstall-WindowsFeature -Name Telnet-ClientVerify removal with:
Get-WindowsFeature -Name Telnet*Product prices and availability are accurate as of the date/time indicated and are subject to change. Any price and availability information displayed on Amazon at the time of purchase will apply.

