Quick wins for a faster PC:
Repair Windows errors before they cause bigger problemsFix Now →Fix the driver behind crashes, sound loss and screen glitchesFind Drivers →Some links on this page are affiliate links: if you buy through them we may earn a commission, at no extra cost to you.
To change a post or page’s featured image, open it in the WordPress editor, show the settings sidebar with the gear icon if necessary, choose the Post or Page tab, open Featured image, select Replace or Set featured image, and save or update the document.
What a featured image is—and what it is not
A featured image is attached to the post or page as document-level metadata. It does not have to appear as an Image block in the article content. You can therefore change the image associated with a post without inserting, moving, or deleting an image in the body.
How visitors see that image is controlled separately. A theme may show featured images on a blog index, home page, archive, or individual page, while another theme may omit them. In a block theme, a template can use a Post Featured Image block to decide where the current post’s image appears. Changing the assignment and changing the template are two different jobs.
The Tool Desk
Outbyte PC Repair FREERepair Windows errors before they cause bigger problemsFix Now →Outbyte Driver Updater FREEFix the driver behind crashes, sound loss and screen glitchesFind Drivers →Change the featured image in the post or page editor
1. Open the document
From the WordPress dashboard, open the post or page you want to edit. This procedure applies to the document editor, not to the Site Editor’s template canvas.
#1 Best Overall

- 16MP Sensor: Captures detailed photos with a CMOS sensor for everyday shooting
- Optical Zoom: 4x optical zoom with a 27mm wide angle lens for flexible framing indoors or outdoors
- Full HD Video: Records 1080p video for travel clips, family moments, or simple vlogging
- Memory Support: Works with Class 10 SD, SDHC, or SDXC cards up to 512GB
- LCD Screen and Battery: 2.7in LCD screen with 2 AA alkaline batteries for convenient on-the-go use
2. Show the settings sidebar
If the right-hand sidebar is hidden, select the gear or settings icon near the upper-right corner of the editor. The canvas may still show your content while the document controls remain hidden until you open this panel.
3. Select the document tab
At the top of the sidebar, choose Post for a post or Page for a page. The neighboring Block tab applies to whichever paragraph, image, or other block is selected. It is not the place to look for the document’s featured-image assignment.
4. Open Featured image
Find the Featured image section in the Post or Page settings. Select Set featured image. WordPress opens the Media Library, where you can pick an image that is already uploaded or upload a new file.
Do these 3 things before closing this tab:
1Scan for outdated or missing drivers - takes under a minute2Repair Windows errors before they cause bigger problems3Fix the driver behind crashes, sound loss and screen glitches5. Choose or upload the image
Select the desired item in the Media Library and confirm with Set featured image. If you upload a file, wait for it to finish processing before confirming. The selected image is now attached to this post or page; it is not automatically inserted into the content area.
6. Save the document
Use Save draft, Publish, or Update, depending on the document’s current status. The assignment is part of the document settings, so leaving the editor without saving can discard the change.
Replace or remove an existing featured image
Replace it
Open the same Post or Page settings and expand Featured image. Choose Replace, select another Media Library item or upload one, then save or update the document.
Rank #2
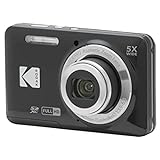
- 16MP Sensor: Captures detailed photos with a CMOS sensor for everyday shooting
- Optical Zoom: 5x optical zoom with a 28mm wide angle lens for flexible framing indoors or outdoors
- Full HD Video: Records 1080p video for travel clips, family moments, or simple vlogging
- Memory Support: Works with Class 10 SD, SDHC, or SDXC cards up to 512GB
- LCD Screen and Battery: 2.7in LCD screen and a rechargeable lithium-ion battery for on-the-go use
Remove it
In the expanded Featured image panel, select Remove. Save or update afterward. Removing the assignment does not delete the media file from the Media Library; it only leaves this document without a featured image.
Do not confuse replacement with editing the body image
If the article contains an Image block, changing that block’s source changes the image in the content. It does not necessarily change the post-level featured image. Use the document settings for the latter.
Set an inserted Image block as the featured image
If the image you want is already in the article, you can use WordPress’s shortcut instead of opening the Media Library again:
- Select the Image block in the editor.
- Open the block’s More options menu.
- Choose Set as featured image.
- Save or update the post or page.
This command assigns the selected media to the document. The image remains in the article unless you separately remove the Image block.
Why the image may appear—or not appear—on the front end
Assignment versus display
Seeing a thumbnail on a blog listing does not prove that the image is inserted into the post body. It may be rendered by the theme from the post’s featured-image field. Conversely, a successfully assigned image may not be visible on the public page if the active template does not render one.
Templates and the Post Featured Image block
In the Site Editor, the Post Featured Image block is a template-level display control. It is commonly used inside a Query Loop or another template area to show the current post’s featured image across a listing. Editing that block changes where or how images are displayed by the template; it does not replace the image assigned to one individual post.
Rank #3
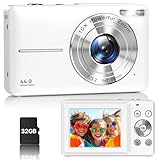
- Latest Digital Camera Built-in Fill Light : This compact digital camera is paired with a powerful CMOS processor and image stabilization to help you take & record the most exciting moments in 44 MP quality images & FHD 1080P quality videos anywhere, anytime. Plus, there is also a built-in fill light to help you take high quality pictures even in low light&dark settings, making this the perfect camera for all indoors/outdoors situations.
- Long-Lasting Battery Life & 16X Digital Zoom :This point and shoot camera will retain its battery charge even after long use. The controls and functions are easy to operate making this the perfect choice for children, teens and younger. This kids camera supports 16x digital zoom, you can zoom in or out the subject by pressing the W/T button for taking still photos to zoom in or out on distant objects and capture all the details you need.
- Multifunctional & Portable Digital Camera: This cheap digital camera is slim enough to fit in your pocket. You'll easily be able to take it with you on all your indoor/outdoor activities and adventures and ideal for beginners, children and teenagers. This kids digital camera is equipped with 20 filters, anti-shaking, self-timer, continuous shooting, date stamp, time-lapse recording, smile capture, internal MIC and speaker (recording sound videos), great for your daily photography needs.
- WEBCAM & PAUSE FUNCTION : More than just a FHD 1080p digital camera, it also works as a webcam for video calls and vlogging. Connect the camera to the computer, press shutter and power button at the same time and the camera will automatically turn on webcam mode for all your video calling and live streaming needs. The pause function allows you to pause when seeing playback videos.
- A Must Have Photography Device : This digital camera with SD card made from high-quality materials, this retro camera is safe and durable. Perfect for all ages to develop & improve their photographic abilities and observation skills. Our dedicated and experienced 24/7 support team is available for all after purchase troubleshooting, questions and technical help.
Theme behavior varies
Available settings and front-end placement can vary by theme and plugins. Treat a missing control or different label as an installation-specific possibility, not proof that the image is unavailable. First verify the editor context and sidebar tab before changing theme or plugin settings.
Changing a page image from the Site Editor
Block themes can expose page details and template controls in the Site Editor. The exact panels depend on the theme and on whether template editing is enabled.
Page details
A page’s details sidebar may include its featured image. If it does, select the image control, choose an existing media item or upload one, and save the page.
Content and template panels
The content panel can let you select or add a Post Featured Image block. Use this when you are editing how a template displays images across pages or posts. If you only need to change one page’s assigned image, use that page’s document details rather than altering the shared template.
When template editing is unavailable
Some themes do not expose the same Site Editor controls. Return to the normal page editor and check the Page settings sidebar for the document-level Featured image section.
Troubleshooting checklist
The Featured image section is missing
- Open the gear/settings icon to reveal the sidebar.
- Confirm that Post or Page, not Block, is selected.
- Make sure you are editing an individual post or page rather than a template in the Site Editor.
- If the section is still absent, consider whether the content type, theme, or a plugin changes the available settings. Check the theme or plugin documentation before disabling anything.
You selected an image, but the editor still shows the old one
- Reopen the Featured image panel and verify that the new thumbnail is selected.
- Use Replace rather than changing an unrelated Image block.
- Save or update the document, then reload the editor.
The image appears on the blog but not inside the post editor
This is normally a difference between a post-level featured image and an image in the content canvas. Check the document’s Featured image panel; a listing can display the assigned image even when the article contains no Image block.
Rank #4

- 16MP Sensor: Captures detailed photos with a CMOS sensor for everyday shooting
- Optical Zoom: 5x optical zoom with a 28mm wide angle lens for flexible framing indoors or outdoors
- Full HD Video: Records 1080p video for travel clips, family moments, or simple vlogging
- Memory Support: Works with Class 10 SD, SDHC, or SDXC cards up to 512GB
- LCD Screen and Battery: 2.7in LCD screen and a rechargeable lithium-ion battery for on-the-go use
The image is assigned but visitors cannot see it
Check the active theme or template. The public layout decides whether the featured image is rendered and where it appears. In a block theme, inspect the template’s Post Featured Image block and any Query Loop that displays the post.
What’s actually slowing this PC down?
Pick the symptom - the matching free tool is one click away.
You changed a template instead of one post
If many posts changed at once, you were probably working in the Site Editor. Return to the individual post editor and set the image in the Post tab. Template changes affect the layout used by multiple documents.
Replace or Remove is unavailable
Expand the Featured image panel and confirm that an image is actually assigned to the current document. If the controls still differ, check the document type and whether a plugin or theme modifies the editor settings.
Independent reader supportYour contribution helps us test, update, and keep practical guides available for everyone.A pre-publish check
- Open the correct post or page, not a template.
- Use the document-level Post or Page tab.
- Confirm the intended image in the Featured image panel.
- Save, publish, or update the document.
- View the relevant public listing or page to verify the theme’s display behavior.
Or skip the browser setup
If you need a clean screenshot of a webpage to use as the source image, ScreenshotNeo can capture it through one request. It is a screenshot API and MCP server, not a WordPress featured-image setter, so you still upload the returned file to the Media Library and assign it using the steps above.
Before capture, ScreenshotNeo accepts cookie or consent banners and removes more than 60 known consent platforms, newsletter popups, and chat widgets; each cleanup step can be turned off. Only clean shots are billed: bot checks or CAPTCHAs, blank pages, timeouts, failed loads, and cache hits cost nothing, and the response identifies the result with X-Page-Verdict and X-Billed headers. Its MCP server provides take_screenshot, get_page_info, and capture_pdf tools for Claude, Cursor, and other MCP clients.
See the ScreenshotNeo documentation for authentication and options. The following examples use the supplied API call and save the returned image locally.
cURL
curl -G "https://api.screenshotneo.com/v1/shot" -d access_key=YOUR_API_KEY --data-urlencode url=https://stripe.com -o shot.webpPython
import requests
r = requests.get("https://api.screenshotneo.com/v1/shot", params={"access_key": "YOUR_API_KEY", "url": "https://stripe.com"}, timeout=90)
open("shot.webp", "wb").write(r.content)
Node.js
const q = new URLSearchParams({ access_key: 'YOUR_API_KEY', url: 'https://stripe.com' });
const res = await fetch(`https://api.screenshotneo.com/v1/shot?${q}`);
After the request succeeds, upload shot.webp (or the returned PNG/JPEG) in the WordPress Media Library and select it as the featured image. ScreenshotNeo includes full-page capture, element capture by CSS selector, device presets, custom viewports, retina scale, custom CSS and JavaScript, click-before-capture actions, waits, request blocking, cookies, headers, user agents, timezone and geolocation controls, resizing, caching with a chosen TTL, signed links, asynchronous jobs with signed webhooks, bulk capture for up to 100 URLs per call, a usage API, and an OpenAPI specification. Its parameter names are compatible with those used by other screenshot APIs, which can simplify a switch.
The Free plan includes 1,000 screenshots per month with no card. Paid plans start at $5 for 3,000 screenshots; every feature is available on every plan. Create a free ScreenshotNeo account to get started.
Quick Recap
Product prices and availability are accurate as of the date/time indicated and are subject to change. Any price and availability information displayed on Amazon at the time of purchase will apply.

