Do these 3 things before closing this tab:
1Repair Windows errors before they cause bigger problems2Fix the driver behind crashes, sound loss and screen glitches3Clear out junk files and repair common Windows errorsSome links on this page are affiliate links: if you buy through them we may earn a commission, at no extra cost to you.
To uncluster a Hyper-V virtual machine without deleting it, shut down the VM, remove its clustered role from Failover Cluster Manager, and then move or export its files if it will run on a standalone Hyper-V host. Removing the role changes cluster management; it is not the same as deleting the VM or its virtual disks.
First, identify the operation you actually need
In Failover Clustering, a highly available Hyper-V VM is represented as a clustered role or resource group. That role allows the VM to fail over between eligible cluster nodes, as described in Microsoft’s Add-ClusterVirtualMachineRole documentation.
| Goal | Correct operation | Result |
|---|---|---|
| Move the VM to another node in the same cluster | Move-ClusterVirtualMachineRole |
The VM remains highly available and clustered. |
| Stop cluster management but retain the VM | Remove the VM’s clustered role | The VM becomes an ordinary Hyper-V VM, subject to registration and storage access. |
| Move it to a standalone Hyper-V host | Remove the role, then use Move-VM or export/import |
The VM leaves the cluster and its files are relocated or copied. |
| Delete the VM | Remove the role, then deliberately delete the VM and its files | The VM is retired. This is not ordinary unclustering. |
| Retire the entire cluster | Migrate or remove all roles, then remove the cluster | Cluster configuration is destroyed for the whole cluster. |
Moving ownership within the existing cluster is different from unclustering. Move-ClusterVirtualMachineRole changes the owner node but leaves the VM clustered.
Free tools Windows power users keep installed
One-click scans. No signup required.
Confirm that the VM is clustered
In Failover Cluster Manager, a clustered VM appears under:
#1 Best Overall

- [Color] PCB color may vary (black or green) depending on production batch. Quality and performance remain consistent across all Timetec products.
- DDR3L / DDR3 1600MHz PC3L-12800 / PC3-12800 240-Pin Unbuffered Non-ECC 1.35V / 1.5V CL11 Dual Rank 2Rx8 based 512x8
- Module Size: 16GB KIT(2x8GB Modules) Package: 2x8GB ; JEDEC standard 1.35V, this is a dual voltage piece and can operate at 1.35V or 1.5V
- For DDR3 Desktop Compatible with Intel and AMD CPU, Not for Laptop
- Guaranteed Lifetime warranty from Purchase Date and Free technical support based on United States
Cluster
└── Roles
    └── VMName
Use the cluster tools—not Hyper-V Manager—to perform operations while the VM remains clustered:
Get-ClusterGroup
Get-ClusterResource
Get-ClusterGroup -Name "VMName" | Get-ClusterResource
If the VM does not appear under Roles and these commands do not identify a corresponding group, it may already be an ordinary Hyper-V VM or its cluster metadata may be orphaned. Do not remove a similarly named role until you have confirmed the VM’s identity.
Prepare before removing the role
Removing a role is normally a controlled administrative change, but you should prepare for downtime and possible registration or storage work.
- Confirm a recoverable backup or export.
- Record the current owner node and VM name.
- Plan a maintenance window. The VM should be shut down before removal.
- Record the VM configuration and storage locations:
Get-VM -Name "VMName" | Format-List *
Get-VMHardDiskDrive -VMName "VMName"
Get-VMMemory -VMName "VMName"
Get-VMProcessor -VMName "VMName"
Get-VMNetworkAdapter -VMName "VMName"
Also record the VM generation, startup and dynamic-memory settings, CPU count, virtual switch and VLAN configuration, Secure Boot, virtual TPM, checkpoints, and all VHDX and AVHDX paths. Note any pass-through disks, shared VHDX files, Fibre Channel devices, guest-clustering configuration, Hyper-V Replica, or backup dependencies.
Rank #2

- Boosts System Performance: 32GB DDR5 RAM laptop memory kit (2x16GB) that operates at 5600MHz, 5200MHz, or 4800MHz to improve multitasking and system responsiveness for smoother performance
- Accelerated gaming performance: Every millisecond gained in fast-paced gameplay counts—power through heavy workloads and benefit from versatile downclocking and higher frame rates
- Optimized DDR5 compatibility: Best for 12th Gen Intel Core and AMD Ryzen 7000 Series processors — Intel XMP 3.0 and AMD EXPO also supported on the same RAM module
- Trusted Micron Quality: Backed by 42 years of memory expertise, this DDR5 RAM is rigorously tested at both component and module levels, ensuring top performance and reliability
- ECC Type = Non-ECC, Form Factor = SODIMM, Pin Count = 262-Pin, PC Speed = PC5-44800, Voltage = 1.1V, Rank And Configuration = 1Rx8
Remove the VM from the cluster with Failover Cluster Manager
- Open Failover Cluster Manager.
- Select the cluster and open Roles.
- Confirm that the selected role is the intended VM.
- Right-click the VM role and choose Shut Down, or shut down the guest operating system cleanly.
- Wait until the role is offline.
- Right-click the VM role again and select Remove.
- Confirm that the VM role disappears from the cluster’s Roles list.
This is the retain-the-VM workflow documented by Microsoft. It removes the cluster role; it does not intentionally delete the VM’s configuration or virtual disks. Validate the exact menu labels against your installed Windows Server release because Microsoft’s detailed GUI procedure is maintained in previous-versions documentation.
Do not choose Hyper-V Manager’s Delete action unless you have separately decided to retire the VM and understand what files will be removed. Unclustering and deletion are separate actions.
Remove the clustered role with PowerShell
First inspect the role and its resources:
Get-ClusterGroup
Get-ClusterGroup -Name "VMName" | Format-List *
Get-ClusterGroup -Name "VMName" | Get-ClusterResource
Shut down the VM cleanly. You can use Failover Cluster Manager, or, when the current owner node and VM identity are known:
Stop-VM -ComputerName "CurrentNode" -Name "VMName"Preview the operation:
Remove-ClusterGroup -Name "VMName" -WhatIfIf the preview identifies the correct role, remove it with confirmation:
Rank #3
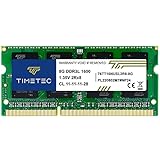
- [Specs] DDR3L / DDR3 1600MHz PC3L-12800 / PC3-12800 204-Pin Unbuffered Non ECC 1.35V CL11 Dual Rank 2Rx8 based 512x8
- [Size] Module Size: 8GB Package: 1x8GB
- [Voltage] JEDEC standard 1.35V, this is a dual voltage piece and can operate at 1.35V or 1.5V
- [Compatibility] Compatible with DDR3 Laptop / Notebook PC, Mini PC, All in one Device
- [Color] PCB Color is Green
Remove-ClusterGroup -Name "VMName" -ConfirmYou can also pipe the verified group object:
Get-ClusterGroup -Name "VMName" |
    Remove-ClusterGroup -Confirm
Microsoft’s current Remove-ClusterGroup documentation states that resources must be removed first or that -RemoveResources must be specified when resources remain in the group.
$role = Get-ClusterGroup -Name "VMName"
$role | Get-ClusterResource |
    Format-Table Name, ResourceType, State, OwnerGroup
Move the unclustered VM to a standalone Hyper-V host
Removing the cluster role does not automatically copy the VM configuration or VHDX files. If the VM will remain on storage accessible to the intended host, verify that the host can access and register the VM. For a standalone deployment, local storage or a supported SMB 3.x file share is usually a clearer destination than leaving the files on cluster-only storage.
After the VM is no longer a clustered role, a direct Hyper-V move can include the VM’s storage:
Rank #4
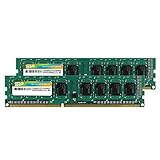
- Efficient performance: A lower voltage of 1.35 V is applied to reduce 20% power, enabling to effectively decrease hardware power consumption.
- System upgrade: With our high quality memory module, ideal for virtualization, cloud computing and multitasks handling, 100% factory-tested for stability, durability and compatibility.
- Durability Armed: 100% factory-tested to make sure the high stability, durability and compatibility.
- Compatibility is imperative: Compatible with major DDR3L / DDR3 motherboards.
- 【NOTE】The DDR3L UDIMM is backed by a lifetime warranty to promise complete services and technical support.
Move-VM `
    -Name "VMName" `
    -DestinationHost "StandaloneHost" `
    -IncludeStorage `
    -DestinationStoragePath "D:Hyper-VVMName"
See Microsoft’s Move-VM documentation for the supported parameters in your Windows Server version. The exact behavior depends on whether the VM is running or off, network connectivity, permissions, storage access, and the destination’s virtual-switch configuration. Do not assume that every move is online or has zero downtime.
Use export/import when the hosts differ substantially
Export/import is often easier when the destination uses different storage, the source registration is incomplete, or direct movement fails.
- Remove the VM’s clustered role while retaining the VM.
- In Hyper-V Manager, select the VM and choose Export.
- Copy the export to the destination host.
- Choose Import Virtual Machine.
- Select the appropriate option—register, restore, or copy—based on whether you want to retain the VM identity and how you want storage handled.
- Review the virtual switch, VLAN, Secure Boot, vTPM, and disk paths before starting it.
Microsoft identifies export as a way to move a VM to another Hyper-V server, including a non-clustered server, in its documented VM removal and migration guidance.
Recommended Free Tools
CSV storage: what changes and what does not
A Cluster Shared Volume is not converted into local storage when you remove a VM role. CSVs are cluster storage designed to allow eligible cluster nodes concurrent access to a volume; Microsoft documents their management and supported versions in its Cluster Shared Volumes guidance.
Best Value

- [Color] PCB color may vary (black or green) depending on production batch. Quality and performance remain consistent across all Timetec products.
- DDR3L / DDR3 1600MHz PC3L-12800 / PC3-12800 240-Pin Unbuffered Non-ECC 1.35V / 1.5V CL11 Dual Rank 2Rx8 based 512x8
- Module Size: 32GB KIT(4x8GB Modules) Package: 4x8GB ; JEDEC standard 1.35V, this is a dual voltage piece and can operate at 1.35V or 1.5V
- For DDR3 Desktop Compatible with Intel and AMD CPU, Not for Laptop
- Guaranteed Lifetime warranty from Purchase Date and Free technical support based on United States
A VM may remain on a CSV if the host still has appropriate access and the storage design supports that arrangement, but the VM is no longer protected or coordinated by its cluster role. A truly standalone host generally needs the VM’s configuration and disks moved or copied to local storage, a supported SMB share, or another non-clustered location.
Independent reader supportYour contribution helps us test, update, and keep practical guides available for everyone.If the VM does not appear afterward
The VM still appears in Failover Cluster Manager
Check that you removed the correct group and inspect its resources:
Get-ClusterGroup
Get-ClusterResource
Get-ClusterGroup -Name "VMName" | Get-ClusterResource
Possible causes include a wrong role name, an orphaned role, missing VM files, disagreement between cluster metadata and Hyper-V registration, or resources remaining in the group. Identify the exact group before considering force removal.
Windows Errors? Fix Them Before They Spread
Repair common Windows errors and clear accumulated junk for a smoother, more stable PC - no reinstall needed.Free scan · no reinstallCrashes, No Sound, or Screen Glitches?
Random freezes, missing sound and display glitches usually trace back to one bad driver. Find and replace yours safely.Free scan · under a minuteThe VM disappears from Hyper-V Manager
Removing a clustered role does not guarantee automatic registration in Hyper-V Manager on every host. Check that:
- The VM configuration files exist.
- The VHDX and any required AVHDX files are present.
- The intended host can access the CSV, SMB share, SAN LUN, or destination folder.
- The VM was actually exported or moved rather than only deregistered from the cluster.
- Permissions allow the Hyper-V service and administrators to access the files.
Use Hyper-V Manager’s import workflow or the appropriate Hyper-V registration process. Do not create a new VM over the existing disks unless you have deliberately chosen that recovery method and understand the configuration differences.
Special cases requiring extra planning
- Shared VHDX or guest clustering: Shared disks, persistent reservations, and guest-level failover clusters may have dependencies beyond the ordinary VM role. Treat the change as a separate migration project.
- Pass-through disks and Fibre Channel: Verify that the destination host has the required storage presentation and zoning; copying VHDX files alone will not recreate these devices.
- Checkpoints: Preserve the complete chain, including AVHDX files. Moving only the parent VHDX can make the VM’s current state unavailable.
- Encrypted VMs and vTPM: Confirm that key protectors, certificates, guardians, and destination-host permissions are available before migration.
- Hyper-V Replica and backup software: Reconfigure protection after the VM changes host or storage. A cluster-role removal does not automatically recreate standalone-host backup or replication coverage.
Commands that are usually wrong for ordinary unclustering
Move-ClusterVirtualMachineRolemoves the VM between cluster nodes but keeps it highly available and clustered.Remove-ClusterGroup -RemoveResourcesis a forceful resource-removal option that should follow a resource review, not be the default command.Remove-Clusterdestroys the existing failover cluster configuration on the nodes. It is a cluster-wide operation, not a per-VM command. See Microsoft’sRemove-Clusterdocumentation.
If you are dismantling the entire cluster
Do not start by removing the cluster. First inventory all roles, back up or migrate every VM and application, remove VM roles individually, move or retire CSVs and other shared storage, and confirm that no production dependencies remain. Only then should you follow a planned cluster-decommissioning procedure.
Quick Recap
Final verification checklist
- The VM no longer appears under the cluster’s Roles node.
- The VM configuration files are present at the intended location.
- All VHDX and required AVHDX files are present.
- The VM is registered on the target Hyper-V host.
- The correct virtual switch and VLAN are configured.
- Secure Boot, vTPM, memory, CPU, and device settings are correct.
- The guest operating system boots successfully.
- Disks, network connectivity, guest services, and applications are healthy.
- Backup, replication, monitoring, and recovery procedures have been reconfigured.
Product prices and availability are accurate as of the date/time indicated and are subject to change. Any price and availability information displayed on Amazon at the time of purchase will apply.
Quick wins for a faster PC:
Clear out junk files and repair common Windows errorsFree Scan →Scan for outdated or missing drivers - takes under a minuteDriver Scan →
