Recommended Free Tools
Some links on this page are affiliate links: if you buy through them we may earn a commission, at no extra cost to you.
A sudden blue, purple, green, yellow, or washed-out projector image is not necessarily a bad screen. First display the projector’s own menu: if the menu has the same cast, investigate projector settings or hardware; if it looks normal, start with the source and HDMI signal path. Then work through the checks below from least invasive to most involved.
Identify the symptom before changing settings
Color symptoms overlap, so treat these as clues rather than diagnoses. Note whether the fault appears on every input, whether it is steady or intermittent, and whether it affects the projector’s menu as well as video.
| What you see | Possible causes | First useful check |
|---|---|---|
| Whole image is blue, purple, green, or pink | Signal format or color-space mismatch, damaged connection or cable, missing channel, or projector-side optical/processing fault | Compare the projector menu with a second source connected directly |
| Skin tones look red, yellow, or green | Picture mode, color temperature, tint, source processing, screen tint, aging light source, or calibration | Reset the active picture mode and inspect the menu |
| Blacks look gray and highlights seem washed out | HDMI range mismatch, HDR handling, excessive brightness, or ambient light | Set source and projector range to Auto or to matching values |
| Image is dark but colors otherwise look normal | Lamp/light-source aging, ECO mode, HDR tone mapping, gamma, or a dirty optical path | Check light-source mode and lamp hours, if applicable |
| Menu looks normal but video does not | Source, app, HDMI chain, HDR, range, or color-space setting | Try another app or source and connect it directly |
| Only one input is affected | Input-specific picture settings, source, cable, adapter, AVR, or switch | Try another input and a short known-good cable |
| Colors change intermittently | Loose connection, HDMI handshake or signal integrity problem, overheating, failing electronics, or (on some DLP models) a color-wheel fault | Reseat or replace the cable and bypass intermediate equipment |
| Fixed colored patches, bands, or uneven tint | Optical engine, LCD panel/polarizer, lens, dust, heat damage, screen contamination, or installation conditions | Compare the menu and a neutral white surface; seek service if the artifact persists |
| Wall looks tinted but a neutral screen does not | Wall or screen color, surface aging, or room reflections | Test on a neutral white matte surface |
1. Let the projector stabilize, then check its menu
Turn on the projector and allow it to reach normal operating temperature before judging its color. There is no universal warm-up interval; it varies by model and light source. Press Menu or Home, or display a built-in test pattern if the projector provides one.
The Tool Desk
Outbyte Driver Updater FREEScan for outdated or missing drivers - takes under a minuteDriver Scan →Outbyte PC Repair FREERepair Windows errors before they cause bigger problemsFix Now →- If the menu is tinted too: source devices and HDMI cables become less likely explanations. Try resetting the active picture mode, then the projector settings. If the cast remains, check the light source and consider hardware service.
- If the menu looks normal: focus first on the video source, its settings, the cable and any receiver, switch, adapter, or extender in the path.
ViewSonic likewise recommends checking the cable or video-card connection and trying another input; it lists a faulty color wheel as one possible projector-side cause, not a diagnosis based on tint alone: ViewSonic image color troubleshooting.
#1 Best Overall

- ACHIEVE TRUE COLOR - Ensures your monitor displays colors accurately, critical for photography, design, and video editing, with unlimited gamma, whitepoint, and brightness settings.
- OPTIMIZE DISPLAY PERFORMANCE - Calibrate a wide range of backlight types including Wide LED, Standard LED, OLED, and Mini LED, ensuring consistent and accurate color across all your screens.
- ENHANCE WORKFLOW EFFICIENCY - Projector Calibration feature allows for accurate color representation during presentations, while Display Analysis/MQA provides comprehensive screen quality assessment.
- WIDE DEVICE COMPATIBILITY - Supports unlimited number of displays and offers an integrated USB-C cable, ensuring seamless connectivity with modern laptops and desktop computers for streamlined use.
- USER-FRIENDLY SOFTWARE - Features an intuitive interface supporting multiple languages, including English, Spanish, Chinese and Japanese, making calibration accessible to a global audience.
2. Reset the active picture mode
Projector menu labels vary by manufacturer, firmware, and input. Look under Picture or Image for Color Mode or Picture Mode. Choose a neutral preset such as Cinema, Theater, Movie, Natural, sRGB, or Standard. Avoid Dynamic, Vivid, Bright, or Game while diagnosing: these modes may deliberately alter saturation, gamma, brightness, or color temperature.
Use the menu’s reset option for that picture mode before making individual adjustments. Some projectors store picture settings separately by input, so reset the affected input as well. Epson recommends trying a color mode suited to the image and viewing conditions: Epson color troubleshooting.
3. Check the source and simplify the HDMI chain
If the menu is normal, test the content path before adjusting the projector’s color controls. A laptop, console, Blu-ray player, streaming box, AVR, switch, or app can apply its own display processing or output a format the projector handles differently.
What’s actually slowing this PC down?
Pick the symptom - the matching free tool is one click away.
- On the source, disable unusual color filters or display effects, such as night mode, blue-light reduction, vivid color, or accessibility color adjustments. Menu paths differ across operating systems and devices.
- Try a different app, a local test image, or another source. If only one app or source is wrong, the projector is less likely to be at fault.
- Reseat both ends of the HDMI cable and try another projector input.
- Connect the source directly to the projector with a short, known-good cable.
- Temporarily remove adapters, extenders, splitters, capture devices, switches, and AV receivers from the path.
- If available, test the original source on another display.
Epson advises checking cable connections, using shorter cables where possible, and verifying source settings: Epson signal-path troubleshooting. A cable does not improve calibrated color simply by being expensive, but a damaged or unreliable link can cause missing channels, sparkles, dropouts, intermittent changes, or failed handshakes.
Rank #2

- SPECIFICATIONS: Monitor calibration colorimeter with Easy 1 2 3 software workflow, USB C connection, compact body approx. 34mm tall x 37mm diameter, adjustable counterweight for screen placement, supports up to 2 displays, brightness target selection including Native or Photo with before and after check.
- EASY SETUP: Guided 1 2 3 workflow makes calibration fast and approachable, helping photographers and creators achieve more accurate color without complicated settings, so you can edit with confidence and trust what you see on screen.
- COLOR ACCURACY: Corrects common monitor color shifts to deliver truer tones and more reliable contrast, improving consistency across editing sessions and helping your images look closer to final output on other screens and devices.
- DUAL DISPLAY SUPPORT: Calibrates up to 2 monitors for matching color across a multi screen workspace, ideal for photo editing, video work, and creative setups where consistent viewing on both displays matters.
- BEFORE AFTER CHECK: Built in comparison view lets you instantly see the difference after calibration, making it easy to confirm improved accuracy and maintain consistent results by repeating the process on a regular schedule.
4. Match HDMI range, color space, and signal format
Look in the projector’s Signal, Signal I/O, or Extended menu, or the source’s display settings. Labels may include HDMI Range, Video Range, Dynamic Range, Black Level, RGB Range, Color Space, Signal Format, or EDID. Names and available options depend on the model and input.
Match video range at both ends
Common range choices are limited/video range (approximately 16–235) and full/PC range (approximately 0–255). The source and projector must agree; a mismatch can make black levels and contrast look wrong. Start with Auto where available, or set both devices to matching values rather than forcing Full or Limited on every setup. BenQ documents Auto, Limited, and Full HDMI Range options for severe HD-video color distortion: BenQ HDMI Range guidance. Epson also says the projector’s video range should match the connected HDMI device: Epson signal-menu definitions.
Check RGB/YUV and color space
Sources may output RGB or YCbCr/YUV, while color-space options can include BT.709 and BT.2020. For ordinary HD SDR content, BT.709 is a useful baseline if Auto is misdetecting the signal; use Auto first when detection works. Do not force one format without checking what the source and projector support. A projector manual illustrates that available HDMI options can include RGB 0–255, RGB 16–235, and YUV: Projector manual with HDMI signal options.
Establish SDR before troubleshooting HDR
- Set the source to SDR for a baseline test.
- Set the projector’s dynamic-range option to Auto or SDR, as available.
- Confirm that SDR color looks normal before re-enabling HDR.
- Then test HDR10 or HLG using Auto or the projector’s intended HDR mode, if supported.
HDR is not inherently a color fault, but incorrect detection, tone mapping, range, color space, or unsupported signal combinations can make an image look dull, dark, or inaccurate. Epson identifies HDMI Video Range, HDR, EDID, and color-space settings as possible causes of image problems: Epson image-color troubleshooting and Epson HDMI/HDR troubleshooting. On applicable models, Epson documents Auto, SDR, HDR10, and HLG dynamic-range choices and Auto, BT.709, and BT.2020 color-space choices in its signal menu reference.
Rank #3

- SPECIFICATIONS: All in one spectrophotometer for camera to print color control, supports monitor display and projector profiling plus printer paper and scanner profiling with Calibrite PROFILER software, includes ColorChecker Classic Mini target for camera profiling, includes USB cable and monitor profiling holder pouch.
- ALL IN ONE: Profiles the devices that impact your final results including monitors, laptops, and projectors plus printers, paper, cameras and scanners, helping photographers maintain consistent color across capture, edit, and output workflows.
- INTELLIGENT PROFILING: Adaptive iterative profiling optimizes results for each unique display every time you calibrate, improving accuracy over repeat sessions and reducing the frustration of color drift and inconsistent screen performance.
- PRINT MATCHING: Ambient light measurement helps set optimal display luminance for comparing prints to your screen, improving print to monitor consistency and supporting more reliable proofing and final output decisions.
- CAMERA SUPPORT: Includes ColorChecker Classic Mini for camera profiling with Calibrite PROFILER software, enabling custom profiles for RAW workflows and a more consistent starting point before you begin editing and grading.
5. Adjust basic picture controls carefully
Only tune controls after the menu-versus-content test and signal checks. Use a neutral test image or calibration pattern, change one control at a time, and note its original value so you can undo a change. Menu organization varies; common labels include Brightness, Contrast, Color or Saturation, Tint or Hue, Color Temperature, and Gamma.
- Picture mode: use a neutral, cinema, or natural preset.
- Color temperature: try Standard or Warm according to the projector and intended reference. Warm often looks less blue, but is not universally correct.
- Brightness: set the black-level threshold so shadow detail is visible without turning blacks gray. This is not the lamp-power control.
- Contrast: adjust white-level intensity while retaining highlight detail; excessive contrast can clip whites.
- Color/saturation: adjust overall color intensity. More saturation does not fix a range or color-space mismatch.
- Tint/hue: shift the red-green balance, often most apparent in skin tones.
- Gamma: adjust the relationship between signal level and displayed brightness, affecting midtones and shadow/highlight balance.
- Advanced RGB gain/bias or CMS/RGBCMY: leave these until basic settings are correct and use suitable measurement tools or a qualified calibrator.
Epson notes that gamma changes can brighten dark areas while reducing saturation in lighter areas: Epson gamma adjustment guidance. It advises professional calibration with specialized tools for RGBCMY controls: Epson advanced color guidance. If a change makes the image worse, reset that control or picture mode and test another source rather than stacking compensating adjustments.
6. Check the screen, room, lens, and ventilation
A screen or wall can change perceived color, but is less likely to explain a sudden electronic-looking fault that also appears in the projector menu. Diagnose against a neutral white matte screen or wall, with strong colored room lights off.
Do these 3 things before closing this tab:
1Clear out junk files and repair common Windows errors2Fix the driver behind crashes, sound loss and screen glitches3Repair Windows errors before they cause bigger problems- Check for a beige, gray, colored, yellowed, stained, or smoke-exposed surface.
- Look for reflections from colored walls, curtains, furniture, or warm lighting.
- Test from another viewing angle if the screen is ambient-light-rejecting (ALR); some surfaces have viewing-angle or uniformity trade-offs.
- Inspect the lens for dust or smudges and remove any lens cap or obstruction. Follow the manufacturer’s cleaning instructions.
- Check ventilation openings, dust buildup, and overheating warnings; do not open the optical engine for casual cleaning.
- Compare a white test image across the screen. Tint that varies by area or follows surface texture points more toward the screen, wall, or optical uniformity than a uniform signal cast.
Some Epson models offer wall-color compensation, but it is model-specific and is not a substitute for a neutral projection surface: Epson projection-condition guidance.
Rank #4

- SPECIFICATIONS; Includes Calibrite Display 123 colorimeter for monitor calibration plus ColorChecker Passport Video 2 for video and photo capture control, designed for exposure reference, white balance setup, and consistent color workflow from capture through edit.
- CAPTURE CONTROL; Passport Video 2 helps set accurate white point, verify exposure, and match multiple cameras on set, giving filmmakers and hybrid shooters a reliable reference for consistent footage in changing or mixed lighting conditions.
- MONITOR CALIBRATION; Display 123 provides an easy monitor profiling workflow so photographers and creators can trust on-screen color when editing, grading, designing, or delivering work that must remain consistent across displays.
- CREATIVE CONFIDENCE; Built for content creators who want dependable color management, this kit reduces trial-and-error corrections, improves workflow efficiency, and supports accurate results for both still photography and professional video production.
- PRO CREATOR WORKFLOW; Ideal for videographers and photographers who require consistent color standards across multiple cameras, monitors, and software platforms, helping maintain professional results from on-set capture through final post-production.
7. Check the lamp or light source
For a lamp-based projector, check lamp hours in an Information, About, or Management menu and look for gradual dimming, flicker, or a color change. Progressive darkening can indicate that the lamp needs replacement, according to Epson’s troubleshooting guidance: Epson lamp and color troubleshooting. Use the correct manufacturer-approved, model-specific lamp; let the projector cool and follow its safety instructions before accessing any lamp compartment.
Do not try to replace a lamp in a laser or LED projector. A declining light engine, laser module, phosphor, or internal optical component may require professional service. A color cast alone does not establish that a lamp or light source is failing.
8. Reset the projector if settings are the likely cause
- Photograph or write down the current picture and signal settings.
- Use Reset, Reset All, or the equivalent factory-reset option. Some models offer separate resets for picture modes, inputs, or signal menus.
- Select the correct input and configure only basic settings.
- Test a source connected directly before restoring advanced settings or reconnecting the rest of the HDMI chain.
A reset can remove a bad setting; it cannot repair a cable, lamp, color wheel, panel, optical block, or light engine. Epson manuals document reset controls for applicable signal-menu settings: Epson signal-menu reference.
When to seek service or consider replacement
Stop troubleshooting as a settings problem and contact the manufacturer or a qualified projector technician if the projector’s own menu remains tinted after a reset, all inputs and cables show the same fault, or a color channel is missing. Fixed bands or large colored patches, color that changes as the projector warms up, and suspected optical discoloration also point toward service-level diagnosis.
Best Value
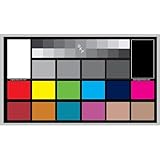
- SUPERIOR ACCURACY - Ensures precise color calibration with professional-grade chips, delivering consistent and reliable results for video production.
- ENHANCED IMAGE QUALITY - Optimizes video quality using 16:9 aspect ratio charts, allowing for detailed adjustments and accurate color reproduction.
- INCREASED DURABILITY - Constructed with robust materials, the Digital Kolor Pro charts are designed for long-term use, resisting wear and tear in demanding environments.
- WIDE COMPATIBILITY - Versatile calibration tool compatible with various cameras and editing software, making it an essential asset for diverse video workflows.
- SIMPLE AND EASY TO USE - Streamlines the color correction process with intuitive chart layouts, enabling quick and efficient calibration for both beginners and experts.
Flickering, grinding or clicking, overheating, a burning smell, or repeated shutdown warrants prompt attention. A DLP color-wheel fault is one possible cause of color changes, while LCD/3LCD models can develop panel, polarizer, prism, or optical-block problems; symptoms alone cannot identify the failed part. Laser and LED models can also have light-engine or phosphor faults. Do not open the optical engine, lamp housing, or high-voltage sections as a DIY repair.
For an older projector, compare a service estimate with the projector’s value and the availability of reliable parts. Replacement may make more sense if the optical engine or light source has failed, parts are unavailable, or the projector also lacks needed brightness, resolution, or current HDMI/HDR support.
When calibration is worth it
Consider calibration when the image is stable and broadly correct but grayscale, gamma, white balance, or color accuracy still falls short of your goal. Visual adjustments can make a picture more pleasing, but cannot reliably establish measured accuracy. Proper calibration uses suitable test patterns, a meter, controlled viewing conditions, and targets appropriate to the projector, screen, and SDR or HDR content. Epson’s professional projector documentation discusses screen matching, ambient light, surface conditions, and calibration conditions: Epson Professional Projector Tool documentation.
Quick Recap
Product prices and availability are accurate as of the date/time indicated and are subject to change. Any price and availability information displayed on Amazon at the time of purchase will apply.

