Free tools Windows power users keep installed
One-click scans. No signup required.
Some links on this page are affiliate links: if you buy through them we may earn a commission, at no extra cost to you.
If your computer stops at an American Megatrends screen, it is usually paused in BIOS/UEFI during POST—the hardware check that happens before Windows starts. “American Megatrends” is normally the firmware supplier, not the computer manufacturer and not itself the diagnosis.
Photograph the complete message, follow the key shown on screen, and avoid changing Secure Boot, CSM, SATA mode, or other BIOS settings at random. The exact warning determines whether you should check a keyboard, cooling, RAM, storage drive, boot order, or Windows recovery.
First, identify what the screen is saying
Look below or beside the AMI logo for the full message. Common examples include:
- “Press F1 to Run SETUP” or “Press F2/DEL to enter BIOS”: the firmware has detected a warning and is waiting for input.
- “The system has POSTed in safe mode”: a recent overclock, XMP/EXPO memory profile, undervolt, or hardware change may have failed.
- CMOS checksum, date, or time warning: BIOS settings were reset or are not being retained.
- CPU fan warning: the fan or pump may be disconnected, stalled, or reporting an unsafe temperature.
- No boot device or missing Windows Boot Manager: firmware cannot find a usable Windows boot entry or storage device.
- A frozen logo with no usable prompt: the system may be stuck during POST, USB initialization, memory training, or hardware detection.
BIOS entry and boot-menu keys vary by manufacturer. Common keys include Delete, F2, F1, Esc, F10, F11, and F12, but follow the instruction displayed on your computer or consult its model-specific manual. Microsoft’s guidance explains how firmware settings differ between UEFI and legacy BIOS modes: UEFI and Legacy BIOS mode.
#1 Best Overall
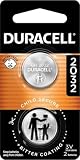
- COMPATIBLE WITH AIRTAG & KEY FOBS: Works with Apple AirTag, all major car key fobs (Toyota, Honda, BMW, Ford, Chevrolet, Lexus), fitness trackers, glucose monitors, tire pressure sensors, and any CR2032 / 3V lithium coin battery device.
- CHILD SAFETY: BITTER TASTE ON BOTH SIDES TO HELP KEEP CHILDREN SAFE—Duracell CR2032 features a bitter taste coating applied to BOTH SIDES of the battery to help deter accidental ingestion by young children.
- SUPERIOR LONGEVITY: Duracell Lasts Longer Than Energizer 3-In-1* | *Duracell 2032 size only. Based on ANSI Digital Household test vs. Energizer 2032 3-in-1.
- QUALITY ASSURANCE: Every Duracell lithium coin battery is manufactured to precise specifications and guaranteed against defects in material and workmanship. Trusted in medical devices and safety applications.
- FAMILY-SAFE PACKAGING: Duracell CR2032 batteries are sold in child-safe packaging—an additional layer of safety for households with young children.
Safe first steps
- Take a photo of the entire screen, including error codes, drive names, fan messages, temperatures, and requested keys.
- Wait once if you recently updated BIOS, installed hardware, or changed memory settings. Memory training can take longer than a normal boot. Do not repeatedly force the computer off during a firmware update.
- Shut down and disconnect USB drives, hubs, printers, card readers, phones, and other nonessential devices.
- Connect a basic wired keyboard directly to a rear motherboard USB port on a desktop. Prefer a USB 2.0 port if one is available. Avoid wireless keyboards, Bluetooth devices, front-panel ports, and hubs for this test.
- Restart once and press the exact key shown on screen. If the keyboard still does nothing, try another wired keyboard or a PS/2 keyboard if the motherboard supports one.
If the computer responds and opens BIOS/UEFI, continue with the checks below. If it never responds, skip to minimal-hardware testing.
What to check in BIOS/UEFI
Menu names differ between manufacturers. Look for equivalents such as Load Optimized Defaults, Load Setup Defaults, Storage, NVMe Configuration, SATA Information, Boot, or Main.
- Load safe defaults. Select the manufacturer’s default or optimized settings if a recent firmware or hardware change caused the problem.
- Check cooling. Confirm that the CPU fan or pump is detected and that the temperature is not immediately abnormal.
- Check the date and time. A repeatedly incorrect clock can indicate lost firmware settings or a failing CMOS/RTC battery.
- Check storage detection. Confirm that the internal SSD, NVMe drive, or hard disk appears in the information or storage screen.
- Check the boot order. If available, put Windows Boot Manager for the correct system drive first.
- Save and exit. This is commonly F10, but use the menu’s own instruction.
Do not blindly switch between UEFI and Legacy/CSM mode. Windows may have been installed for one mode and fail to boot in the other. Do not disable Secure Boot merely because the AMI screen appears. Microsoft recommends following the computer manufacturer’s instructions when changing firmware settings; see its Secure Boot guidance.
Quick wins for a faster PC:
Scan for outdated or missing drivers - takes under a minuteDriver Scan →Repair Windows errors before they cause bigger problemsFix Now →If the computer enters BIOS every time
| BIOS result | Likely direction |
|---|---|
| SSD, NVMe drive, or hard disk is missing | Power, cable, slot, drive, or motherboard problem |
| Drive is visible but Windows Boot Manager is missing | Boot entry, boot mode, EFI partition, or drive problem |
| Windows Boot Manager is visible but Windows fails | Windows boot-loader or operating-system troubleshooting |
| Settings reset after every shutdown | CMOS battery, firmware, or motherboard problem |
| Fan or temperature warning appears | Fan, pump, cooler mounting, or thermal problem |
| “POSTed in safe mode” appears | Undo recent BIOS, overclock, XMP/EXPO, or hardware changes |
A blinking cursor or a message indicating that no boot device was found generally means the firmware has progressed beyond some hardware checks but cannot find a usable boot device. It does not automatically prove that the drive has failed.
Fix common AMI warnings
“CPU Fan Error”
Do not simply disable the warning. Check whether the fan is spinning, whether it is connected to the CPU_FAN header, and whether an all-in-one cooler’s pump and radiator fans are connected as required. Check cooler mounting, remove any packaging obstructing the heatsink, and watch the CPU temperature in BIOS. Stop if the temperature rises rapidly.
CMOS checksum or date/time error
This can follow a CMOS reset, failed firmware update, incorrectly seated battery, motherboard fault, or depleted CMOS/RTC battery. Record the current boot settings before replacing a desktop battery because the replacement may restore factory defaults. Laptop RTC batteries and access procedures are model-specific.
Rank #2

- COMPATIBLE WITH AIRTAG & KEY FOBS: Works with Apple AirTag, all major car key fobs (Toyota, Honda, BMW, Ford, Chevrolet, Lexus), fitness trackers, glucose monitors, tire pressure sensors, and any CR2032 / 3V lithium coin battery device.
- CHILD SAFETY: BITTER TASTE ON BOTH SIDES TO HELP KEEP CHILDREN SAFE—Duracell CR2032 features a bitter taste coating applied to BOTH SIDES of the battery to help deter accidental ingestion by young children.
- SUPERIOR LONGEVITY: Duracell Lasts Longer Than Energizer 3-In-1* | *Duracell 2032 size only. Based on ANSI Digital Household test vs. Energizer 2032 3-in-1.
- QUALITY ASSURANCE: Every Duracell lithium coin battery is manufactured to precise specifications and guaranteed against defects in material and workmanship. Trusted in medical devices and safety applications.
- FAMILY-SAFE PACKAGING: Duracell CR2032 batteries are sold in child-safe packaging—an additional layer of safety for households with young children.
“The system has POSTed in safe mode”
Enter setup, load optimized defaults, and undo any recent overclock, undervolt, XMP/EXPO profile, or manual memory timing change. If the problem continues, test memory modules individually and inspect cooling and power connections.
TPM or fTPM prompt
Read the prompt carefully rather than assuming one key is always correct. Resetting or changing TPM-related settings can trigger BitLocker recovery on some Windows installations. Make sure you have the BitLocker recovery key before accepting a TPM reset or changing security settings.
Drive-health or SMART warning
Back up important files as soon as possible if Windows still starts. Avoid repeatedly power-cycling an intermittently detected drive. A health warning can indicate a failing drive, but the appropriate next step depends on the exact message and the importance of the data.
If the drive is missing in BIOS
Do not reinstall Windows yet. On a serviceable desktop:
- Power off and unplug the computer.
- Reseat SATA power and data cables.
- Reseat an M.2/NVMe drive only if the computer’s service instructions allow it.
- Try another SATA cable or supported M.2 slot.
- Disconnect nonessential drives and expansion devices.
- Check for a drive-health warning or intermittent detection.
Testing the drive in another computer or a suitable enclosure can help, but do not do this if it risks the data or violates a warranty. Laptop storage access is model-specific; use the manufacturer’s service guide.
The Tool Desk
Outbyte Driver Updater FREEScan for outdated or missing drivers - takes under a minuteDriver Scan →Outbyte PC Repair FREEClear out junk files and repair common Windows errorsFree Scan →Test a desktop with minimum hardware
Use this procedure only on a desktop you are comfortable opening. Do not reseat laptop components unless the manufacturer explicitly supports user service.
Rank #3

- High-quality Cmos Battery: This CR2032 battery is specifically designed for laptops and has high-quality performance and reliability, so you can say goodbye to laptop time and date setting issues!
- Compatibility: This battery is universal and compatible with most laptop brands and models, which means you only need to buy one battery to use on multiple laptops.Rtc Bios Cmos battery compatible with Dell Alienware M11x R1 R2 Area-51 13 15 17 18 R2 R3 R4 M14x R1 R2 M17x M18x R2 Area-51 M9700 M9750;Cmos battery for Dell Precision M6600 M4600 M4700 M6700 M4800 M6800 M3800 15 (7510);Cmos battery for Dell Inspiron 15 (7559), 15 (7577), 9400, 9300, 9200;Cmos battery for Chromebook 13 (7310);Cmos battery for Dell XPS 1820.
- Longevity: This battery has a long lifespan and can keep your laptop's time and date setting for up to 8 years, which means you don't need to replace the battery frequently and can save a lot of time and money.
- Convenient and easy to use: The product size is 20mm (0.79 inches) in diameter, about 3.5mm (0.138 inches) in height, and 65mm (2.56 inches) in length.Replacing the battery is very simple and can be completed in just a few steps without any special professional skills or tools, which means you can easily complete the battery replacement task on your own.
- Battery packaging: Each battery product is individually packaged, these batteries cannot be charged, otherwise they will damage the battery and product.
- Shut down, switch off the power supply, unplug AC power, and press the power button for several seconds.
- Disconnect all external peripherals except the monitor and wired keyboard.
- Disconnect nonessential internal drives and expansion cards.
- Reseat the RAM and test one module in the motherboard’s recommended slot.
- Reseat the graphics card and verify its PCIe power connectors.
- Check the 24-pin motherboard connector and the separate CPU power connector.
- Confirm the CPU fan or pump is connected to the correct header.
- Try another keyboard, monitor, video cable, and video output. Use motherboard video output only if the CPU supports integrated graphics.
- Check motherboard diagnostic LEDs, beep codes, or a POST-code display.
- Reconnect one component at a time until the failure returns.
For a new build, also verify the CPU is supported by the installed BIOS, RAM is seated in the supported slots, motherboard standoffs are correctly placed, the CPU socket has no bent pins, and the monitor cable is connected to the correct graphics output.
Clear CMOS only when it is appropriate
Clearing CMOS can recover from a bad overclock, failed memory profile, boot-mode change, or corrupted firmware setting. It is not the first fix for every AMI screen, because it erases working BIOS configuration and can change boot mode, Secure Boot, fan settings, virtualization, and memory settings.
For a desktop, the general process is:
- Shut down the computer, turn off the power supply if present, and unplug AC power.
- Hold the power button for several seconds.
- Use the documented Clear CMOS button, jumper, or battery procedure for the exact motherboard.
- Reconnect power and enter BIOS/UEFI.
- Set only what is necessary: date and time, the correct boot drive, required boot mode, and safe fan settings.
- Leave memory profiles and overclocks disabled until the system boots reliably.
Never short random motherboard pins. Do not remove a laptop battery or RTC/CMOS battery unless the manufacturer’s service instructions permit it. A reset may erase configured passwords and management settings. See the model-specific guidance from MSI and Dell.
What’s actually slowing this PC down?
Pick the symptom - the matching free tool is one click away.
If BIOS detects the drive but Windows will not start
This is a Windows boot problem rather than necessarily an AMI or POST failure. First select Windows Boot Manager and save. If Windows still fails, use Windows Recovery Environment.
From Windows, go to Settings > System > Recovery > Advanced startup > Restart now > Troubleshoot > Advanced options. From installation media, boot from the Windows USB and choose Repair your computer, not Install.
Useful options include:
- Startup Repair for common boot-configuration problems.
- Uninstall Updates if the failure began after an update.
- System Restore if a suitable restore point exists.
- Startup Settings for diagnostic startup options.
- UEFI Firmware Settings to return to BIOS/UEFI.
- Command Prompt for advanced troubleshooting.
BitLocker-encrypted systems may request the recovery key. Back up or recover important data before reinstalling Windows, replacing a drive, or using repair commands.
Rank #4

- Plastic, Metal
- Imported
- IN THE BOX: 4-pack of CR2032 3 volt lithium coin cell batteries; replacement for BR2032, DL2032, and ECR2032
- DEVICE COMPATIBLE: Ideal for watches, calculators, key fobs, Apple TV remotes, and other small electronics
- EASY IDENTIFICATION: Engraved with battery model for quick identification
In WinRE, drive letters can differ from those used in normal Windows. These commands only identify disks and volumes:
diskpart
list disk
list volume
exit
Do not run a universal bootrec or bcdboot sequence without first identifying the correct Windows and EFI volumes. Incorrect partition selection can make recovery harder. Microsoft’s Windows Recovery Environment documentation lists the available tools.
When RAM may be responsible
Suspect memory when the screen reports DRAM errors, the problem began after installing RAM, the system repeatedly fails memory training, or BIOS settings reset after changing a memory profile. Test one module at a time in the motherboard’s recommended slot.
A separate bootable test can help. The official MemTest86 download page lists version 11.7 Build 1000 in the supplied research and notes that current v11.7 images require UEFI; older BIOS-only systems need the older v4 release. You need another working computer to create the USB. A clean memory test reduces the likelihood of some RAM faults but does not prove that the motherboard, CPU, power supply, or storage is healthy.
Should you update BIOS?
Only update BIOS when the manufacturer specifically lists a fix for the symptom, a new CPU or memory kit requires it, or the exact release addresses a verified compatibility problem. Confirm the exact computer model, motherboard model, and board revision. Use reliable power and the manufacturer’s documented procedure.
Do these 3 things before closing this tab:
1Clear out junk files and repair common Windows errors2Fix the driver behind crashes, sound loss and screen glitches3Repair Windows errors before they cause bigger problemsDo not flash an unrelated BIOS file or treat an update as a generic first-line repair. If the system cannot boot normally, use only a documented recovery feature such as BIOS Flashback, USB BIOS recovery, or the manufacturer’s emergency recovery method. HP’s BIOS recovery guidance illustrates why procedures vary by model.
When to stop troubleshooting
Contact the manufacturer or a qualified technician when there is a burning smell, liquid damage, visible damage, repeated electrical shutdown, immediate CPU overheating, a failed BIOS update, or a persistent CPU, DRAM, VGA, or BOOT diagnostic code. Seek specialist help sooner if an intermittently detected drive contains irreplaceable data or if you cannot reach BIOS after a CMOS reset and minimum-hardware testing.
For model-specific diagnostics, use the official support pages for Dell, HP, ASUS, or MSI.
Quick Recap
Product prices and availability are accurate as of the date/time indicated and are subject to change. Any price and availability information displayed on Amazon at the time of purchase will apply.

