Free tools Windows power users keep installed
One-click scans. No signup required.
Some links on this page are affiliate links: if you buy through them we may earn a commission, at no extra cost to you.
Most TM-T88V failures can be isolated without replacing the printer. First separate a printer-side fault (power, paper, cutter, thermal head) from a connection, Windows-driver, network, or POS-application fault. Record the exact model label, installed interface, paper width, operating system, LED state, and whether the Feed button moves paper. Then test in layers: printer controls, Epson utility, operating-system test page, and finally the POS application.
The TM-T88V is an aging but still supportable thermal receipt printer. Epson’s U.S. support page lists drivers, utilities, and POS components, but each package has different compatibility and a different purpose: Epson TM-T88V support.


Identify your exact TM-T88V before changing anything
Do not treat the standard TM-T88V as interchangeable with the TM-T88V-i, TM-T88V-DT, TM-T88VI, or TM-T88VII. Their interfaces, firmware, utilities, and procedures differ. Record:
Windows Errors? Fix Them Before They Spread
Repair common Windows errors and clear accumulated junk for a smoother, more stable PC - no reinstall needed.Free scan · no reinstallCrashes, No Sound, or Screen Glitches?
Random freezes, missing sound and display glitches usually trace back to one bad driver. Find and replace yours safely.Free scan · under a minute- Full model number (for example, M244A or the label variant).
- Interface: USB, RS-232 serial, parallel, Ethernet, wireless LAN, or USB Plus Power.
- Paper configuration: approximately 80 mm or 58 mm.
- Whether jobs come from Windows, a browser POS, local POS software, OPOS/JavaPOS, ESC/POS, or ePOS-Print.
- LED condition and whether Feed advances paper.
The operator manual lists RS-232, IEEE 1284, 10BASE-T/100BASE-TX Ethernet, wireless LAN, USB, and USB Plus Power configurations, depending on the installed interface board. Use the model-specific documentation at Epson’s TM-T88V manuals page.
#1 Best Overall

- Maximum Label Width: 3.15". Direct Thermal Printer
- Interfaces: USB 2.0 Type B, RS-232, Drawer kick-out
Safe preparation and a five-minute triage
Turn the printer off and unplug it before working near the cutter, paper path, DIP-switch cover, or electronics. Let the thermal head cool. Never force jammed paper, keep liquids away from the printer, and do not use alcohol, benzine, or thinner on the case. For the head only, Epson permits a cotton swab lightly moistened with ethanol or isopropyl alcohol after shutdown and cooling; periodic cleaning is generally recommended every three months. See the TM-T88V User’s Manual.
- Check power, the outlet, paper roll, cover closure, and interface cable.
- Press Feed. If paper advances, the mechanism has power and can at least feed.
- Observe whether the Error or Paper LED is steady or flashing.
- Run an Epson utility or printer-side test where supported.
- Print a Windows test page, then test the POS application. A successful Windows page does not prove the POS configuration is correct.
LED symptoms and immediate fixes
No LEDs and no Feed response
- Reconnect the power cable at the printer and wall outlet and test the outlet with another device.
- Use the correct Epson supply. The manual specifies a 24 V supply (24 V ±7%; rated output 24 V/2.0 A or more).
- Disconnect the interface cable and retry.
- Check for a loose DC connector or a switch obstructed by an optional cover.
If there are still no lights, the likely fault is the supply, DC input, switch, or main electronics. Do not open a power adapter unless you are a qualified service technician.
Error LED steady
- Close the roll-paper cover fully.
- Check that the roll is present, correctly oriented, and not empty.
- Look for a partially engaged cutter.
- Confirm that the POS system is not paused or offline and that the cable is on the intended port.
Error LED flashing
Epson identifies a paper jam, cutter out of position, or temporary thermal-head overheating as possible causes. Stop sending jobs and allow a hot head to cool; printing may resume automatically. If the cover will not open, turn the printer off, slide open the cutter cover, turn the cutter knob until the triangle is visible through the opening, close the cutter cover, then open the roll-paper cover and remove the jam. If no cause is apparent, turn the printer off for at least 10 seconds and restart.
Rank #2

- Maximum Mono Print Speed: 11.81 in/s
- Maximum Print Width: 2.83"
- Standard Memory: 4 KB
- Maximum Label Width: 3.15". (Direct Thermal Receipt Printer).
- Interfaces: USB 2.0 Type B and RS-232.
Paper loading, jams, and cutter failures
Load the roll correctly
- Press the cover-open button and remove the old core.
- Place thermal paper so the coated side contacts the print head as it feeds.
- Pull out a short length, close the cover firmly, tear off the excess, and press Feed.
Supported dimensions are approximately 79.5 mm ±0.5 mm (80 mm configuration) or 57.5 mm ±0.5 mm (58 mm configuration), with a maximum roll diameter of about 83 mm. The core is approximately 12 mm inside and 18 mm outside diameter. Converting to 58 mm requires the physical paper guide and matching software setting; Epson warns that the same procedure cannot return that printer to 80 mm.
Remove a jam without damaging the cutter
- Open the cover and remove the jammed section gently; never pull hard around the cutter.
- If locked, use the cutter-knob reset described above.
- Clear paper scraps and dust, inspect for folded or skewed edges, and reload a fresh roll.
- Repeated jams after cleaning and reset can indicate a worn cutter mechanism.
Blank, faint, streaky, or uneven receipts
Blank output
- Reinstall the roll with the thermal side facing the head. A fingernail rubbed across that side will typically darken it.
- Try known-good thermal paper; ordinary paper, damp stock, aged stock, or poor thermal sensitivity can produce blank output.
- Clean the cooled head with a lightly moistened cotton swab, let it dry, and test again.
- Run a printer-side or Epson utility test. If it is also blank, suspect the head or mainboard; if it prints, investigate POS data.
Epson recommends certified media and warns that unapproved media can damage the head or affect warranty coverage. Check the certified-media information at Epson’s media documentation.
Faint or streaky output
Possible causes include a dirty or worn head, unsuitable paper, an incorrect density setting, voltage problems, or heavy continuous printing. The listed maximum is 300 mm/s under specified manufacturer test conditions, not a guaranteed speed for every receipt; speed can adjust with supply voltage and head temperature. Do not scrape the head or touch its elements with fingers or hard objects.
USB troubleshooting on Windows
- Disconnect USB and remove stale or duplicate TM-T88V entries if necessary.
- Install only the required Epson package while the printer remains powered off when the installer requires that sequence.
- Connect directly to the computer, avoiding hubs during diagnosis, then power on.
- Confirm the Epson device and port in Windows and print a Windows test page.
- Test Epson Utility and only then the POS application.
Advanced Printer Driver (APD) is for ordinary Windows application printing. The TM Virtual Port Driver is for compatible serial/parallel-to-USB virtual-port scenarios, not every native USB installation. Epson’s current U.S. listing shows APD v4.59a (listed November 14, 2023), APD v5.13 (April 22, 2022), TM-T88V Utility v1.72_e2 (February 20, 2024), and TM Virtual Port Driver v8.70c (October 2, 2025), accessed August 18, 2026. Verify the exact operating-system compatibility before installing.
Do these 3 things before closing this tab:
1Scan for outdated or missing drivers - takes under a minute2Clear out junk files and repair common Windows errors3Fix the driver behind crashes, sound loss and screen glitchesSerial, Ethernet, and wireless connections
RS-232 serial
- Use the required null-modem cable, not a straight-through cable.
- Match COM number, baud rate, data bits, parity, stop bits, and flow control at both ends.
- Depending on configuration, supported speeds include 2,400 through 115,200 bps.
- Check DIP-switch settings only after recording their original positions and powering off.
Ethernet or wireless
- Check link lights and the printer’s current IP address.
- Confirm host and printer are on the same subnet and that DHCP has not changed the address.
- Check the Windows Standard TCP/IP or Epson port, firewall rules, and duplicate-IP conflicts.
- Confirm that the POS application uses the installed interface’s expected protocol and port.
Ethernet is not present on every TM-T88V; behavior depends on the installed board.
When Windows prints but the POS does not
A Windows test page validates the basic Windows path, not the application. Check the POS printer assignment and exact printer name, selected port, OPOS logical-device name, OPOS/JavaPOS versus APD mode, ESC/POS compatibility, paper width, print-server permissions, spooler state, and browser-to-local-printer restrictions. Test in this order: Feed button, Epson utility, Windows page, POS test print, then a real transaction.
Rank #4
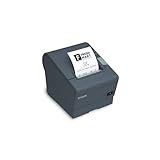
- The TM-T88V is the latest addition to Epson's industry leading TM-T88 POS printer series. Designed for use in food service and retail environments, the TM-T88V offers more speed, features and relia
Widths, alignment, continuous feeding, and cutting
Wrong width or alignment
Match the physical roll, TM-T88V Utility paper-width setting, driver paper size, POS template, margins, and characters-per-line. The manual lists about 72 mm print width on 80 mm paper and 50.8 mm on 58 mm paper; default 80 mm capacity is 42 characters in Font A or 56 in Font B. A printer changed to 58 mm while software remains at 80 mm will produce wrapping, clipping, or incorrect cuts.
Paper feeds continuously
- Cancel all jobs and clear the Windows queue.
- Power-cycle the printer.
- Print a short Windows page and run an Epson utility test.
- If only POS triggers feeding, check duplicate jobs, page length, extra ESC/POS feed commands, wrong model selection, or a retrying service.
- Reinstall only the correct driver if the fault is limited to Windows printing.
Cutter or cash drawer does not operate
Check for scraps and cutter position, then verify the POS sends the cut command. For a drawer, use the printer’s DK socket, confirm cable and drawer compatibility, and ensure the POS sends the drawer-open command. The manual describes support for two drawer drives, but exact behavior depends on interface and software.
Recommended Free Tools
Epson software and advanced settings
| Package | Purpose | Epson listing signal accessed August 18, 2026 |
|---|---|---|
| Advanced Printer Driver v4.59a / v5.13 | Windows application printing | Listed November 14, 2023 / April 22, 2022 |
| TM-T88V Utility v1.72_e2 | Tests, settings, logos, network configuration, backup and restore | Listed February 20, 2024 |
| TM Virtual Port Driver v8.70c | Compatible serial/parallel-to-USB virtual ports | Listed October 2, 2025 |
| Epson Monitoring Tool v3.10.0 | Monitor LAN/PC printers and back up settings | Listed July 29, 2025 |
| OPOS ADK v3.00E R30 | OPOS-based POS software | Listed June 3, 2026 |
| JavaPOS ADK v1.14.41W | JavaPOS environments | Listed June 3, 2026 |
Install only what your connection and application require. OPOS/JavaPOS packages are not substitutes for APD, and utility software cannot revive a dead power system or damaged head.
DIP switches
Power off before removing the cover, record every original position, change only settings required by the interface, and power-cycle afterward. Epson warns that removing the cover while powered can cause a short or malfunction. Do not alter DIP switches to solve a native USB or Ethernet problem unless the documentation specifically requires it.
Repair or replace?
Repair is usually sensible when
- The printer powers on and produces acceptable test output.
- The fault is paper loading, cleaning, cabling, configuration, or a supported interface issue.
- You have compatible supplies and a spare printer or low downtime risk.
Replacement is more sensible when
- Power or mainboard failure persists after basic checks.
- The head has permanent blank bands or severe fading.
- The cutter repeatedly jams, an interface is obsolete, or parts and labor approach replacement cost.
- The business needs current cloud, mobile, or direct-print features and cannot tolerate downtime.
For a replacement, verify interface, regional power supply, paper width, mounting requirements, warranty, and POS compatibility. Epson’s newer TM-T88VII is documented at Epson’s TM-T88VII support page; current price and availability vary by region.
Quick Recap
Final fault-isolation checklist
- No lights: outlet, correct 24 V supply, connector, switch, then service decision.
- Steady Error: cover, roll orientation, empty roll, cutter, offline state.
- Flashing Error: cool down, reset cutter, remove jam, restart.
- Feeds but blank: thermal side, certified paper, head cleaning, hardware test.
- Windows works, POS fails: application assignment, port, middleware, commands, and permissions.
- Network fails: link, IP, subnet, DHCP, port, firewall, duplicate address.
- Persistent hardware symptom: compare parts and technician cost with a supported replacement.
Product prices and availability are accurate as of the date/time indicated and are subject to change. Any price and availability information displayed on Amazon at the time of purchase will apply.

