Some links on this page are affiliate links: if you buy through them we may earn a commission, at no extra cost to you.
The fix depends on which QuickBooks you use. In QuickBooks Online, the Modernized template can’t be edited as a custom template; use a standard or custom form style instead. In QuickBooks Desktop for Windows or Mac, templates have separate editing tools. In every edition, editing a style, choosing it for an invoice, and making it the default are different steps.
Start by identifying your edition, then follow its instructions below. Menu names can vary slightly by region or interface update.
First, identify your QuickBooks edition
- QuickBooks Online: You work in a web browser and manage styles under Settings → Custom form styles.
- QuickBooks Desktop for Windows: You manage forms through Lists → Templates and the invoice’s Formatting → Manage Templates controls.
- QuickBooks Desktop for Mac: You select a form from the invoice’s Current Template list and edit it with Layout Designer.
Don’t mix the instructions: Online form styles and Desktop templates are different systems. If you’re unsure, check whether you open QuickBooks in a browser or in an installed desktop application.
What’s actually slowing this PC down?
Pick the symptom - the matching free tool is one click away.
QuickBooks Online: choose or create an invoice style
Select a style for an invoice
- Select Create or + New, then choose Invoice.
- On the invoice, select Manage (or the gear icon) and open Design.
- Choose the style you want under Other templates.
- Save or finish the invoice, then use Print or download to check the actual output.
A style can be saved in your company settings without being selected on the invoice you’re looking at. Choosing a design on one form also doesn’t automatically redesign estimates, sales receipts, or other form types.
#1 Best Overall
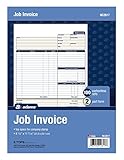
- DETAILED DESCRIPTIONS: Letter-sized form provides lots of room for descriptions, materials costs, labor and miscellaneous charges
- 100 2-PART CARBONLESS RECEIPTS: Give clients the white top copy; you keep the yellow duplicate
- MADE FOR SERVICE & REPAIR: Includes fields for labor, material costs, and misc. expenses
- CUSTOMIZABLE: Personalize the 1-1/4" x 4-1/2" blank space at top with your logo or company stamp
- STOCK UP: Each pack includes 100 white/canary sets; order several to keep your favorite forms on hand
Create or edit a custom form style
- Open Settings → Custom form styles.
- Select New style and choose Invoice, or select Edit beside an existing invoice style.
- Adjust the available options in the design and content sections, such as the logo, fields, header, footer, colors, and supported column labels or widths.
- Preview the form and select Done or save.
- Return to an invoice and select the saved style under Manage → Design.
For column changes, open the style’s Content tab, select the product/service table in the preview, then choose Edit labels and widths. Turn supported columns on or off, adjust widths, and rename labels that QuickBooks allows you to change. Preview or download the invoice afterward: the printed label may differ from the name used in the settings—for example, Service Date may appear as Date.
Why there’s no Edit button: the Modernized template
QuickBooks Online uses a Modernized template by default. Current Intuit guidance says it can be selected and adjusted for certain appearance settings, but it isn’t editable as a custom template. If you need deeper control, create or edit a standard/custom form style and select it on the invoice. See Intuit’s guide to customizing invoices and other sales forms in QuickBooks Online.
Rank #2

- NO.10 SECURITY DOUBLE WINDOW ENVELOPE: PANDRI NO.10 envelope's dual window design allows for easy reading of the window's contents. It is suit for secure business mail, invoices, bills, checks and other business mail
- DOUBLE WINDOW DESIGN:Sending and mailing addresses can be clearly displayed Protects sensitive content and information for standard business and legal mailings, advertising campaigns, etc. Reducing the hassle of handwritten addresses
- QUICK AND EASY TO SEAL:Designed with a super strong self-sealing adhesive strip that forms a complete, super secure seal across the width of each envelope, eliminating the need for glue sticks and licking envelopes, allowing for quicker and easier sending of more invoices, a huge time saver and suit for mass mailing
- SAFE INNER GRAIN: Using the inner grain secrecy printing technology, the secure tone backing makes the envelope hard to see through and ensures the privacy of your invoices and statements under the light without any prying eyes
- LONG LASTING SUPPLY: With 500 NO.10 double window envelopes per box for long lasting supply, they are ideal for everyday business correspondence and large mailing tasks. This is the envelope you're looking for. Order Now
QuickBooks Online also distinguishes the default from other styles: the standard template is the one that can be made the default. Other custom styles generally need to be selected for the relevant form. To change the default, open an invoice, select Manage → Design, remove the default from the Modernized template section, and use Add/Edit to adjust the standard template if needed. Check a new invoice to confirm which design QuickBooks now uses.
QuickBooks Desktop for Windows: edit and preview a template
- Go to Lists → Templates to view your templates.
- Open an invoice and select Formatting → Manage Templates.
- Select the invoice template. Choose Copy to preserve the original and make a separate version, or continue with the selected template to edit it.
- Use Basic Customization for options such as logos, fonts, colors, and company information.
- Choose Additional Customization for supported header, column, and footer fields. Use Layout Designer when you need to move or resize fields.
- Select OK, open Print Preview, and save after checking the result.
For more detail, see Intuit’s instructions for customizing QuickBooks Desktop form templates. Desktop lets you duplicate a customized template for another form type, such as a packing slip, but a template’s fields and behavior still depend on the form it is used for.
Rank #3

- 【Package Included】You will get 2 Job Invoice Forms 50sets/book,100sets in total. Each receipt book is divided into 2 parts,white,yellow.
- 【Material】Our work order forms are made of paper, not easy to tear, large quantity can meet long time uses.
- 【2-Part Carbonless Receipts】Give the white original copy to the customer for their records; you keep the yellow carbonless copy as a record.
- 【Designed for the Service and Repair Industry】The order form has dedicated sections for filling in labor costs, material costs, and various miscellaneous expenses.
- 【Wraparound Back Cover】The back cover can be folded between each set of receipts ,which can keep the receipts neat and clear.
QuickBooks Desktop for Mac: use Current Template
- Open an invoice and find the Current Template list.
- Select the template you want, then choose Edit Current Template or New Template.
- Use Layout Designer to add, remove, move, or resize supported fields.
- Save using File → Save As, then reopen or preview the invoice to verify it.
The Mac controls differ from Windows. Follow the QuickBooks Desktop for Mac template instructions rather than looking for Windows menu paths.
If the old design still appears
- Check what you selected. On an Online invoice, reopen Manage → Design and confirm the intended style is selected. In Desktop, check the invoice’s Template or Current Template selection.
- Test with a new invoice. A transaction created before you changed a style may still be using its existing selection. Don’t assume changing the style changes every previously created invoice.
- Check the form type. Make sure you edited an invoice style, not an estimate or sales receipt style.
- Inspect the rendered form. Use Print or download in Online or Print Preview in Desktop. Screen editing views may not match the final PDF exactly.
- For Online, test a private window. Sign in using an incognito/private browser window and see whether the missing control or new style appears. If it does, clear the normal browser’s cache and try again. This is a diagnostic workaround, not a guaranteed fix; if the problem continues, use a current supported browser. Community guidance describes this approach at QuickBooks Community.
- Check access rights. If settings or edit controls are missing, confirm your QuickBooks user account has permission to edit company settings and forms. Template controls may also vary by regional edition or interface rollout.
If a Desktop template won’t save or keeps reverting
A damaged template is one possible cause; it isn’t the only explanation. Intuit’s suggested check is to create a test invoice and see whether a built-in Intuit template remains selected:
Rank #4

- Two-Part Carbonless Invoice Book: Each invoice book has 50 sets of invoices, each with a white/light yellow section, with the yellow section retained in the invoice book to maintain detailed records.
- Consecutively Numbered: Enlarged red 6-digit numbers in the upper right corner of each invoice receipt book help you quickly navigate through your orders.
- Wraparound Divider Flap: A thick folded cardboard divider is integrated into the back of each invoice book for use between each two-part sales order to prevent the written content from rubbing off on subsequent copies of the invoice, resulting in wasted invoices.
- 2 Packs/50 Sets (100 Sets Total): Each invoice book provides 50 sequentially numbered carbonless sets of 2 invoice books for long-term use.
- Customizable Space: Each invoice book for small business has space at the top to add a company seal or sticker.
- Go to Customers → Create Invoices.
- Select an Intuit template from the Template dropdown.
- Enter test customer and item details, then save and close the invoice.
- Reopen invoice creation and check whether the Intuit template remains the default.
If the Intuit template behaves normally but your custom one repeatedly fails, consider restoring a backup from when the template worked or recreating the custom template. Follow Intuit’s guidance for common Desktop template issues. Avoid repeatedly overwriting the only copy if you may need to recover the original.
Quick wins for a faster PC:
Fix the driver behind crashes, sound loss and screen glitchesFind Drivers →Repair Windows errors before they cause bigger problemsFix Now →Missing logo, field, or column? Check what the editor controls
- QuickBooks Online: Open Settings → Custom form styles, edit the invoice style, and inspect the relevant design or content section. For table columns, use Content → product/service table → Edit labels and widths. Not every field or label is freely changeable.
- Desktop for Windows: Use Additional Customization to control supported headers, columns, and footers; use Layout Designer to reposition or resize elements.
- Desktop for Mac: Use Layout Designer from the template editor to adjust supported fields.
First check whether the field is enabled in the editor; an absent printed column may simply be hidden. Some elements are controlled by QuickBooks, your region, edition, or form type, and may not be replaceable through template settings.
Best Value

- A large description area leaves space for precise descriptions of the work performed including products, service and labor
- 100 Three-Part Carbonless Receipts provide a perforated white top copy for the customer with pink and yellow duplicates for office staff
- Fields capture work-order number, bid number and the site address
- Payment instructions at bottom tell the customer when and what to pay to help you get paid on time
- Add a company stamp in the blank header space for a customized touch
Moving Desktop templates between company files
QuickBooks Desktop supports exporting a template from one company file and importing it into another, subject to compatibility limits: a template from a newer QuickBooks version can’t be imported into an older version, and templates can’t be transferred between regional editions such as U.S. and Canadian editions. See Intuit’s Desktop template guide for its import and export instructions.
When to contact QuickBooks support
Contact QuickBooks support if the controls remain missing across supported browsers, the issue affects multiple users or company files, a Desktop template keeps reverting after the built-in-template test, or the final PDF differs materially from the editor and you can’t correct it. If a Desktop template may be damaged and no usable backup exists, support can help you assess recovery options. For a straightforward Online Modernized-template limitation, first try a standard/custom form style; upgrading a plan is not a reliable fix for an uneditable Modernized design.
Frequently Asked Questions
Can I make a custom QuickBooks Online invoice template the default?
QuickBooks Online currently allows the standard template to be made the default; other custom styles generally must be selected on the relevant invoice.
Crashes, No Sound, or Screen Glitches?
Random freezes, missing sound and display glitches usually trace back to one bad driver. Find and replace yours safely.Free scan · under a minuteWindows Errors? Fix Them Before They Spread
Repair common Windows errors and clear accumulated junk for a smoother, more stable PC - no reinstall needed.Free scan · no reinstallCan I change invoice column names in QuickBooks Online?
Some supported labels can be changed under Settings → Custom form styles → Content → product/service table → Edit labels and widths. The available fields and the printed label may vary.
Can I import a QuickBooks Desktop template from another company file?
Yes, Desktop supports template export and import, but templates from newer versions cannot be imported into older ones, and regional editions are not interchangeable.
Quick Recap
Product prices and availability are accurate as of the date/time indicated and are subject to change. Any price and availability information displayed on Amazon at the time of purchase will apply.

