Quick wins for a faster PC:
Scan for outdated or missing drivers - takes under a minuteDriver Scan →Clear out junk files and repair common Windows errorsFree Scan →Some links on this page are affiliate links: if you buy through them we may earn a commission, at no extra cost to you.
A quick ESP32-C3 and 24-GHz radar prototype—but not a complete three-minute build. This Hackster project combines a Carenuity C3-Mini with an HLK-LD2410C radar module to report presence without a camera or microphone. The three-minute claim is best understood as a prepared demonstration; soldering, configuration, tuning, and Home Assistant integration take longer.
What this project builds
The project is a small, camera-free presence sensor based on two key components:
- Carenuity C3-Mini: an ESP32-C3-based development board that provides power, processing, and a potential Wi-Fi platform for automation.
- HLK-LD2410C: a 24-GHz mmWave radar module that detects movement and radar reflections associated with human presence.
The original project, published on Hackster.io on April 11, 2024, also uses a radar adapter, USB-C data cable, and Android phone running the HLK configuration app.
Do these 3 things before closing this tab:
1Scan for outdated or missing drivers - takes under a minute2Repair Windows errors before they cause bigger problems3Fix the driver behind crashes, sound loss and screen glitchesThe signal path is straightforward:
- The LD2410C emits and receives radar signals.
- The radar module determines whether activity or presence is detected.
- The ESP32-C3 supplies power and provides a platform for network-connected projects.
- The Android app connects over Bluetooth so you can inspect or configure the radar.
- With suitable firmware, the ESP32-C3 can report a state to a system such as Home Assistant.
That final step is important: the Hackster page says Home Assistant integration is possible, but it does not include a complete firmware file, ESPHome configuration, textual pinout, or reproducible Home Assistant setup.
#1 Best Overall

- WWZMDiB 5 Pcs PIR Sensor: When a human body enters the sensing range, the temperature difference between the body and the background causes a voltage change in the pyroelectric device. After amplification and comparison, the voltage signal is output.
- Voltage:DC 4.5-20V
- Detection Angle: <110 ° cone angle Lens size
- Detection range: 3-7 meters (10-23 feet)(adjustable)
- Two triggering modes: H: The output signal is maintained as long as a person is present. L: Triggered once with each change.
Presence detection is not the same as ordinary motion detection
A PIR motion sensor typically notices changes in infrared radiation when a person moves. That makes PIR sensors cheap, simple, and power-efficient, but a person who sits still may eventually disappear from the sensor’s perspective.
mmWave radar can detect much smaller movements, including movement associated with a relatively stationary person. Breathing-level motion may be detectable in favorable conditions, but performance depends on the exact module, orientation, distance settings, sensitivity, reflections, and room layout. It is more accurate to say that the sensor reports radar-detected presence than to promise perfect human detection.
| Technology | Advantages | Limitations |
|---|---|---|
| PIR | Low cost, low power, simple setup | May miss someone who remains still; line of sight matters |
| 24-GHz mmWave | Can detect very small movement and stationary occupants; works without visible light | Requires more careful placement and tuning; reflections can cause false triggers |
| Camera | Provides visual context and possible identification | Greater privacy, lighting, security, bandwidth, and processing concerns |
| Wi-Fi CSI | Can sense occupancy without a dedicated radar module, camera, or microphone | More experimental and dependent on the Wi-Fi environment |
A separate ESP32 project called ESPectre uses Wi-Fi channel-state information rather than the LD2410C. It should not be confused with this radar-based build.
Who should build it?
This is a good project for a beginner who is willing to solder and wants to learn how radar sensing, ESP32 boards, and room automation fit together. It is especially suitable for:
- ESP32 and Home Assistant hobbyists
- Camera-free occupancy sensing
- Smart-lighting experiments
- Workspace or room automation
- Readers who already have a USB-C power source and Android phone
It is not a good fit if you want a finished, certified security product; a battery-operated sensor without additional power-management work; a no-tools installation; or a safety-critical alarm. It also is not ideal for iPhone-only users because the documented configuration path uses the HLK Android app.
Parts and tools
| Item | Purpose | What to check |
|---|---|---|
| Carenuity C3-Mini | ESP32-C3 controller and connectivity platform | Confirm the exact board revision and whether headers are installed |
| HLK-LD2410C radar sensor | 24-GHz presence sensing | Confirm the exact module variant and its voltage requirements |
| Radar sensor adapter | Makes the module easier to connect to the controller | Check header orientation and wiring |
| USB-C data cable | Power, and potentially flashing or serial communication | Use a data-capable cable, not a charge-only cable |
| Android smartphone | Runs the HLK configuration app over Bluetooth | Install the app before beginning |
| Header pins | Electrical and mechanical connections | They may not be included or soldered |
| Soldering iron | Required for the documented bare-board assembly | Use basic soldering safety and ventilation |
| Regulated USB power source | Runs the assembled sensor | Do not connect mains voltage directly |
Have a breadboard and jumper wires available as a fallback if the adapter is unavailable. Before soldering, confirm whether the C3-Mini and adapter already have headers. Pre-soldered parts can turn this into a much faster demonstration.
Rank #2
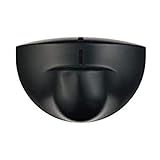
- Support NO(Normal Open) and COM, not support NC( Normal Close). it normally work together with another master device( control device or a professional power unit) to trigger relay
- Max mounting height:3-4M;Detection Area:4m(W)x2m(D)
- Technology:24G Microwave abd microprocessor
- Detection mode: Movement
- When walk close to door, it will detect person and trigger to open lock automatically. High-sensitivity, quick and accurate response. Specially apply in commercial, industrial and demanding of automatic access area.
What “three minutes” really means
The title comes from the Hackster project, but the page labels its instructions as a one-hour beginner build. Those descriptions are not equivalent.
Windows Errors? Fix Them Before They Spread
Repair common Windows errors and clear accumulated junk for a smoother, more stable PC - no reinstall needed.Free scan · no reinstallCrashes, No Sound, or Screen Glitches?
Random freezes, missing sound and display glitches usually trace back to one bad driver. Find and replace yours safely.Free scan · under a minute- Prepared demonstration: If the boards are already assembled, the app is installed, the wiring is known, and the sensor only needs to be powered and observed, a first response may be visible within a few minutes.
- First build: Component identification, header soldering, mechanical assembly, wiring checks, Bluetooth setup, and troubleshooting make the realistic time substantially longer.
- Smart-home installation: Firmware, Wi-Fi, Home Assistant entities, automations, notifications, placement, and tuning are a separate project stage.
So, is it genuinely a three-minute build? Only in the best-case configuration-and-demo sense—not as a complete first-time assembly.
Assembly and first test
The documented setup sequence is:
- Solder long female headers to the C3-Mini.
- Solder male headers to the radar adapter.
- Mount the HLK-LD2410C on the adapter.
- Use a breadboard and jumper wires instead if the adapter is unavailable.
- Install the HLK Android app from Google Play.
- Enable Bluetooth on the Android phone.
- Power the assembled device.
- Open the app and check whether the radar module responds.
- Move through the intended detection area.
- Remain still for a while, then walk away and observe how the sensor changes state.
Do not infer the pin mapping from another ESP32 board. The Hackster article refers to a breadboard image, but does not expose the connections as text. Verify the adapter orientation, board labels, and module documentation before applying power. If you need an exact, reproducible build, the missing pinout and firmware details must be confirmed from the relevant hardware documentation rather than guessed.
Configure and tune the detection zone
Radar sensing is highly dependent on the final installation location. Begin with the smallest practical detection area and expand it only if necessary. The goal is to detect the intended room or workspace without seeing through a doorway or into an adjacent area.
Watch for:
- Fans, rotating equipment, and moving curtains
- HVAC airflow and vibrating furniture
- Large reflective surfaces and nearby metal
- Doors, plants, pets, or activity in adjoining spaces
- Furniture that blocks or redirects radar reflections
- A plastic enclosure that changes behavior compared with open-air testing
An LD2410-family tutorial recommends tuning distance gates to restrict detection to the desired zone and reduce triggers beyond a doorway. The exact range figures and settings should not be transferred automatically to the C3-Mini project. A comparable implementation reports example values such as 115200-baud UART, GPIO16/GPIO17 for UART, and GPIO4 for a digital presence output, but those pins belong to that specific ESP32 example and are not a verified Carenuity C3-Mini pinout. See the comparable LD2410 implementation for context, not as a drop-in wiring guide.
Rank #3

- Operating voltage range: DC 4.5-20V
- Quiescent Current: <50uA Trigger: L can not be repeated trigger/H can be repeated trigger(Default repeated trigger)
- Delay time: 5-200S(adjustable) the range is (0.xx second to tens of second)
- Board Dimensions: 32mm*24mm
- Angle Sensor: <100 ° cone angle Lens size sensor:Diameter:23mm(Default)
Test the sensor in its final position for several hours or days before allowing it to control lights, heating, cooling, or alerts. Record when it stays active, when it clears, and what nearby equipment was running.
False positives and false negatives
Why it may report presence when nobody is there
- A fan, curtain, plant, or other object is moving.
- Vibration or HVAC airflow is producing reflections.
- The radar sees activity through a doorway or in an adjacent space.
- The detection zone is too large or sensitivity is excessive.
- A pet or other moving object is inside the configured area.
Why it may fail to report a person
- The module is poorly oriented or partially shielded.
- The person is outside the configured range or in a weak-reflection area.
- The detection gates are too narrow.
- Power, wiring, or the module variant is incorrect.
- The sensor’s clear-time or timeout has not expired.
- The enclosure, furniture, or room geometry is changing the radar path.
Presence sensing does not identify a person, count occupants, distinguish a resident from an intruder, or guarantee that every stationary person will always be detected. “Camera-free” also does not mean information-free: an occupancy signal still reveals whether people may be present, so disclose and secure it appropriately.
Where Home Assistant fits
The hardware can be the sensing front end for a smart-home system, but several layers are involved:
Recommended Free Tools
- The radar module detects activity locally.
- Firmware on the ESP32-C3 reads or exposes that state.
- The board reports the state over Wi-Fi using a verified integration method.
- Home Assistant discovers or receives the entity.
- Automations use the entity for lighting, HVAC, dashboards, or notifications.
The original Hackster page only states that Home Assistant integration is possible. It does not document the firmware, ESPHome YAML, MQTT topics, entity names, discovery configuration, or local-versus-cloud behavior needed for a complete setup. Do not treat the project as plug-and-play Home Assistant hardware without those details.
Once a verified integration exists, sensible uses include keeping lights on while someone reads or works, switching lights off after a room is empty, adjusting HVAC behavior, triggering a notification, or exposing a privacy-preserving occupancy state. These are potential automation uses, not measured claims of energy savings or security performance.
A conceptual digital-output test
Some LD2410 tutorials use the module’s simple digital presence output for a binary occupied/unoccupied signal, while UART can provide richer configuration and target information. The following sketch is an example from a comparable build, not verified firmware for the Carenuity C3-Mini project:
Rank #4

- Motion sensor audio player detection range is up to 13ft(4m), 120° view angle. It will trigger the sound remind you when someone or animals enter and move in the monitored area.
- Music files can be customized, Download MP3 or WAV music files by computer. (Recommend the Windows 7 ) MP3 audio files playback, single track or multiply play.This product only supports USB data cable to replace voice, not TF card.The card slot is for decoration only.(Part of the audio has been downloaded for the initial product, if you need to change it, please connect to the computer to replace the audio)
- Indoor festival music decorations ,halloween and christmas party fun music,entrance door greeting, driving animals soundbox or alert. Install front doors, window frames, driveways, and anywhere you want to be playing music to motion.
- Customize your chimes, your MP3 sound file will playback automatically after the PIR sensor detects movement. sounds as you wish! Included mounting screws, ball mounting accessories, USB cable
- Operates with 3 AAA batteries (Not Included) and optional to be plugged in DC5V (USB Cable Included) for external power supply. (If you have any questions about the product, please contact us immediately and we will reply you within 24 hours.)
const int LD2410_OUT = 4;
const int RELAY = 5;

void setup() {
  pinMode(LD2410_OUT, INPUT);
  pinMode(RELAY, OUTPUT);
  Serial.begin(115200);
}

void loop() {
  bool present = digitalRead(LD2410_OUT);
  digitalWrite(RELAY, present ? HIGH : LOW);
  Serial.println(present ? "HUMAN" : "empty");
  delay(200);
}
Do not upload this without confirming the board’s GPIO assignments, voltage levels, firmware environment, and output wiring. In particular, do not attach a mains relay during initial testing.
Free tools Windows power users keep installed
One-click scans. No signup required.
Troubleshooting
The board does not power on
Try a known-good regulated USB supply and inspect the cable and connectors. Check for solder bridges, reversed headers, and an incorrect adapter orientation. Disconnect optional loads while testing.
The computer cannot flash or communicate with it
The original project specifies a USB-C data cable. A charge-only cable may provide power while preventing data communication. Also confirm that the board appears as the expected USB device and that the selected board definition matches the C3-Mini.
The Android app cannot find the radar
Confirm Bluetooth is enabled, the app has the permissions required by the current Android version, and the radar is powered. App availability and interface details can change, so follow the current listing and module documentation rather than assuming the interface shown in the 2024 project is unchanged.
The radar powers up but never reports presence
Check the module’s wiring and supply requirements, then test at close range with clear line of sight. Confirm that the detection zone has not been configured too narrowly and that the sensor is not behind shielding material.
What’s actually slowing this PC down?
Pick the symptom - the matching free tool is one click away.
The sensor is constantly active
Move it away from fans, curtains, vibrating surfaces, large metal objects, and doorways. Reduce the detection area or sensitivity and repeat the test in the final enclosure and location.
Best Value

- IS335 WIRED PIR Motion Detector, 40' x 56' by Honeywell
It works on the bench but not in the room
That usually points to placement, reflections, shielding, or a changed power and wiring arrangement. Re-test with the enclosure installed and tune the zone for the room rather than relying on the open-bench result.
Home Assistant cannot see it
First verify that the radar and ESP32 work independently. Then confirm that the chosen firmware actually publishes a sensor entity and that the board is connected to the intended network. The original project does not specify an integration method, so a complete diagnosis requires the firmware and transport configuration you selected.
Alternatives
Use PIR instead
Choose PIR when low power, simplicity, and basic movement detection matter more than detecting someone sitting still. A hybrid PIR-plus-mmWave design can improve responsiveness and help reject some false triggers, but adds hardware and tuning work.
Use another LD2410-family module
LD2410B and LD2410C modules are closely related but can differ in breakout layout, connectors, and availability. LD2450 is aimed at richer multi-target tracking, while LD1125H is another radar option. These are not automatically interchangeable with the Hackster wiring or firmware.
Choose a longer-range DFRobot C4001
The DFRobot C4001 comparison describes 12-m and 25-m variants. The referenced guide reports up to 25 m of motion detection and 16 m of static presence for the SEN0609, and up to 12 m of motion and 8 m of static presence for the SEN0610. Those distances are much greater than many rooms require and can make zoning and false-positive control more difficult. Do not transfer those figures to the LD2410C.
Use Wi-Fi CSI sensing
ESPectre uses Wi-Fi channel-state information and does not require a dedicated radar module. It is an interesting camera- and microphone-free alternative, but it is a different and more experimental approach.
Buy a finished sensor
If soldering, firmware, enclosure work, and radar tuning are not the point of the project, a ready-made device such as Apollo Automation’s MSR-2 may be more practical. It sacrifices some of the educational and customization value of the DIY build in exchange for a more direct smart-home path.
The Tool Desk
Outbyte PC Repair FREERepair Windows errors before they cause bigger problemsFix Now →Outbyte Driver Updater FREEScan for outdated or missing drivers - takes under a minuteDriver Scan →Verdict
This is a worthwhile beginner electronics project if you want to learn how an ESP32-C3 and mmWave radar can provide camera-free occupancy sensing. It is not a no-tools, plug-and-play three-minute product: the first build involves soldering and verification, and a reliable Home Assistant installation requires firmware and integration details that the original project does not provide.
Use it for experimentation, lighting, workspace automation, or a carefully tested occupancy signal. Do not rely on it as a certified security system, medical monitor, safety device, or guaranteed room-empty detector.
Quick Recap
Product prices and availability are accurate as of the date/time indicated and are subject to change. Any price and availability information displayed on Amazon at the time of purchase will apply.

