Free tools Windows power users keep installed
One-click scans. No signup required.
Some links on this page are affiliate links: if you buy through them we may earn a commission, at no extra cost to you.
This project combines a four-band resistor color-code calculator with an approximate resistance meter built around an ATmega328/Arduino Uno-class controller. It uses a 1.8-inch, 128×160 ST7735 TFT, six push buttons, a CD4051 analog multiplexer and eight selectable range resistors. The calculator decodes printed bands; the ohmmeter estimates resistance from a voltage-divider reading. It is an educational instrument, not a replacement for a calibrated multimeter.
The original design and its schematic, parts list and downloadable code are described by All About Circuits. Use that schematic for exact wiring and pin assignments; the guide below explains how the design works and how to build and check a compatible version.
Two different jobs in one device
The color calculator is a software task: choose four band colors, then calculate the nominal resistance and tolerance. The ohmmeter is a measurement task: apply a known voltage through a known resistor, read the resulting divider voltage with the Arduino ADC, and calculate the unknown resistance. The two results need not match exactly: a printed band value is nominal, while a physical resistor varies within its tolerance and the meter has its own error sources.
Quick wins for a faster PC:
Clear out junk files and repair common Windows errorsFree Scan →Scan for outdated or missing drivers - takes under a minuteDriver Scan →Repair Windows errors before they cause bigger problemsFix Now →The project supports conventional four-band resistors, not five- or six-band codes. Its eight selectable ranges are nominally about 2 Ω, 20 Ω, 200 Ω, 2 kΩ, 20 kΩ, 200 kΩ, 2 MΩ and 20 MΩ. Those are range-resistor choices, not guaranteed accuracy specifications; useful limits depend on the actual components, construction and calibration.
#1 Best Overall
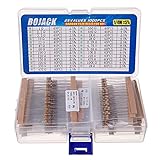
- BOJACK resistor assortment kit contains 1000pcs resistors with variety values. Enough quantity for your DIY project and experiments
- These resistor kits including 25 different values: 1Ω,2.2Ω, 3.3Ω, 10Ω, 22Ω, 47Ω, 68Ω, 100Ω, 120Ω, 150Ω, 220Ω, 330Ω, 470Ω, 560Ω, 680Ω, 1KΩ, 2KΩ, 2.2KΩ, 4.7KΩ,5.6KΩ, 10KΩ, 22KΩ, 47KΩ, 100KΩ,1MΩ, to fulfill your variety requirement
- Upgrade version resistors with ±5% tolerance range, 1/4w film and thicker metal pins to have a better connection and stable performance features which help you finish the electrical experiments project faster and more smoothly
- Quantity: 1000pieces
- With complete certification including RoHS certificateC
Decode a four-band resistor
Read the bands from the end opposite the tolerance band, which is often spaced farther from the other three. Band one is the first significant digit, band two the second, band three the multiplier, and band four the tolerance. If orientation is unclear, rotate the resistor and check whether one end band is visibly separated; do not assume every resistor is easy to read.
| Color | Digit | Multiplier |
|---|---|---|
| Black | 0 | ×10⁰ |
| Brown | 1 | ×10¹ |
| Red | 2 | ×10² |
| Orange | 3 | ×10³ |
| Yellow | 4 | ×10⁴ |
| Green | 5 | ×10⁵ |
| Blue | 6 | ×10⁶ |
| Violet | 7 | ×10⁷ |
| Gray | 8 | ×10⁸ |
| White | 9 | ×10⁹ |
For digits d1 and d2 and multiplier exponent m, calculate:
R = (10 × d1 + d2) × 10^m
| Tolerance band | Typical tolerance |
|---|---|
| Brown | ±1% |
| Red | ±2% |
| Gold | ±5% |
| Silver | ±10% |
For example, red-violet-brown-gold means (10 × 2 + 7) × 10¹ = 270 Ω, with ±5% tolerance. The color-code screen should show the nominal value and tolerance separately, for example 270 Ω ±5%. Resistor finish, lighting and faded bands can make colors ambiguous, so use a meter when the exact value matters.
How the voltage-divider ohmmeter works
The design selects one known range resistor and measures a divider made with the unknown resistor. For the topology below, the known resistor is connected from the supply to the sense node, and the unknown resistor from that node to ground:
Rank #2

- Wide Range: 25 values, 40 pieces each, covers 95% of prototyping and repair work, including 1, 4.7, 10, 22, 47, 100, 220, 330, 470, 680, 1K, 2.2K, 3.3K, 4.7K, 10K, 22K, 33K, 47K, 68K, 100K, 220K, 330K, 470K, 680K, 1M
- Precision Tolerance: ±1 % metal film resistors machine-tested for stable, low-noise circuit performance
- Instant Identification: printed value strips eliminate color-band decoding, speed selection on the workbench
- Breadboard Friendly: full-length rigid tinned leads seat firmly in sockets for rock-solid connections
- Clear Case: transparent organizer with printed value chart & color-band reference prevents mix-ups and spills
5 V (regulated)
 |
 Rrange (selected known resistor)
 |
 +---- Arduino analog input (Vx)
 |
 Runknown
 |
GND
The voltage at the sense node is Vx = VCC × Runknown / (Rrange + Runknown). Rearranging gives Runknown = Rrange × Vx / (VCC − Vx). If the Arduino uses the same VCC as both divider supply and ADC reference, a 10-bit ADC reading N (nominally 0–1023) gives the convenient ratio form:
Runknown = Rrange × N / (1023 − N)
This expression assumes exactly the topology shown. If the unknown and known resistors are reversed, or the ADC measures across the other resistor, the formula must change. Matching the code to the actual wiring is essential. Values very close to 0 or 1023 are poorly conditioned: the calculated result becomes highly sensitive to a small ADC error. Report under-range or over-range, or change range, rather than presenting such a result as precise.
A single known resistor is a poor choice across a very wide resistance span. When the unknown is much smaller than the range resistor, the divider output is near zero; when much larger, it is near the supply. A reading near the middle of the ADC span generally gives better sensitivity, which is why the design switches among decade-spaced range resistors.
What’s actually slowing this PC down?
Pick the symptom - the matching free tool is one click away.
What the main components do
- ATmega328/Arduino Uno-class board: reads the analog input, drives the multiplexer address pins, scans buttons, computes results and draws the interface. The standard Uno Rev3 uses an ATmega328P, has six analog inputs and runs at 16 MHz; see Arduino’s Uno Rev3 documentation.
- CD4051: a digitally controlled eight-channel analog switch selects one range-resistor path using three address signals. It is not an ideal switch: on-resistance can affect low-ohm measurements, while leakage can matter on high-value ranges. Check the datasheet for the exact variant you buy and observe its voltage and signal limits.
- Eight range resistors: define the measurement ranges. The sketch must use the actual values, not merely the nominal labels. If you substitute values, update the constants or table.
- ST7735 TFT: a 1.8-inch color display, 128×160 pixels, driven with Adafruit GFX and ST7735 libraries.
- Six tactile buttons: Select, Back, left, right, up and down navigate the menus and choose colors or functions.
- Regulated 5 V supply: the original PCB design has no voltage regulator and recommends regulated 5 V. Do not assume a bare ATmega328 circuit and a complete Uno accept power in the same way.
Parts and construction choices
The original bill of materials includes an ATmega328 or compatible development board, six buttons and their pull-down resistor networks, a CD4051, eight range resistors, two eight-pin headers, a 128×160 TFT and a USB-B power connector, plus a PCB or prototype wiring. A breadboard or perfboard can be used to prototype the circuit, but breadboard contacts and leakage can undermine measurements at both extremes.
Rank #3

- BUILD BREADBOARD CIRCUITS AND MINI PROJECTS - Create LED indicators, button inputs, traffic-light sequences, light-activated circuits, RGB effects and buzzer alarms for electronics practice, classroom demonstrations and maker projects
- 235 PARTS FOR REPEATABLE EXPERIMENTS - Includes a 400-tie-point solderless breadboard, power module, jumper wires, Dupont wires, potentiometer, buttons, LEDs, resistors, capacitors, diodes, transistors, buzzers and light-sensitive components
- LEARN HOW CORE COMPONENTS WORK - Use the 74HC595 to expand outputs, the 4N35 optocoupler to explore signal isolation, PN2222 transistors to switch loads and 1N4007 diodes for polarity protection and rectification experiments
- POWER AND REWIRE PROJECTS QUICKLY - Use the breadboard power module for selectable 3.3 V or 5 V rails, while rigid jumpers and female-to-male leads simplify connections; use a suitable 6.5–9 V DC input and do not exceed 9 V
- COMPONENT KIT WITH CLEAR EXPECTATIONS - A controller board, programming cable and wall power adapter are not included; use a compatible microcontroller for coded projects and follow the current tutorial, datasheets and wiring guidance
For a more dependable measurement build, use 1% or better range resistors and measure their actual values with a trusted meter. Very low resistance is affected by wiring and contact resistance; very high resistance is vulnerable to leakage and contamination. A custom board can make the instrument neater, but it does not by itself make the reading accurate.
Build and firmware workflow
- Choose the controller route. An Uno or compatible ATmega328P development board is easiest for a first build because it provides USB programming and support circuitry. A bare ATmega328 needs a suitable clock, power decoupling and reset circuitry, and may need a bootloader and USB-to-serial adapter. Confirm adapter logic voltage and wiring before connecting it.
- Follow the project schematic for wiring. Connect the CD4051 address lines to three digital outputs, its selected resistor path into the divider, and the divider sense node to an analog input. Wire the six buttons as shown. Do not infer exact pin numbers from a generic Uno diagram; the project schematic and sketch determine them.
- Connect the TFT and test it alone. Install Adafruit GFX and the Adafruit ST7735 library. On an Uno, hardware SPI uses MOSI on D11 and SCLK on D13; CS, data/command and reset depend on the module and sketch. Run the library’s graphics test before adding the rest of the project. ST7735 boards vary in pin labels, voltage requirements and initialization offsets; select the appropriate
initR()variant for the module. - Enter actual range-resistor values. Update the sketch’s range table whenever the physical values differ. Incorrect constants create systematic errors even if the ADC and display work perfectly.
- Upload and test in stages. Select the correct board, processor variant where applicable, and port in Arduino IDE. First verify the display, then each button, then each mux channel, and only then take resistance readings.
- Calibrate against known resistors. Check multiple known values on every range using a trusted meter as a reference. Keep the useful range and observed error for each setting; do not assume one correction factor fixes every range.
Menu and software structure
The original interface is described as seven nested screen functions: a main menu leads to the ohmmeter or color calculator, with further screens for choosing bands. A state-machine design makes the same behavior easier to maintain: MAIN_MENU branches to OHMMETER or COLOR_CALCULATOR, and the calculator moves through band-selection states. Each button event updates the current state or selection, then the display redraws the relevant screen. Add button debouncing so a single press does not register as several.
For the color calculator, store digit and tolerance values in lookup tables instead of a long chain of conditionals. Track the first digit, second digit, multiplier and tolerance separately. For the meter, select a mux channel, allow the analog signal to settle, read the ADC, reject readings near either rail, and calculate using the actual selected range value. Multiple samples with a mean or median can reduce display jitter, but filtering does not correct calibration error.
The Tool Desk
Outbyte Driver Updater FREEScan for outdated or missing drivers - takes under a minuteDriver Scan →Outbyte PC Repair FREERepair Windows errors before they cause bigger problemsFix Now →Testing, calibration and troubleshooting
Display is blank, shifted or mirrored
Check CS, DC, reset, MOSI and clock wiring; confirm the module’s power and logic-voltage requirements; and run the graphics test on its own. A wrong ST7735 initialization/tab setting can cause a blank, offset or oddly oriented image. Modules may use different controllers or pinouts despite similar appearance.
Rank #4

- 525-Piece 17-Value Resistor Assortment: Stock your electronics bench with 17 useful resistance values covering 0 Ω to 1 MΩ; the assortment provides options for LED circuits, voltage dividers, pull-up and pull-down connections, sensors, prototypes and everyday circuit building
- 1/4W Metal Film with ±1% Tolerance: Each axial resistor is rated at 1/4 watt and uses a metal film design with ±1% resistance tolerance, giving makers, students and electronics hobbyists a dependable component supply for breadboard experiments and low-power circuits
- Extra Pieces of Commonly Used Values: Includes 50 pieces each of 100 Ω, 220 Ω, 1 kΩ and 10 kΩ resistors for frequently built circuits, plus 25 pieces each of the remaining 13 values so you can keep popular components on hand without running out as quickly
- Labeled Storage Makes Values Easy To Find: Resistors are separated by resistance value in individually labeled zip bags and stored together in a plastic case; the included resistor color-code guide helps beginners identify resistor bands and quickly select the value they need
- Breadboard-Friendly Axial Leads: Approx. 0.55 mm #24 SWG leads are easy to handle and insert into standard solderless breadboards, making the assortment useful for prototyping, circuit repair, electronics learning, STEM labs and microcontroller-based DIY projects
Readings are consistently wrong
Likely causes include range constants that do not match the installed resistors, a formula for the opposite divider orientation, incorrect mux channel mapping, or the sense wire connected to the wrong node. Measure the range resistors, print raw ADC counts and the selected channel over serial, test one channel at a time, and compare known resistors across several decades.
Readings fluctuate
Long wires, poor contacts, an unstable supply, floating inputs, high-value leakage or sampling too soon after switching the mux can all contribute. Keep the sense path short, ensure inputs have defined states, allow settling after a range change, and average or median-filter repeated samples. Keep fingers away from high-impedance nodes and clean flux or residue from the board.
Low-ohm values read high
Breadboard contacts, test leads, clips, headers and CD4051 on-resistance can be comparable to the unknown resistance. Use short, heavier wiring and consider a zero-offset check. If accurate milliohm measurements matter, this topology is not sufficient; a four-wire measurement approach is a better starting point.
Windows Errors? Fix Them Before They Spread
Repair common Windows errors and clear accumulated junk for a smoother, more stable PC - no reinstall needed.Free scan · no reinstallOutdated Drivers Are Slowing You Down
One free scan finds every outdated or missing driver and matches the right update for your exact hardware.Free scan · exact hardware matchHigh-ohm readings are unstable or low
Surface leakage, moisture, dust, mux leakage, input leakage and environmental noise become increasingly important at high impedances. Keep traces short and the board clean. Treat the nominal 20 MΩ range as approximate unless your own calibrated tests establish a useful practical range.
Best Value

- BOJACK resistor assortment kit contains 1000pcs resistors with variety values. Enough quantity for your DIY project and experiments
- These resistor kits including 25 different values: 1Ω,2.2Ω, 3.3Ω,4.7Ω, 10Ω, 22Ω, 47Ω, 68Ω, 100Ω, 150Ω, 220Ω, 330Ω, 470Ω, 1KΩ, 1.5KΩ,2KΩ, 2.2KΩ, 4.7KΩ,5.6KΩ, 10KΩ, 15KΩ,22KΩ, 47KΩ, 100KΩ,1MΩ, to fulfill your variety requirement
- Upgrade version resistors with ±5% tolerance range, 1/2w film and thicker metal pins to have a better connection and stable performance features which help you finish the electrical experiments project faster and more smoothly
- Quantity: 1000pieces
- With complete certification including RoHS certificate
Buttons misbehave or a bare chip will not upload
For buttons, verify pull-down wiring and pin assignments and add debouncing; a redesigned circuit may instead use active-low INPUT_PULLUP logic. For a bare ATmega328, check the clock, bootloader, adapter voltage, RX/TX crossover, reset signaling and selected processor/board configuration. A standalone-chip build needs a USB-to-serial programming path if it has no onboard USB interface.
Accuracy, limits and safe use
The ATmega328’s 10-bit ADC produces nominal counts from 0 to 1023, but resolution is not the same as accuracy. Error also comes from reference variation, range-resistor tolerance, switch resistance and leakage, ADC noise, contact resistance, temperature, wiring and supply stability. Using the same supply for divider excitation and ADC reference allows supply variation to cancel in the count-ratio equation to a degree; it does not remove the other errors. Calibrate each range using measured resistor values and known reference resistors, then state only the performance your own tests support.
Use the meter only on an isolated passive resistor. Remove it from its circuit first; never connect this device to an energized circuit. Do not measure a capacitor immediately after charging it, and do not assume the circuit is safe for batteries, semiconductors or other components. At low resistance, measurement current and contact resistance matter; at high resistance, leakage and cleanliness matter. For dependable measurements or electrical safety work, use a suitable commercial multimeter.
Do these 3 things before closing this tab:
1Fix the driver behind crashes, sound loss and screen glitches2Repair Windows errors before they cause bigger problems3Scan for outdated or missing drivers - takes under a minuteUseful upgrades
- Use measured range-resistor values and per-range calibration corrections, storing constants in EEPROM if desired.
- Add automatic or hybrid ranging only after the manual measurement path is stable; automatic switching needs rail checks and settling time.
- Use a more capable ADC for improved resolution, while recognizing that better resolution alone does not fix reference, resistor or leakage errors.
- Use four-wire sensing for low-ohm work, and a carefully cleaned, guarded layout for high-impedance work.
- Add five- and six-band decoding as a separate software extension; the original calculator is four-band only.
- Choose a replacement board or display as a redesign, not a guaranteed drop-in part. Check controller, pin mapping, logic levels, initialization and code compatibility.
For further project detail, consult the original All About Circuits project, the Uno Rev3 documentation and the Adafruit ST7735 library examples.
Quick Recap
Product prices and availability are accurate as of the date/time indicated and are subject to change. Any price and availability information displayed on Amazon at the time of purchase will apply.

