Outdated Drivers Are Slowing You Down
One free scan finds every outdated or missing driver and matches the right update for your exact hardware.Free scan · exact hardware matchPC Slower Than It Used to Be?
A free scan shows the junk files, broken settings and background clutter dragging Windows down - then fixes them in one click.Free scan · Windows 10 & 11Some links on this page are affiliate links: if you buy through them we may earn a commission, at no extra cost to you.
This lab builds an op-amp-style circuit from six individual bipolar transistors, then tests it open-loop, as a voltage follower, and as a noninverting amplifier with a nominal gain of two. It is a teaching circuit for exploring differential pairs, current mirrors, and negative feedback—not a precision substitute for an integrated op amp.
What this circuit builds
A discrete op amp performs an op-amp function using separate components rather than a single integrated-circuit package. This design uses six BJTs: Q3 and Q4 form the differential input pair; Q1 and Q2 form a PNP current-mirror load; and Q5 and Q6 form an NPN current mirror that establishes the pair’s bias, or tail, current. Rprg controls the lower mirror. The output measurement point in the experiments is Q4’s collector, measured relative to circuit ground.
The current mirrors improve on a simple differential-amplifier arrangement. The upper mirror acts as a high-impedance load, which supports greater voltage gain than a basic load resistor. The lower mirror sets the input pair’s current more consistently than a resistor alone. Neither mirror makes the circuit precise: transistor mismatch, temperature, supply variation, and wiring still affect its behavior. The project is part of a sequence introducing discrete semiconductor circuits (background on discrete semiconductor projects).
Parts and equipment
| Quantity | Part |
|---|---|
| 2 | 6 V batteries |
| 4 | NPN transistors; 2N2222 or 2N3403 recommended |
| 2 | PNP transistors; 2N2907 or 2N3906 recommended |
| 2 | 10 kΩ single-turn linear potentiometers |
| 1 | 270 kΩ resistor |
| 3 | 100 kΩ resistors |
| 1 | 10 kΩ resistor |
Use a breadboard or equivalent prototyping board, jumper wires, and a digital multimeter for the voltage measurements. An oscilloscope is optional but can help reveal the rapid output transition in open-loop operation or diagnose erratic behavior. The specified two 6 V batteries provide the project’s nominal supply arrangement; do not substitute an arbitrary supply voltage. The project does not state a maximum supply rating.
#1 Best Overall

- All products are tested for stability, consistency and reliability,Ensure product excellence
- Save time with this handy box full of the most practical and common electronic components
- Easy to store: Each different component is packaged in a plastic bag, Resistors values are stamped with the according value
- Electronic components set include: diodes, resistors, transistors, LED diodes, electrolytic capacitors, ceramic capacitors
- Electronics component kit: This is a great assortment of components for electronic professionals or enthusiasts
Check the exact manufacturer datasheet for every transistor before wiring it. Part number alone does not guarantee the same lead order across package styles or manufacturers; a 2N2222 example datasheet shows why the package-specific pin configuration matters (2N2222 datasheet example). Confirm polarity and emitter, base, and collector locations with power disconnected.
Assemble and check the circuit
Follow the original simple op-amp project schematic and breadboard layout for the exact node-to-node wiring. The transistor roles above identify the functional blocks, but are not a substitute for the schematic: do not infer transistor lead connections from device names or a generic pinout.
Rank #2
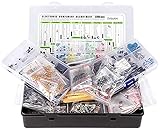
- Box including: Resistors, Transistors, Diodes, Zeners, Inductors, ICs, Crystal Oscillators, PCBs, LEDs, Mini Switch, Potentiometer, Trim Pots, LDRs, Headers, Terminals
- Includes 2200 pcs of the most important and usefull Eletronic Components Electronic Component Assortment
- Assorted by Professionals, made for Professionals
- Comes in a recyclable 11 * 7 * 2.5 inch Box, well organized
- Place the six transistors and resistors according to the project schematic. Keep the two 10 kΩ potentiometers available as adjustable input-voltage dividers.
- Verify each transistor’s NPN or PNP polarity and its package-specific lead order. Check that the current mirrors and differential pair match the schematic.
- With power disconnected, inspect battery polarity, the shared ground reference, resistor placement, and breadboard rows. Confirm that the potentiometers are wired as voltage dividers, not as unintended series resistors.
- If available, use a current-limited dual-rail bench supply for the initial power-up, set to reproduce the project’s supply arrangement. Otherwise use the specified batteries and stop immediately if a component heats unexpectedly.
- For voltage readings, put the meter’s black probe on circuit ground and the red probe on the node under test. Measure output at Q4’s collector; avoid slipping probes across adjacent breadboard contacts.
Test it open-loop as a comparator
With no feedback connection, the circuit has high open-loop gain: a small difference between its inputs can cause a large output change. Q3 is the noninverting input (V+), and Q4 is the inverting input (V−). This comparator-like response is useful for the demonstration, but it does not qualify the circuit as a general-purpose comparator.
Quick wins for a faster PC:
Repair Windows errors before they cause bigger problemsFix Now →Scan for outdated or missing drivers - takes under a minuteDriver Scan →Clear out junk files and repair common Windows errorsFree Scan →- Use the left potentiometer to set Q3’s input to 2.5 V. Set Q4’s input to 2.0 V with the other potentiometer.
- Measure Q4’s collector voltage relative to ground.
- Slowly sweep Q4’s input while watching the output. As the inputs approach and cross, the output should change rapidly.
- Reverse the test: set Q4 to 2.5 V and Q3 initially to 2.0 V, measure the output, then slowly sweep Q3’s input.
Raising V+ should drive the output in the same direction; raising V− should drive it in the opposite direction. The output is not expected to be a clean logic-level signal with specified thresholds or switching behavior.
Rank #3

- 【Package Included】Electronic components set includes 6 different kinds components: LED diodes, metal film resistors, electrolytic capacitor package, common diodes, ceramic capacitors, common transistor, 1400 pcs in total.
- 【High Quality Electronic Components】This electronic component assortment kit is adopted with high quality material which is safe and durable. All products are tested for stability, consistency and reliability, so you can use them with confidence.
- 【Easy to sort & store 】Each different component is well organized , and you can find the component easily with the sticky note stamped on the bag. Moreover, all components are packaged in a plastic bag which can protect them form damaged and lost.
- 【Great component kit】This is a great assortment of components for electronic professionals or enthusiasts and1400pcs components will meet your various needs. It's value for money!
- 【Service Guarantee】If you have any questions about this electronic component assortment kit, please feel free to contact us and we will reply within 24 hours. Sincerely wish you a happy shopping!
Connect negative feedback for a voltage follower
Negative feedback turns the high-gain open-loop stage into a circuit whose behavior is controlled by its feedback connection. For a follower, reconnect the output to the inverting input so the amplifier adjusts its output to track the noninverting input.
- Power down the circuit.
- Connect the output to Q4’s inverting input; at transistor level, connect Q4’s collector and base as shown in the project instructions.
- Remove the right-hand, inverting-input potentiometer.
- Power up, vary the remaining input potentiometer, and measure both input and output relative to the same ground.
The output should follow the input reasonably closely. The project reports deviations of no more than a few hundredths of a volt under its experiment conditions; treat that as an observation, not a guaranteed specification for different transistors or builds.
Rank #4

- 【100% brand new and high quality】All products are tested for stability, consistency and reliability,Ensure product excellence.
- 【Include】1、16 Value 32pcs IC;2、4 Value 8pcs Voltage Regulator tube;3、4 Value 4pcs Digital Tube;4、19 Value 190pcs Transistor;5、18 Value 36pcs Adjustable Resistors;6、5 Value 50pcs Photoresistors ;7、41 Value 820PCS Metal Film Resistor;8、14 Value 140pcs Zener Diodes;9、8 Value 100pcs Diode;10、11 Value 205pcs LED Diodes;11、14 Value 124PCS Aluminum Electrolytic Capacitor;12、30 Value 300PCS Ceramic Capacitors;13、4 Value 4pcs PCB;14、2 Value 10pcs Switches;15、2 Values 10pcs Headers ;16、Terminals 5pcs
- [Full assortment] The product contains 16 kinds of electronic components, each component contains a variety of specifications, a total of 2038PCS, fully covering the range of commonly used electronic components. A set of products to meet all your needs.
- 【Easy to store】Each of the different components is packaged in a plastic bag and placed in a plastic container. Easy to store and remove.
- 【Value for money】Minidodoca Electronic Components Package includes 16 different kinds components, 2038pcs in total,100% compatible for Arduino UNO, MEGA, Raspberry Pi, PLC, This is a great assortment of components for electronic professionals or enthusiasts.
Build a noninverting amplifier with nominal gain of two
For a noninverting amplifier, the ideal closed-loop voltage gain is Av = 1 + Rf/Rg, where Rf is the feedback resistor from output to the inverting input and Rg connects the inverting input to ground. With equal resistor values, Av = 1 + 1 = 2. Use the project’s equal-value feedback network and retain Q3 as the signal input.
Measure the input and output voltages and compare their ratio with two. A small error is normal in this discrete circuit: mismatch and imperfections in the differential stage prevent ideal behavior. The project notes that an additional gain stage could reduce the relative effect of such errors, but that is beyond this six-transistor build.
Best Value
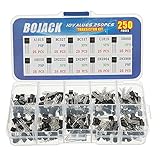
- BOJACK High Quality Power Transistors Assortment Kit.
- Product Name: Power Transistors
- Transistor Type: PNP & NPN
- Transistor Model: 10 Values, Include: A1015 PNP, BC327 PNP, BC337NPN, C1815 NPN, S8050 NPN, S8550 PNP, 2N2222 NPN, 2N2907 PNP, 2N3904 NPN, 2N3906 PNP.
- Package Quantity: 250pcs (Each model 25pcs), Packed in A Rugged Convenient Re-sealable Plastic Storage Case.
Explore Rprg without overheating the circuit
Rprg controls the lower current mirror and therefore affects the differential-pair current and other performance characteristics. The project recommends experimenting from 10 kΩ to 1 MΩ and explicitly warns not to go below 10 kΩ: excessive current can overheat the mirror transistors and cause thermal runaway.
- Power down before changing Rprg.
- Try values only within the stated 10 kΩ–1 MΩ range.
- After each change, note output behavior, input/output error, supply current if you can measure it safely, and whether any transistor warms.
- Stop and disconnect power if a transistor becomes hot, current rises unexpectedly, or the output shifts substantially as the circuit warms.
Reducing resistance generally raises the programmed current; that may affect transconductance, gain, or speed, but also increases dissipation and heating. Because the transistors are discrete and not guaranteed to be matched or thermally coupled, results can vary. An adjustable bias arrangement is sometimes called programmable, unlike the factory-fixed bias of most packaged op amps.
Troubleshoot by symptom
| Symptom | Checks |
|---|---|
| No useful output or output pinned near a rail | Verify supply polarity and ground reference, transistor orientation, current-mirror wiring, open emitter or collector connections, and the measurement node. Check for loose breadboard contacts or a misplaced resistor. |
| Output changes in the wrong direction | Confirm Q3 is V+ and Q4 is V−, and that neither transistor polarity nor input-potentiometer wiring is reversed. |
| Follower does not track its input | Check that output is connected to Q4’s inverting input, the right-hand potentiometer is removed, Q3 remains the noninverting input, and input and output are measured against the same ground. The circuit may also be outside its usable operating range or saturated. |
| Gain differs from two | Verify the equal feedback-resistor values and wiring first. Then consider transistor mismatch and operating temperature; exact gain is not specified for this build. |
| A transistor heats or current rises | Disconnect power. Confirm Rprg is not below 10 kΩ and inspect the lower current mirror for wiring or polarity errors. |
| Erratic behavior or apparent oscillation | Shorten breadboard wiring, inspect connections, avoid arbitrary capacitive loads, and use an oscilloscope if available. Supply bypass capacitors near the circuit may help, but are a practical addition rather than part of the project’s listed parts. |
If a substitution is necessary, preserve transistor polarity and check voltage/current suitability, package pinout, and small-signal behavior. The recommended part numbers are not a promise that arbitrary NPN or PNP transistors will operate identically.
The Tool Desk
Outbyte Driver Updater FREEScan for outdated or missing drivers - takes under a minuteDriver Scan →Outbyte PC Repair FREEClear out junk files and repair common Windows errorsFree Scan →What this teaching circuit cannot promise
This build makes the internal relationship between a differential pair, current mirrors, and feedback visible. It is useful for learning and low-voltage bench experiments, not as a drop-in replacement for a modern integrated op amp. The project provides no guaranteed open-loop gain, gain-bandwidth product, input offset or bias current, common-mode range, output swing or current, slew rate, frequency compensation, short-circuit protection, matching tolerance, or thermal tracking. Accordingly, it does not establish precision, stability with arbitrary feedback networks, or compatibility with arbitrary loads. For the project’s original experiment sequence and schematic, see All About Circuits’ Simple Op Amp lab.
Quick Recap
Product prices and availability are accurate as of the date/time indicated and are subject to change. Any price and availability information displayed on Amazon at the time of purchase will apply.

