Windows Errors? Fix Them Before They Spread
Repair common Windows errors and clear accumulated junk for a smoother, more stable PC - no reinstall needed.Free scan · no reinstallCrashes, No Sound, or Screen Glitches?
Random freezes, missing sound and display glitches usually trace back to one bad driver. Find and replace yours safely.Free scan · under a minuteTo create a banner from web content, first choose where it will appear and what it should communicate. Then gather images and text you have permission to use, build a layout at the destination’s required dimensions, and export and inspect a separate web-ready image. A webpage can be a source of ideas or material, but simply being able to view or download its images does not give you permission to reuse them.
1. Choose the banner’s destination and message
Start by identifying the placement: a website hero, display ad, email header, or social image may have different dimensions, file limits, and cropping behavior. Check the destination’s current specifications before you make the final canvas. There is no single banner size that suits every placement.
Write down what the viewer should understand or do. For a promotion, use a concise headline and make the call to action readable. For a banner summarizing an article, choose one central idea rather than trying to squeeze the whole page into the image. Find out whether the destination crops, overlays, or responsively resizes the image, and leave room around essential text and visuals.
2. Gather material you are allowed to use
Use your own images and graphics, assets licensed for the intended use, or material you have permission to use. Keep a note of each asset’s source and any attribution or usage conditions. An image being visible on a website—or downloadable from it—does not establish that you may reuse it in a banner.
Fair use in the United States is a fact-specific assessment involving four factors: the purpose and character of the use, the nature of the work, the amount used, and the effect on the work’s market. The U.S. Copyright Office cautions that no fixed percentage or amount automatically makes a use permissible. If a commercial use is uncertain, seek permission or legal advice rather than relying on a pixel-count or attribution shortcut.
3. Create the layout
Make a canvas for the destination’s specifications, then establish a simple visual hierarchy: headline first, supporting detail second, and an image or graphic that reinforces the subject. Keep important content clear of edges and likely crop areas. Check contrast and text size at the scale people will actually see; text that looks legible while editing may be too small in the published banner.
Use a design tool or editor
A template-based workflow is one option: choose a banner template, customize its text, fonts, colors, and images, then download or share the result. Canva documents this kind of workflow. In Photoshop, Adobe’s tutorial demonstrates building a banner with shape layers and layer styles. These are examples, not required tools; use an editor that lets you set the canvas size and retain a revisable source file.
Use a webpage screenshot only when it fits the design
A screenshot can supply a visual reference or show a permitted portion of a page, but it is not a substitute for permission to reuse third-party content shown on that page. For a manual capture, open the page in a browser, set the window to the target viewport, position the content you intend to show, and capture the screen. Crop and compose the result in an image editor, checking that browser controls, unrelated content, and private information are not included.
The Tool Desk
Outbyte PC Repair FREERepair Windows errors before they cause bigger problemsFix Now →Outbyte Driver Updater FREEFix the driver behind crashes, sound loss and screen glitchesFind Drivers →Or skip the browser setup: ScreenshotNeo can return a website capture as an image. For example, this cURL request saves a capture of a page; use only page content you are permitted to reproduce in your banner:
curl -G "https://api.screenshotneo.com/v1/shot" -d access_key=YOUR_API_KEY --data-urlencode url=https://stripe.com -o shot.webpSee the ScreenshotNeo documentation for API details. A screenshot may include content owned by others, so capturing it does not itself grant reuse rights.
4. Set dimensions and export
As examples of ad formats, Canva’s web-ad guide lists these pixel dimensions:
#1 Best Overall

- Premium Inkjet Matte Polypropylene Banner roll
- Size: 24 inch x 100 ft. Opacity: 90%
- 6 Mil Thickness, 2 inch Core
- Brand New, USA Seller
- Compatible with a versatile range of inks, including eco solvent pigment, latex, UV-curable, and dye inks.
| Format example | Dimensions |
|---|---|
| Leaderboard | 728 × 90 px |
| Medium rectangle | 300 × 250 px |
| Large rectangle | 336 × 280 px |
| Wide skyscraper | 160 × 600 px |
These are examples, not universal or guaranteed-current requirements for a particular website or platform. Confirm the destination’s dimensions, safe areas, accepted formats, and file-size limits before exporting.
Quick Recap
Best Value
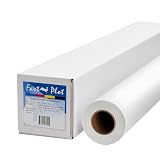
- Optimal for producing vibrant indoor banners, posters, and signs with exceptional print quality.
- Residue-free adhesive for a clean application and removal.
- Compatible with a versatile range of inks, including pigment, latex, UV-curable, and dye inks.
- Delivers photo-quality output with UV protection when using pigment, latex, or UV ink.
- Durable yet lightweight material, easily hangable from any location.
Rank #4

- Equipped with a 2-inch core, our product ensures seamless compatibility with different printing setups.
- Compatible with Pigment, Latex, and UV Curable inks, our product provides a versatile and adaptable solution for various printing needs.
- Versatile and cost-effective, our durable solution is a top choice for printing main street and boulevard banners on scrim vinyl.
- Renowned in the banner printing industry, our material boasts waterproof, scratch-resistant, and tear-resistant properties, ensuring durability and fade resistance.
- Our product guarantees 100% satisfaction with a money-back assurance, delivering optimal results for your confidence and maximum investment.
Rank #3
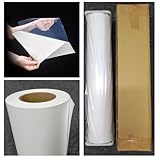
- Premium Inkjet self adhesive Matte Polypropylene Banner roll
- Size: 36 inch x 100 ft. Opacity: 90%
- Weight : 6 Mil Thickness, 2 inch Core
- Brand New, USA Seller
- Compatible with a versatile range of inks, including eco solvent pigment, latex, UV-curable, and dye inks.
Rank #2

- 【WIDE INK COMPATIBILITY & VERSATILE PRINTING】Compatible with Pigment, Dye, Latex, Eco-Solvent, and UV inks. Designed for smooth, high-resolution printing, making it perfect for custom crafts, art prints, window decals, product labels, store signage, and stickable banners
- 【PREMIUM HEAVY-DUTY VINYL ROLL】Features a durable 6 Mil thickness with a standard 2-inch core, measuring 24 inches x 100 feet. This matte self-adhesive vinyl offers a professional finish, exceptional durability, and high tear resistance for both indoor and outdoor use
- 【WATERPROOF & LONG-LASTING】Built to withstand moisture and daily wear. The waterproof photo-quality matte coating ensures vibrant colors and crisp details that won't smudge or fade over time, giving your projects a premium look
- 【EASY TO CUT & APPLICATION FRIENDLY】Easy to cut with standard vinyl cutters, craft plotters, or scissors. The peel-and-stick backing applies smoothly to various clean, flat surfaces without peeling or curling at the edges
- 【PERFECT FOR PERSONALIZED GIFTS & DIY】Ideal for creating unique personalized stickers, customized gift wrapping, and custom decals. Show your creativity and heart by adding custom printed designs to gifts for friends, family, or customers
Keep an editable source file if you may need revisions. Adobe recommends saving a layered Photoshop project separately from the web image. Choose an export format according to the image and destination: Adobe’s tutorial names JPEG, PNG, and SVG as possible web formats, while Canva’s banner instructions list JPG and PNG downloads. Check whether transparency is needed and which formats the destination accepts, then inspect the downloaded export rather than assuming it matches the editor preview.
Independent reader supportYour contribution helps us test, update, and keep practical guides available for everyone.5. Check the published-size result and accessibility
- View the exported banner at its actual display size and at likely screen widths.
- Confirm that the destination’s crop or responsive resizing does not cut off the headline, call to action, or focal image.
- Check the final file’s dimensions, format, and size against the destination’s requirements.
- If the image conveys information on a webpage, provide alternative text describing that information rather than merely calling it a “banner.” Adobe Commerce Page Builder, for example, includes an alternative-text field for a banner image. Decorative images may be handled differently by the site’s accessibility implementation.
Product prices and availability are accurate as of the date/time indicated and are subject to change. Any price and availability information displayed on Amazon at the time of purchase will apply.

