The Raspberry Pi 5 can still drive an old TV, VCR, CRT monitor, or composite capture device, but it is not as simple as plugging a yellow RCA cable into the board. Unlike earlier Raspberry Pi models with a built-in 3.5 mm analogue AV jack, the Pi 5 exposes composite video through dedicated board pads, so you need the right wiring and a few configuration changes before you see a picture.
Composite output is useful for retro gaming setups, legacy displays, video art projects, and low-cost monitoring, but it comes with clear limits. It is standard-definition only, much softer than HDMI, and more sensitive to cable quality, TV standards, and grounding. A correct setup involves enabling the output, choosing PAL or NTSC as needed, wiring signal and ground properly, and testing with a display or capture device that can handle analogue video.
What You Need for Raspberry Pi 5 Composite Video
Composite video on the Raspberry Pi 5 is not available from a 3.5 mm AV jack as it was on some older Raspberry Pi models. Instead, the analog video signal is exposed on a small two-pin composite video header footprint on the board. To use it, you need a way to connect that board-level signal safely to an RCA composite input on a TV, monitor, VCR, or USB capture device.
The basic parts are inexpensive, but the setup is less plug-and-play than HDMI. You will need the Raspberry Pi 5 itself, a suitable power supply, a microSD card with Raspberry Pi OS, and access to the operating system so you can edit the boot configuration. For the video connection, you need a two-pin cable, header, or soldered wires from the composite video pads, plus an RCA plug or RCA breakout lead to connect to the display.
Quick wins for a faster PC:
Fix the driver behind crashes, sound loss and screen glitchesFind Drivers →Repair Windows errors before they cause bigger problemsFix Now →Scan for outdated or missing drivers - takes under a minuteDriver Scan →#1 Best Overall
![Adafruit A/V and RCA (Composite Video, Audio) Cable for Raspberry Pi [ADA2881]](https://m.media-amazon.com/images/I/517ecmnCfPL._SL160_.jpg)
- Great way to turn your Pi 3, 2, A+ or B+'s output into a full on composite video and audio device
- 5 ft long cable
- Get full RCA visuals and sound with this cable
Required hardware
- Raspberry Pi 5: Composite output is available from the board’s dedicated composite video header footprint, not from the HDMI ports.
- 5 V USB-C power supply: Use the official Raspberry Pi 27 W USB-C power supply or another reliable supply. Weak power can cause boot failures or unstable output.
- microSD card with Raspberry Pi OS: A current Raspberry Pi OS image is recommended, since Raspberry Pi 5 firmware and display behavior depend on up-to-date boot files.
- Composite video connection: Use a two-pin header, jumper wires, or carefully soldered wires connected to the composite video signal and ground pads on the board.
- RCA connector or adapter: The signal normally needs to end in a yellow RCA composite plug for most TVs and capture devices.
- Composite-capable display or capture device: This can be an older television, a monitor with AV input, an AV-to-HDMI converter, or a USB composite capture dongle.
If your Raspberry Pi 5 does not already have pins fitted to the composite header footprint, you may need to solder a small two-pin header or solder wires directly to the pads. A header is cleaner if you plan to disconnect and reconnect the cable, while direct wiring is acceptable for a permanent installation. Keep the cable short if possible, and use a cable with a proper ground connection to reduce noise, shimmer, and interference in the picture.
Tools and accessories
- Small soldering iron and solder: Needed if no header is fitted and you are attaching wires to the composite pads.
- Multimeter: Useful for checking continuity between the Raspberry Pi ground pad and the RCA shield before powering on.
- RCA cable: A standard yellow composite video cable is enough; red and white audio plugs, if present, are not used for Raspberry Pi 5 composite video.
- Keyboard, mouse, and HDMI display or SSH access: Helpful for initial configuration, especially before composite output is enabled.
Composite video carries video only, not audio. If you need sound, use HDMI audio, USB audio, Bluetooth audio, an I2S audio HAT, or another separate audio output method. Also keep in mind that composite video is low resolution and interlaced compared with HDMI. It is well suited for CRT televisions, retro projects, kiosks, and compatibility with legacy AV equipment, but it will look soft on modern flat panels and will not provide the sharp desktop experience you get from micro-HDMI.
Understanding Composite Video on the Raspberry Pi 5
Composite video on the Raspberry Pi 5 is an analog video output intended for older televisions, small backup monitors, CRT displays, and capture devices that accept a single yellow RCA-style video input. Unlike HDMI, which carries digital video and audio at high resolution, composite video combines brightness, color, and sync information into one low-resolution analog signal. This makes it broadly compatible with older equipment, but it also means softer image quality, visible color artifacts, and a much lower usable desktop resolution.
On the Raspberry Pi 5, composite video is not provided through the 3.5 mm AV jack used on some earlier Raspberry Pi models. Instead, the signal is available from a dedicated pair of pads or pins on the board, intended for a two-wire composite connection: signal and ground. Because of this change, you cannot simply plug in an old Raspberry Pi TRRS AV cable and expect video to appear. You need to connect the composite signal output to the center pin of an RCA plug, and connect Raspberry Pi ground to the RCA shield.
The composite output is generated by the Raspberry Pi’s display hardware and must be enabled in software before it will produce a usable picture. By default, Raspberry Pi OS is normally configured for HDMI output, especially on the Pi 5, so a composite-connected screen may remain blank until the correct configuration is applied. Once enabled, the Pi outputs a standard-definition signal such as PAL or NTSC, depending on the setting you choose. PAL is commonly used in Europe, Australia, and parts of Asia and Africa, while NTSC is common in North America and Japan.
How composite differs from HDMI
- Resolution: Composite video is standard definition, typically around 480i for NTSC or 576i for PAL, far below 720p, 1080p, or 4K HDMI modes.
- Signal type: HDMI is digital and resistant to minor interference; composite is analog and more sensitive to cable quality, grounding, and noise.
- Image clarity: Text on the desktop can look blurry over composite, especially small fonts, thin lines, and detailed icons.
- Audio: Composite video carries video only. Audio must be handled separately, for example through HDMI, USB audio, Bluetooth, or an external audio output solution.
- Boot behavior: HDMI is usually detected automatically, while composite output often requires explicit configuration before the display works.
Composite video is best suited to console-style projects, retro gaming front ends, camera preview displays, installer screens, signage on old TVs, or situations where the screen only needs to show simple menus and large text. It is not ideal for normal desktop use, web browsing, programming, or any task where sharp text and high resolution matter. If you are using Raspberry Pi OS with the full desktop, increasing font sizes and using a simple theme can make the display easier to read.
It is also useful to understand that composite video is a single-ended analog signal, so the ground connection is just as significant as the video connection. A poor ground, a loose RCA plug, a long unshielded cable, or wiring the signal and ground backwards can produce no picture, rolling sync, unstable colors, or heavy noise. Keeping the cable short, using shielded cable where possible, and confirming the TV is set to the correct AV input will make later setup and troubleshooting much easier.
Enabling Composite Video in the Raspberry Pi Configuration
On the Raspberry Pi 5, composite video is disabled by default. Unlike HDMI, it will not usually become active just because you connect a cable to a television or capture device. You need to enable the analogue TV output in the boot configuration, then reboot the board. On current Raspberry Pi OS releases, the file you need is /boot/firmware/config.txt. On older installations it may be /boot/config.txt, but Raspberry Pi OS Bookworm and later use the /boot/firmware/ path.
Do these 3 things before closing this tab:
1Scan for outdated or missing drivers - takes under a minute2Clear out junk files and repair common Windows errors3Fix the driver behind crashes, sound loss and screen glitchesOpen a terminal on the Raspberry Pi, or edit the boot partition from another computer. If you are working directly on the Pi, run:
sudo nano /boot/firmware/config.txt
Scroll to the bottom of the file and add the following line:
enable_tvout=1
Save the file, exit the editor, and reboot:
sudo reboot
After the reboot, the Raspberry Pi 5 will enable its composite video output. This setting is required before you can get a signal from the composite output pads or any adapter board wired to them. If you are using the desktop environment over HDMI while making the change, keep the HDMI display connected until you have confirmed the composite output works, especially if the Pi is in a case or installed somewhere difficult to access.
Rank #2
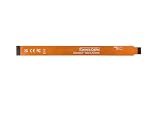
- This is the Official Pi CSI FPC Flexible Cable, Compatible with Raspberry Pi 5, 22Pin to 15Pin. 200mm/20cm/0.65ft Length.
- Suitable for Connecting RPi 5 to CSI Camera Modules.
- Please Attention: DSI cable and CSI cable are not compatible and cannot be mixed.
Setting the TV format in config.txt
Many televisions and capture devices expect either NTSC or PAL. If the wrong TV standard is selected, the image may roll, appear black and white, or fail to lock at all. You can set the standard in the same configuration file using sdtv_mode. For most North American and Japanese NTSC equipment, use mode 0. For most European, Australian, and many other PAL devices, use mode 2.
sdtv_mode=0— NTSC, commonly 480i at approximately 60 Hzsdtv_mode=2— PAL, commonly 576i at 50 Hz
A typical NTSC configuration looks like this:
enable_tvout=1

sdtv_mode=0
A typical PAL configuration looks like this:
enable_tvout=1

sdtv_mode=2
You can also set the aspect ratio if your display handles it poorly. The setting sdtv_aspect=1 selects 4:3, while sdtv_aspect=3 selects 16:9. Composite video is low-resolution interlaced video, so 4:3 is often the more practical choice for old CRT televisions and small analogue monitors.
What changes after composite output is enabled
Composite video is much more limited than HDMI. It carries standard-definition video only, and the picture will be softer than even a low-resolution HDMI display. Fine text in the Raspberry Pi desktop can be hard to read, so composite is best suited to simple interfaces, retro-style output, status screens, video playback for analogue equipment, or headless systems that only need occasional local display access.
If you later want to return to an HDMI-only setup, edit /boot/firmware/config.txt again and remove or comment out enable_tvout=1 by placing a # at the start of the line. Reboot after making the change. Keeping a backup copy of the original configuration file is a good habit before changing display settings, since a wrong video mode can leave you with no visible output until the file is corrected from another computer.
Wiring the Composite Video Output Correctly
On the Raspberry Pi 5, composite video is not available from the 3.5 mm audio jack as it was on some earlier Raspberry Pi models. Instead, it is exposed on a small two-pin composite video header footprint on the board. To use it, you need to connect the video signal pin to the centre conductor of an RCA composite cable, and connect ground to the outer shield of that same RCA connector. This gives you the yellow video plug expected by most TVs, AV receivers, VCRs, and USB composite capture adapters.
The composite video header is located near the edge of the Raspberry Pi 5 board and is usually marked for TV output. If your board does not have pins soldered into this footprint, you can either solder in a suitable 2-pin header or solder the cable directly to the pads. For a temporary setup, a properly secured two-wire connection can work, but for regular use a soldered header or purpose-made adapter is much more reliable. Poor contact on either wire can cause rolling video, black-and-white output, flickering, or no signal at all.
Basic RCA wiring
| Raspberry Pi 5 connection | RCA composite plug connection | Purpose |
|---|---|---|
| Composite video signal | Centre pin | Carries the video picture signal |
| Ground | Outer ring / shield | Provides the signal reference and shielding |
If you are cutting an existing RCA cable, the inner insulated wire is normally the video signal and the braided or foil shield around it is ground. Strip the cable carefully so the shield does not touch the centre conductor. A short circuit between signal and ground will usually result in a blank screen, and while it is unlikely to permanently damage the TV input, it should be fixed before continuing. Keep the cable reasonably short, especially if you are using thin or unshielded wire; composite video is an analog signal and is more sensitive to noise than HDMI.
What’s actually slowing this PC down?
Pick the symptom - the matching free tool is one click away.
Practical wiring steps
- Power off the Raspberry Pi 5 and unplug the USB-C power supply before making any connections.
- Identify the composite video signal pad and the ground pad on the Raspberry Pi 5 TV output header.
- Connect the signal pad to the centre conductor of the yellow RCA plug.
- Connect the ground pad to the RCA plug’s outer shield or sleeve.
- Check the wiring with a multimeter if available, confirming continuity and checking that signal is not shorted to ground.
- Connect the RCA plug to the TV’s composite video input, usually labelled AV, Video In, or shown as a yellow socket.
- Power on the Raspberry Pi only after the wiring is secure.
Composite video carries picture only, so audio must be handled separately. On a Raspberry Pi 5, that usually means HDMI audio, USB audio, Bluetooth audio, or an external audio HAT or DAC, depending on your setup. If you are connecting to an older television that expects yellow, white, and red RCA plugs, the yellow connector is video, while the white and red connectors are left and right audio. The Raspberry Pi 5 composite header will only feed the yellow video input.
For the cleanest result, use a proper 75-ohm composite video cable or a short RCA lead rather than loose jumper wires. Jumper wires may work for a quick bench test, but they can pick up interference and create unstable sync, especially near power supplies, motors, LED strips, or long cable runs. Once the wiring is correct, the remaining setup depends on the configured TV standard, such as PAL or NTSC, and whether the display or capture device supports the signal being generated.
Setting the Correct TV Standard and Resolution
After composite video has been enabled and wired, the next step is to make sure the Raspberry Pi 5 is generating a signal your television or capture device can understand. Composite video is not a flexible high-resolution output like HDMI. It normally uses either PAL or NTSC, and the selected standard affects refresh rate, visible picture height, color encoding, and compatibility with older displays.
On Raspberry Pi OS, the main setting is usually placed in /boot/firmware/config.txt. If you are editing the card from another computer, open the small boot partition and look for the same file. For a typical NTSC setup, used in regions such as North America and Japan, add or adjust the composite mode line as follows:
Free tools Windows power users keep installed
One-click scans. No signup required.
Rank #3

- This is the Official Pi CSI FPC Flexible Cable, Compatible with Raspberry Pi 5, 22Pin to 15Pin. 300mm/30cm/0.98ft Length.
- Suitable for Connecting RPi 5 to CSI Camera Modules.
- Please Attention: DSI cable and CSI cable are not compatible and cannot be mixed.
enable_tvout=1

sdtv_mode=0
For a typical PAL setup, used in much of Europe, Australia, and many other regions, use:
enable_tvout=1

sdtv_mode=2
The most common sdtv_mode values are:
| Value | Standard | Typical Use |
|---|---|---|
0 |
NTSC | North America, Japan, some capture devices |
1 |
NTSC-J | Japanese NTSC equipment |
2 |
PAL | Europe, Australia, many older TVs |
3 |
PAL-M | Brazilian PAL-M equipment |
If the picture appears in black and white, rolls vertically, or shows heavy color distortion, the TV standard is often wrong. Try switching between sdtv_mode=0 and sdtv_mode=2 first, because NTSC and PAL are by far the most common choices. After saving the file, fully reboot the Raspberry Pi 5; changing the cable or TV input alone will not reload these boot-time video settings.
Resolution is more limited over composite. NTSC is effectively around 480 interlaced lines, while PAL is around 576 interlaced lines. The usable desktop area is smaller than those numbers suggest because analog TVs may crop the edges through overscan. If the Raspberry Pi desktop does not fit properly on the screen, use the graphical Raspberry Pi configuration tool to adjust overscan where available, or edit the relevant display options in the configuration file. For terminal-only use, a larger console font can also make the display easier to read.
The Tool Desk
Outbyte Driver Updater FREEScan for outdated or missing drivers - takes under a minuteDriver Scan →Outbyte PC Repair FREERepair Windows errors before they cause bigger problemsFix Now →For the best results, keep expectations realistic. Composite video is suitable for retro displays, simple dashboards, menus, video playback at standard definition, and recovery access when HDMI is unavailable. It is not a good choice for a modern desktop, small text, web browsing, or development work. If you need sharp text, high refresh rates, audio over the same cable, or resolutions such as 1080p and 4K, HDMI remains the better output on the Raspberry Pi 5.
Testing the Output on a TV or Capture Device
After enabling composite video, setting the TV standard, and wiring the Raspberry Pi 5 correctly, the next step is to verify the signal on a real display or capture device. Power the Pi off before making or changing connections, then connect the composite video output to the yellow RCA video input on the TV, monitor, VCR, or USB capture adapter. If you are also using audio, remember that composite video only carries the picture; sound must come from HDMI audio, USB audio, Bluetooth, the headphone output on an external audio device, or another supported audio path.
Turn on the TV or capture device first, select the matching input, then power on the Raspberry Pi 5. On a television, this input is often labeled AV, Video, Composite, CVBS, or sometimes Line In. On older sets, you may need to cycle through inputs with the remote rather than using the channel buttons. For a USB capture adapter, open the capture software before or shortly after booting the Pi, then select the adapter as the video source and choose the same standard you configured on the Pi, such as PAL or NTSC.
What a successful test should look like
A working composite setup should show the Raspberry Pi boot screen, followed by the console or desktop, depending on your operating system and configuration. The image will be noticeably softer than HDMI, especially on text and fine desktop details. This is normal: composite video is a standard-definition analog signal, typically suitable for retro displays, CRT televisions, simple dashboards, video mixers, and compatibility with legacy equipment. Do not expect sharp 1080p-style desktop output; large fonts and low-resolution interfaces work much better.
Windows Errors? Fix Them Before They Spread
Repair common Windows errors and clear accumulated junk for a smoother, more stable PC - no reinstall needed.Free scan · no reinstallCrashes, No Sound, or Screen Glitches?
Random freezes, missing sound and display glitches usually trace back to one bad driver. Find and replace yours safely.Free scan · under a minute- On a CRT TV: the image may fill the screen with some overscan, meaning the edges are slightly cropped.
- On a flat-panel TV: the image may be scaled and processed, sometimes adding blur or input lag.
- On a USB capture dongle: the preview may look delayed, interlaced, or compressed depending on the adapter and software.
- On a professional monitor: you may need to manually select CVBS rather than component, S-Video, or SDI.
Checking the signal with a capture device
If you are testing with a USB composite capture adapter, confirm that the adapter supports the same television standard configured on the Raspberry Pi 5. Many inexpensive adapters support both PAL and NTSC, but some software defaults to the wrong mode. In OBS Studio, VLC, ffmpeg-based tools, or vendor capture applications, select the correct input device, then set the video standard where the option is available. A mismatch can produce a rolling image, black-and-white output, distorted color, or no picture at all.
For a clean test, start with a simple boot to the text console or a lightweight desktop rather than launching a full-screen application immediately. If the capture window remains black, unplug and reconnect the capture adapter, restart the capture software, and confirm that the yellow RCA plug is connected to a video input rather than an audio input. Some adapters use breakout cables with nonstandard color assignments, so if the expected yellow socket does not work, check the adapter documentation or try the other RCA sockets briefly while monitoring the preview.
Useful test observations
| Result | Likely meaning |
|---|---|
| Stable color picture | The wiring, TV standard, and configuration are probably correct. |
| Black-and-white picture | The Pi and display may be using different PAL or NTSC modes, or the display has limited color decoding support. |
| Rolling or unstable picture | The selected TV standard or refresh rate is likely wrong for the display or capture adapter. |
| No signal | The output may not be enabled, the wrong input may be selected, or the wiring may be incorrect. |
Once you get a stable image, test the actual use case: a terminal interface, emulator frontend, kiosk screen, camera preview, or media output. Adjust font sizes, overscan settings, and application resolution to suit the display. Composite video from the Raspberry Pi 5 is best treated as a compatibility output for standard-definition equipment, while HDMI remains the better choice for sharp text, high resolutions, modern monitors, and general desktop work.
Independent reader supportYour contribution helps us test, update, and keep practical guides available for everyone.Troubleshooting No Signal, Bad Color, or Unstable Video
If the Raspberry Pi 5 composite output does not appear on your TV or capture device, start by checking the simplest parts of the chain: the selected input, the ground connection, and the video signal wire. Composite video is a single analog signal, so a weak joint, swapped pin, missing ground, or wrong input mode can produce a black screen even when the Pi is configured correctly. Make sure the display is set to its AV, CVBS, Video, or Composite input, not component, HDMI, RGB, or antenna input.
Rank #4
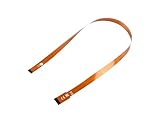
- This is the Official CSI FPC Flexible Cable for Raspberry Pi 5
- 22Pin To 15Pin, 500MM/50CM/1.64 FT Long Extension
- Suitable For CSI Camera Modules
No signal at all
For a completely blank screen, confirm that composite output is still enabled in the Raspberry Pi configuration file and that HDMI is not being forced as the only active display path. On Raspberry Pi OS, check /boot/firmware/config.txt and verify that the composite video settings you added are present, saved, and not commented out with a leading #. After each change, perform a full reboot rather than only restarting the desktop session.
- Check the wiring: composite video should go to the center signal pin of the RCA connector, while ground should go to the RCA shield.
- Check continuity: use a multimeter to confirm that the GPIO header pin reaches the RCA plug and that ground is continuous.
- Check for shorts: the signal line must not be shorted to ground.
- Try another cable: old RCA leads and thin jumper wires can cause poor contact or excessive noise.
- Disconnect HDMI: test with only composite connected, especially during initial setup.
Black-and-white image or wrong colors
A monochrome picture usually means the TV standard does not match the display. For most North American and Japanese equipment, use NTSC. For much of Europe, Australia, and many other regions, use PAL. Some older TVs support only one standard, while many capture devices accept both but must be set manually in their software. If the image is stable but lacks color, change the standard, reboot the Pi, and select the matching standard in the capture application or TV menu.
| Symptom | Likely cause | What to try |
|---|---|---|
| No picture | Wrong input, missing ground, disabled composite output | Select AV input, verify wiring, recheck config.txt |
| Black and white picture | PAL/NTSC mismatch | Change TV standard on the Pi and display |
| Rolling or tearing image | Unsupported mode or unstable sync | Use a standard 480i NTSC or 576i PAL mode |
| Fuzzy or noisy video | Poor cable, long wire run, weak ground | Use short shielded cable and solid ground |
Unstable, rolling, or noisy video
If the picture rolls vertically, tears horizontally, or repeatedly drops out, the display may not be locking to the sync signal. Use a standard interlaced composite mode rather than an unusual resolution. Composite output is designed for low-resolution television formats, so it will not behave like HDMI at 720p, 1080p, or 4K. Keep the signal path short, avoid breadboard jumpers for permanent use, and use a shielded RCA cable where possible. A shared ground between the Pi and the display input is required for a stable reference.
Also remember the practical limits of composite video. Text will look soft, thin fonts may shimmer, and desktop interfaces can be difficult to read on CRT televisions or cheap USB capture dongles. For setup, recovery, retro gaming, dashboards, and compatibility with old displays, composite can be very useful. For normal desktop use, web browsing, coding, or high-resolution media playback, HDMI remains the better output. If troubleshooting becomes difficult, temporarily reconnect HDMI to confirm that the Pi boots correctly, then return to composite testing once the operating system and configuration are known to be working.
Recommended Free Tools
Frequently Asked Questions
Does the Raspberry Pi 5 still have composite video output?
Yes, but it is not available through the 3.5 mm AV jack used on some older Raspberry Pi models. On the Raspberry Pi 5, composite video is exposed through dedicated pads on the board, so you need to wire to those pads or use a suitable breakout solution. You must also enable composite output in the Raspberry Pi configuration because HDMI is the default display output.
What cable or adapter do I need for composite video on a Raspberry Pi 5?
You need a composite video connection from the Pi 5 video pad to the yellow RCA input on your TV or capture device, plus a shared ground connection. A standard HDMI-to-RCA adapter will not use the Pi’s native composite output; it converts HDMI separately and may add lag or compatibility issues. For the native output, use proper wiring, a breakout board, or a carefully soldered connection to the composite video and ground pads.
How do I enable composite video if I cannot see anything on HDMI?
Edit the Raspberry Pi boot configuration from another computer by mounting the boot partition of the microSD card. In Raspberry Pi OS Bookworm, configuration is typically handled in files under the boot firmware partition, such as config.txt, where you can enable composite output and set the TV standard. After saving the changes, safely eject the card, put it back in the Pi, and boot with the composite cable already connected to the display.
Should I use PAL or NTSC for Raspberry Pi 5 composite output?
Use NTSC if your TV or capture device is made for North America, Japan, or other NTSC regions, and PAL for most of Europe, Australia, and many other regions. If the setting is wrong, you may see a rolling image, black-and-white video, distorted color, or no stable signal. Many capture devices support both standards, but older TVs often require the correct one.
Why is the Raspberry Pi 5 composite picture blurry or low resolution?
Composite video is an analog standard designed for old TVs, so it is much lower quality than HDMI. Text will look soft, fine details may shimmer, and the usable resolution is limited to standard-definition TV formats such as 480i or 576i. For terminal use, retro gaming, or CRT projects it can be useful, but for desktop work, web browsing, or sharp UI output, HDMI is a much better choice.
Bottom Line
Composite video on the Raspberry Pi 5 is possible, but it is not as plug-and-play as HDMI: you need the right breakout or wiring to the board’s composite TV output, a shared ground, and the correct configuration in config.txt. Once enabled, it is a practical way to connect the Pi 5 to older TVs, CRTs, capture devices, or embedded displays.
Use HDMI whenever image quality, high resolution, or simple setup matters, and choose composite only when compatibility with analog video equipment is the goal. If you get no picture, recheck the wiring, confirm PAL/NTSC settings, test with a known-good cable and display, and keep your Raspberry Pi OS firmware fully updated.
Quick Recap
Product prices and availability are accurate as of the date/time indicated and are subject to change. Any price and availability information displayed on Amazon at the time of purchase will apply.

